Creating Timeless Keepsakes: Silhouettes Using Procreate
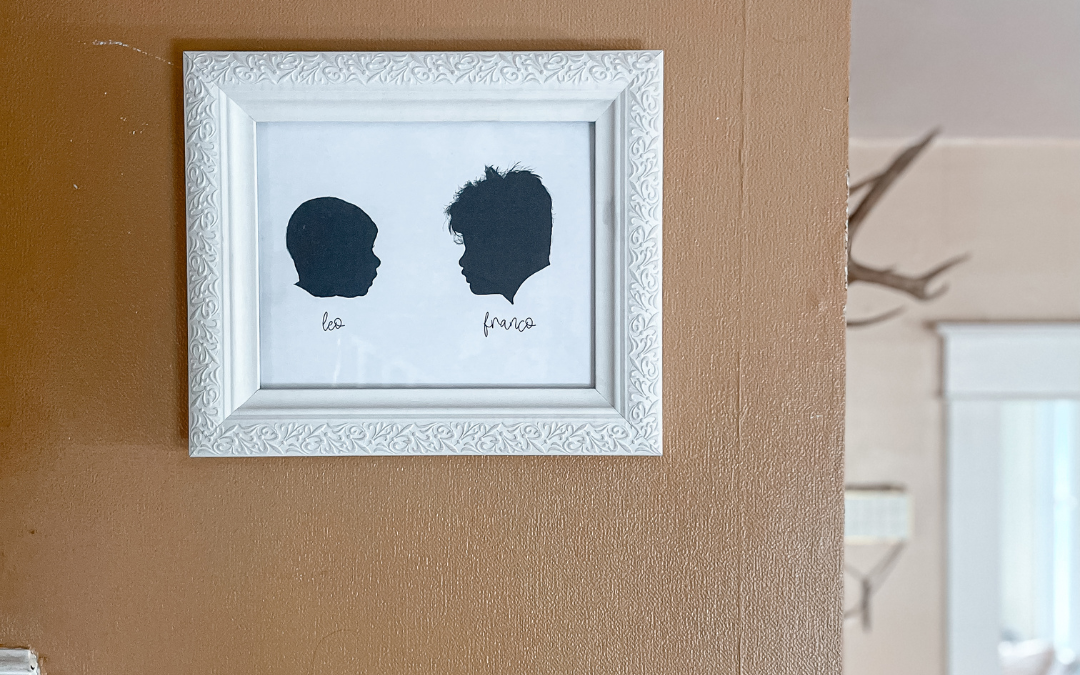
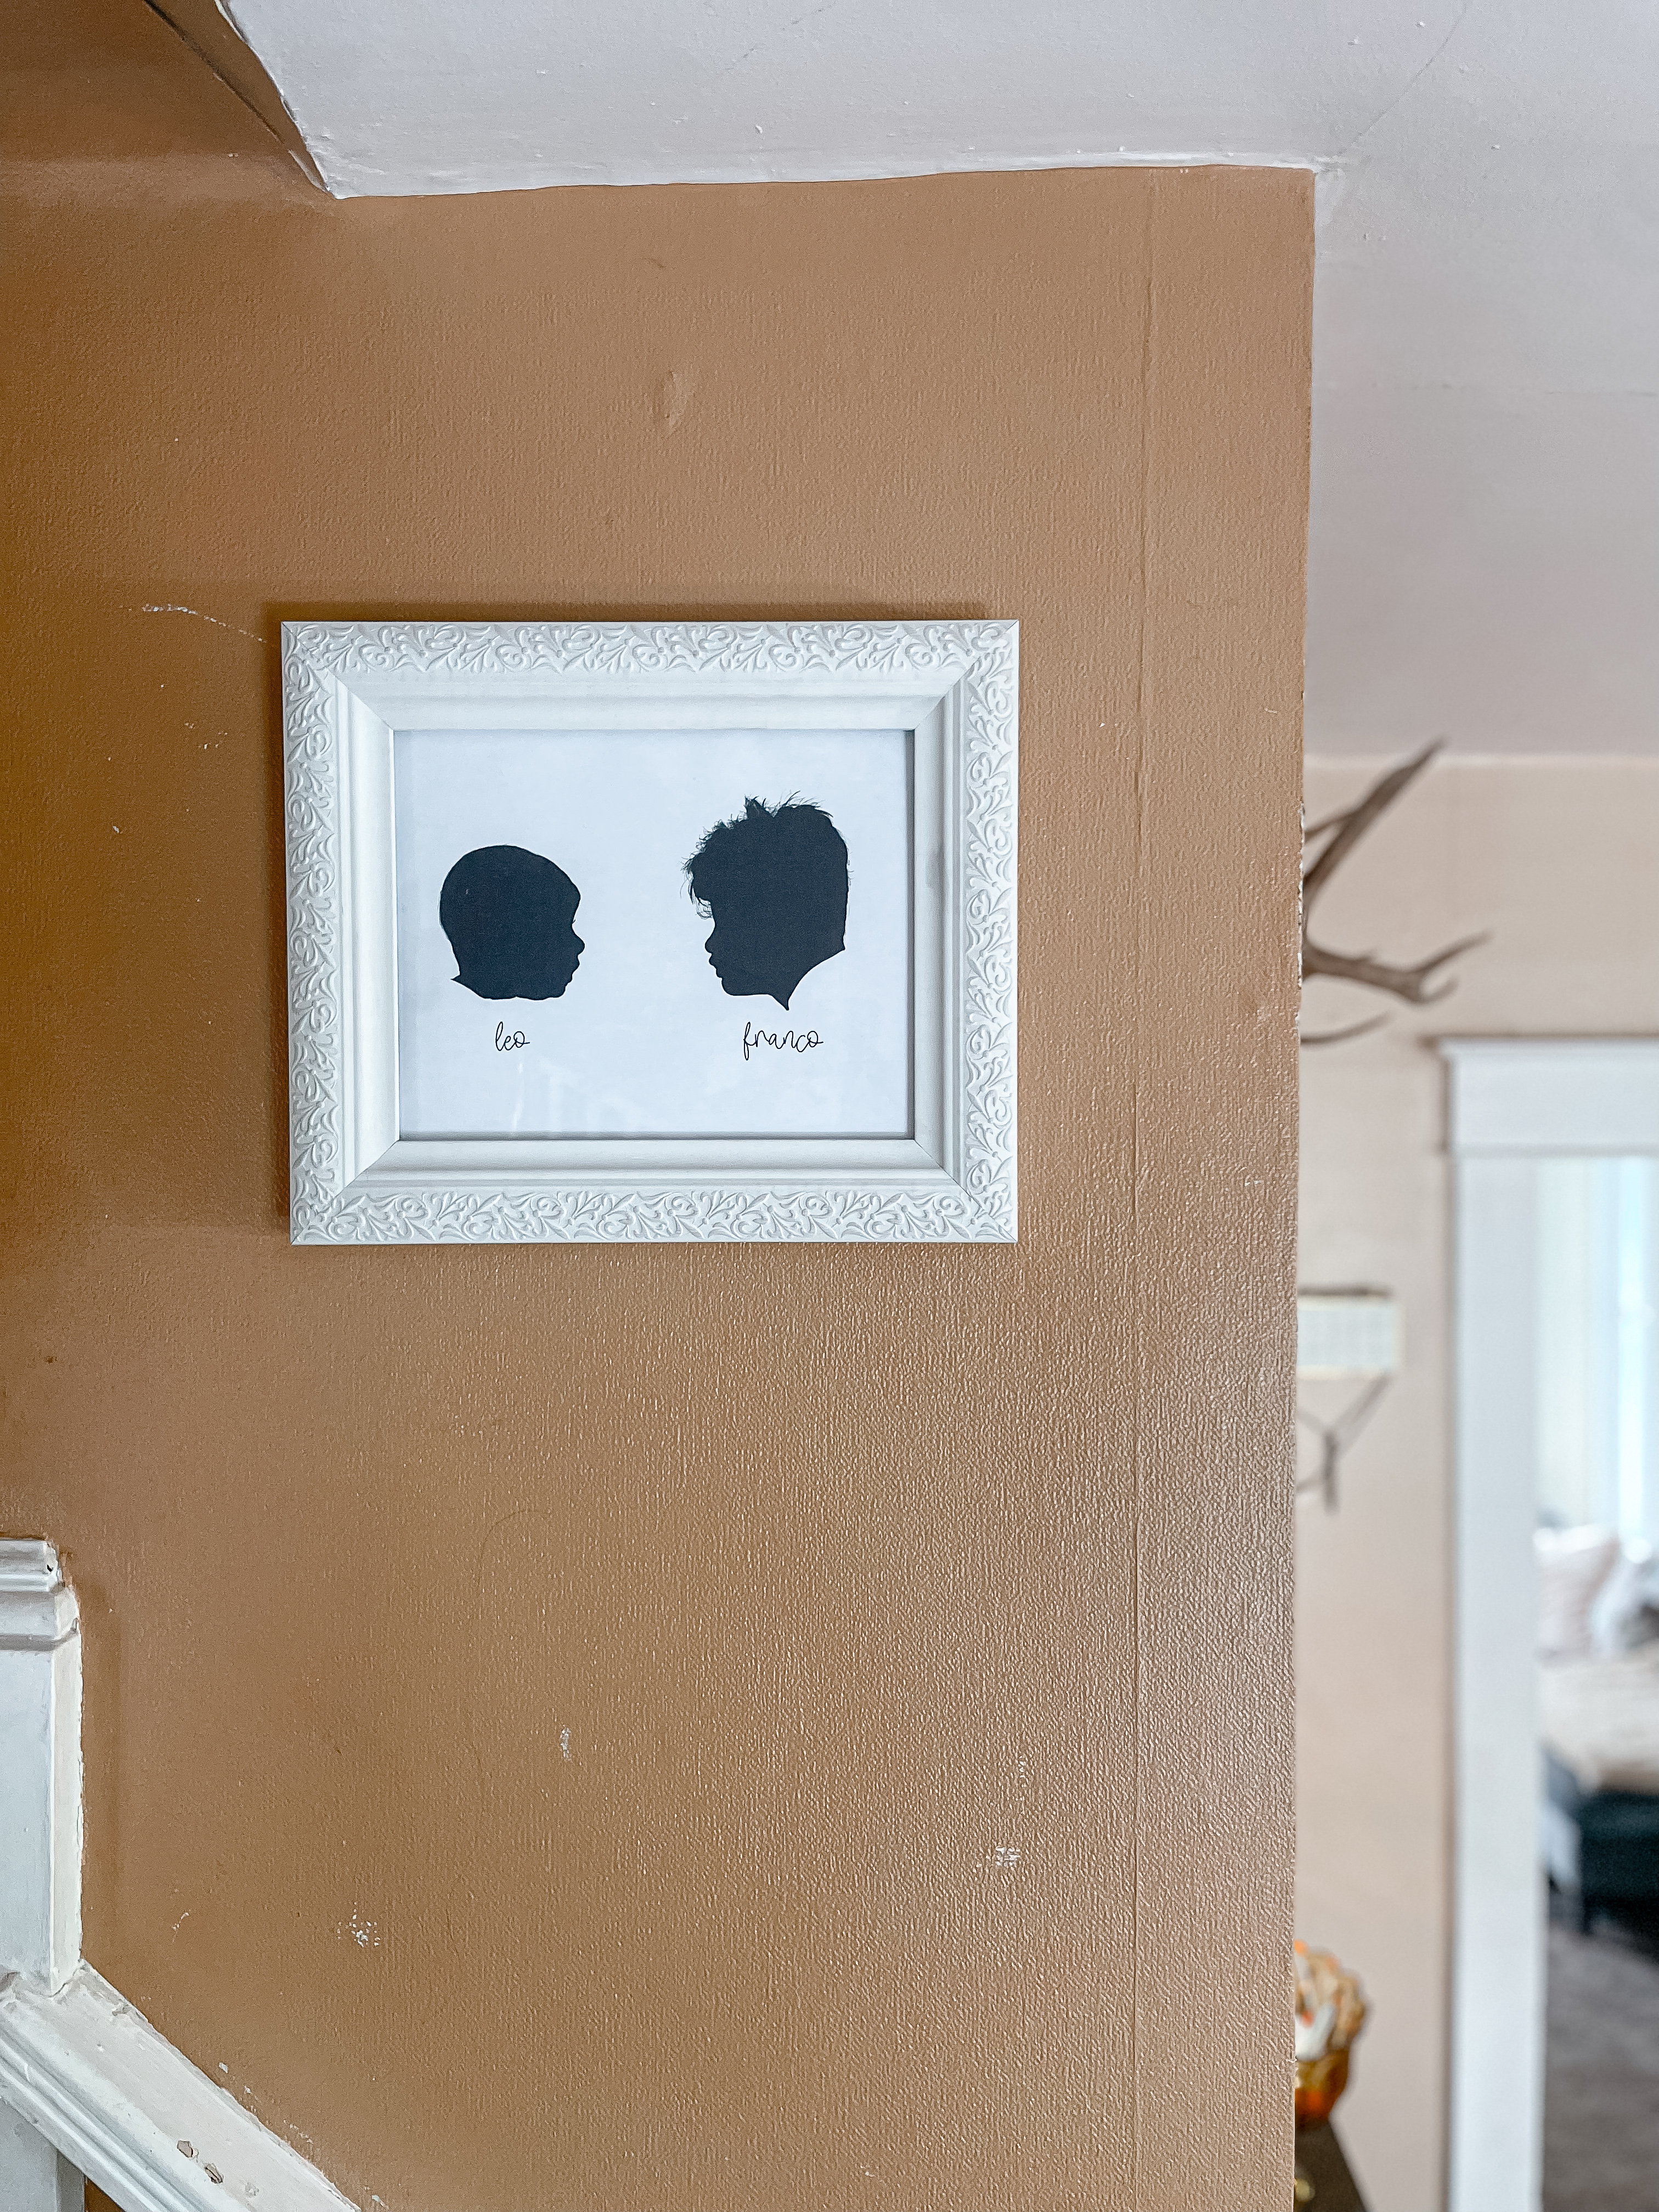
As a mom, I’ve always loved finding ways to capture and cherish moments with my sons. One of my favorite keepsakes has always been silhouettes. They are timeless, elegant, and beautifully simple, capturing the essence of a person with just their outline. Recently, I discovered how easy it is to create these cherished silhouettes using the Procreate app on my iPad, and I’m excited to share this process with you.
Why Silhouettes?
Silhouettes have a classic appeal that never goes out of style. They’re versatile and can be adapted for various uses, from home décor to personalized gifts. What’s even better is having a digital file of these silhouettes. Once you have it, the possibilities are endless: you can print it on canvas, engrave it on jewelry, or even etch it onto wood. The digital format ensures that you can reproduce your silhouette in multiple ways without losing quality.
What You’ll Need
iPad with Procreate app
A good quality side-profile photo of your subject
Apple Pencil (optional, but highly recommended)
Step-by-Step Guide
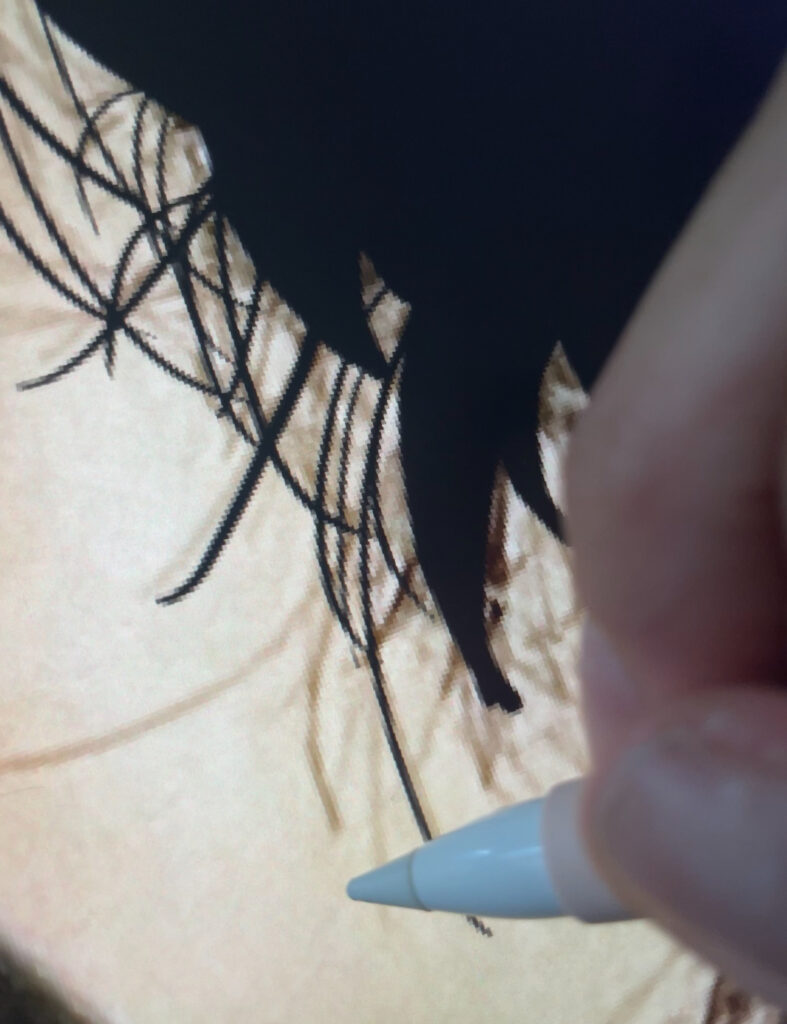
Open Procreate and Set Up Your Canvas: Open the Procreate app and create a new canvas. I recommend a square canvas (e.g., 3000 x 3000 pixels) to give you flexibility for different print sizes.
Import Your Photo: Import the side-profile photo of your subject into the canvas. You can do this by selecting the wrench icon, then “Add,” and “Insert a Photo.”
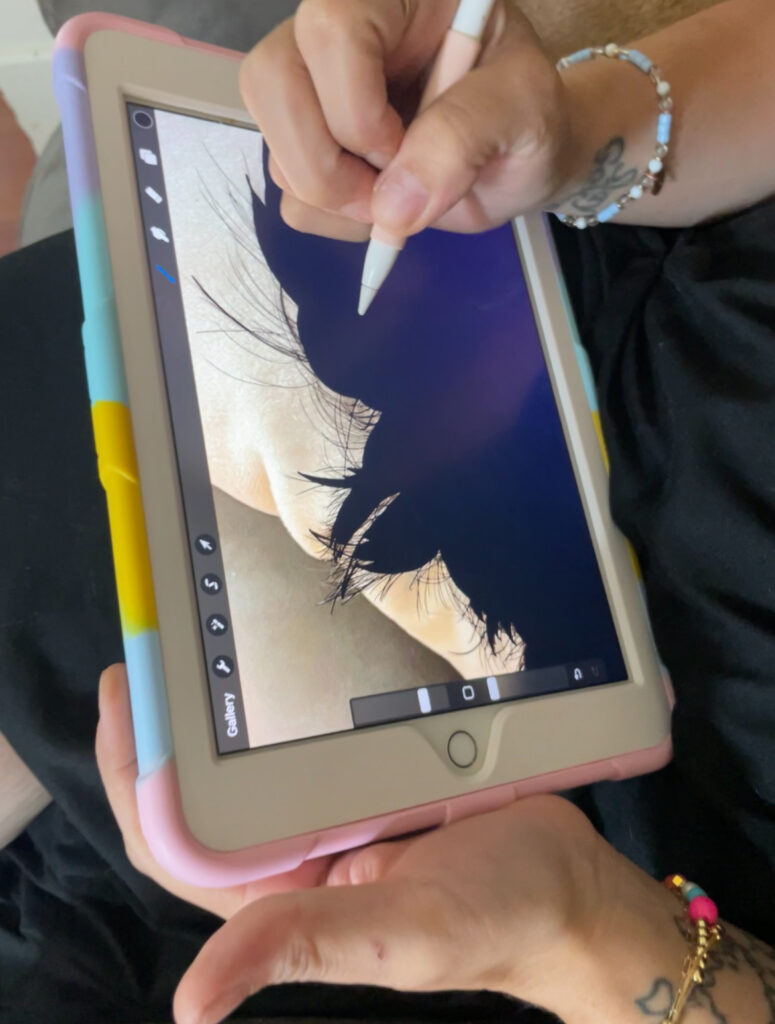
Adjust the Photo: Resize and position the photo to fit within your canvas. Lower the opacity of the photo layer so that you can see your drawing lines clearly.
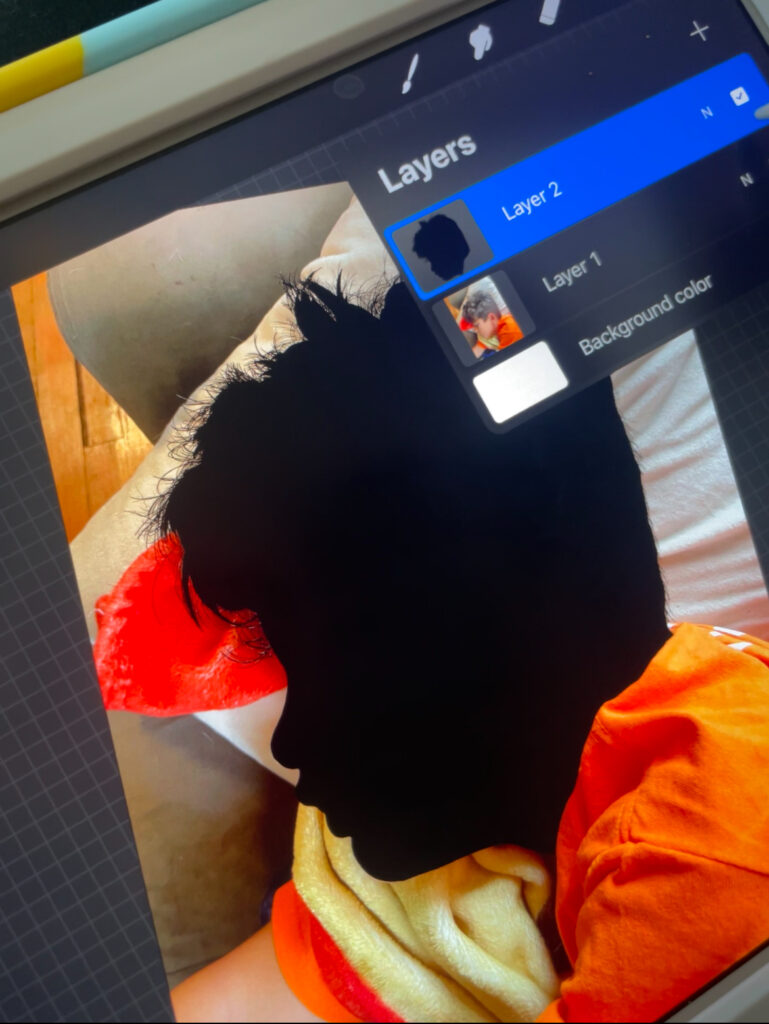
Create a New Layer: Add a new layer on top of the photo layer. This will be your drawing layer.
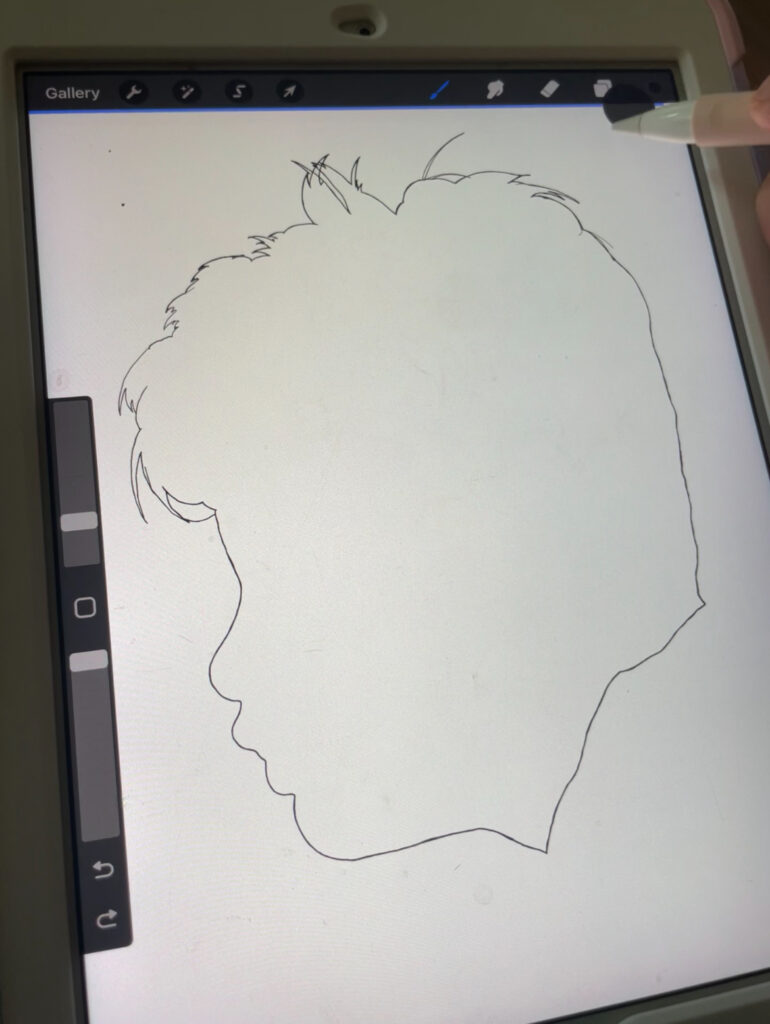
Outline the Silhouette: Using the Apple Pencil or your finger, trace around the profile of your subject on the new layer. Pay attention to details like the curve of the nose, lips, and hairstyle. Use a monoline brush for clean, smooth lines.
Fill in the Silhouette: Once you have the outline, close the shape and fill it with black (or any color of your choice) using the paint bucket tool. You now have a solid silhouette.
Refine the Edges: Zoom in and refine any rough edges or areas that need more detail. You can use the eraser tool to clean up the outline.
Export Your Silhouette: Once you’re satisfied with the silhouette, export the file. Go to the wrench icon, select “Share,” and choose your preferred file format (PNG for a transparent background is ideal).
Creative Uses for Your Silhouette
Having a digital file of your silhouette opens up a world of creative possibilities. Here are a few ideas:
Print on Canvas: Create a piece of art for your home by printing the silhouette on a canvas.
Engrave on Jewelry: Personalize a piece of jewelry with the silhouette, making a beautiful keepsake.
Etch on Wood: Create a rustic piece of décor by etching the silhouette onto wood.
Custom Cards: Use the silhouette for custom greeting cards or invitations.
Creating silhouettes using Procreate is not only easy but also a fun and creative way to preserve memories of your loved ones. These silhouettes are timeless keepsakes that you can treasure forever, and having them in a digital format means you can continuously find new ways to enjoy them. If you’re printing them for home décor, creating personalized gifts, or just keeping them as a digital memento, silhouettes are a beautiful way to capture the essence of those you love.
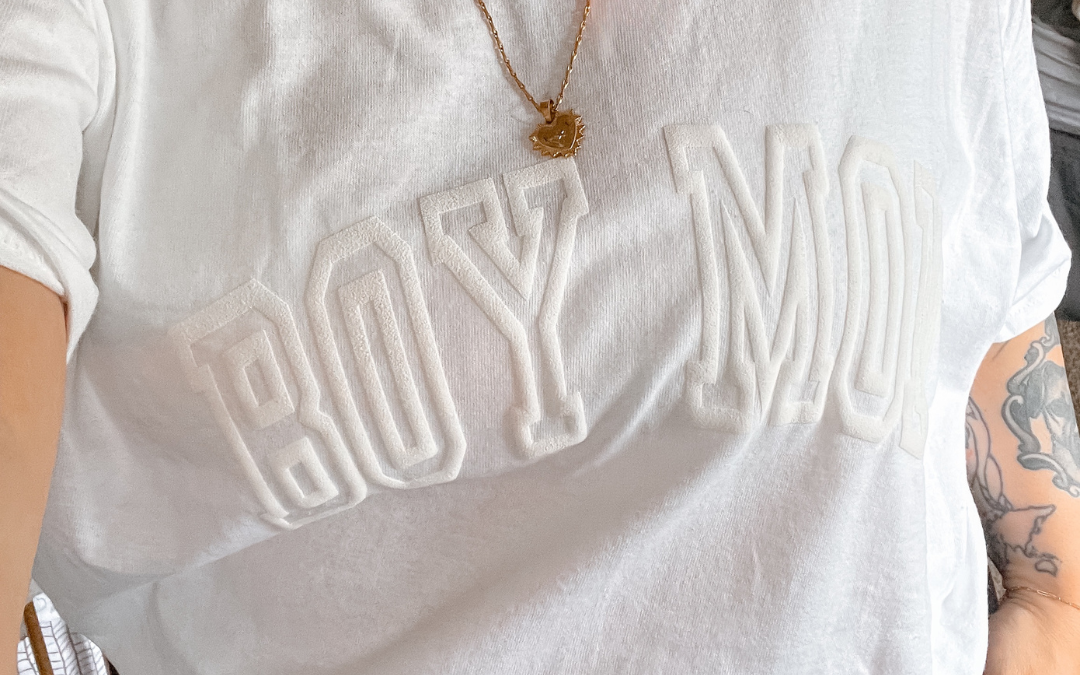
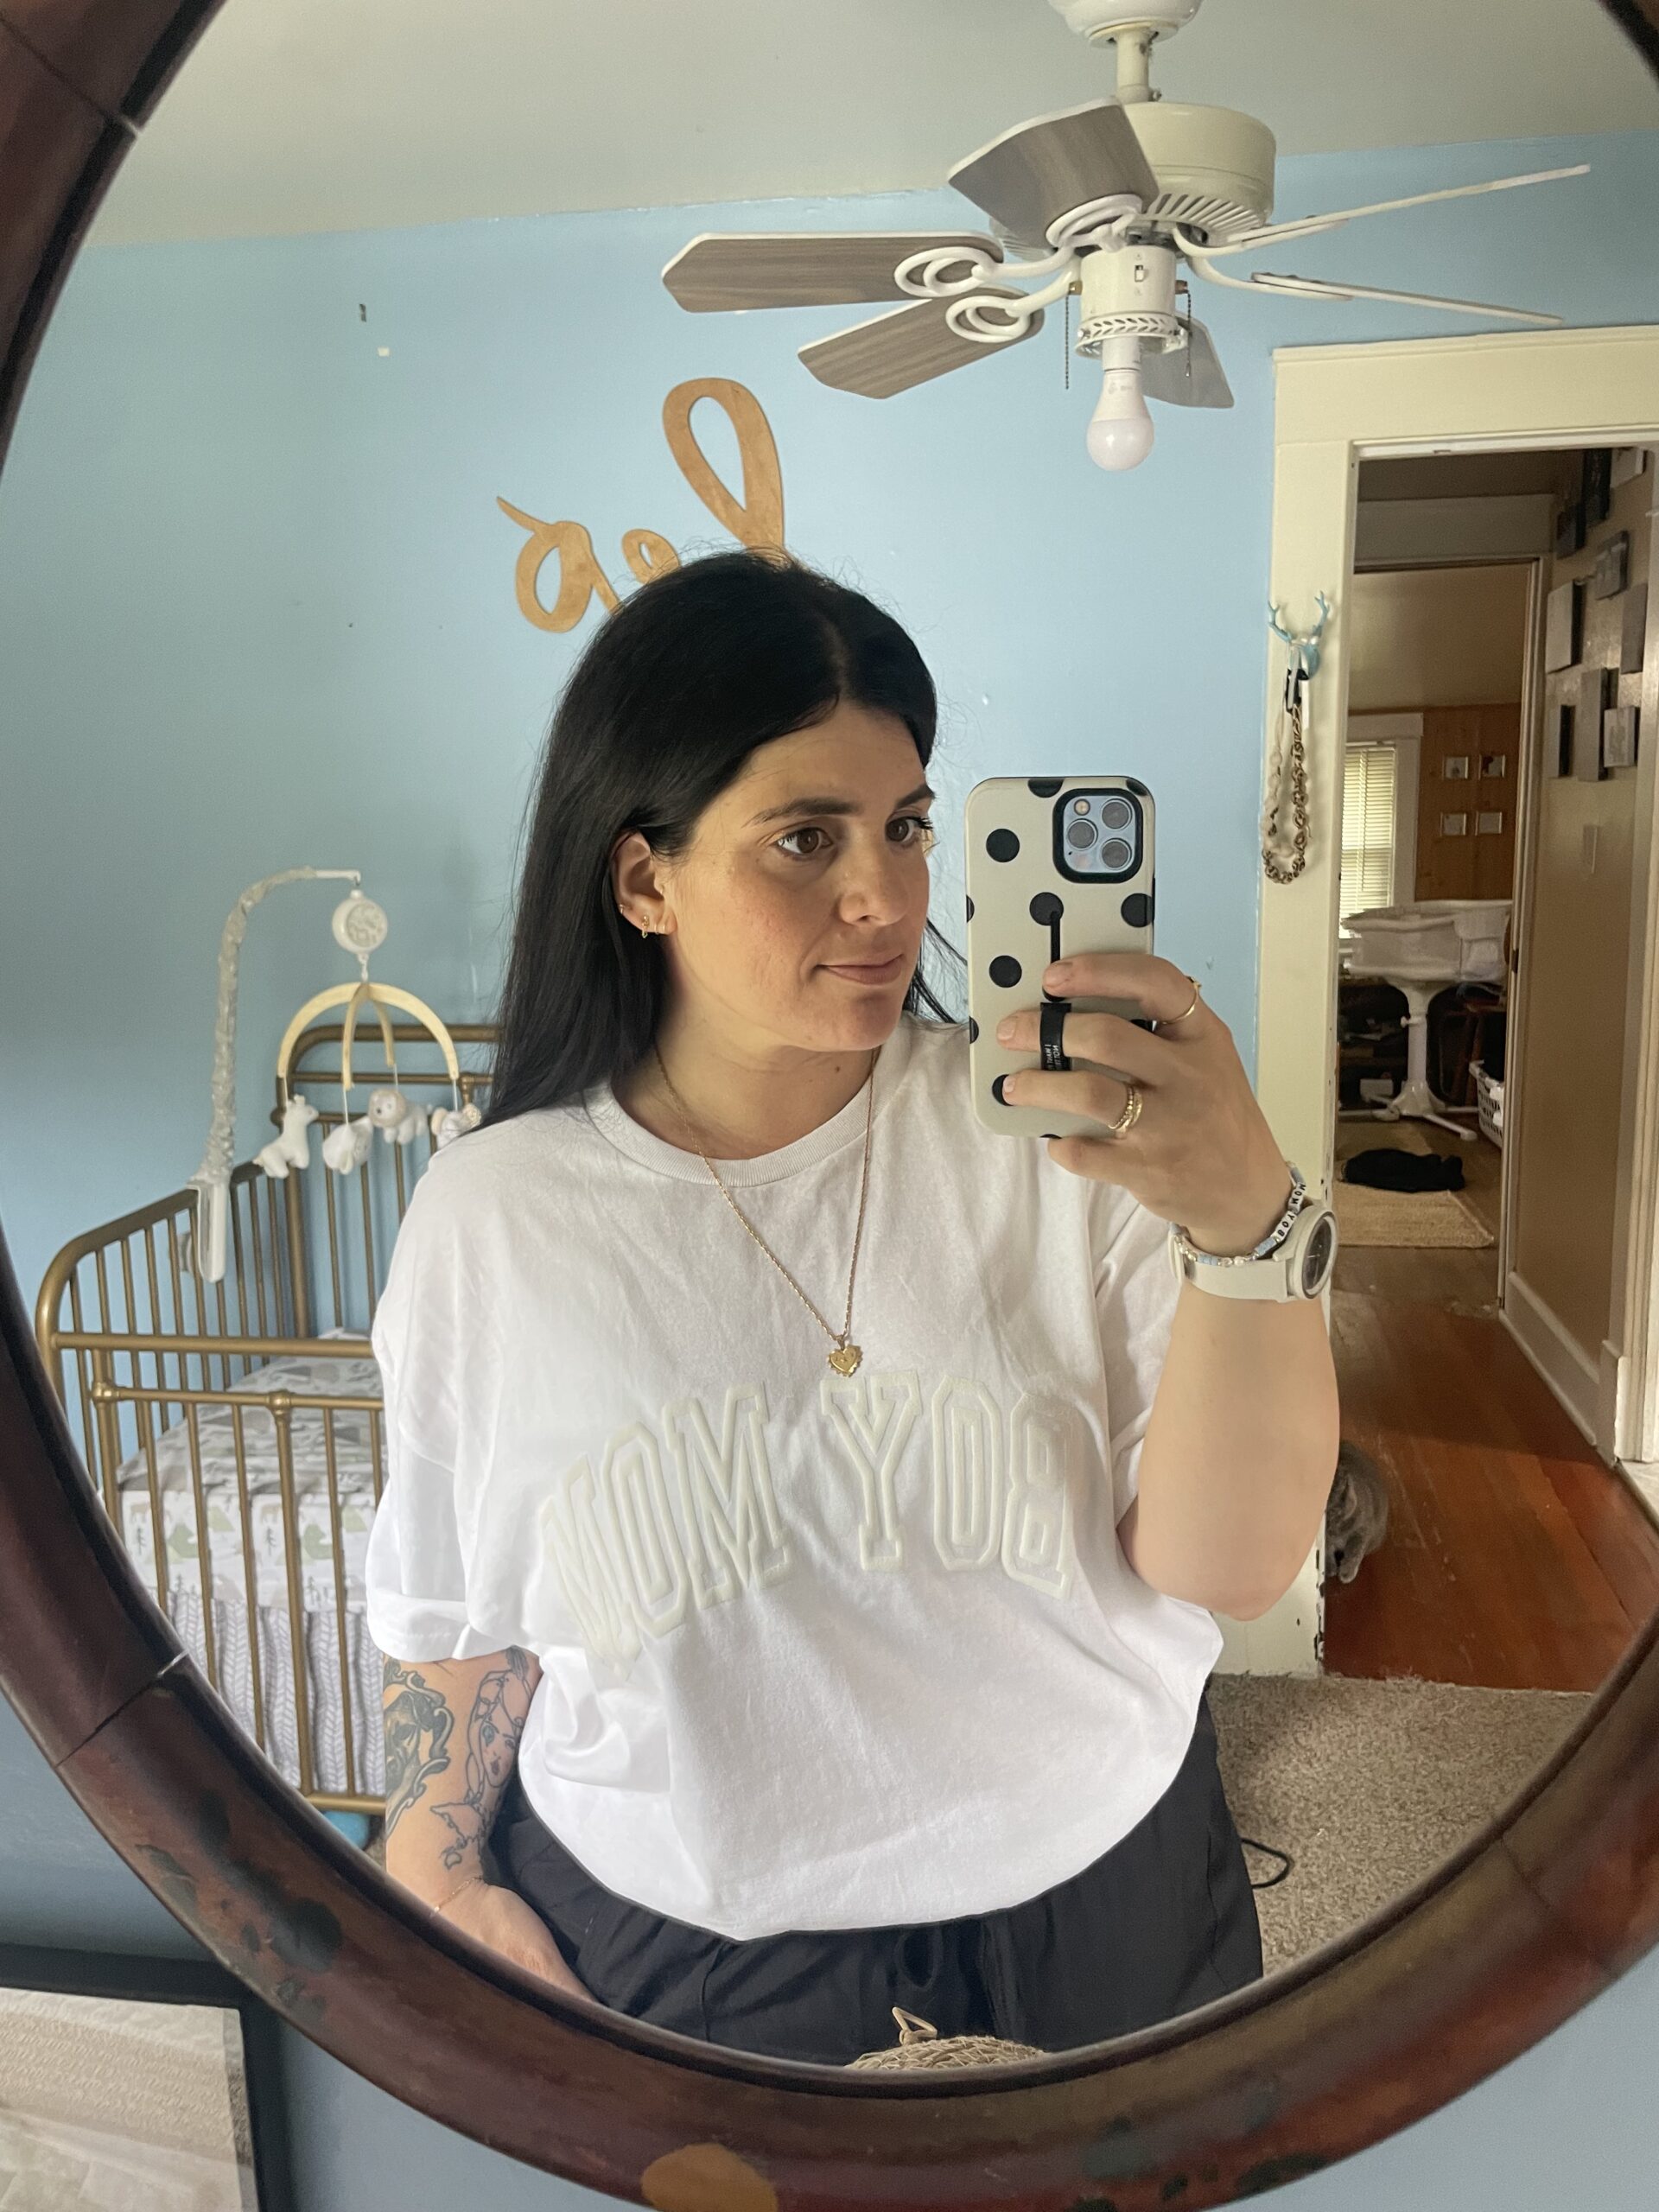
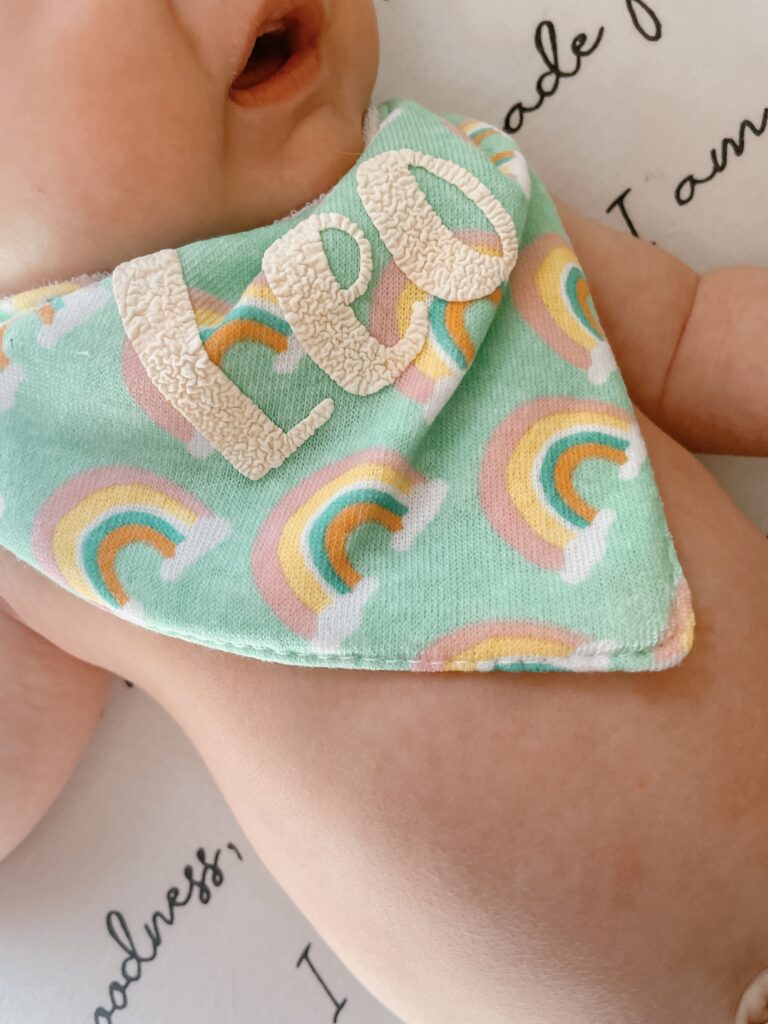
The Magic of Puff HTV: Elevating Your Creations with a Vintage Touch
In the ever-evolving world of crafting, discovering new techniques and materials is part of the joy. Recently, I stumbled upon something truly remarkable: Puff HTV (Heat Transfer Vinyl). I love it since I still only use my old Cricut Explore (One of these days I’ll upgrade!)
Unveiling the Charm of Puff HTV
Puff HTV, also known as puff vinyl or raised HTV, is a type of heat transfer vinyl that adds dimension and texture to your designs. Unlike traditional flat vinyl, puff HTV creates a raised effect when heat is applied, resulting in a vintage-inspired look reminiscent of 80’s tees.
Simplicity Meets Quality
What truly sets puff HTV apart is its simplicity of use coupled with the exceptional quality it delivers. Whether you’re a seasoned crafter or a newbie exploring the world of DIY, working with puff HTV is a breeze.
Cutting and Weeding: Just like standard heat transfer vinyl, puff HTV is compatible with most cutting machines. Simply create or select your design, cut the vinyl, and weed away the excess material.
Heat Application: Once your design is prepared, it’s time for the magic to happen. Using a heat press or an iron, apply heat and pressure to activate the adhesive on the vinyl, causing it to puff up and create that signature raised effect. The ideal heat temperature for applying puff HTV typically ranges between 300°F to 320°F (149°C to 160°C). The pressing time for applying puff HTV usually ranges between 10 to 15 seconds.
Peel and Admire: After the heat application, peel away the carrier sheet to reveal your masterpiece. The result? A beautifully textured design that adds a touch of vintage charm to any project.
Elevating Your Creations
Whether you’re customizing apparel, accessories, or home décor items, puff HTV has the power to elevate your creations to new heights. Here are just a few ways you can incorporate this versatile material into your projects:
Custom Apparel: Add a retro flair to t-shirts, hoodies, hats, and jackets with vintage-inspired designs.
Accessories: Personalize bags, pouches, and even shoes with textured accents that stand out from the crowd.
Home Décor: From throw pillows to wall art, puff HTV can transform ordinary items into statement pieces that showcase your unique style.
In a world saturated with mass-produced goods, there’s something truly special about creating handmade items infused with personality and charm. Puff HTV allows crafters to channel their creativity and imagination into tangible works of art, all while achieving a high-quality vintage aesthetic.
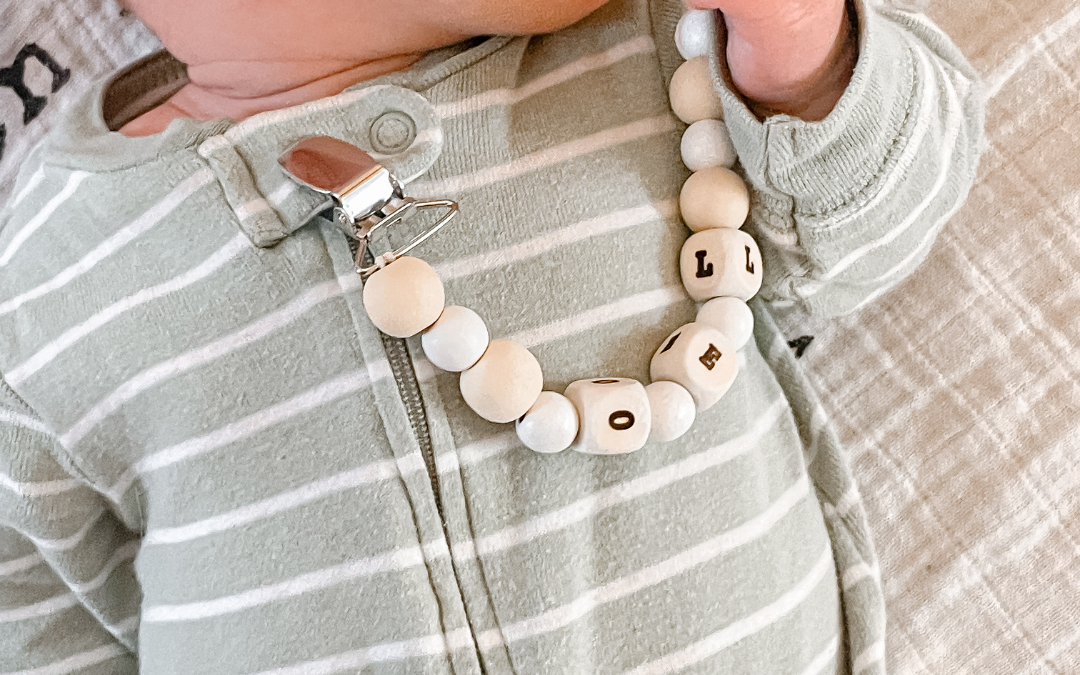
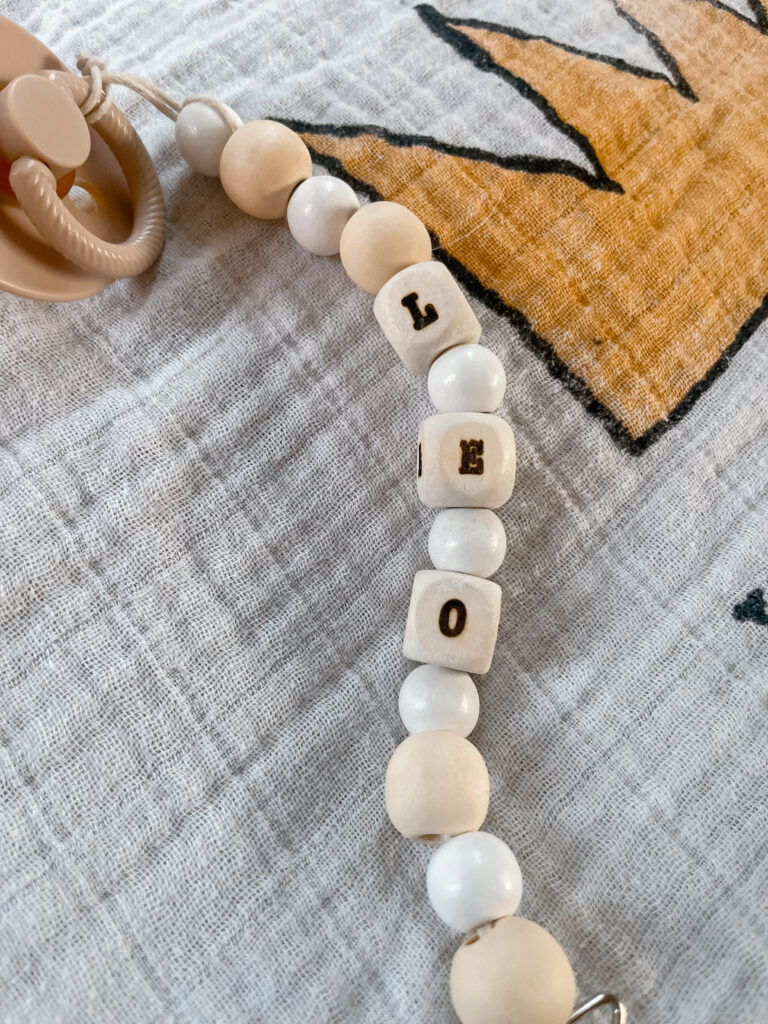
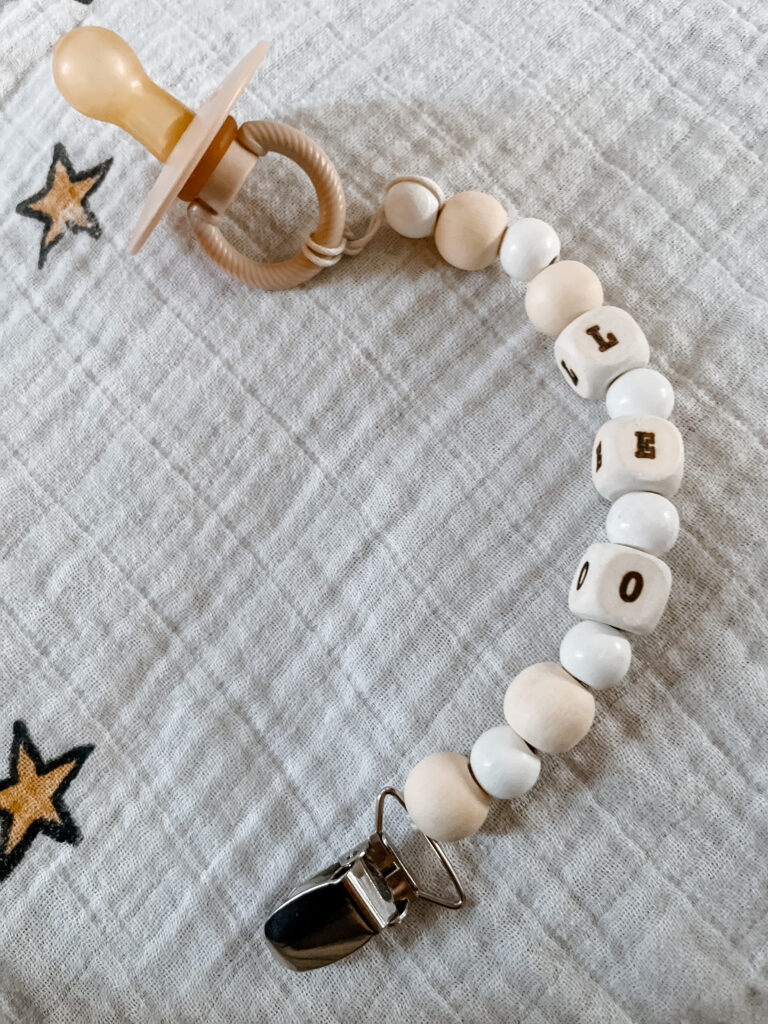
Crafting a Safe and Stylish Wooden Bead Pacifier Clip: A DIY Guide
This post contains affiliate links.
Pacifier clips are a lifesaver for parents, keeping pacifiers within reach and preventing them from falling to the ground. While store-bought options are readily available, crafting your own wooden bead pacifier clip allows for customization and ensures safety and style. In this guide, I’ll walk through the steps to create a personalized pacifier clip using wooden beads and a way to give it a personalized touch.
Materials Needed:
Wooden beads (ensure they are non-toxic and large enough not to pose a choking hazard)
Nylon or cotton cord (strong and durable)
Metal clip (with a plastic insert to protect clothing)
Portable laser engraver (optional)
Scissors
Lighter (optional, for sealing cord ends)
Step 1: Selecting Beads and Cord
Choose wooden beads that are smooth, free of splinters, and non-toxic. Beads should be large enough to prevent choking hazards, typically around 0.5 to 1 inch in diameter. For the cord, opt for a strong and durable material like nylon or cotton, ensuring it can withstand pulling and tugging without breaking.
Step 2: Stringing the Beads
Cut a length of cord, approximately 8 to 10 inches long, depending on the desired length of the pacifier clip. Thread the cord through the metal clip, doubling it over and tying a secure knot to hold it in place. Begin stringing the wooden beads onto the cord, alternating sizes and colors if desired. Leave a small loop at the end of the cord to attach the pacifier.
Step 3: Securing the Ends
Once all beads are strung onto the cord, tie a knot at the end to prevent them from slipping off. Optionally, use a lighter to carefully melt the ends of the cord to seal them and prevent fraying.
Step 4: Finishing Touches
Trim any excess cord, leaving a small tail to ensure the knot does not come undone. Double-check the security of all knots and attachments, ensuring the clip is safe for use. Inspect the wooden beads for any rough edges or imperfections, smoothing them out if necessary.
Optional: Designing with a laser engraver to customize the wooden beads with names, initials, or decorative patterns is a fun option. I use this portable laser from LaserPecker.
Enjoy!
Crafting a wooden bead pacifier clip not only provides a practical solution for keeping pacifiers within reach but also allows for personalization and customization. Remember to prioritize safety by choosing non-toxic materials and securing all components properly. With a bit of creativity and attention to detail, you can create a stylish and safe pacifier clip that both you and your little one will love.
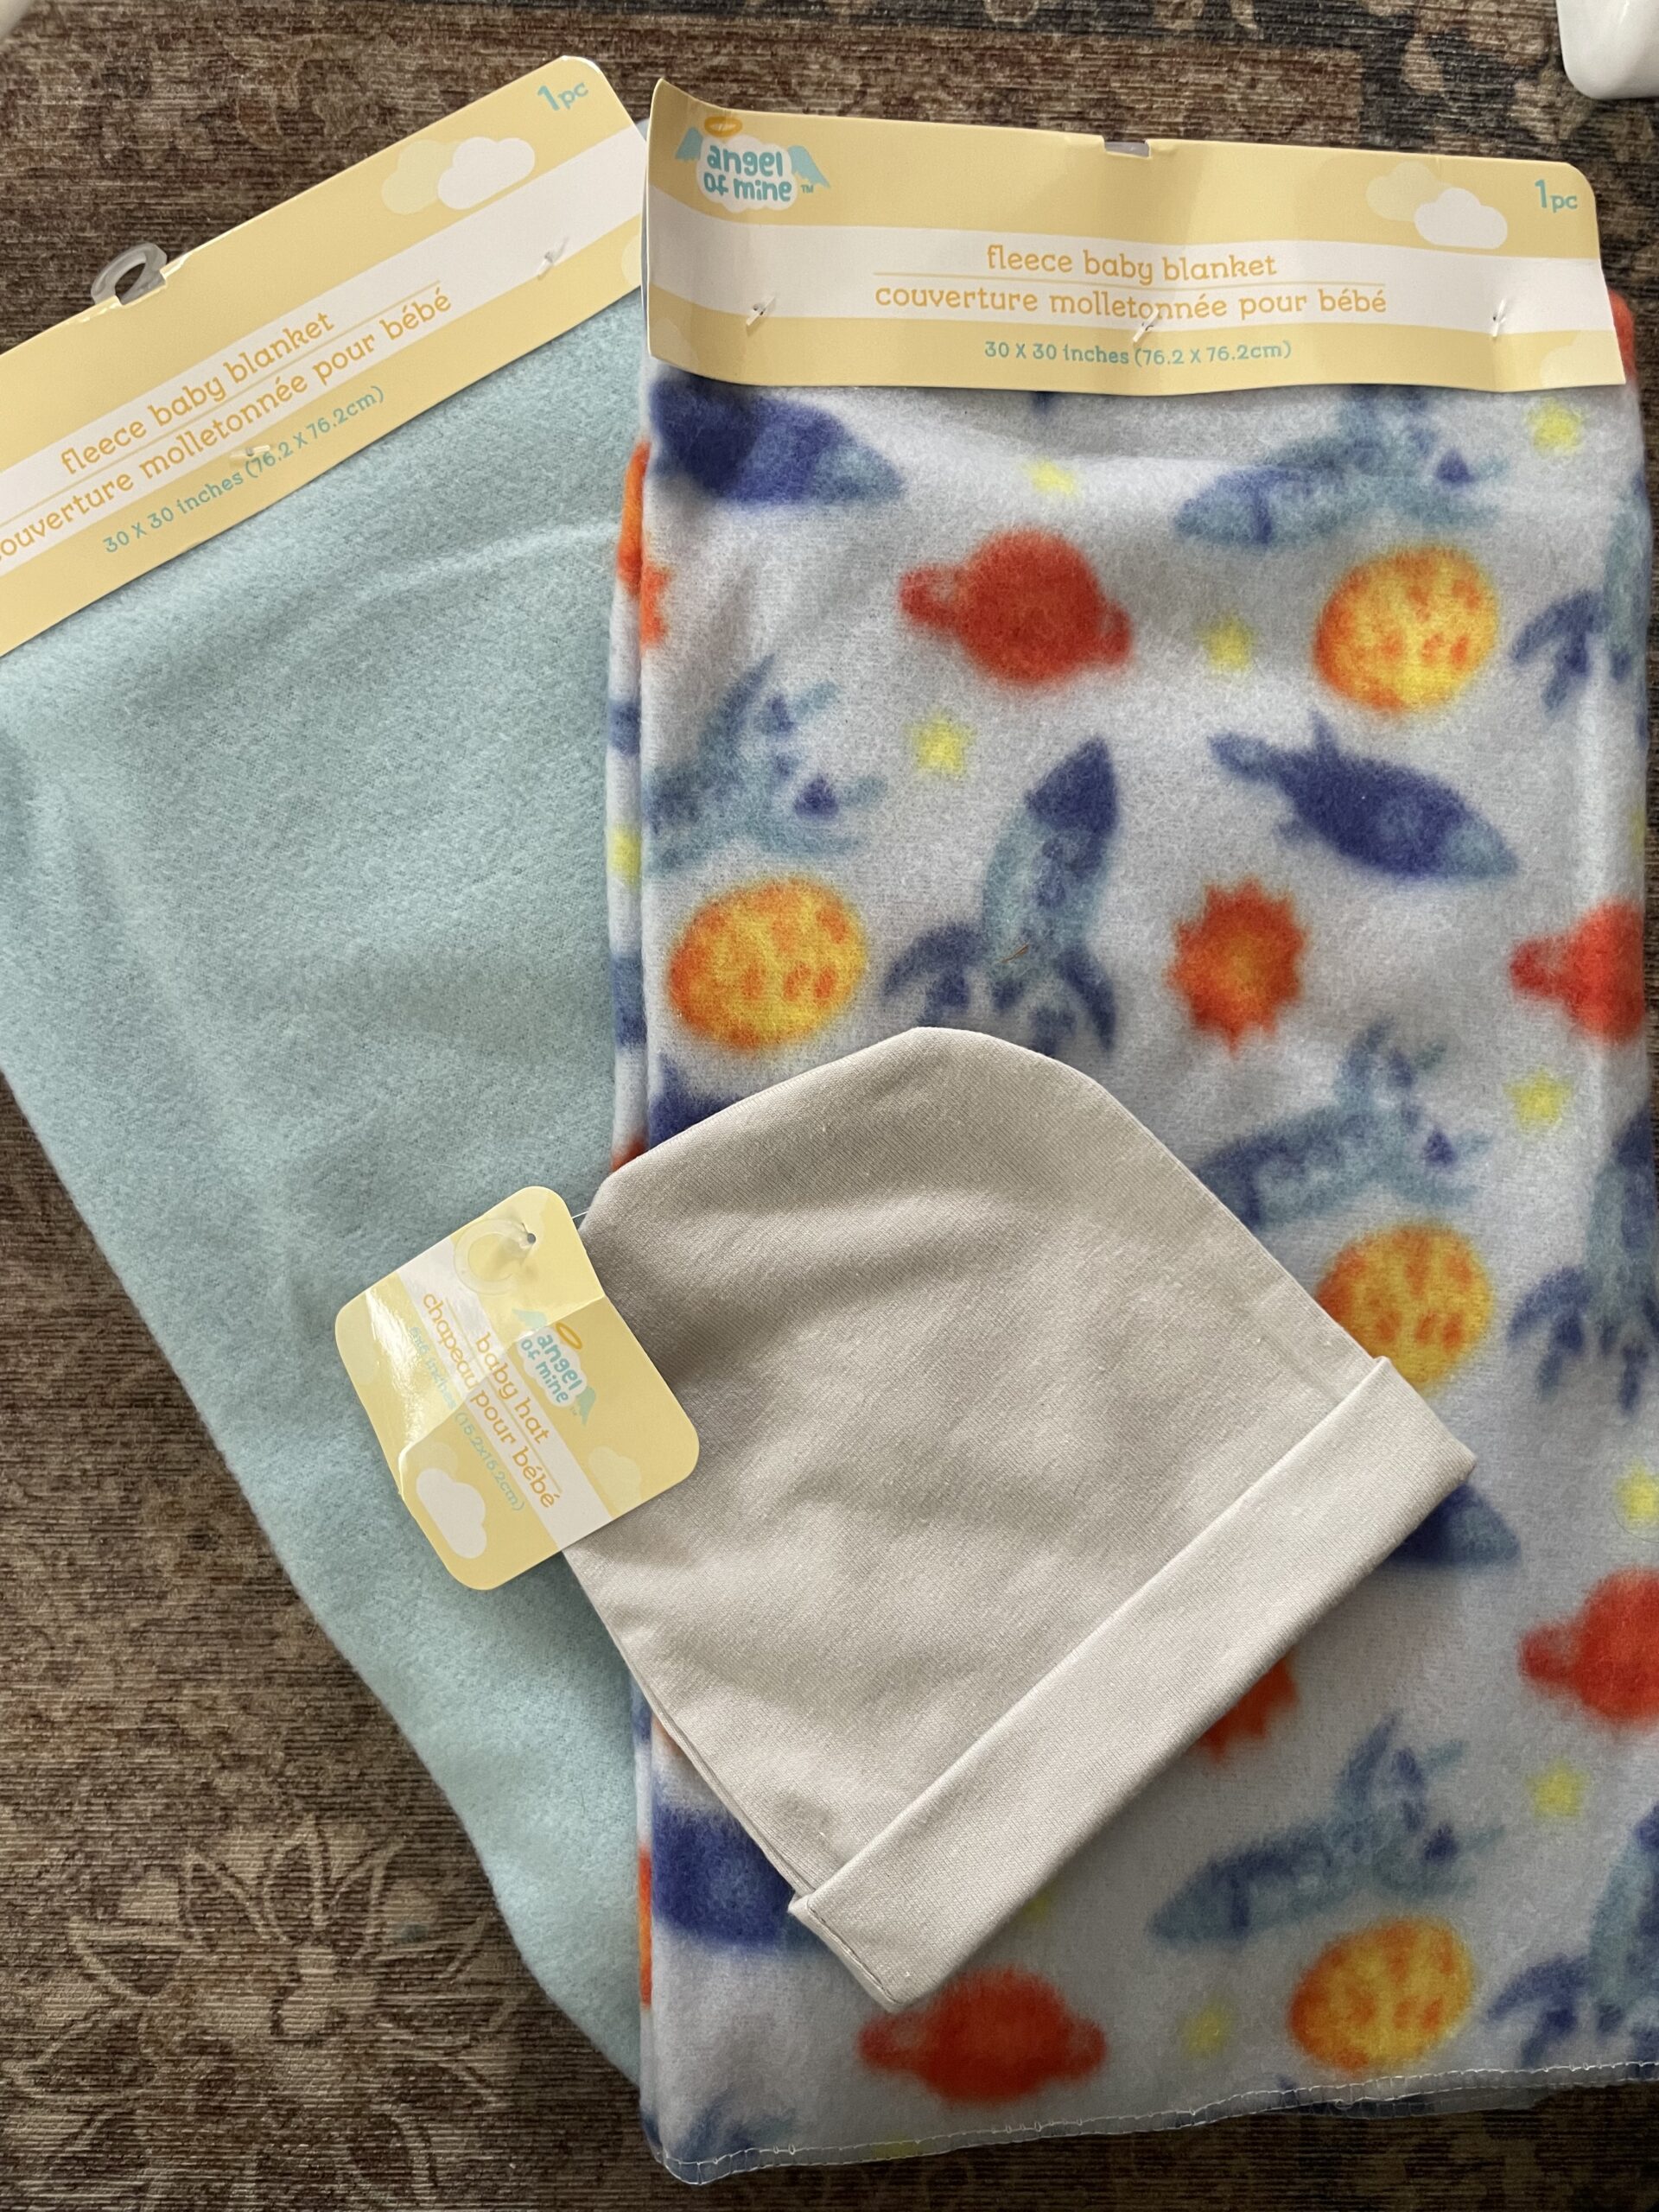
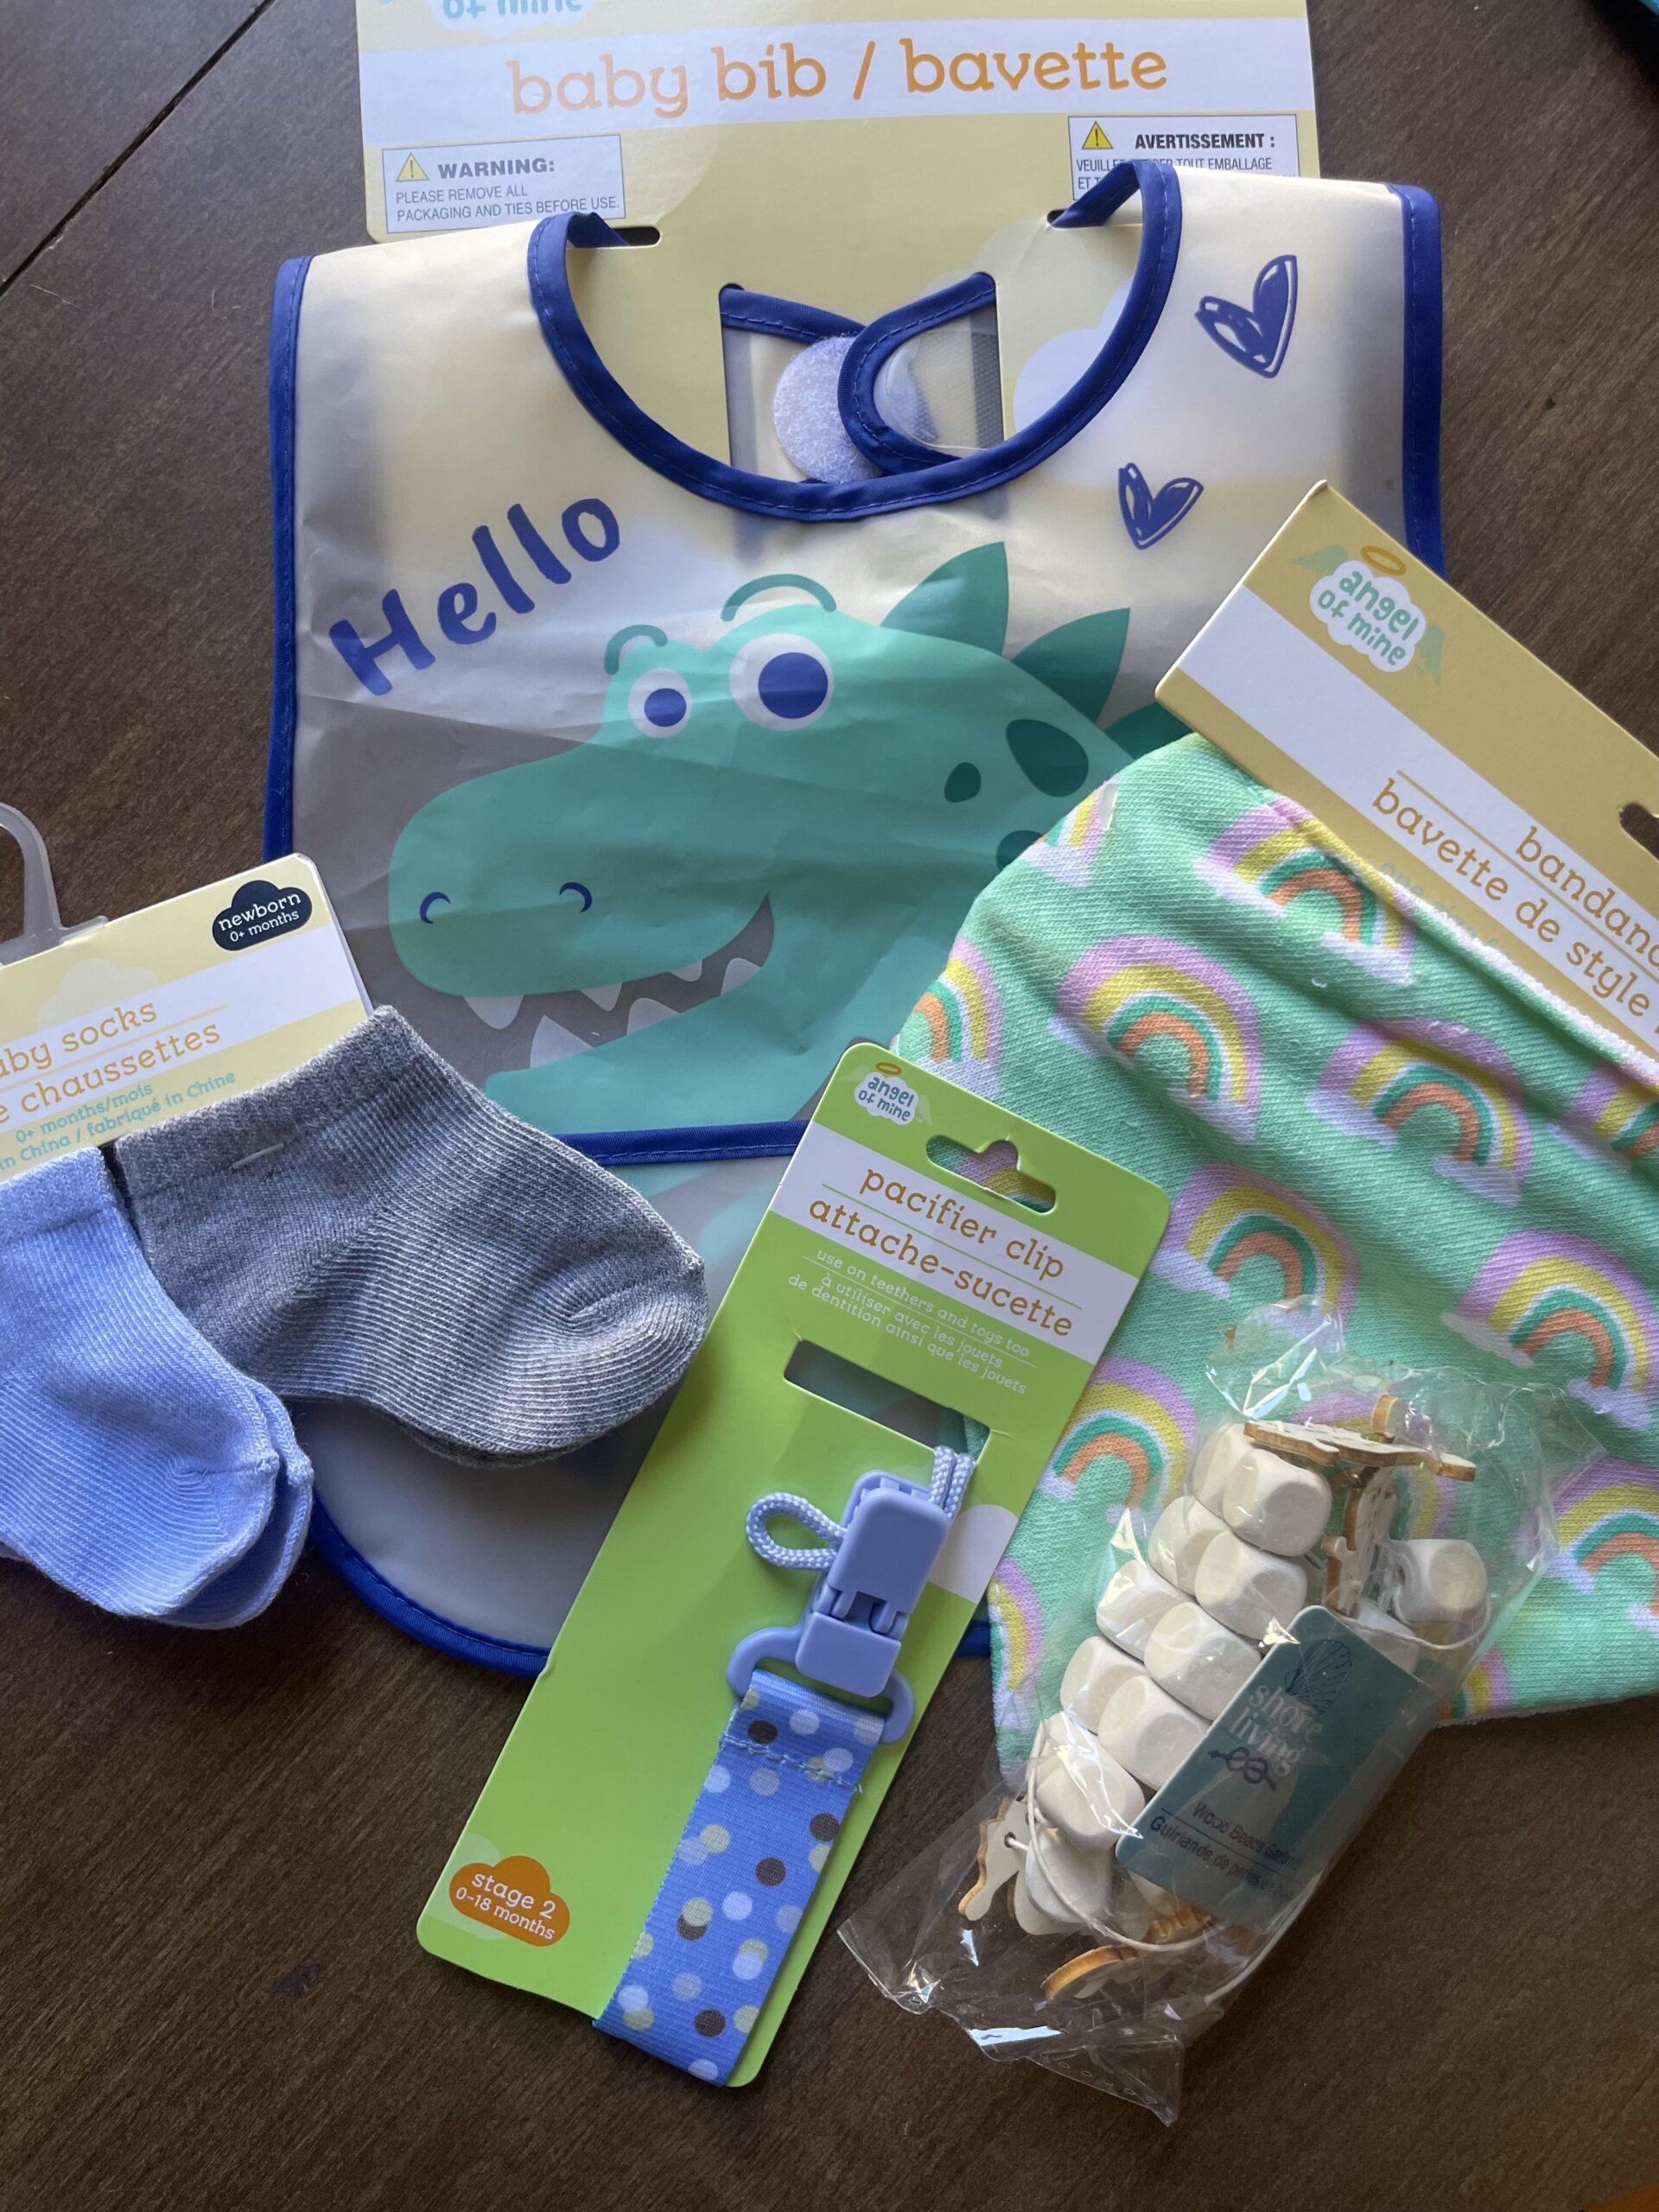
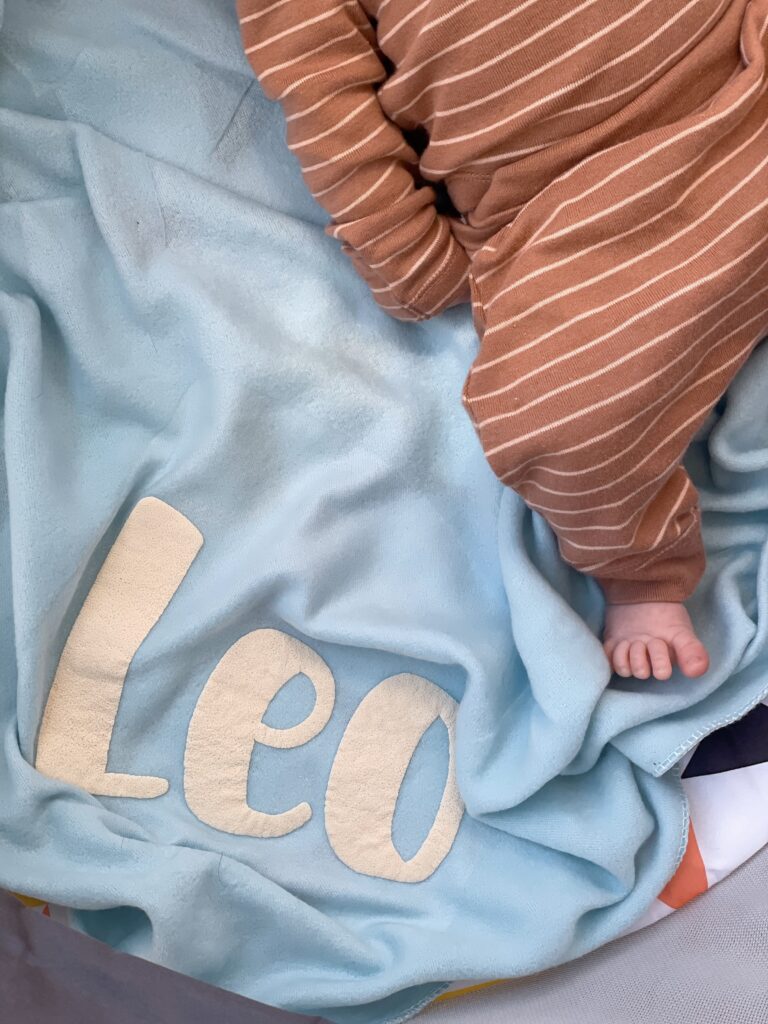
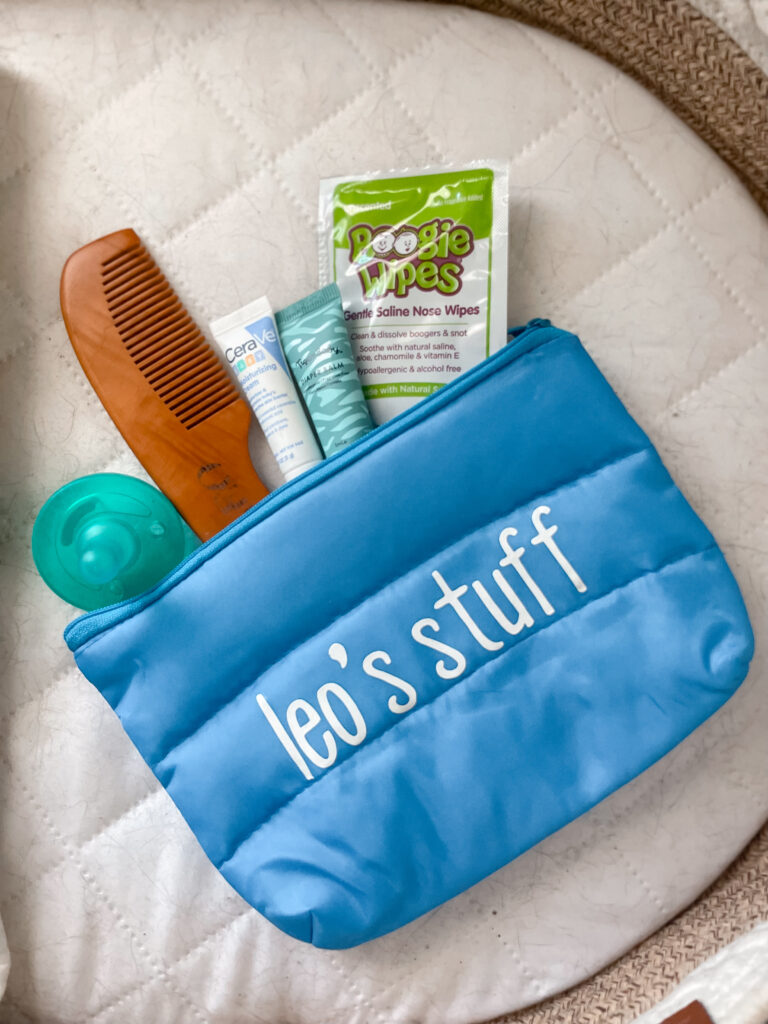
DIY Personalized Baby Gifts on a Budget: Dollar Tree Haul!
Hey there, fellow mommas! Today, I’m super excited to share with you my latest Dollar Tree haul and some adorable DIY personalized baby gifts I created on a budget. As a mom of two, I’m always on the lookout for ways to save money while still giving thoughtful and personalized gifts, especially for baby showers and birthdays.
So, let’s dive right into what I found on my recent trip to Dollar Tree. I stumbled upon a treasure trove of baby goodies: blankets, pacifier clips, bibs, socks, hats, and even storage bags. But the real magic happened when I paired these finds with some vinyl (also from Dollar Tree, except for the puff vinyl) and fired up my trusty Cricut machine.
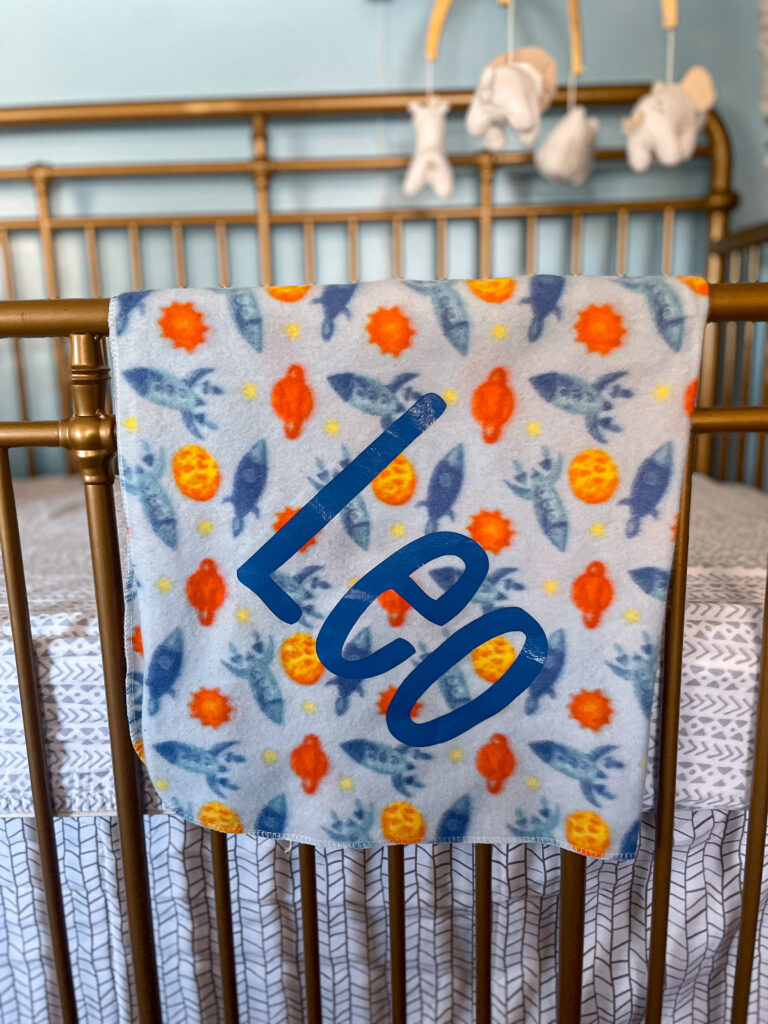
First up, let’s talk baby blankets. I picked out a few soft, cozy blankets, perfect for customizing. With some iron-on vinyl, I was able to add the baby’s name or initials in adorable fonts and designs. These personalized blankets are not only practical but also make for a heartfelt keepsake that parents will cherish.
Next, I moved on to pacifier clips. These little gems are a lifesaver for keeping pacifiers within reach and off the floor. Using vinyl in fun patterns and colors, I personalized each clip with the baby’s name or a cute little phrase. They turned out so cute and are sure to be a hit with any new mom.
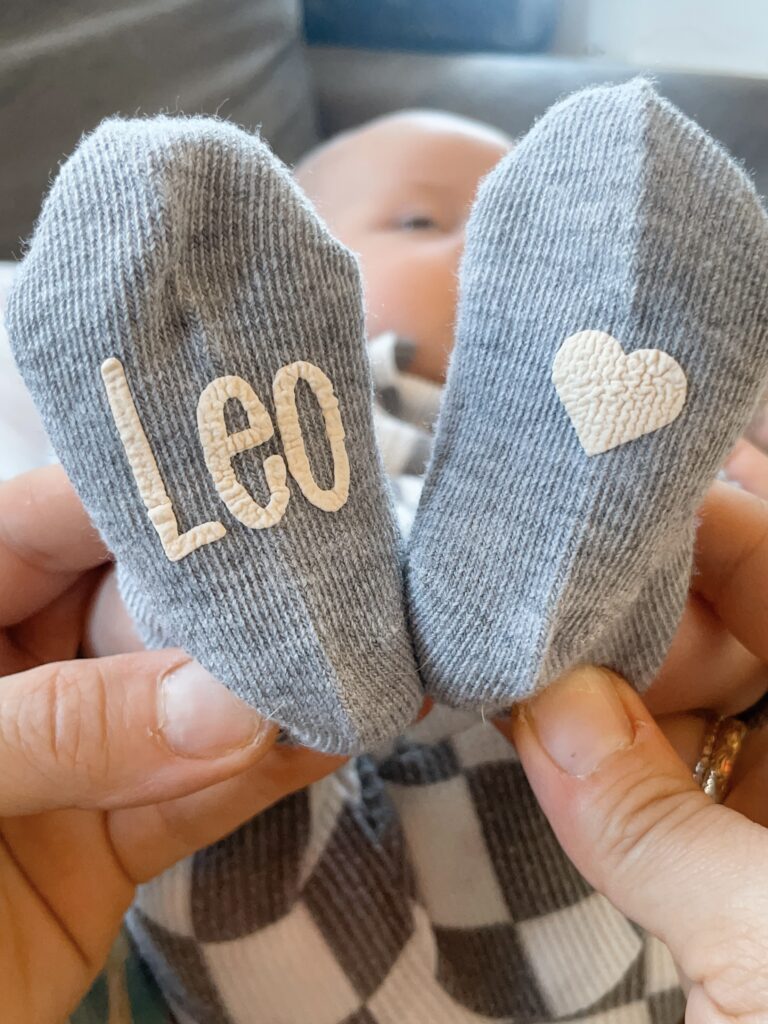
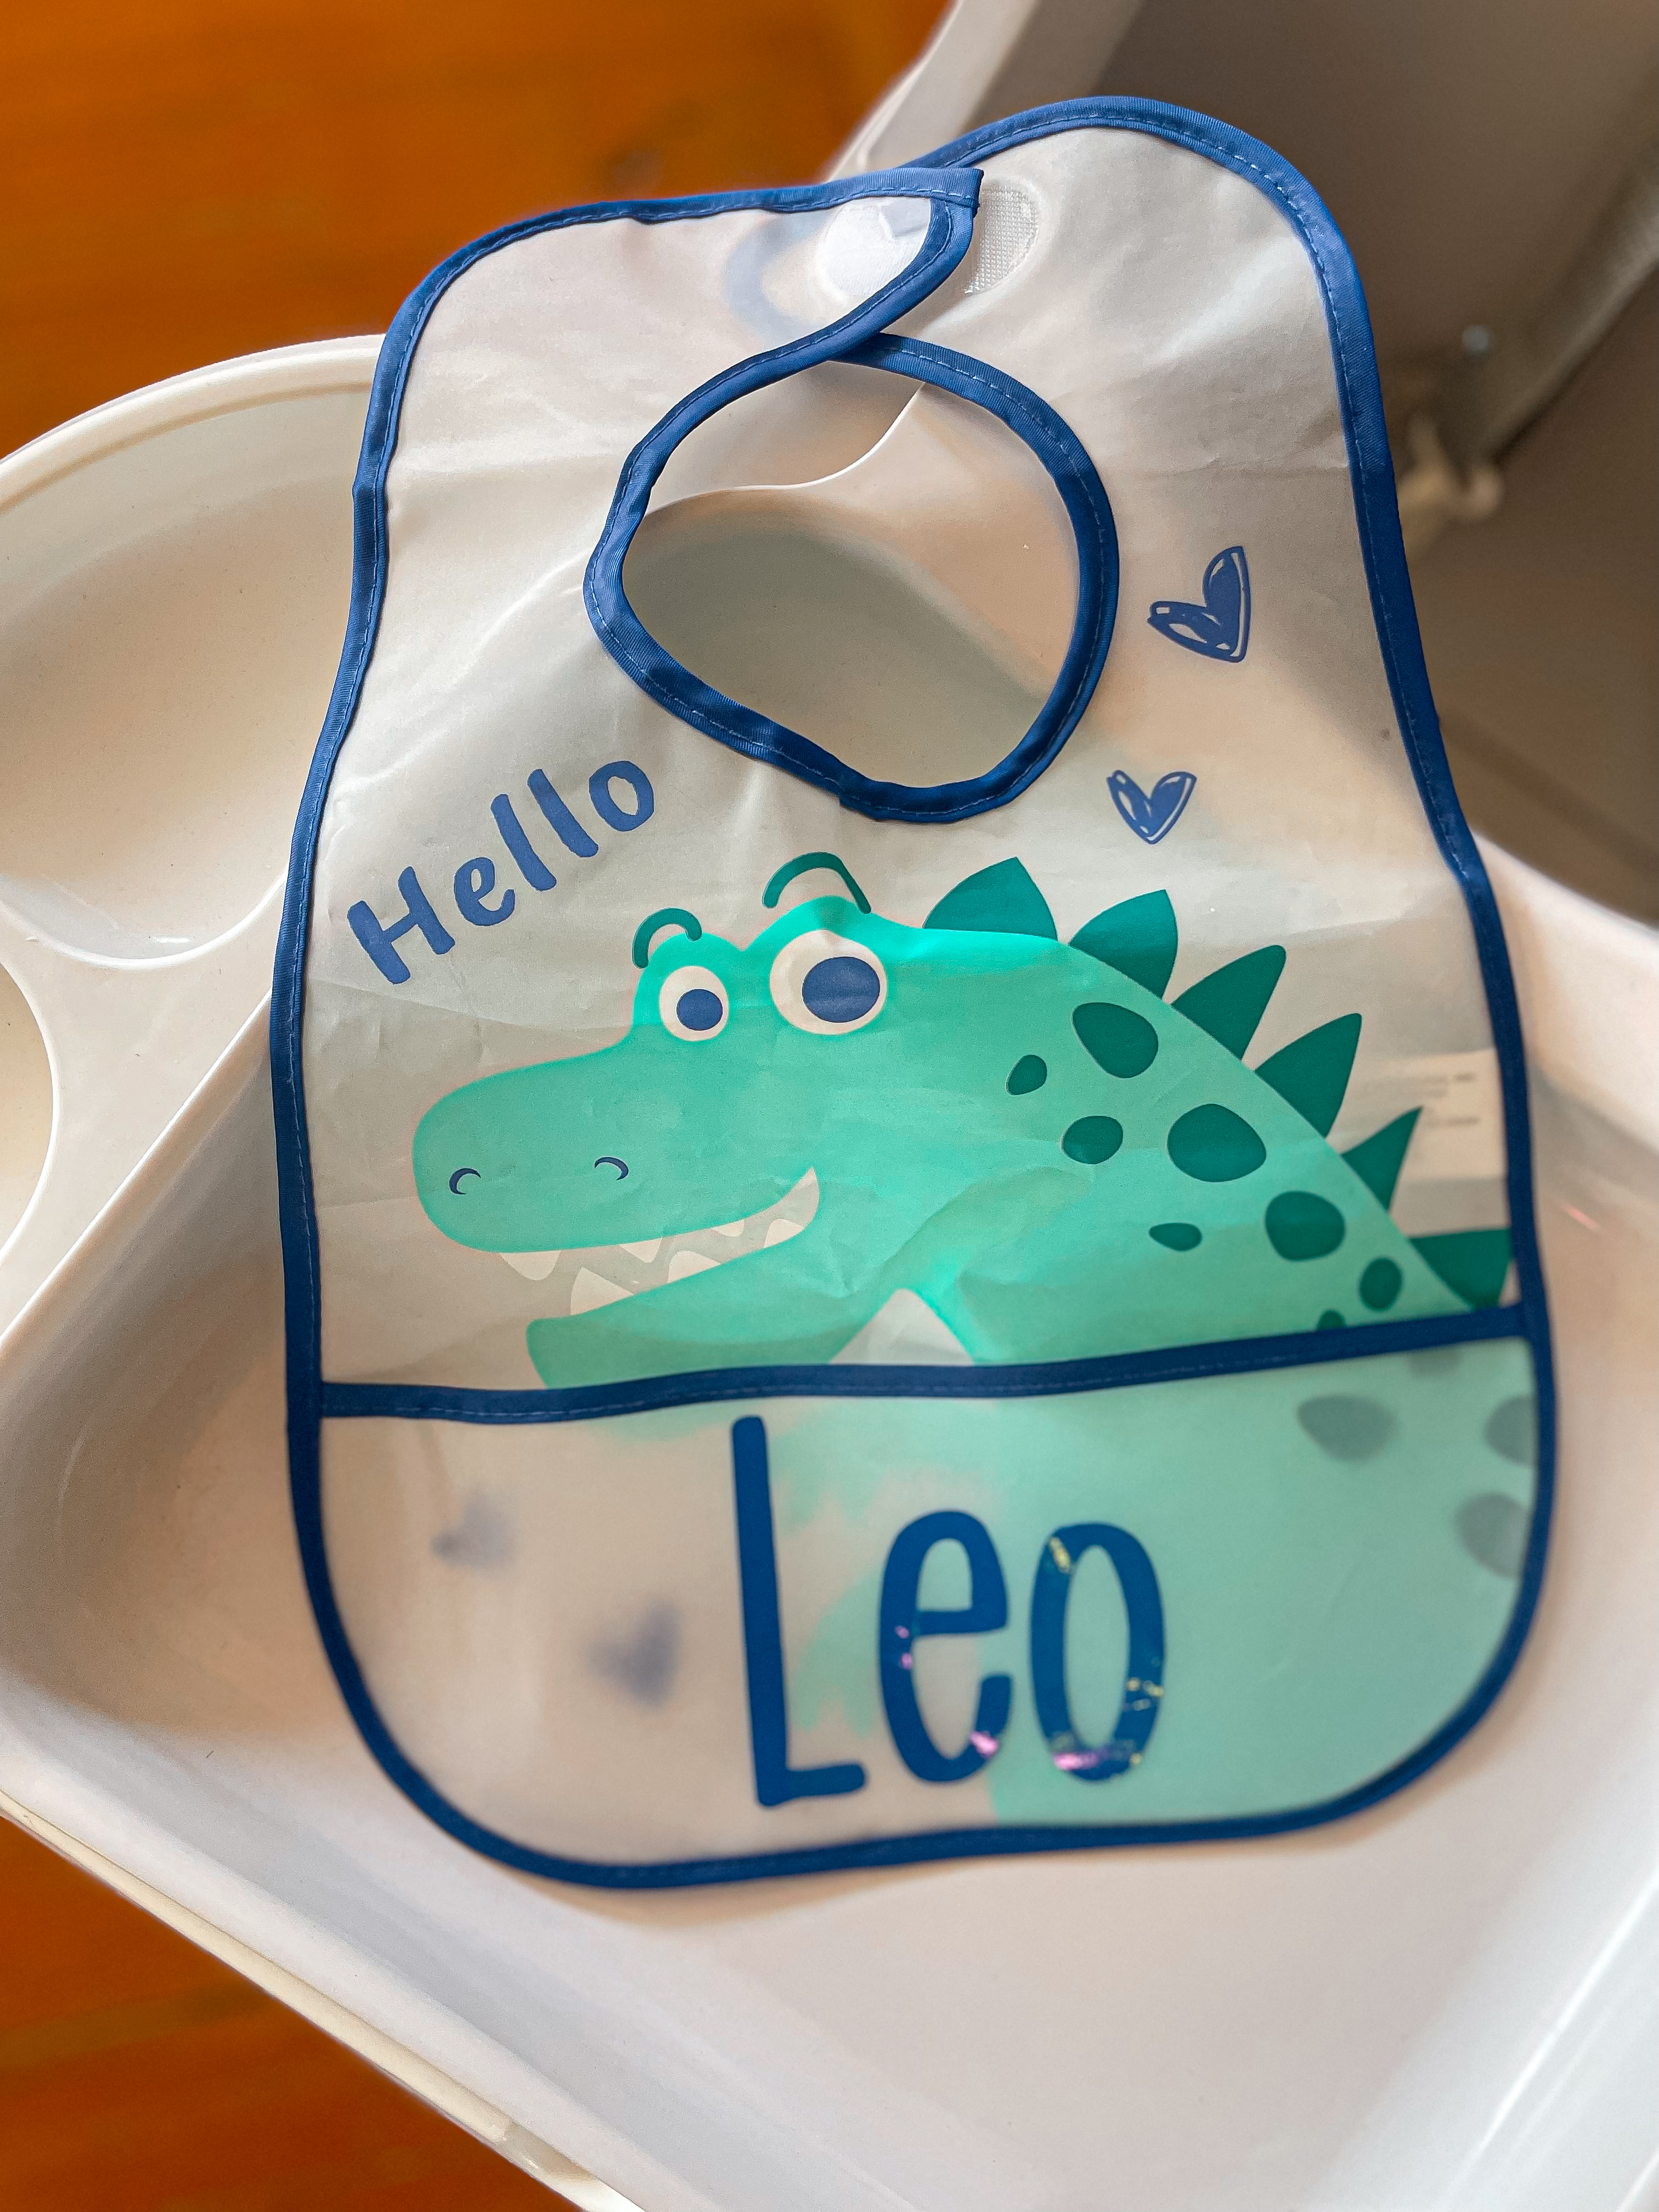
And let’s not forget about bibs, socks, and hats – oh my! I couldn’t resist picking up a few of each and adding some personalized flair with vinyl decals. Whether it’s a sweet saying, a playful design, or just the baby’s name, these DIY touches take these everyday items from ordinary to extraordinary.
Finally, I snagged this cute storage bag to use for many things.
Now, I know what you’re thinking – DIY projects can be time-consuming and complicated, right? But fear not, my fellow mommas! With the help of my Cricut machine and some easy-to-use vinyl, these projects were a breeze. Plus, the satisfaction of creating something unique and special with my own two hands is truly priceless.
So, there you have it – DIY personalized baby gifts on a budget, courtesy of Dollar Tree and a little bit of creativity. Whether you’re attending a baby shower, celebrating a new arrival, or just want to spoil your own little one, these handmade gifts are sure to be a hit. Happy crafting, mommas!
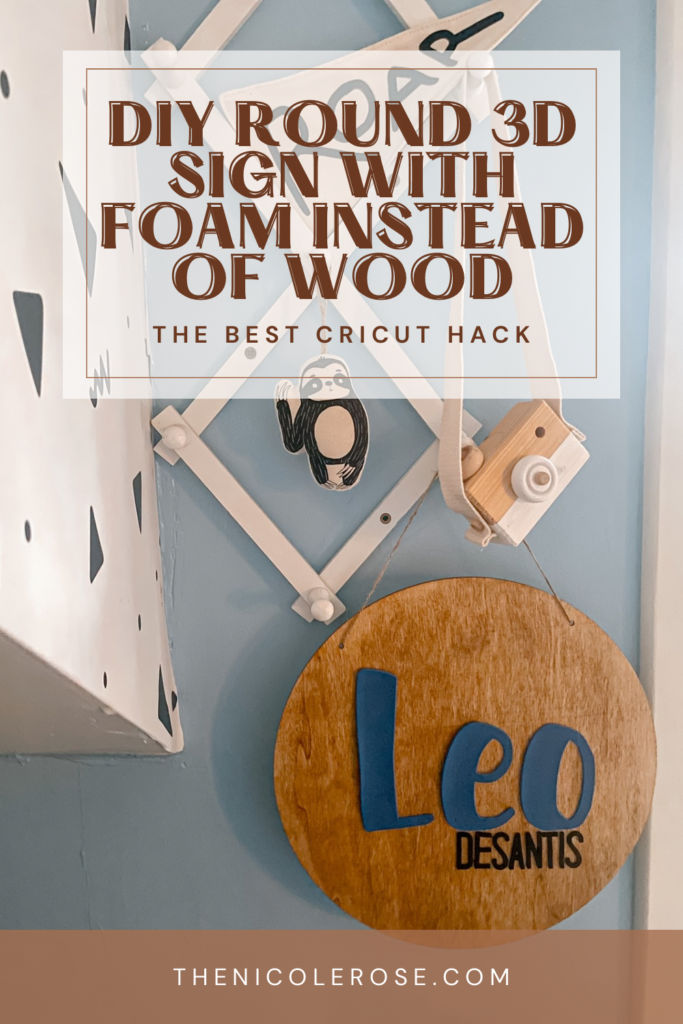
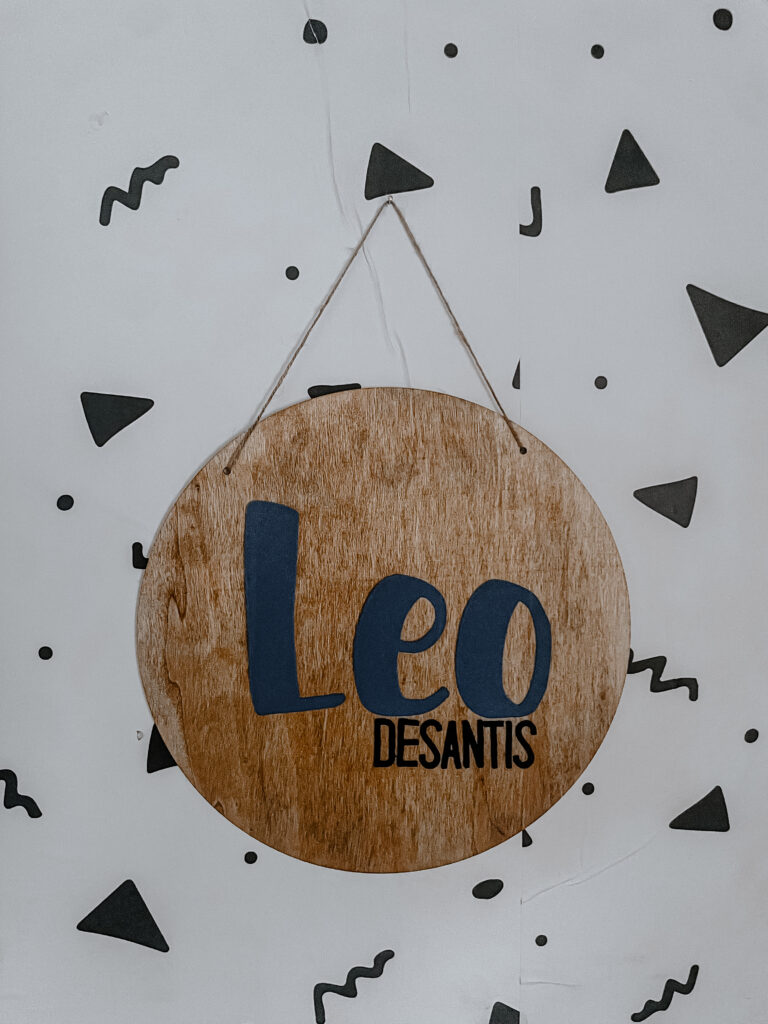
Cricut Hack: DIY Round 3D Sign With Foam Instead of Wood
Hey there, fellow crafting moms! Are you ready to add a touch of rustic charm to your little one’s nursery without the hassle of cutting wood? I’ve got just the hack for you: creating impressive 3D texts using a DIY Round 3D Sign With Foam Instead of Wood!
The Wood Sign Hack: Crafting Magic with Cricut
Imagine achieving the look of carved wood without the need for woodworking skills or heavy machinery. With this ingenious hack, you can transform ordinary foam board into stunning 3D texts that mimic the warmth and texture of wood, all thanks to your trusty Cricut machine.
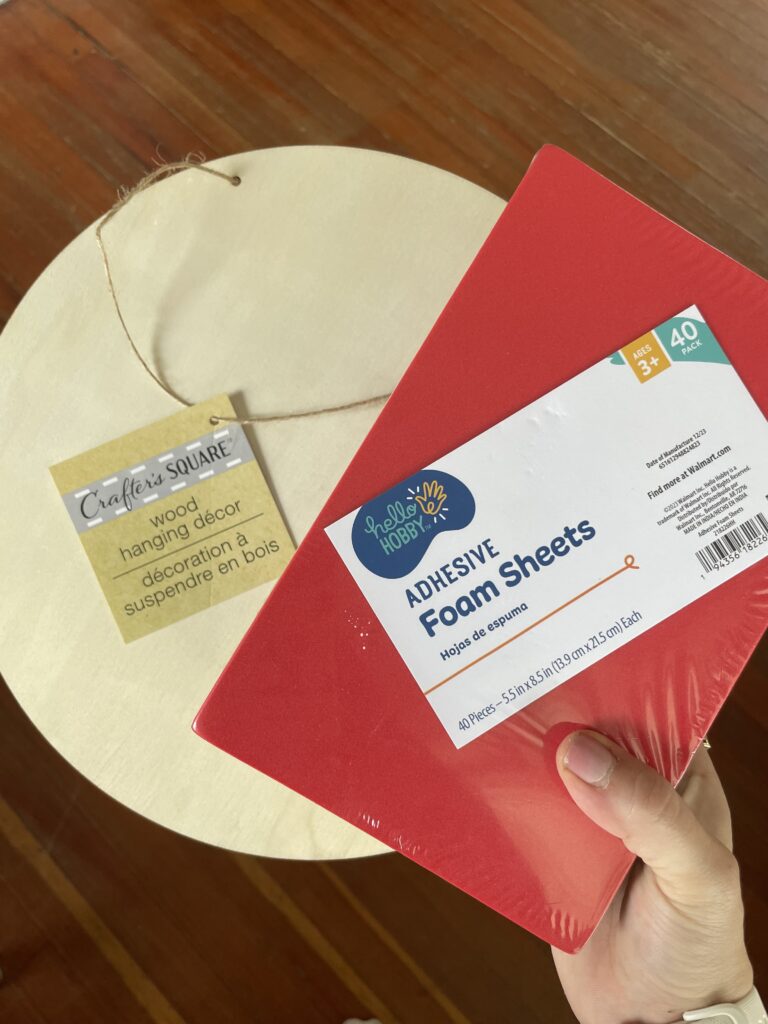
Materials Needed:
Foam craft sheets (readily available at most craft stores)
Glue
Cricut cutting machine
Printer and paper
Round Wooden Sign (I got mine from Dollar Tree)
Paint or wood stain
Steps to Create 3D Texts:
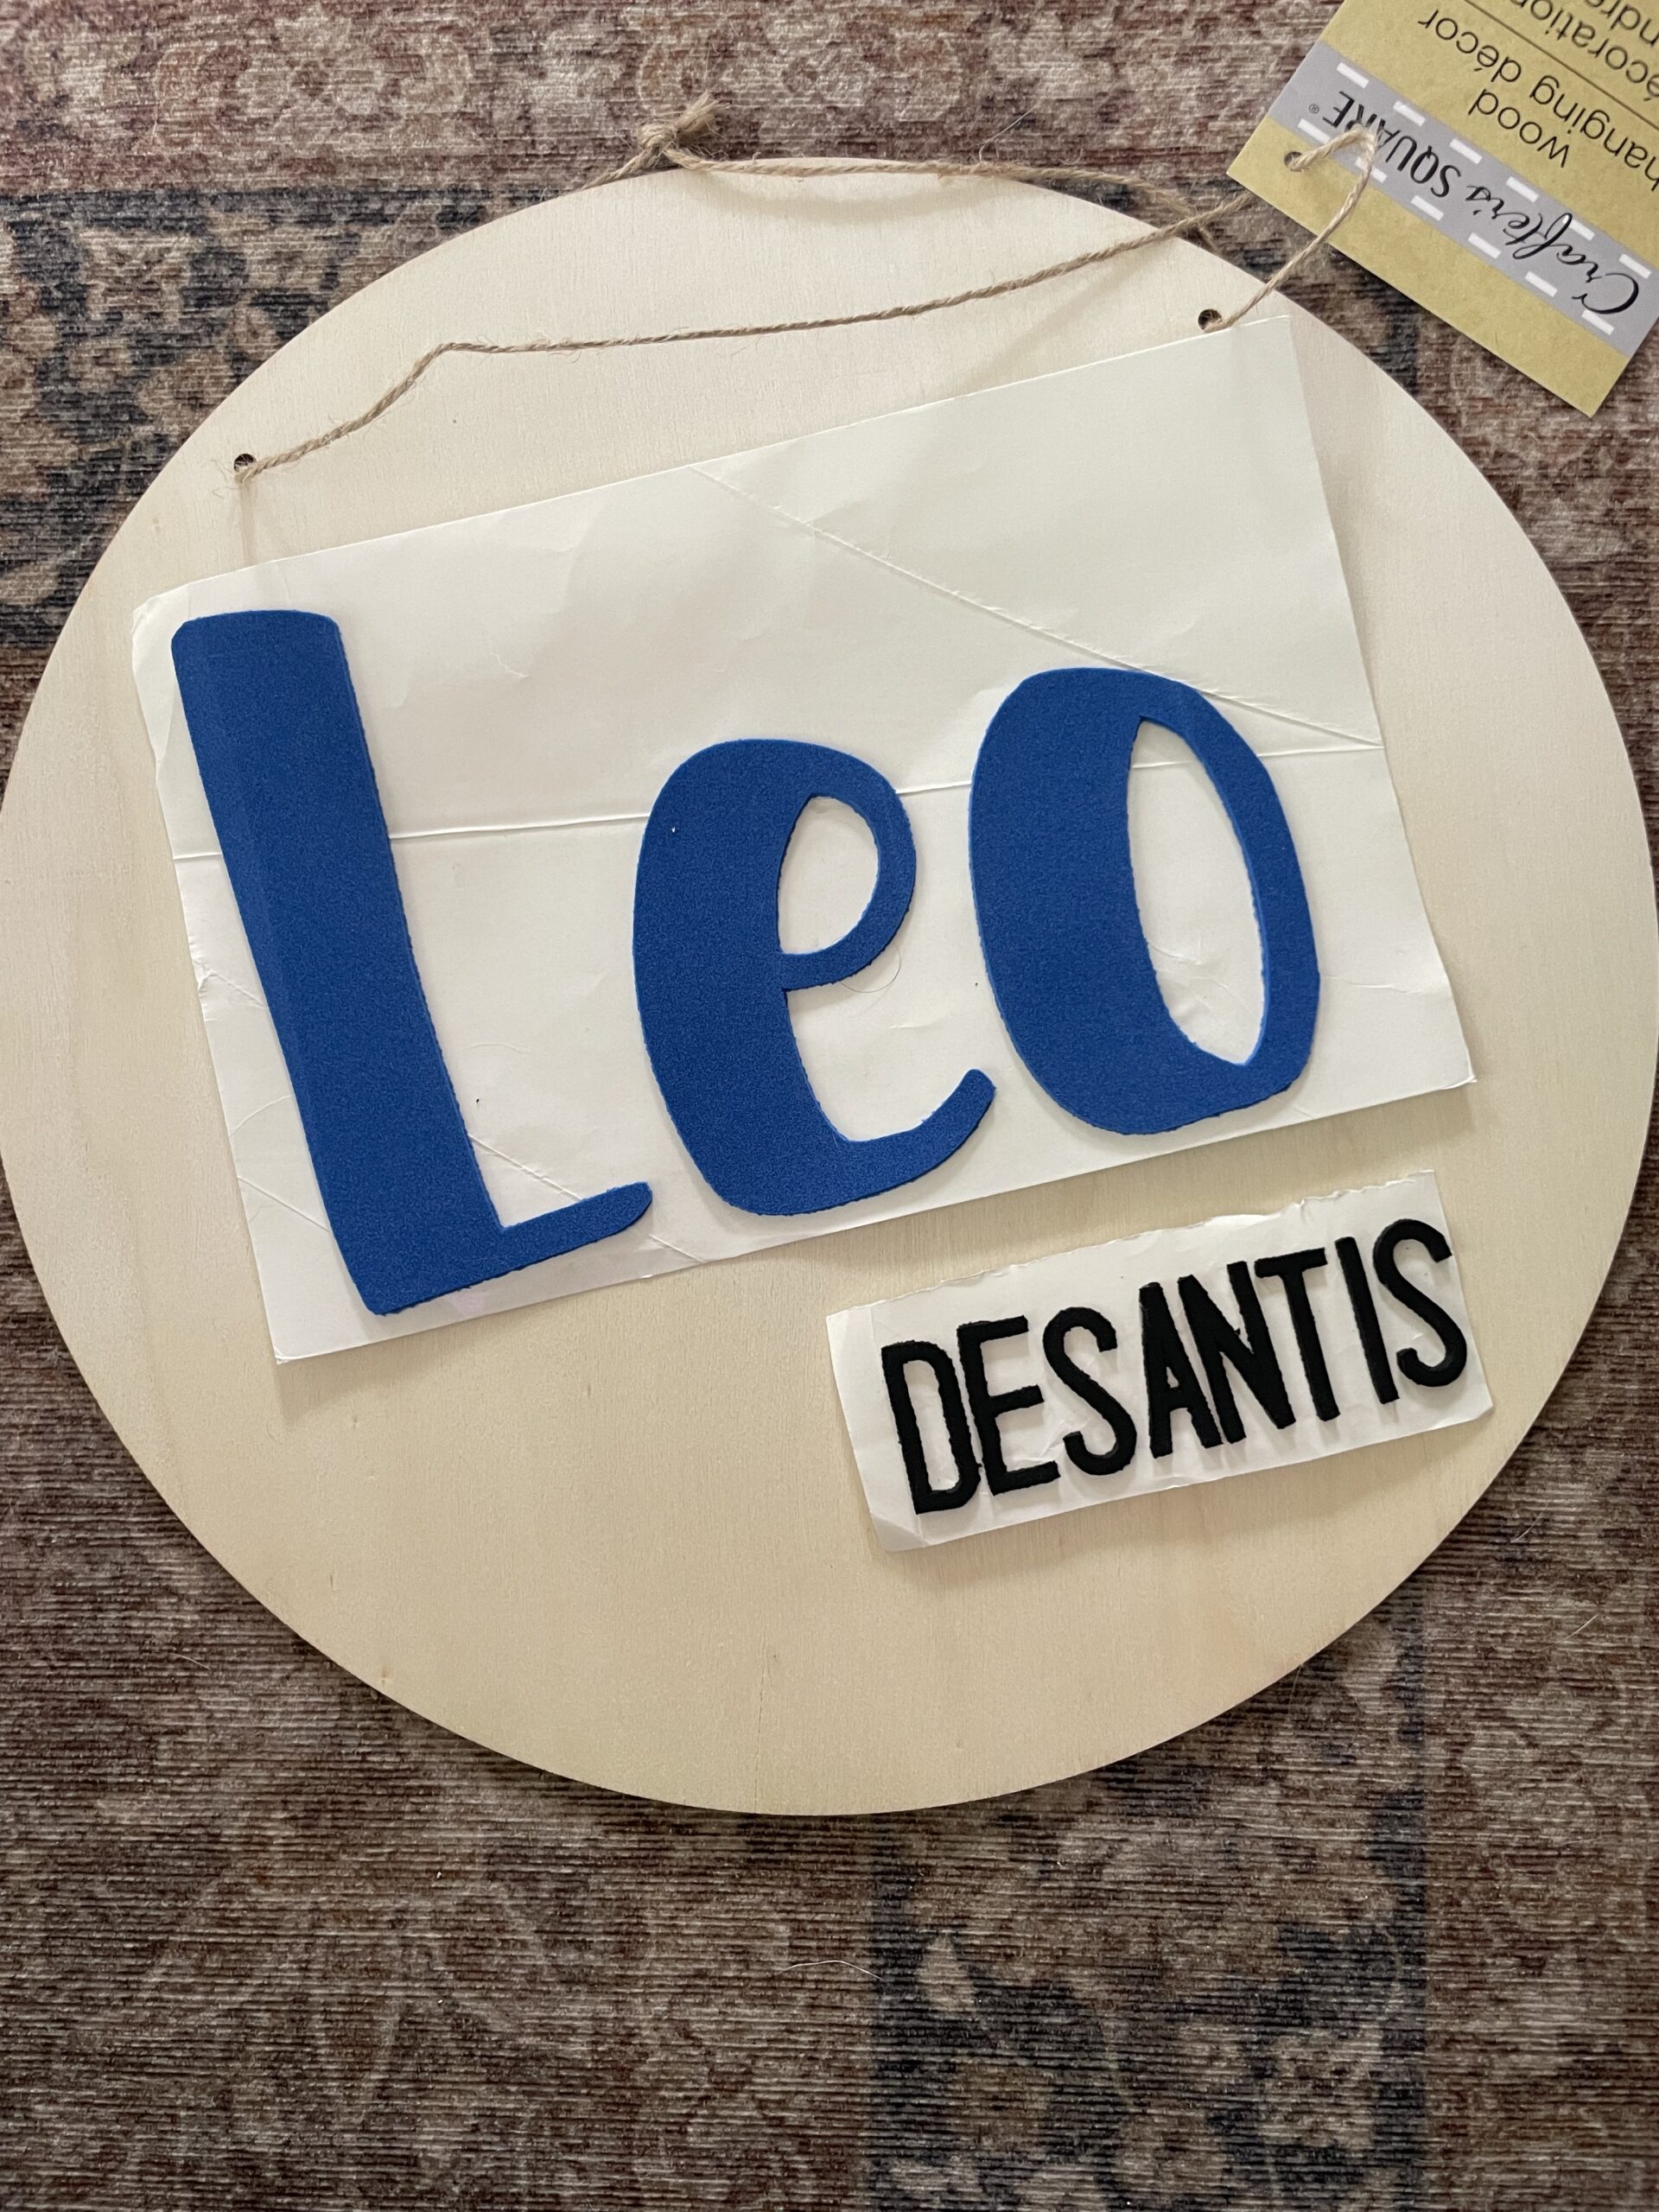
Design Creation: Begin by designing your sign in your preferred design software. Cricut Design Space offers a user-friendly interface for creating and customizing designs. Choose your font, size, and any additional graphics or elements you wish to include. I chose to do my son’s first and middle name in free fonts Karley and Poke Night.
Material Selection: Select foam board as your material option in Cricut Design Space. Adjust the settings according to the thickness of your foam board to ensure precise cutting.
Wooden Sign: Paint or stain the round wooden sign and completely dry before assembling.
Cutting: Place the foam board on the cutting mat and load it into your Cricut machine. Follow the prompts in the software to initiate the cutting process. The machine will precisely cut out your design, including any intricate details.
Assembly: Carefully remove the cut pieces from the foam board. Apply adhesive or glue to the back of each piece and arrange them according to your design. The lightweight nature of foam makes it easy to handle and position.
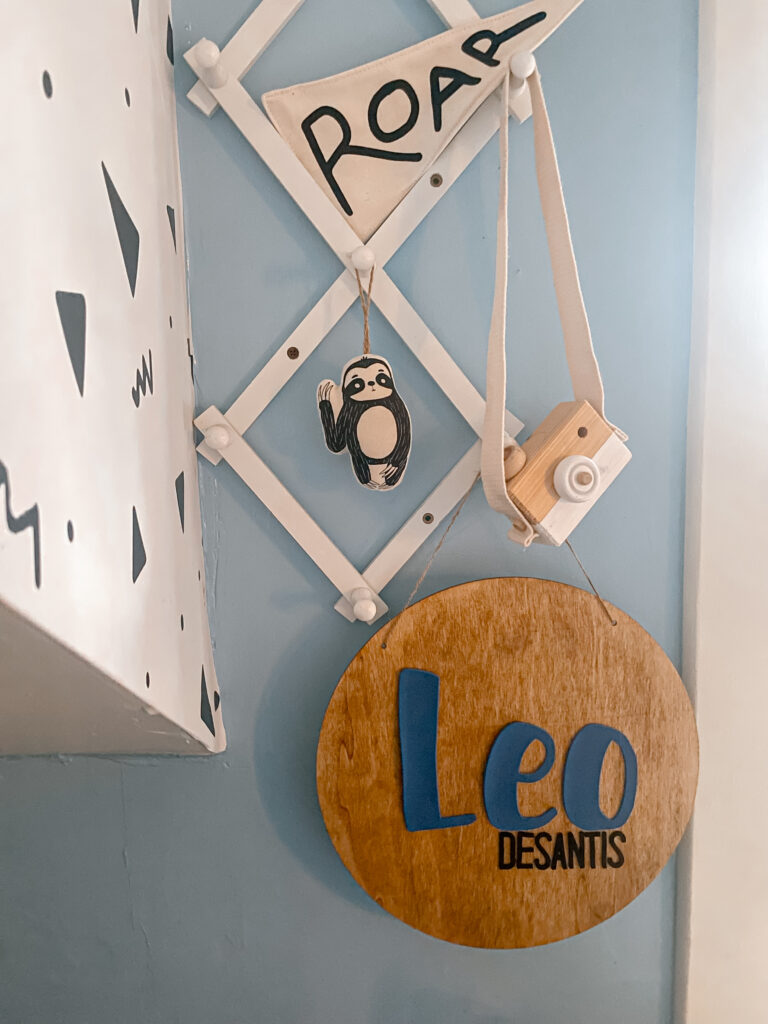
Display: Once your sign is complete and dry, it’s ready to be displayed!
Benefits of the Wood Sign Hack with Cricut:
Budget-Friendly: Foam board is an affordable alternative to wood, and with the help of your Cricut machine, you can create professional-looking results without breaking the bank.
User-Friendly: Cricut Design Space makes it easy to design and customize your text, while the Cricut machine ensures precise cutting for flawless results.
Versatility: Foam board comes in various sizes and thicknesses, allowing you to customize your project to suit your needs and preferences.
Family-Friendly: Get the kids involved in the crafting fun! This project is perfect for family crafting sessions and allows everyone to unleash their creativity.
Enjoy!
With this DIY wood sign hack featuring the magic of Cricut, you can create stunning 3D texts that add warmth and character to any space in your home. Whether you’re a seasoned crafter or just starting out, this budget-friendly and family-friendly project is sure to be a hit.
If motherhood has you stressed and you feel like you’ve lost your creativity, I am here to help! Here you will find easy recipes, simple DIY’s, affordable styles, and what to read next. I believe we all have a creative side, some of us just need a little help to find it. I will help inspire you to have creative expression without standards.