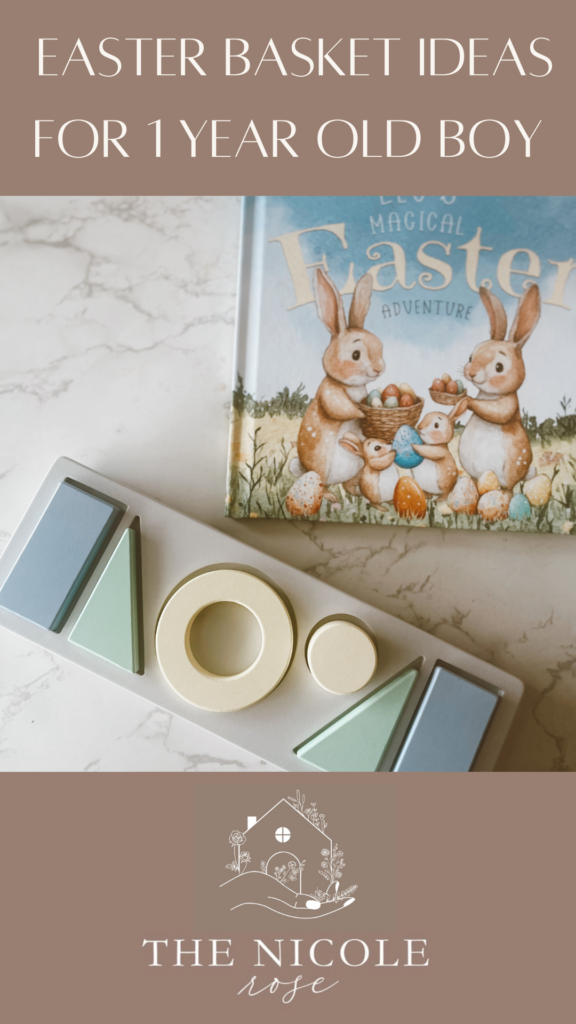
Easter is right around the corner, and even though your little one might not be hunting eggs just yet, that doesn’t mean we can’t spoil them with the cutest Easter basket ever! If you’re shopping for your one-year-old son this year, I’ve rounded up some baby-friendly, totally adorable, and super practical goodies that are perfect for his first (or second!) Easter celebration.
These ideas are sweet, safe, and sure to bring big smiles. You can shop everything I included in Leo’s basket right here: Easter Basket for a One-Year-Old
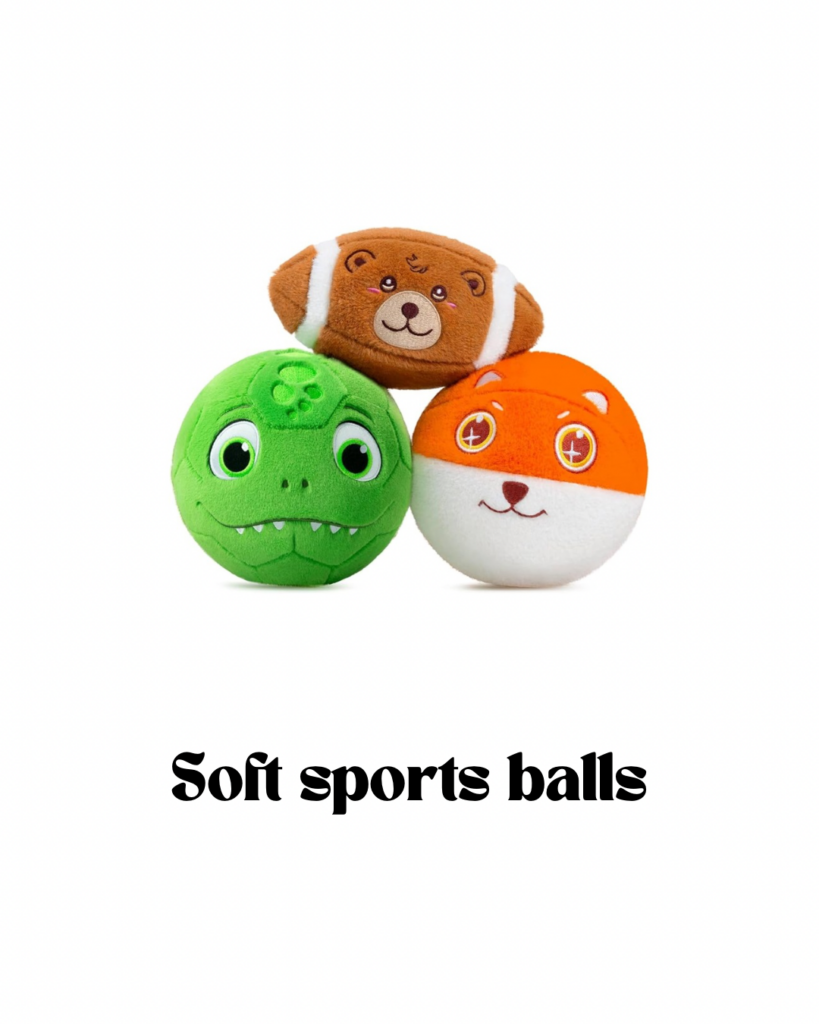
1. Soft Sports Balls Set
Let’s get ready to play ball! These plush, inflatable balls are the perfect size for tiny hands to grip, toss, and roll. They’re soft, colorful, and a great way to work on motor skills while having a blast.
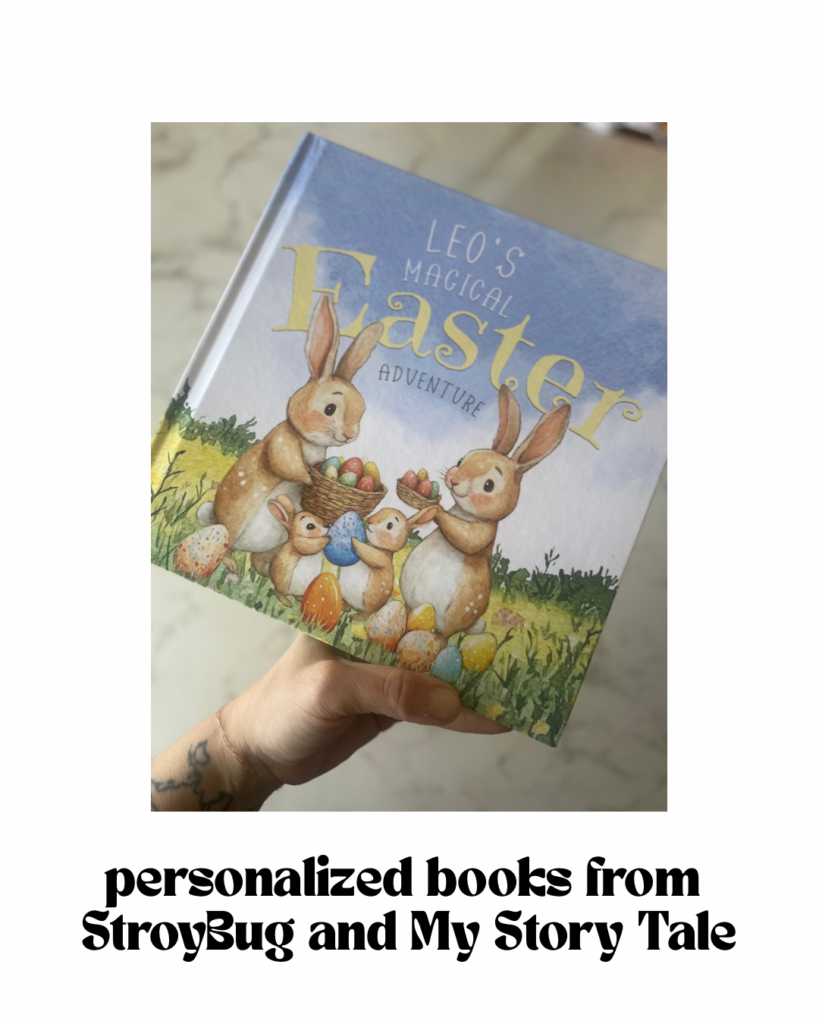
2. Personalized First Easter Storybook
You guys know I love a personalized touch—and this book is such a sweet keepsake! It features your little one’s name and takes them on an Easter adventure that you’ll love reading together year after year.
3. My 1st Tumbler
Time to level up from sippy cups! This adorable tumbler is made just for toddlers—with a straw, easy-to-grip handles, and a leak-resistant lid. Perfect for smoothies, milk, or water on the go.
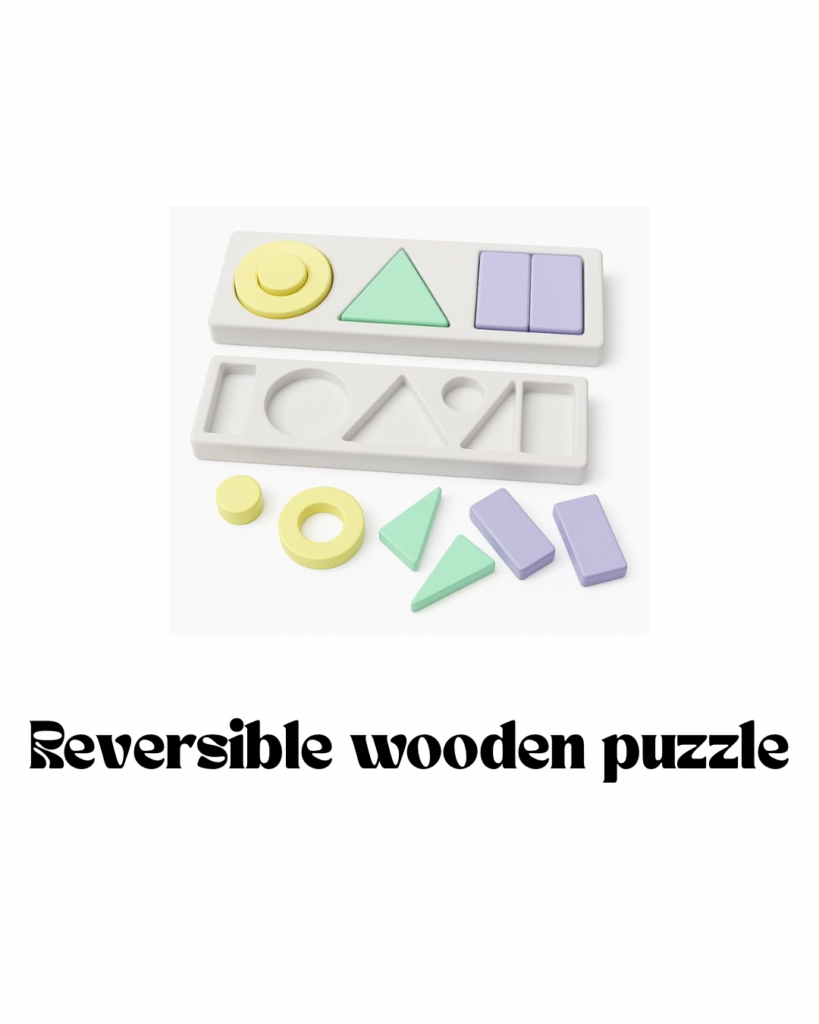
4. Montessori Shape Sorter Puzzle
This one’s a winner for quiet time play! It’s a 2-in-1 puzzle and shape sorter that helps teach colors, shapes, and coordination—all while keeping little hands busy and curious.
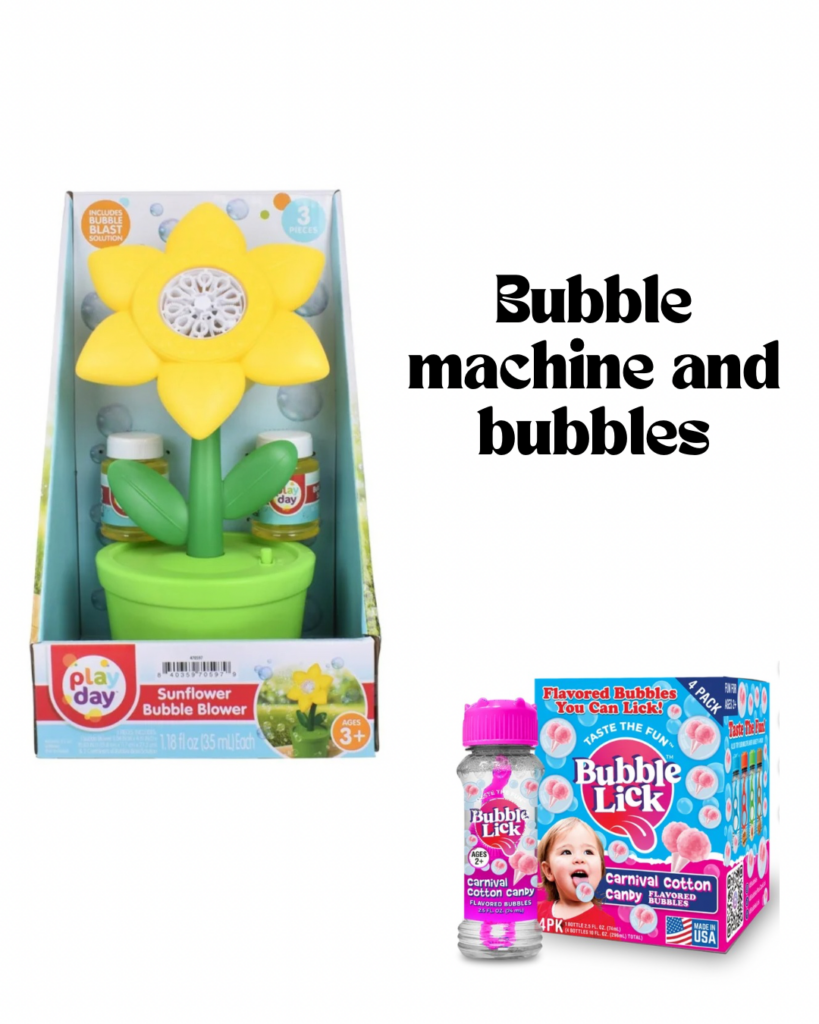
5. Bubble machine and Lickable Bubbles
Yes, you read that right—lickable bubbles! These are safe, flavored bubbles that are just as fun to chase as they are to (safely) taste. Great for outdoor play and endless giggles!
6. Personalized Plush Bunny
I mean… could it be any cuter? This soft, snuggly bunny has your baby’s name stitched right onto the ear and makes the sweetest cuddly companion. It’s a forever kind of gift.
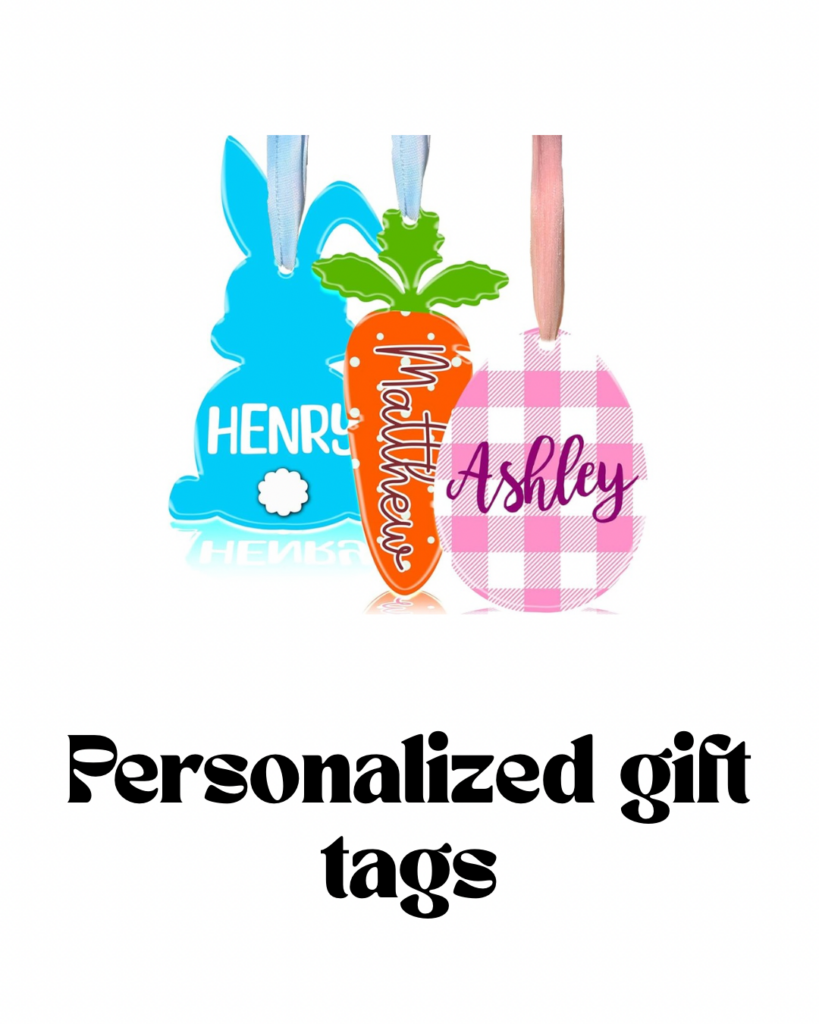
7. Custom Easter Basket Name Tag
This acrylic carrot-shaped name tag adds the cutest finishing touch to your baby’s Easter basket. It’s reusable too, so you can bring it out year after year as a tradition!
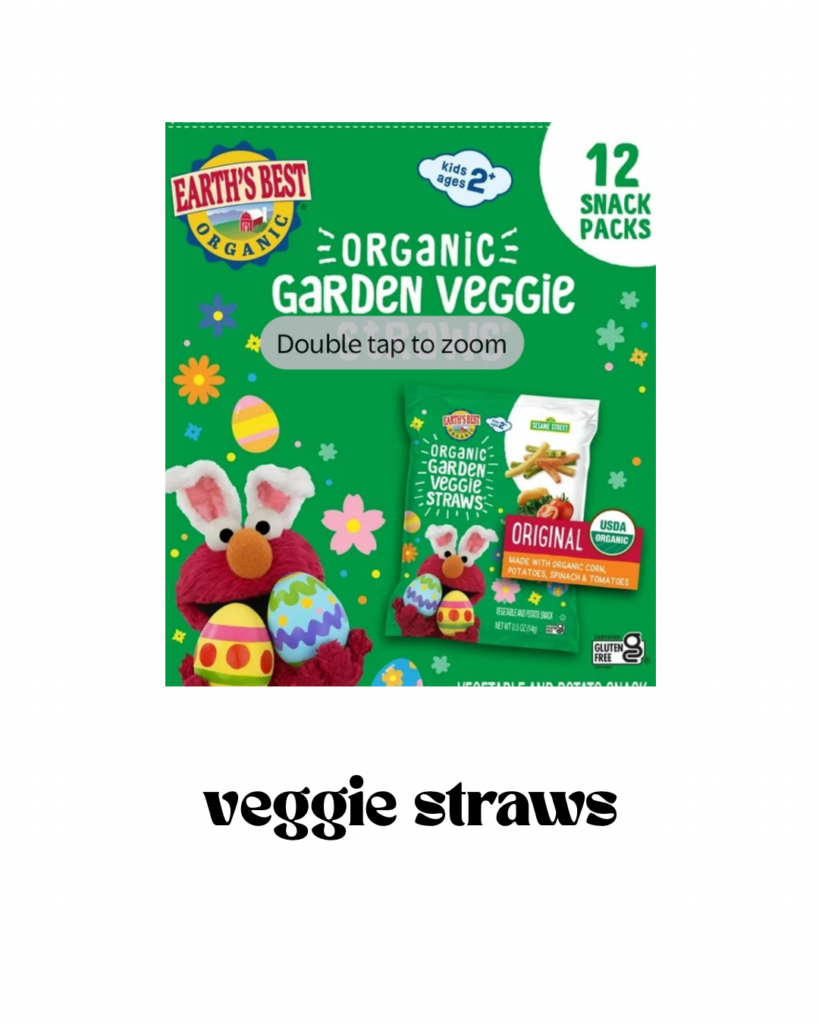
8. Organic Garden Veggie Straws
Because every Easter basket needs a snack! These veggie straws are toddler-approved and mama-approved—crunchy, colorful, and just the right amount of salty for little tastebuds.
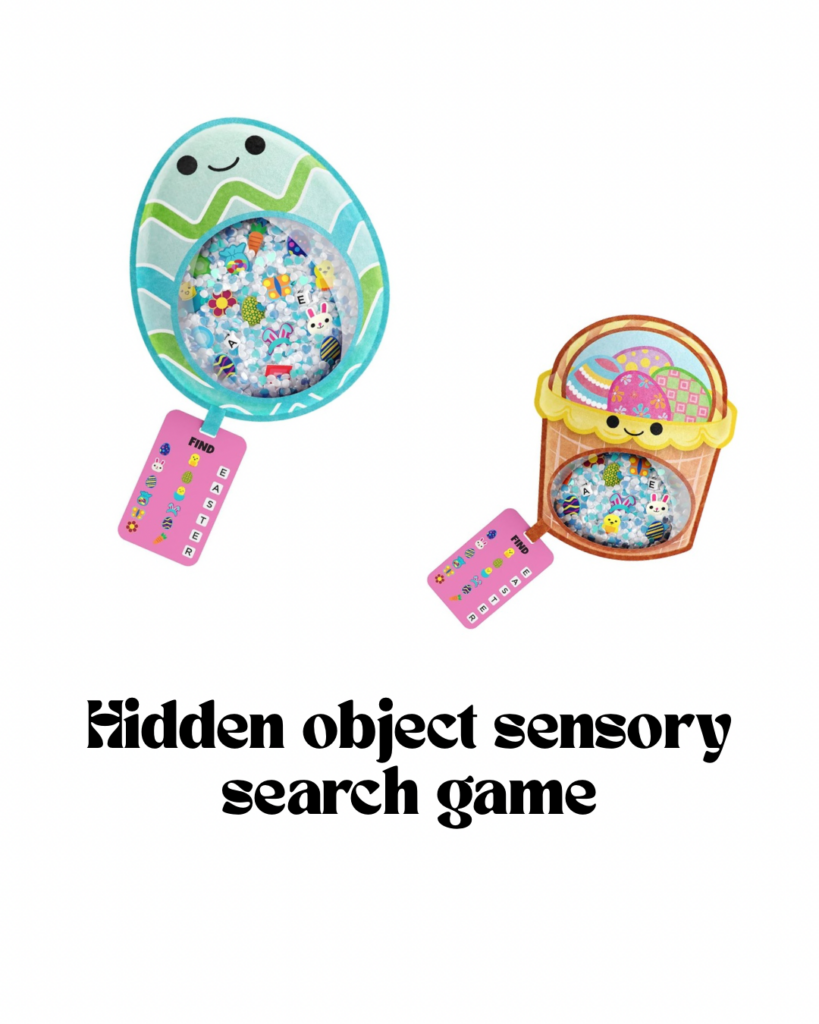
9. Hidden Object Sensory Toy
This is a perfect toy for tiny hands. Full of color and little objects, they are sure to keep your little one busy.
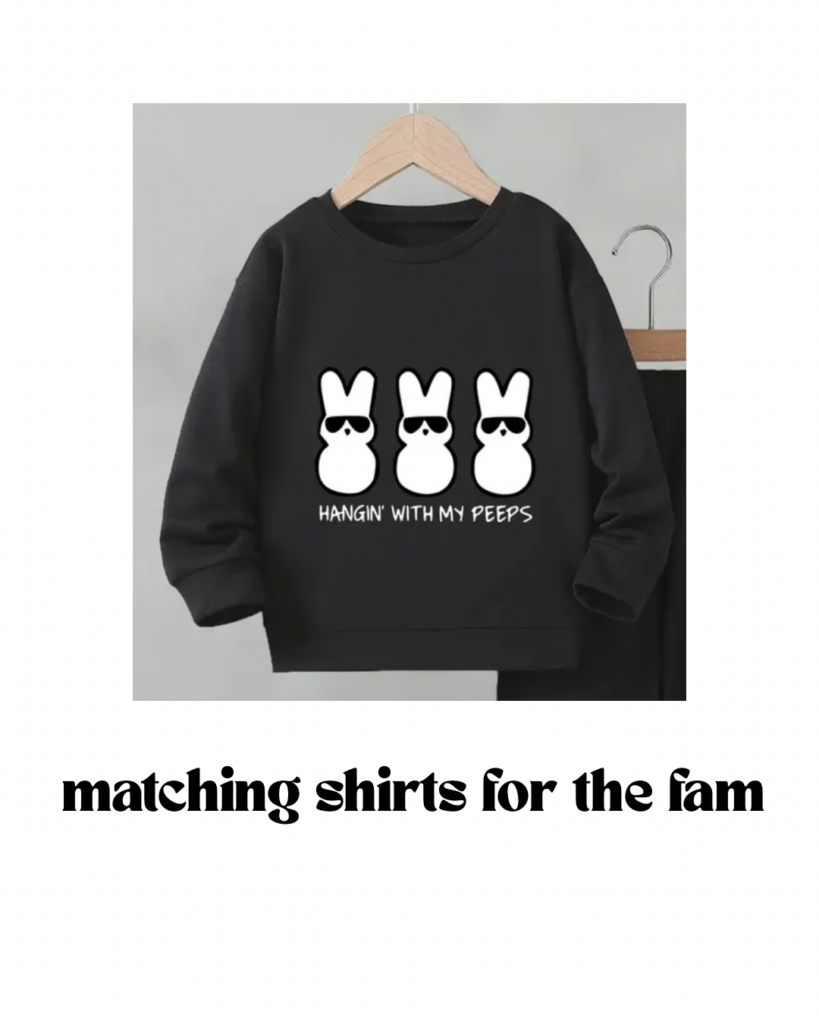
10. Matching Family Shirt
You know we needed matching shirts for the boys!
I love creating baskets that mix sensory play, learning, cuddles, and a little personalized magic—and this one hit all the marks for our one-year-old. Whether it’s baby’s first Easter or you’re building a new tradition, these basket fillers are fun, functional, and full of love.
Don’t forget to check out the full list right here if you’re looking for the perfect mix of baby-friendly Easter goodies!
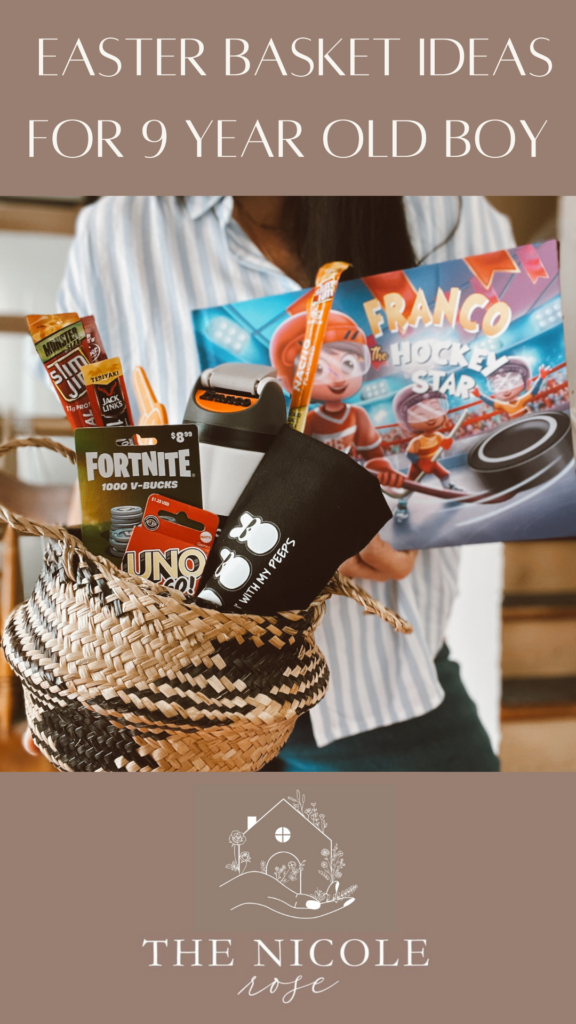
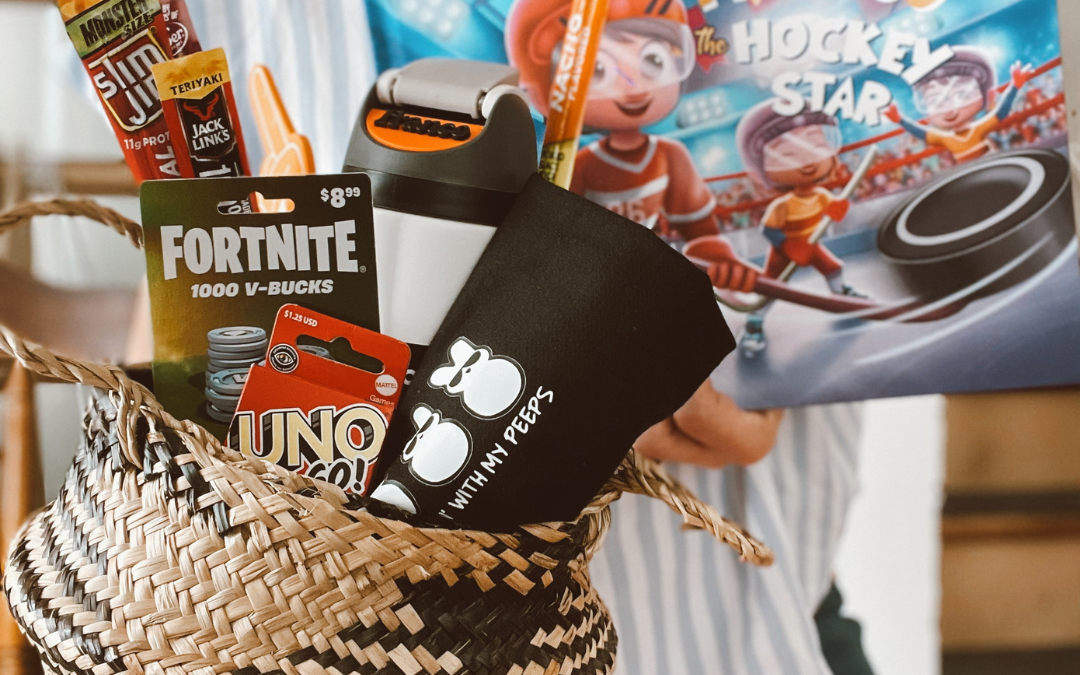
Easter is hopping our way, and if you’re anything like me, you want to put together a basket that’s more than just chocolate bunnies and plastic eggs (although—let’s be real—we’re still totally including those too). If you’re shopping for a 9-year-old boy this Easter, I’ve rounded up some fun, practical, and just plain awesome finds that will light up his face brighter than a glow-in-the-dark baseball. Yes, that’s a thing. And yes, it’s included.
Check out everything I’m putting in my son’s Easter basket this year—you can shop the full list right here!
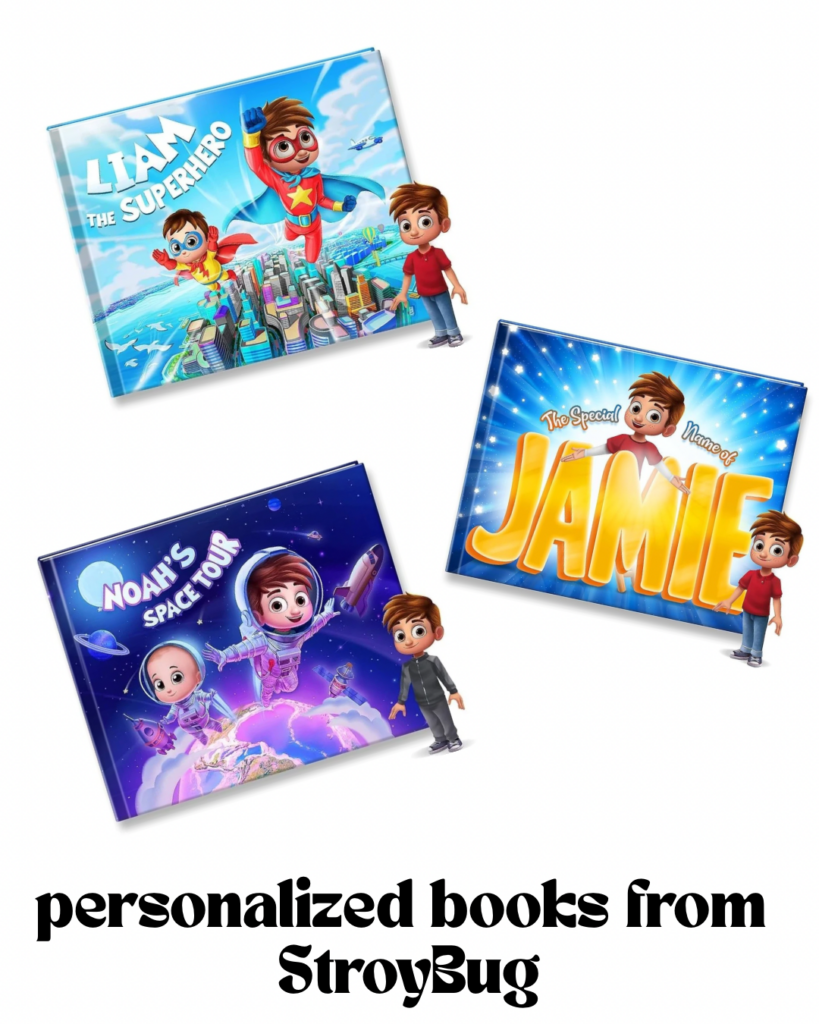
1. Make It Personal
Who doesn’t love seeing their name on something cool? Personalized gifts make the basket feel extra special.
Custom Book from Story Bug – Your kiddo becomes the star of their own story! It’s such a fun keepsake and makes reading even more exciting.
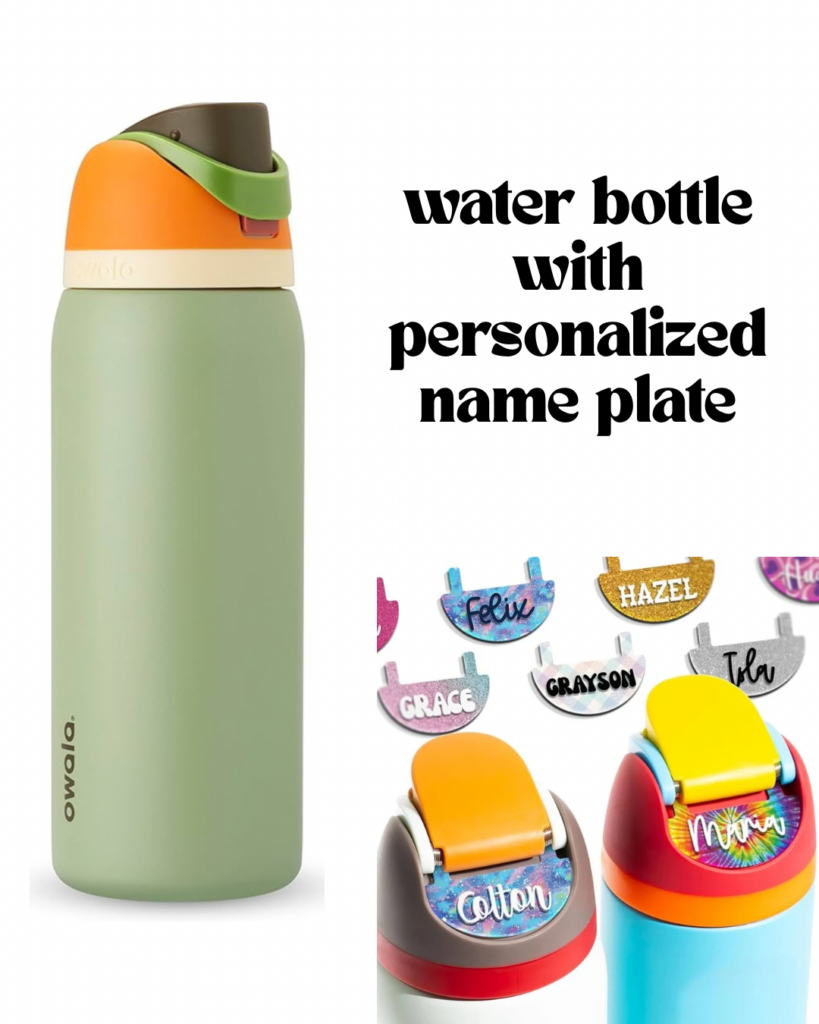
2. Cool (and Useful!) Gear
Because we love a basket that’s equal parts fun and functional.
Owala FreeSip Water Bottle – These are the BEST for school, sports, or park days. They keep drinks cold for hours, and the colors are so fun.
Personalized Name Plate for Owala – No more mix-ups with friends. This clip-on name tag is cute, durable, and perfect for adding personality.
3. Game Night Goodies
Games are always a hit in our house—and these are great for travel, too!
Monopoly Deal – A fast-paced twist on a classic. It’s easy to learn and super addicting.
UNO – A forever favorite. You just can’t go wrong!
Battleship- Dont forget this all time fave!
4. Play All Day
This find takes the fun outside—hello, spring energy!
Glow-in-the-Dark Baseball with Bluetooth Speaker – I mean… a baseball that lights up and plays music?! Instant favorite.
5. Snack Attack!
Toss in a few tasty treats for the ultimate boy-approved snack stash.
Slim Jim Savage Meat Sticks – Great for the kid who prefers savory over sweet.
KRAVE Beef Jerky Variety Pack – Fun flavors and packed with protein—perfect for on-the-go snacking.
6. Something Festive
You know I had to include at least one adorable Easter item…
“Hangin’ With My Peeps” Tee – A funny and festive shirt that’s perfect for Easter brunch, egg hunts, and pictures with the bunny. Plus I got matching with his baby bro!
7. What They Really Want
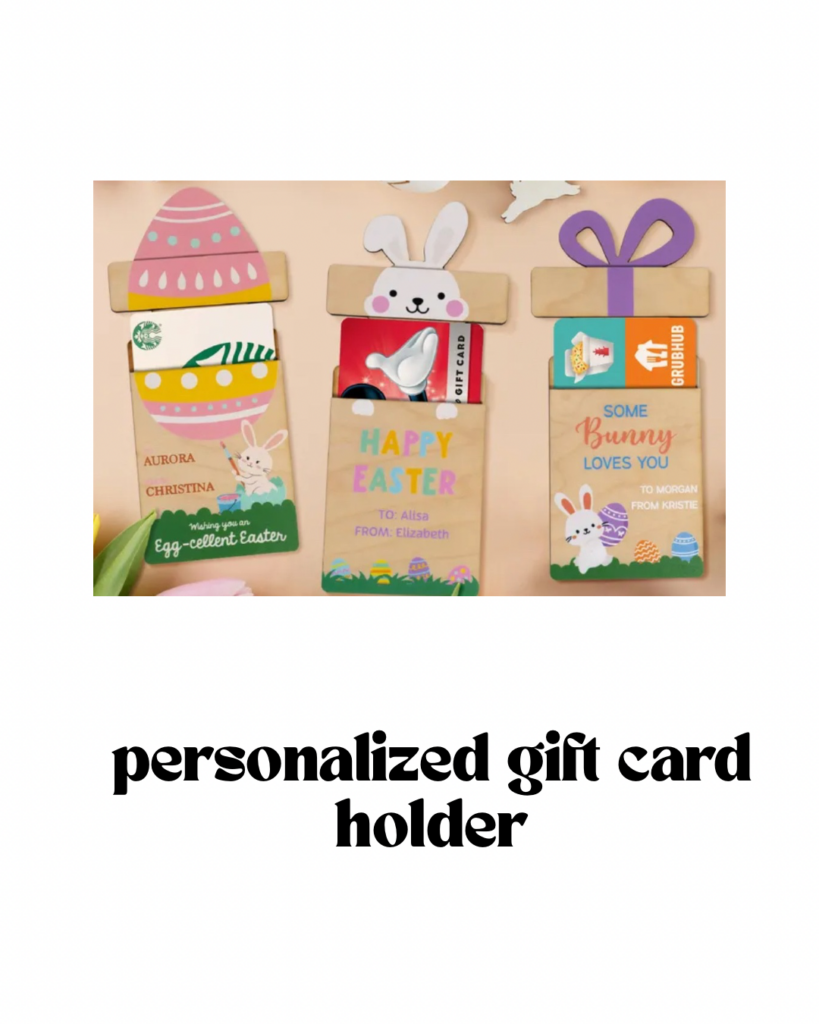
Gift Cards- We all know that’s all they want! Might as well jazz them up with a personalized gift card holder.
I love curating a basket that mixes fun, function, and a little wow factor—and this list seriously checks all the boxes. Whether you’re shopping last-minute or planning ahead, you can grab everything I used right here for your own Easter surprise!
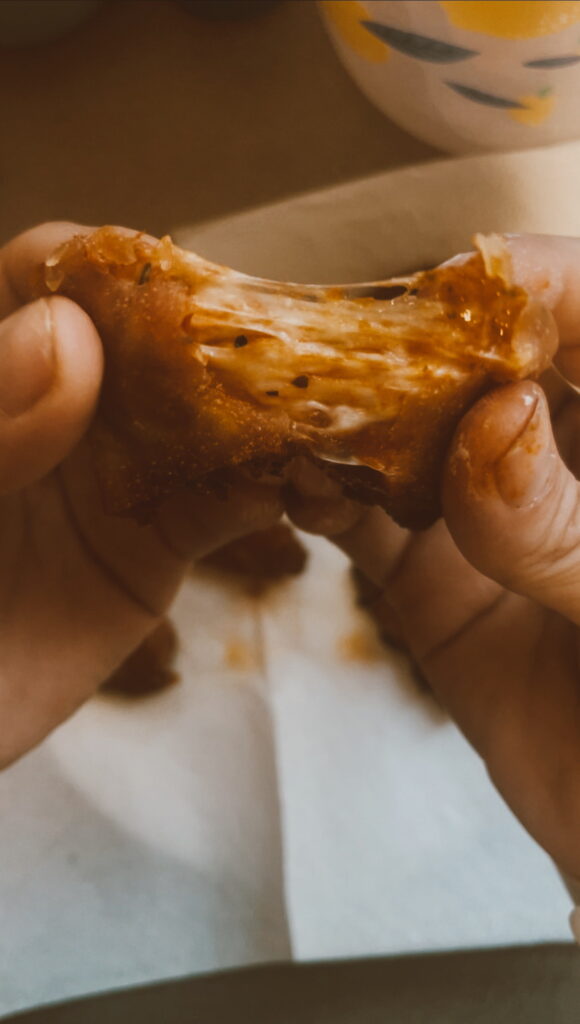
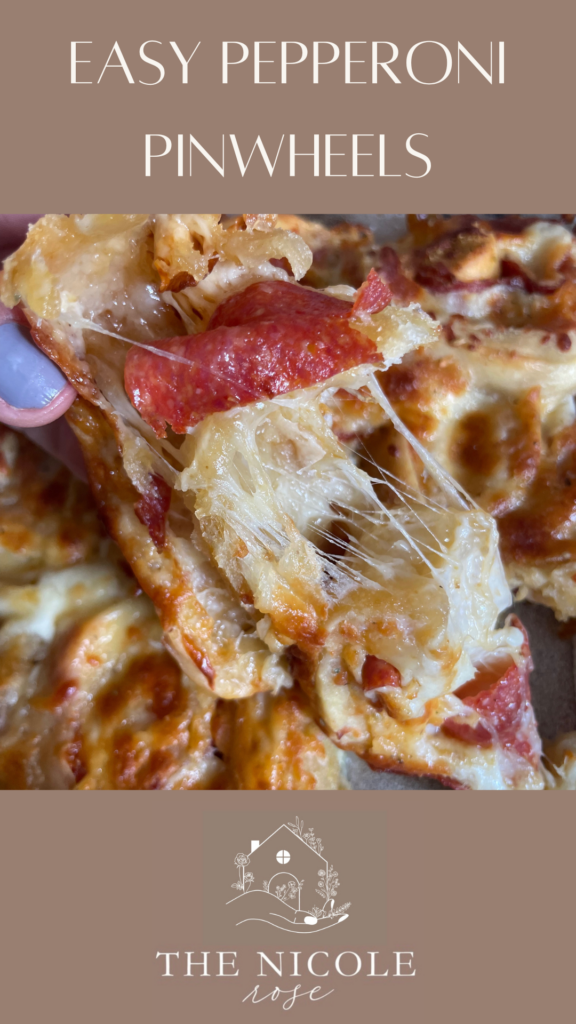
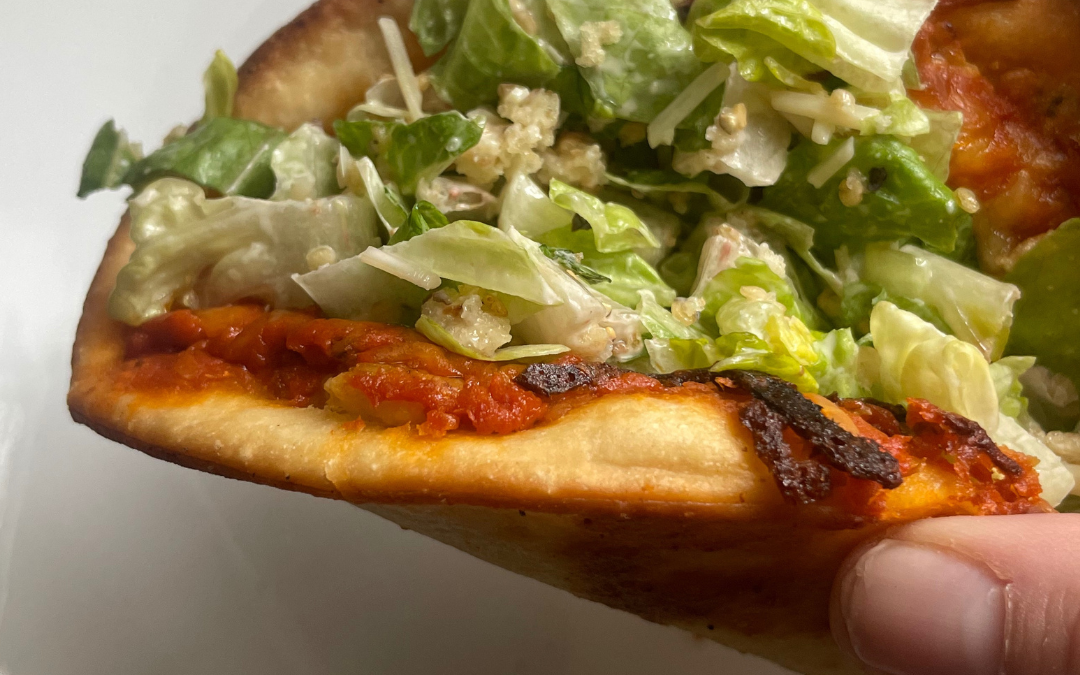
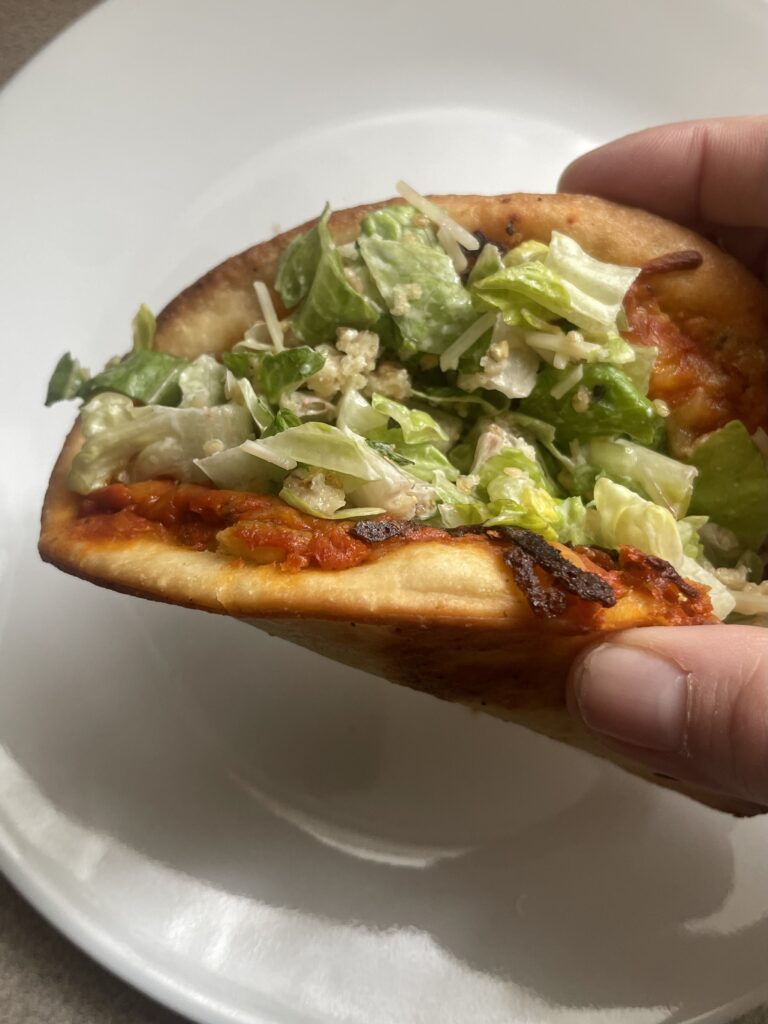
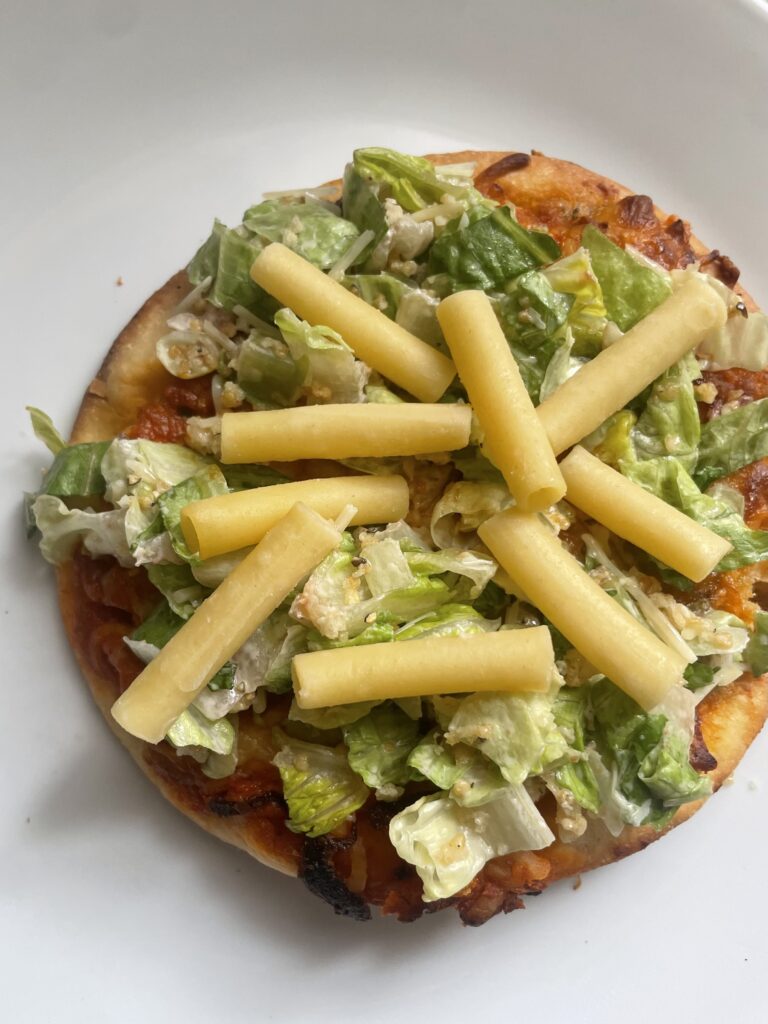
You know what’s better than pizza? Pizza you can eat by the handful. These homemade pizza rolls are everything you love about pizza—ooey-gooey cheese, savory sauce, crispy crust—but wrapped up in golden-brown bite-sized goodness.
And because I can’t help but stir the pot (or in this case, the salad bowl), I swapped out croutons in my Caesar salad and threw these babies in instead. The result? Crave-level chaos in the best way.
Ingredients:
Wonton wrappers (find them in the refrigerated section near tofu!)
Shredded mozzarella
Pepperoni, mini or chopped (or whatever toppings your heart desires)
Pizza sauce or marinara
Avocado oil for pan-frying
Optional: Italian seasoning, garlic powder, or grated Parmesan
Instructions:
Place a wonton wrapper on a flat surface.
Add a small spoonful of pizza sauce, a pinch of cheese, and your topping.
Wet the edges with a little water, then fold into a triangle or rectangle—whatever shape speaks to your soul—and seal tightly.
Heat a little oil in a pan over medium heat. Fry the rolls for 1–2 minutes per side, or until golden brown and crispy.
Optional but recommended: Toss them in the air fryer at 375°F for 3–4 minutes to really crisp them up.
Let them cool slightly (molten cheese is no joke), then serve!
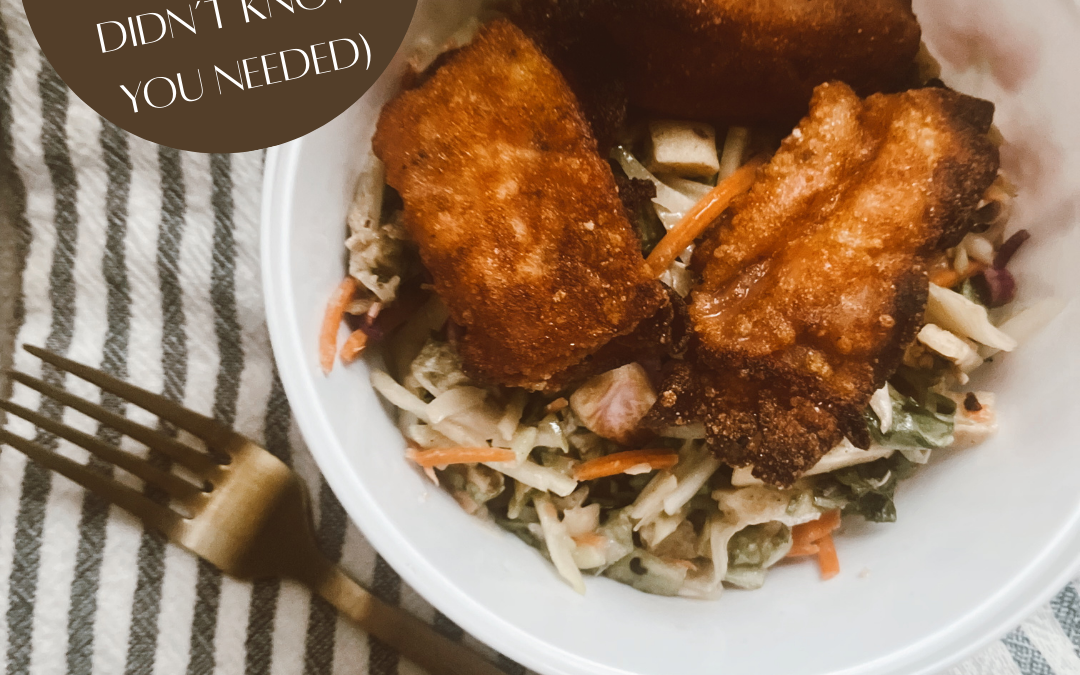
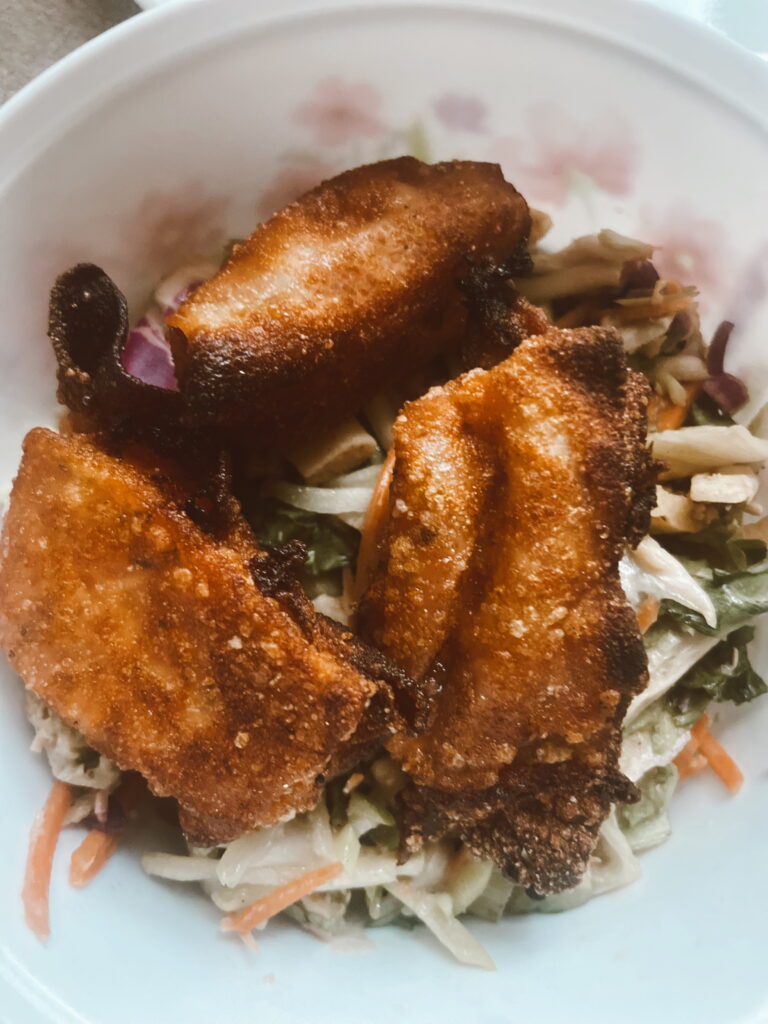
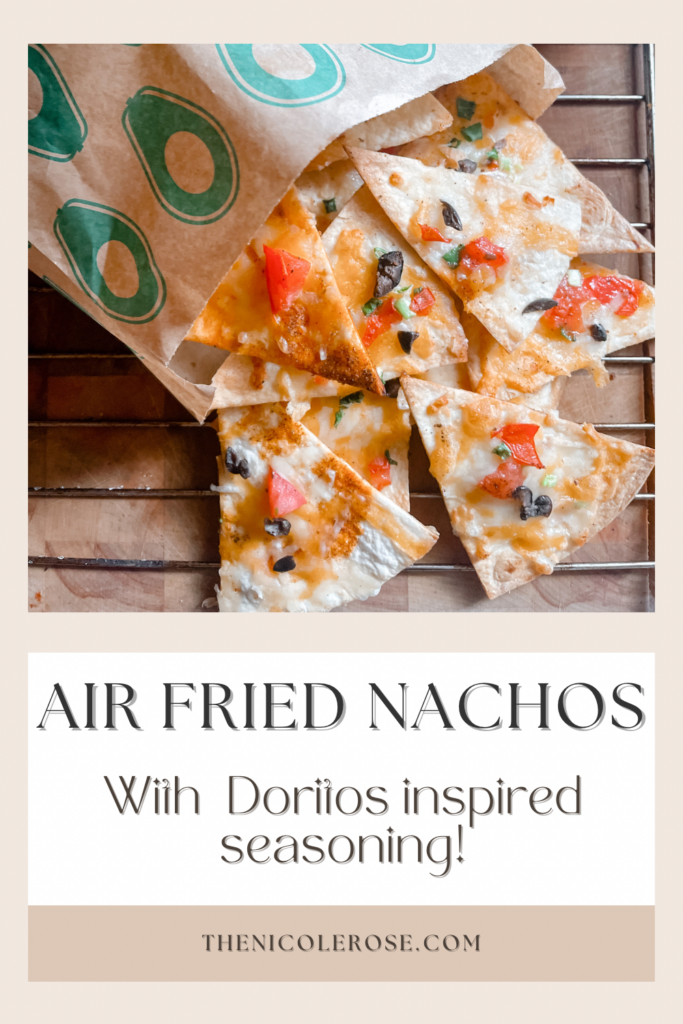
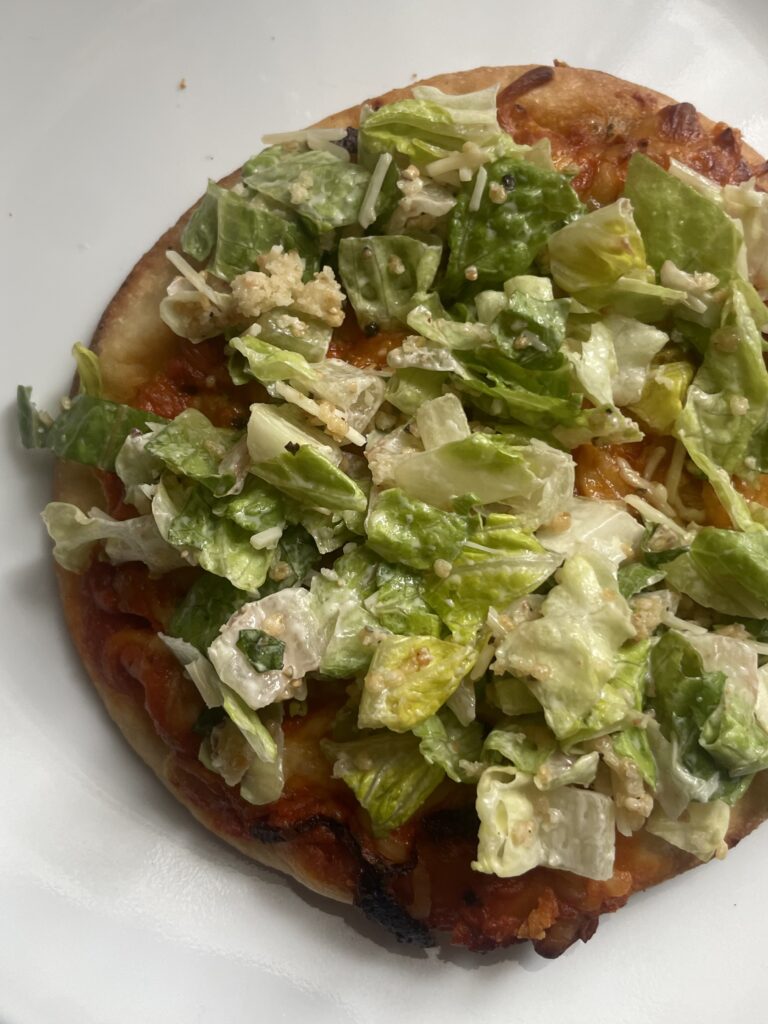
The Salad Hack You Didn’t Know You Needed
So you’ve got a batch of crispy pizza rolls. You could eat them by the handful (valid), but why not get a little wild? Toss them into a Caesar salad in place of croutons.
The result? Creamy meets crispy. Cold lettuce meets hot cheesy bites. It’s a salad/dinner/snack hybrid that’s totally unexpected and totally addictive.
Why I’m Obsessed:
Wonton wrappers are lighter than dough = more crunch, less fuss.
They’re fast to fry and freezer-friendly.
Your Caesar salad will never be boring again.
This is the kind of recipe that makes your kids cheer, your friends ask for the secret, and your salad go viral on Instagram (okay maybe not viral, but like… worthy).
Make It a Moment:
Perfect for after-school snacks
Fun dinner twist for picky eaters
Crowd-pleasing appetizer for parties
A way to make Caesar salad exciting again
Pizza Roll FAQ
Can I make these pizza rolls ahead of time?
Yes! Assemble them ahead and store them in the fridge for up to 24 hours before baking. Or freeze them (uncooked or cooked) for a quick snack later—just reheat in the oven or air fryer until warmed through.
Can I use store-bought dough instead?
Totally! Store-bought pizza dough works great if you’re short on time. You can usually find it in the refrigerated section near the deli or bakery.
How do I reheat leftover pizza rolls?
Pop them in the air fryer at 350°F for 3–4 minutes or in the oven at 375°F for about 5–7 minutes to crisp them up again. The microwave works too, but you’ll lose that delicious crunch.
What other fillings can I use?
Get creative! Try cooked sausage, sautéed mushrooms, olives, or a little ricotta for a stuffed-pizza vibe. Just avoid overfilling or they’ll be hard to seal.
Can kids help make these?
Yes! Rolling out dough and filling pizza rolls is a super fun activity for little hands. Just supervise during the sealing and baking steps.
Why put pizza rolls in a Caesar salad?
Why not? The combo of warm, cheesy bites with cool, crisp lettuce and tangy dressing is unexpectedly amazing. It’s a great way to shake up a classic!
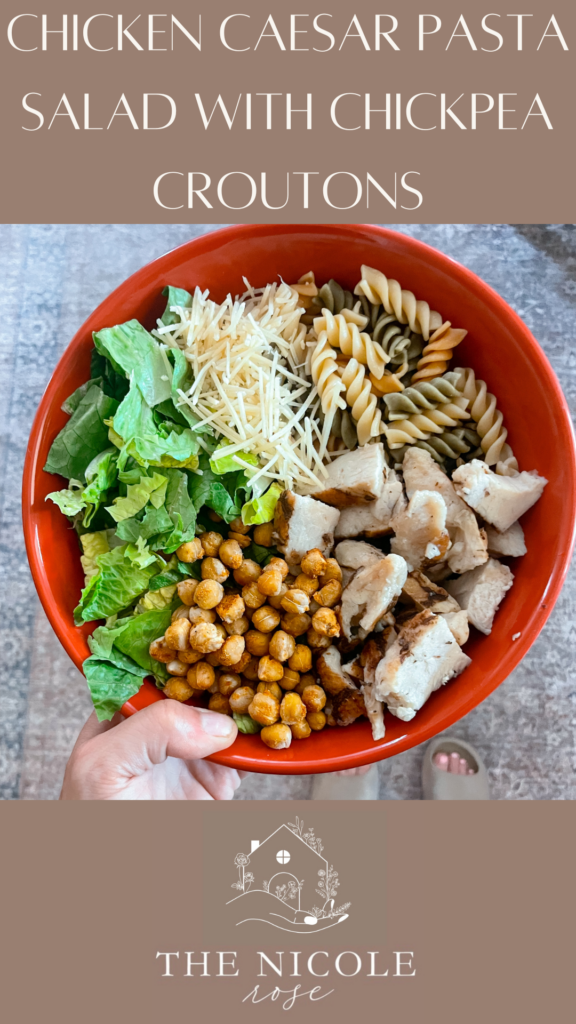
These chicken parm smash tacos bring the best of Italian-American comfort food into a handheld delight. The combo of crispy chicken, melty cheese, tangy tomato sauce, and cool Caesar salad is next-level good. Add some pasta and call it dinner done right
If you’ve ever wished chicken parmesan and tacos could join forces, this recipe is your dream come true. These Chicken Parm Smash Tacos are loaded with flavor, easy to whip up, and topped with a crisp Caesar salad for a tangy, crunchy finish. Nestled into warm pita bread and optionally served with pasta, this dish is pure comfort with a fun twist.
Ingredients:
For the Chicken Patties:
• 1 lb ground chicken
• 1 tsp garlic powder
• 1 tsp Italian seasoning
• 1/2 cup bread crumbs
• 1/4 cup grated Parmesan cheese
• Olive oil (for cooking)
For Assembly:
• 1 cup tomato sauce (marinara works great)
• 1 cup shredded mozzarella cheese
• 4–6 small pita breads (or however many your mixture yields)
• 1 Caesar salad kit (with dressing and croutons)
Optional Add-On:
• Cooked pasta of your choice (penne or spaghetti works great) tossed in a little olive oil or extra tomato sauce
Instructions:
1. Make the Chicken Smash Patties:
In a mixing bowl, combine ground chicken, garlic powder, Italian seasoning, bread crumbs, and Parmesan cheese. Mix until just combined—don’t overwork it.
Divide into 4–6 equal portions and form loose meatballs.
2. Smash + Cook:
Heat a bit of olive oil in a skillet over medium heat. Place a pita bread in the pan, then set a meatball in the center. Use a spatula (or the bottom of a small plate) to press down and smash the meatball flat onto the pita. Cook for 3–4 minutes until browned, then flip.
3. Sauce + Cheese:
Spoon tomato sauce on top of the cooked chicken side, then sprinkle with shredded mozzarella. Cover the skillet for a minute or two until the cheese melts and the chicken finishes cooking.
4. Caesar Crunch:
While the tacos cook, toss your Caesar salad kit together (dressing, lettuce, and croutons). Feel free to crush the croutons for a taco-friendly texture.
5. Assemble + Serve:
Top each taco with a generous scoop of Caesar salad and a final sprinkle of Parmesan. Serve warm, optionally alongside a bowl of pasta for those extra-hungry nights.
Tips + Variations:
• Swap pita for naan or tortillas if that’s what you have on hand.
• Spice it up with a pinch of red pepper flakes in the chicken mix.
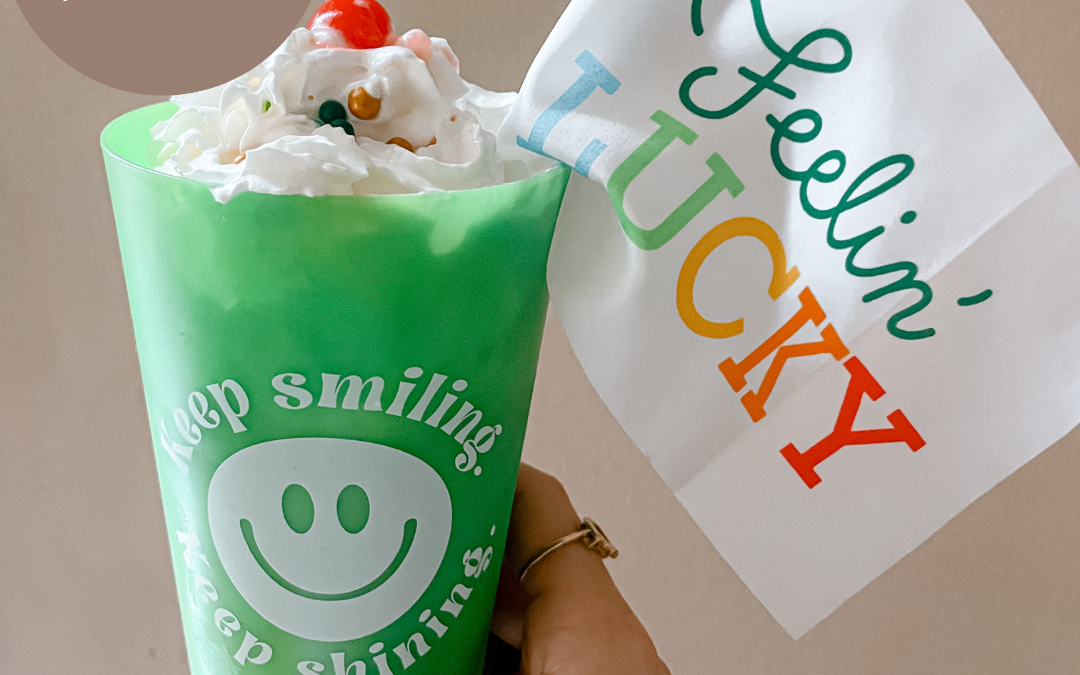
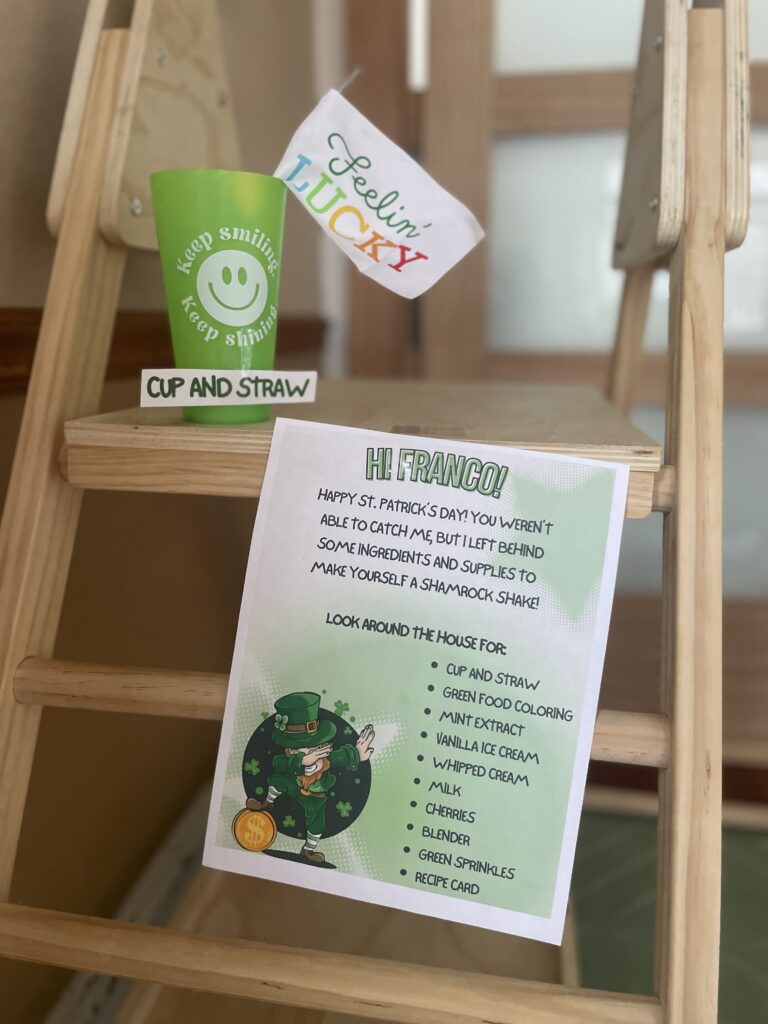
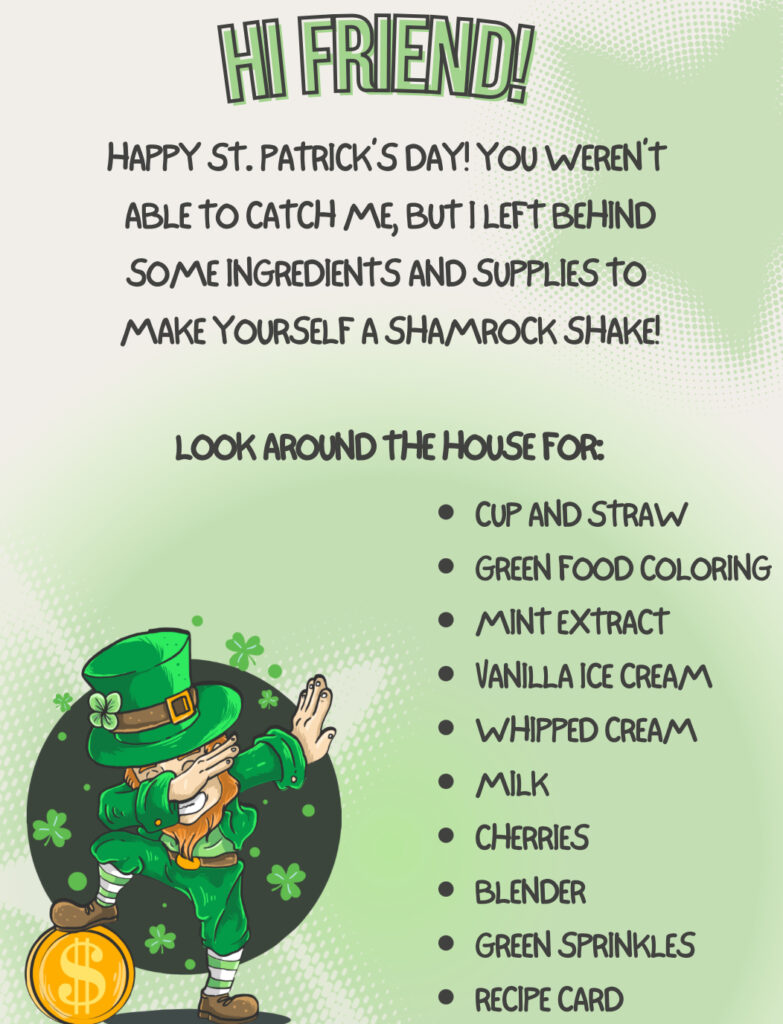
St. Patrick’s Day is all about magic, mischief, and a little bit of luck. This year, bring some extra fun into your home with a Shamrock Shake Scavenger Hunt—a playful way for kids to gather the ingredients needed to make their own festive green milkshake.
A sneaky leprechaun will leave behind a note with instructions, leading your little ones on a scavenger hunt around the house to find the ingredients for a delicious Shamrock Shake. At the end of the hunt, you’ll all whip up the shake together and enjoy a lucky treat.
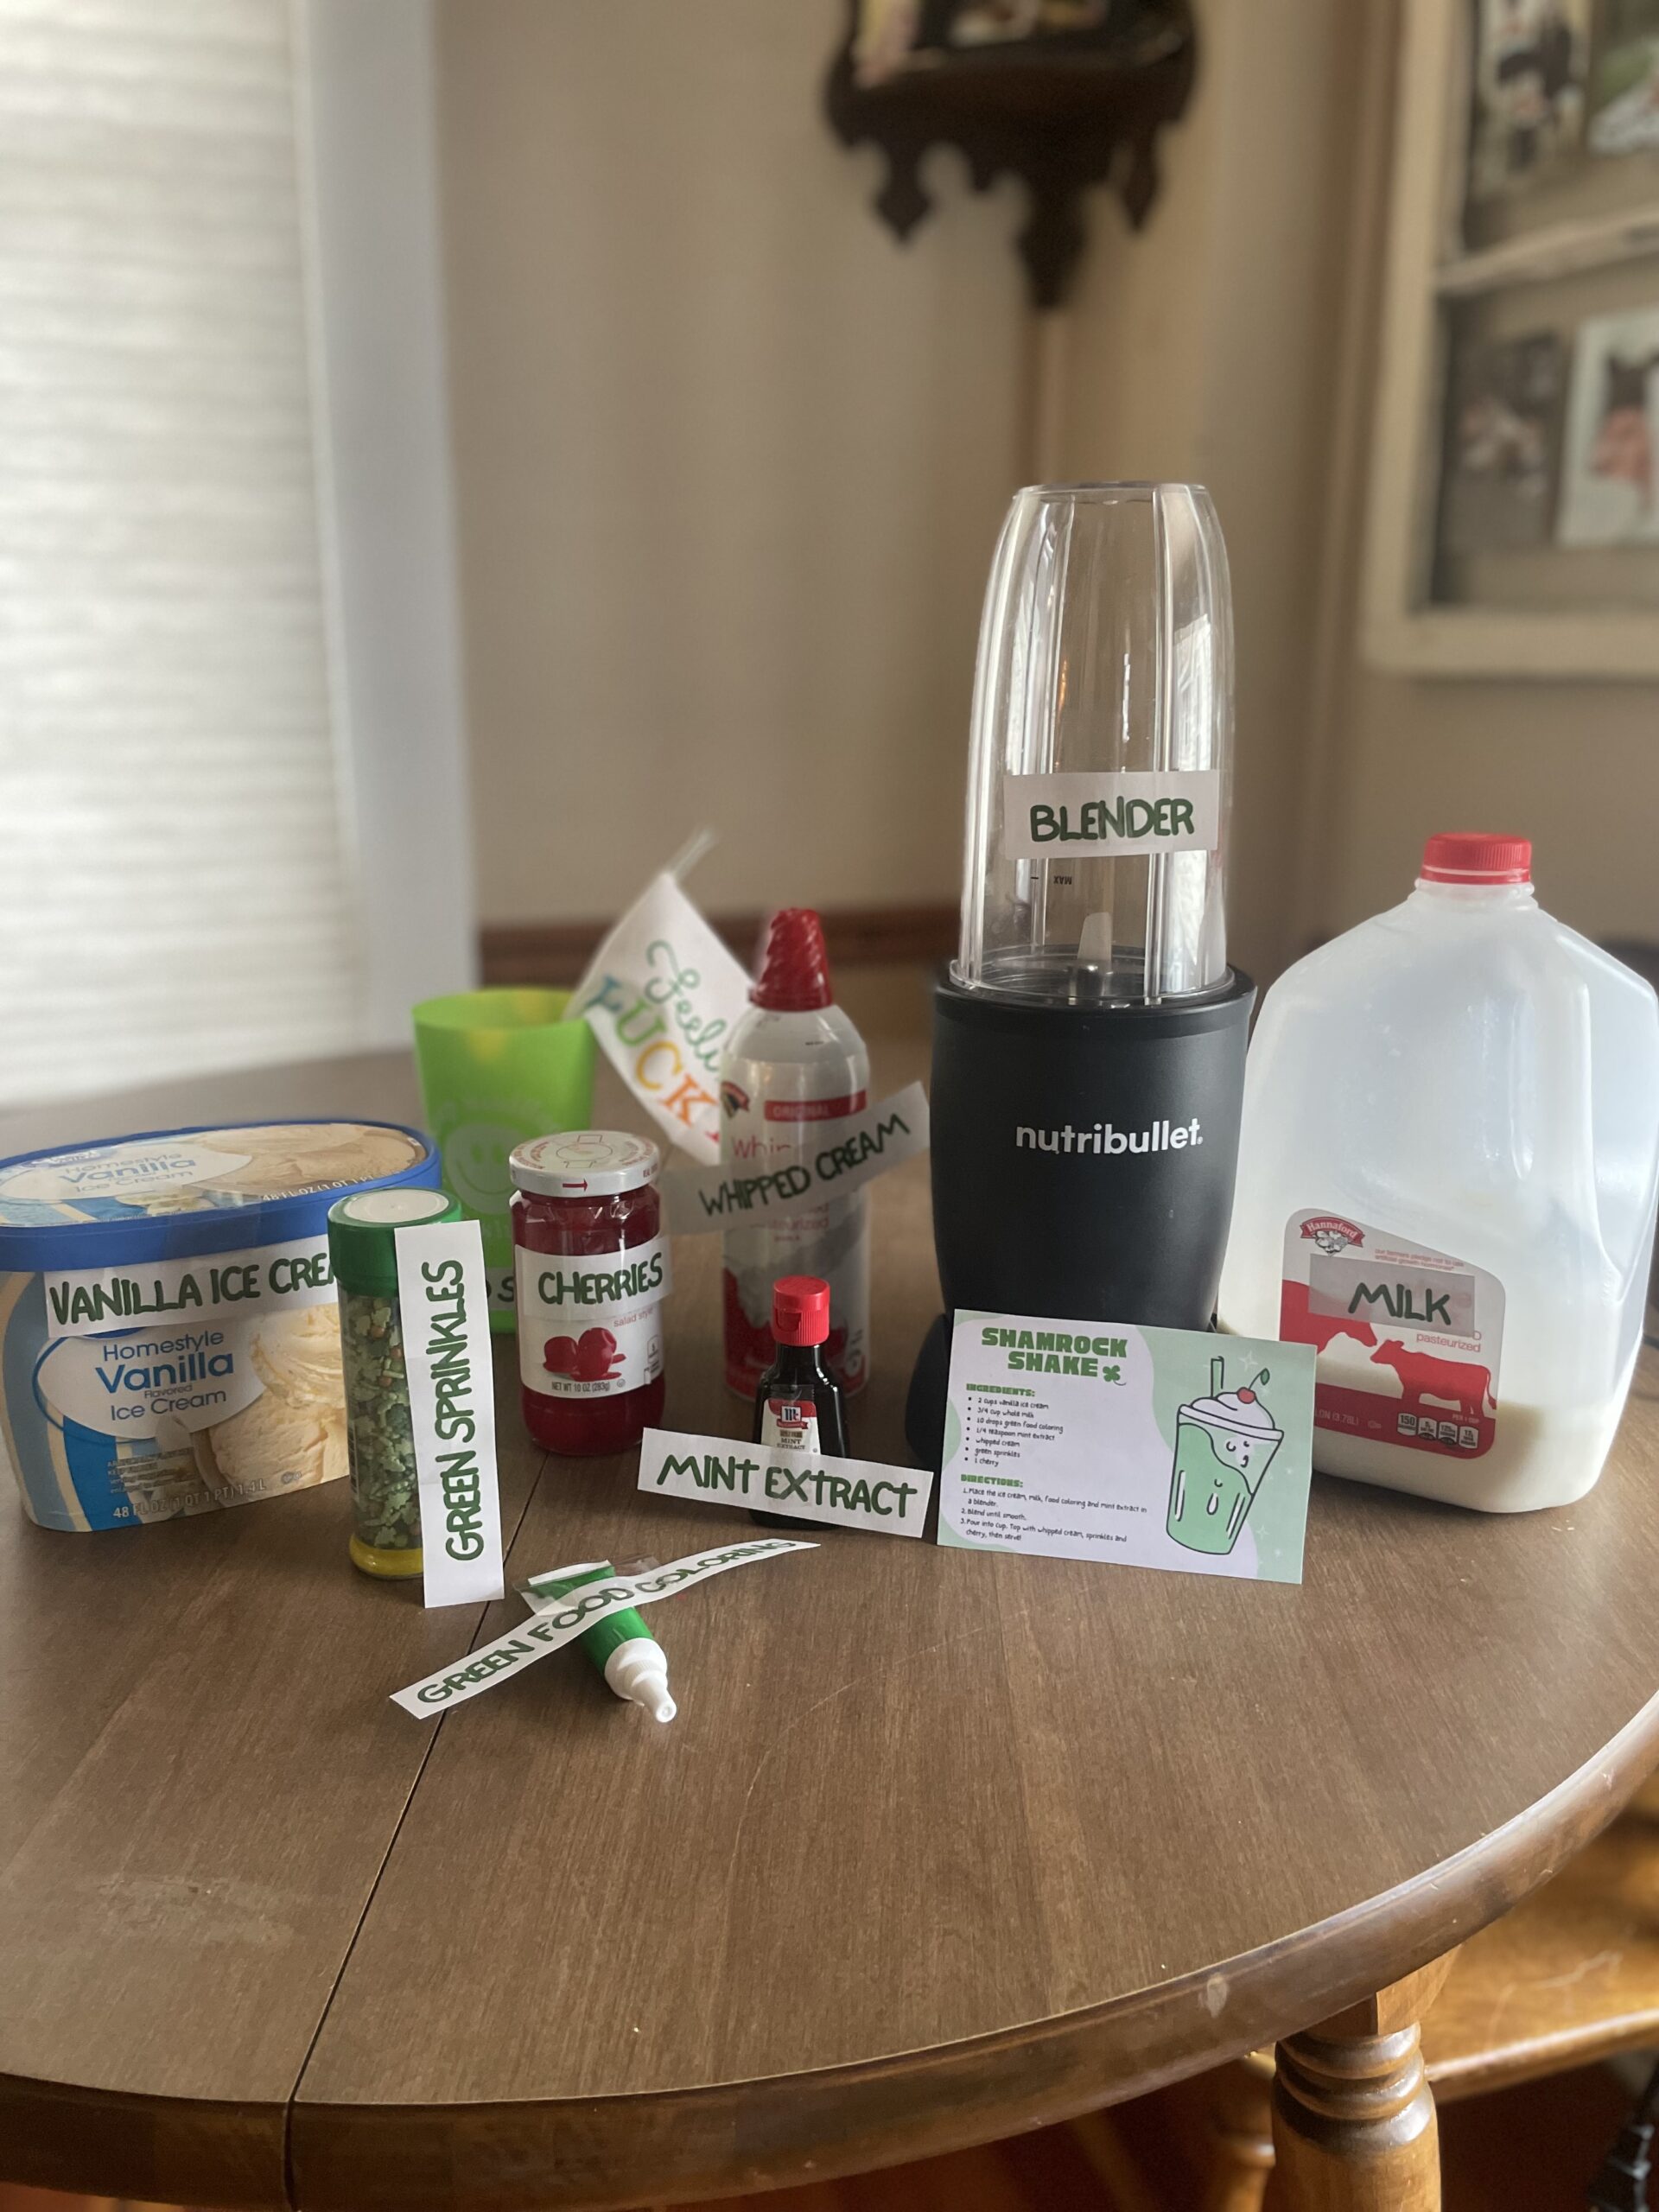
To make it even easier, I’ve included a free printable with:
• A leprechaun’s note to start the hunt
• Ingredient labels to place on hidden items
• A recipe card for making the perfect Shamrock Shake
How the Shamrock Shake Scavenger Hunt Works
1. Set the Scene
Before your kids wake up or return home, hide the ingredients in different spots around the house. Use the printable ingredient labels to mark each item so they know they’re on the right track.
2. The Leprechaun’s Note
Place the leprechaun’s note where your kids will find it first—maybe near their breakfast plate or taped to the fridge. The note explains that the sneaky little guy has hidden the ingredients for a special Shamrock Shake and challenges them to find each one.
3. The Hunt Begins
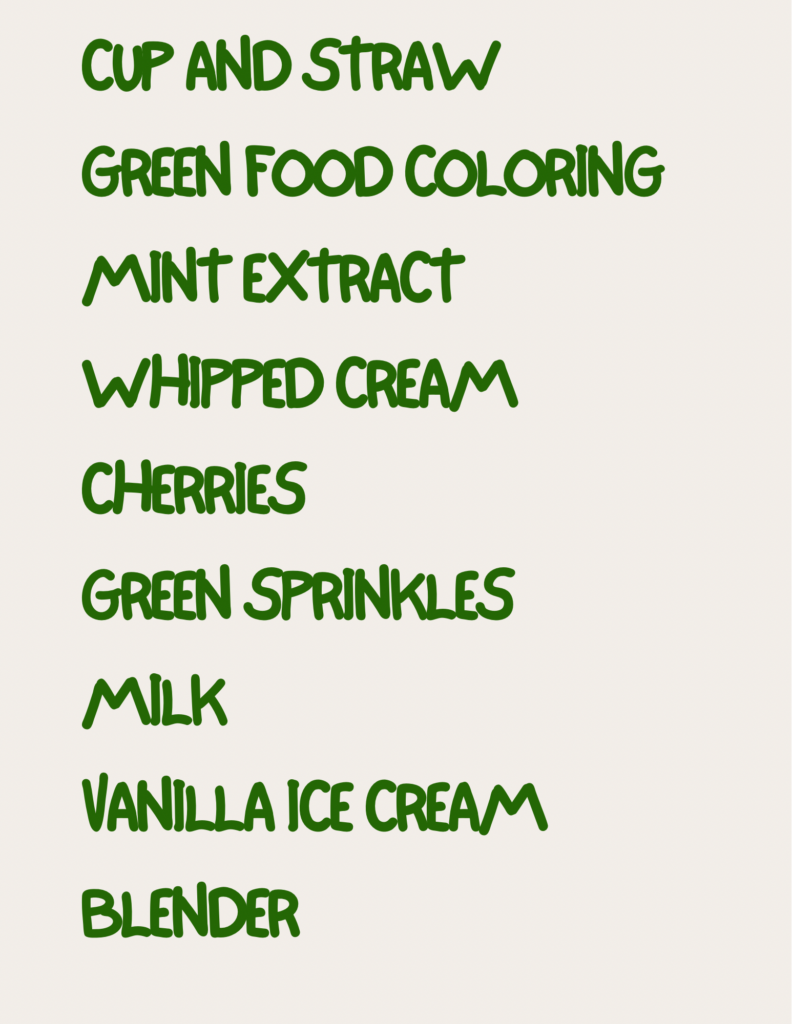
Your kids will search the house to find:
• Milk
• Vanilla ice cream
• Mint extract
• Green food coloring
• Whipped cream
• Festive sprinkles
• Cherry
Once all the ingredients are collected, it’s time to blend up the magic.
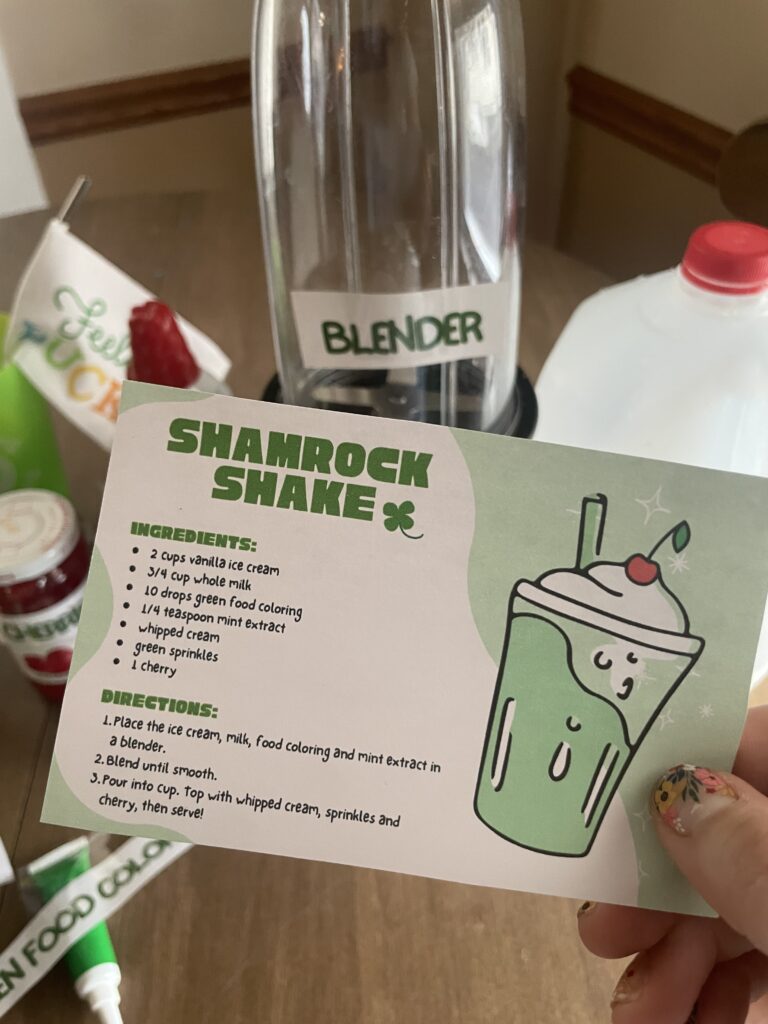
4. Making the Shamrock Shake
Use the printable recipe card to guide your little ones in making their own Shamrock Shake.
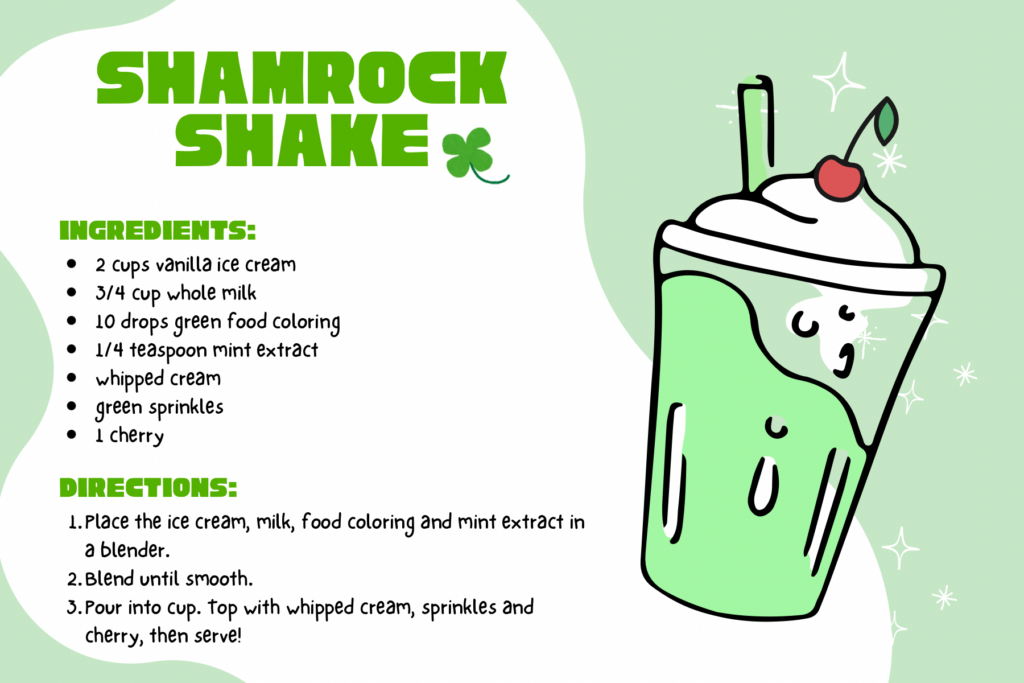
Shamrock Shake Recipe
Ingredients:
• 2 cups vanilla ice cream
• 3/4 cup milk
• 1/4 teaspoon mint extract
• 10 drops green food coloring
• Whipped cream (for topping)
• Green sprinkles
• Cherry (for garnish)
Instructions:
1. In a blender, combine ice cream, milk, mint extract, and green food coloring.
2. Blend until smooth and creamy.
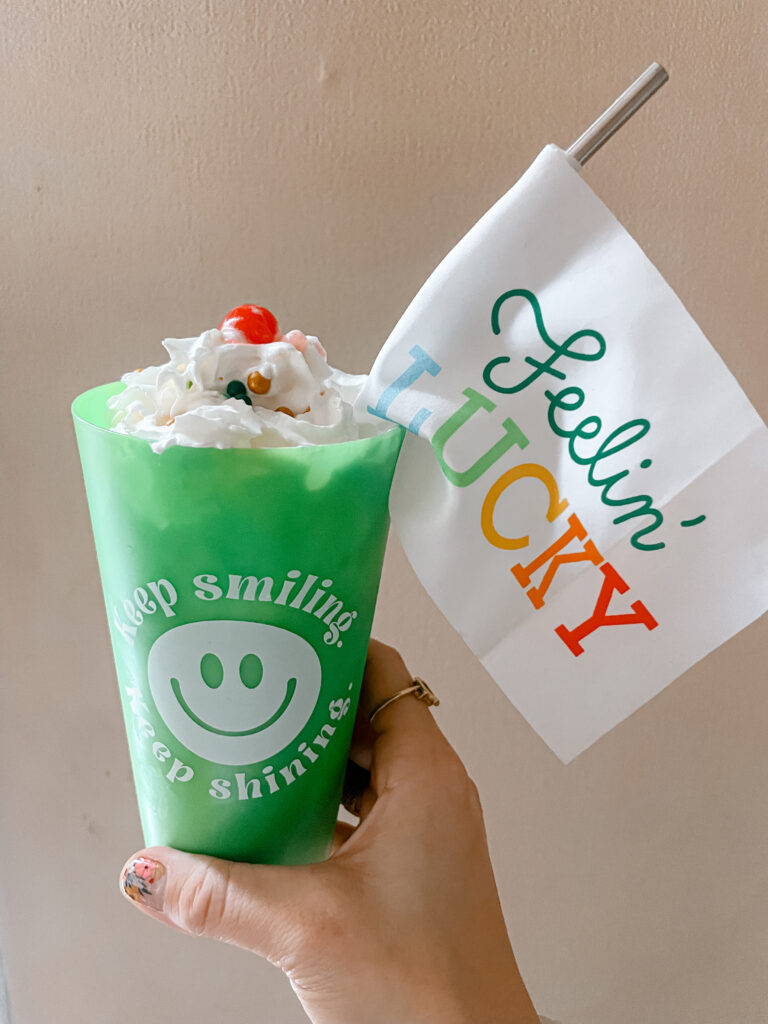
3. Pour into a glass, top with whipped cream, sprinkles, and a cherry.
4. Enjoy your lucky treat.
Once the shakes are ready, snap a few photos of your little leprechauns enjoying their prize. You can also turn this into a leprechaun trap night, leaving out the empty glass as “evidence” that a leprechaun stopped by.
Get the Free Printable
To make this Shamrock Shake Scavenger Hunt even easier, grab the free printable set below. It includes:
If motherhood has you stressed and you feel like you’ve lost your creativity, I am here to help! Here you will find easy recipes, simple DIY’s, affordable styles, and what to read next. I believe we all have a creative side, some of us just need a little help to find it. I will help inspire you to have creative expression without standards.