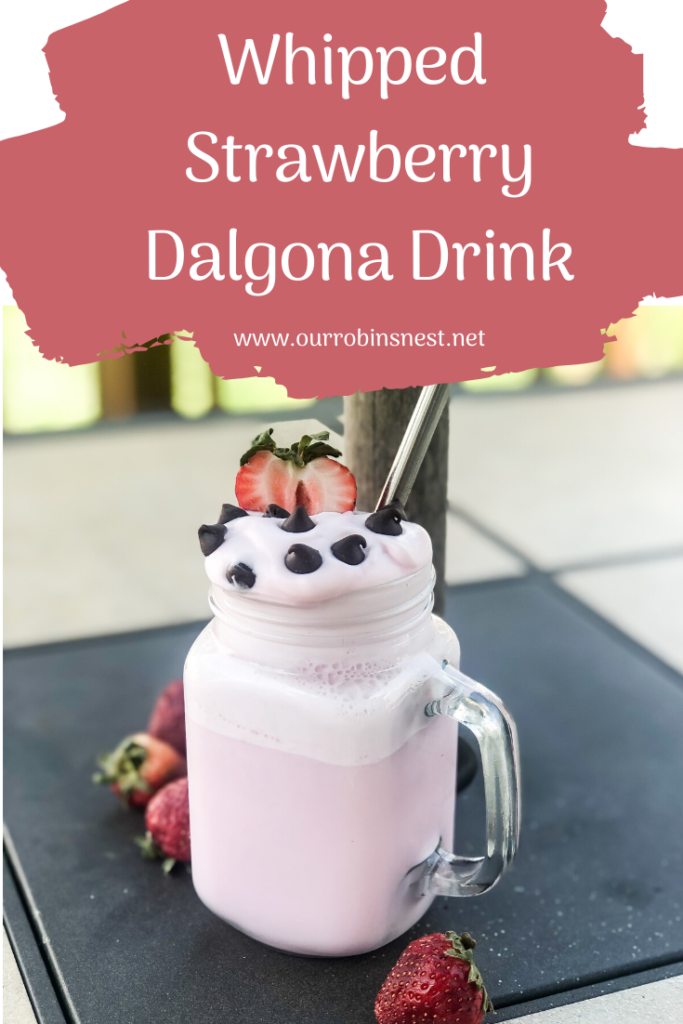
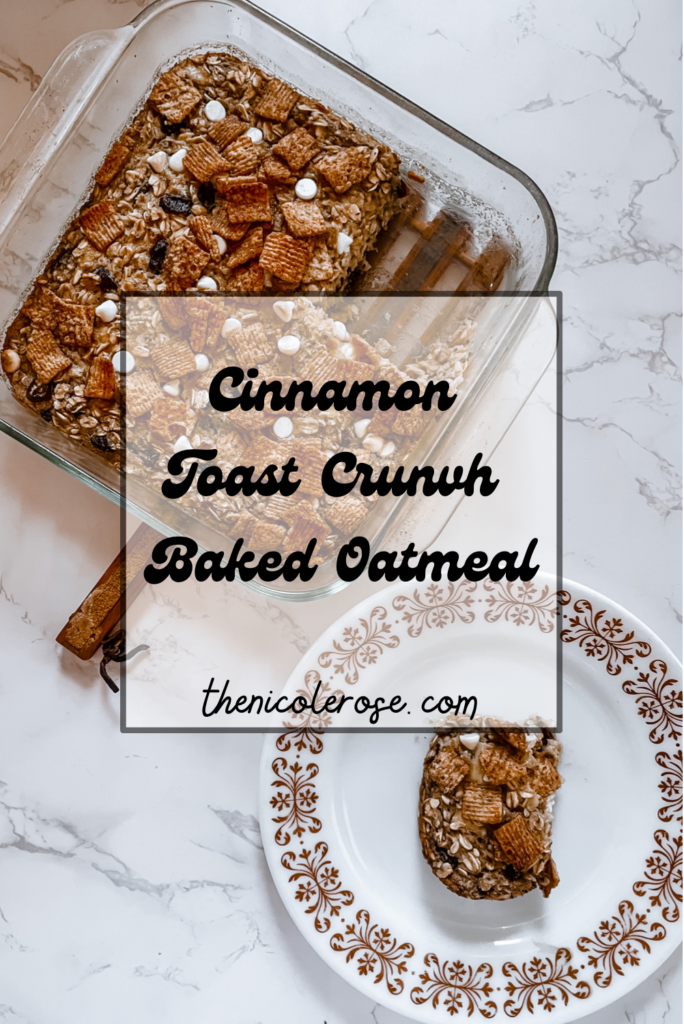
Navigating Pregnancy Sickness: Embracing Natural Support and Cherry Almond Moon Milk
Being sick during pregnancy can be challenging, especially when traditional medications are limited. I’ve been dealing with an awful cold and Covid for the past two months, and it has been draining. I wanted to explore the journey of finding natural support for wellness while pregnant and learn about the benefits of tart cherry juice. I want to share a delightful recipe for Cherry Almond Moon Milk since it has helped me significantly these past few weeks.
Benefits of Cherry Juice:
Cherry juice is a powerhouse of antioxidants and anti-inflammatory compounds. It can help alleviate symptoms like nausea and inflammation during pregnancy, providing a natural boost to your immune system.
Understanding Moon Milk:
Moon milk, a trendy bedtime drink, combines warm milk with various herbs and spices known for their calming properties. This soothing elixir can be customized to suit your preferences and needs.
Cherry Almond Moon Milk Recipe:
Ingredients:
1 cup warm almond milk
1 1/3 cup tart cherry juice (not from concentrate)
1 teaspoon honey (adjust to taste)
1/2 teaspoon vanilla extract
A pinch of ground cinnamon
Instructions:
Heat the milk and cherry juice in a saucepan until warm but not boiling.
In a mug, combine honey and vanilla extract.
Pour the warm cherry milk into the mug and whisk until well combined.
Sprinkle a pinch of ground cinnamon on top for added flavor.
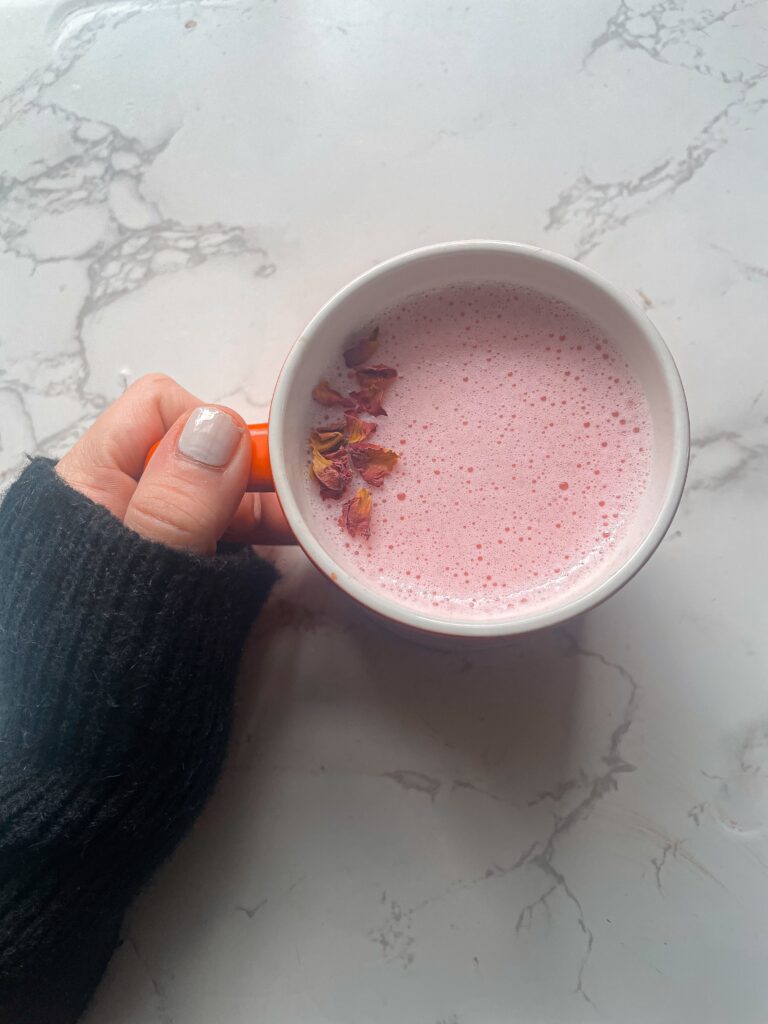
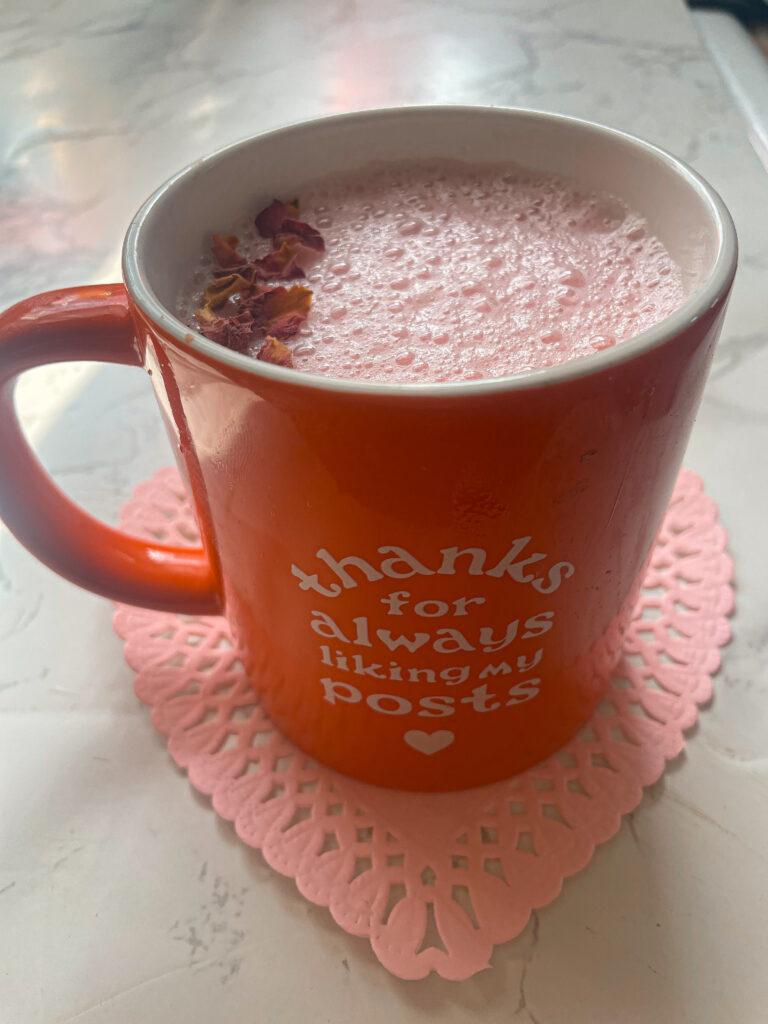
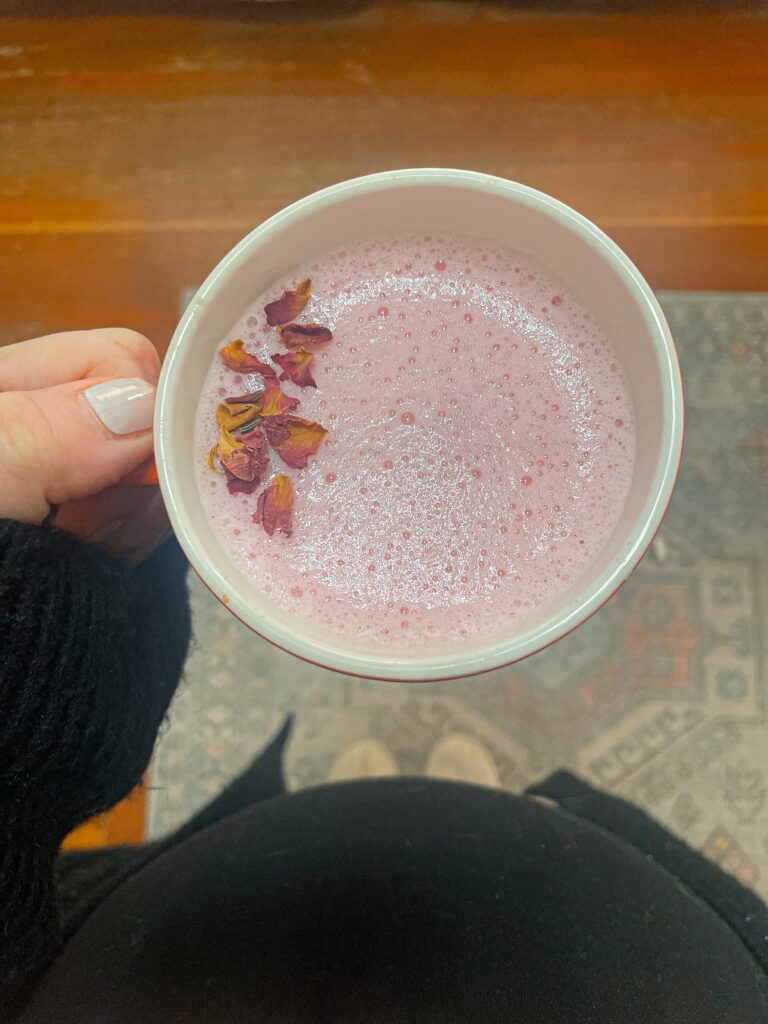
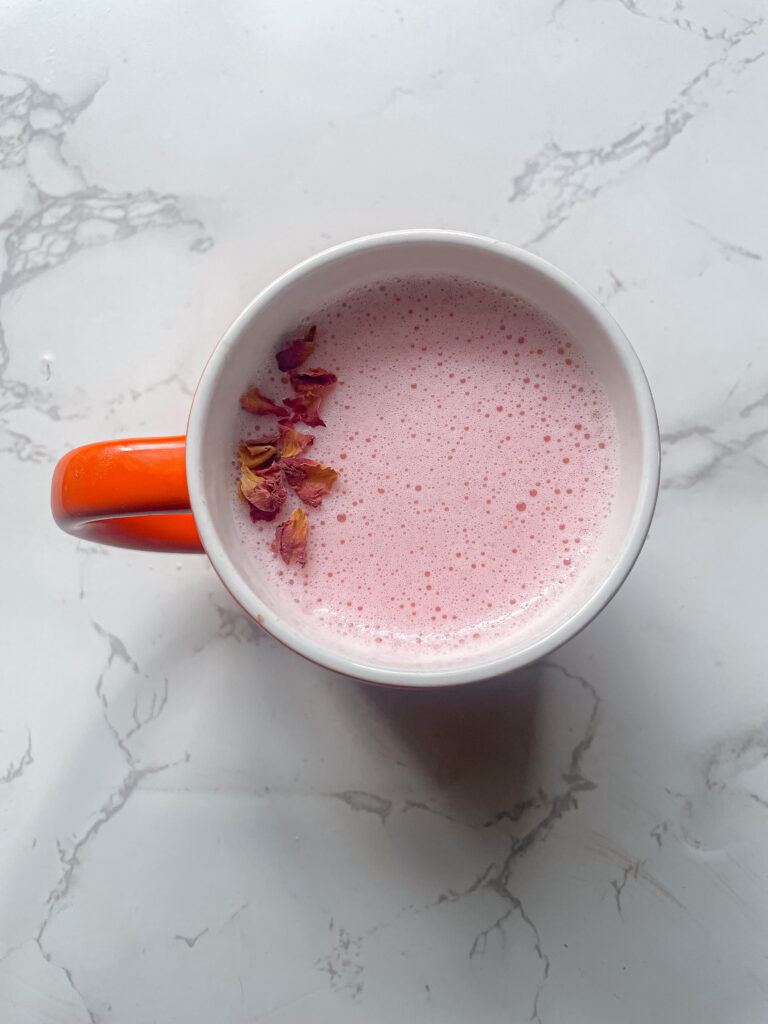
Stir gently or use a frother to make it extra creamy, and enjoy the comforting Cherry Almond Moon Milk.
I also added some dried rose petals for extra aroma.
Embracing natural remedies during pregnancy can be empowering. Incorporating cherry juice and soothing moon milk into your routine might just be the key to finding relief without relying on traditional medications. Let me know what you think!
Remember to consult with your healthcare provider before making significant changes to your diet during pregnancy.
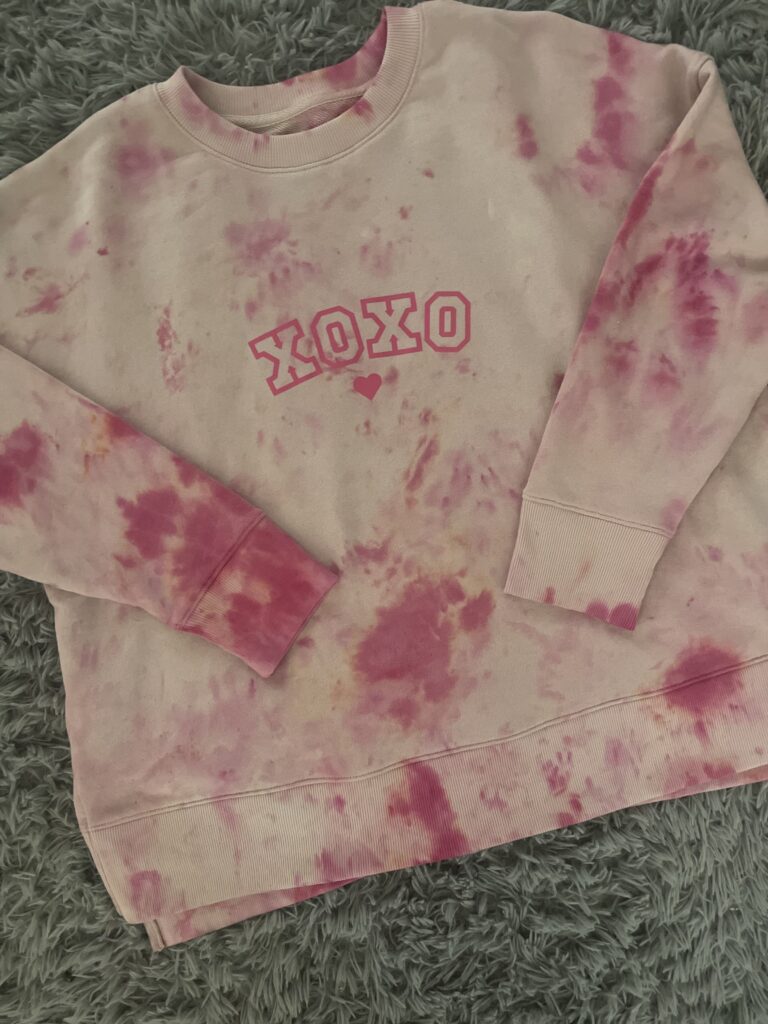
Snow Tie Dye Magic: Transforming Your Sweatshirt in a Winter Wonderland
Embrace the winter wonderland with a fun and creative activity – snow tie dye! In this blog post, I will guide you through the steps of snow tie dyeing a cozy sweatshirt and adding a personalized touch with vinyl decals. Plus, I’ve got some awesome SVG designs for you to download and use. Let’s turn a snowy day into a colorful masterpiece!
Materials:
White or light-colored sweatshirt
Fabric dye in various colors
Plastic squeeze bottles
Snow (freshly fallen works best)
Rubber bands
Plastic gloves
Vinyl decal (optional)
Iron or heat press (for applying the decal)
SVG designs (download from the provided link)
Instructions:
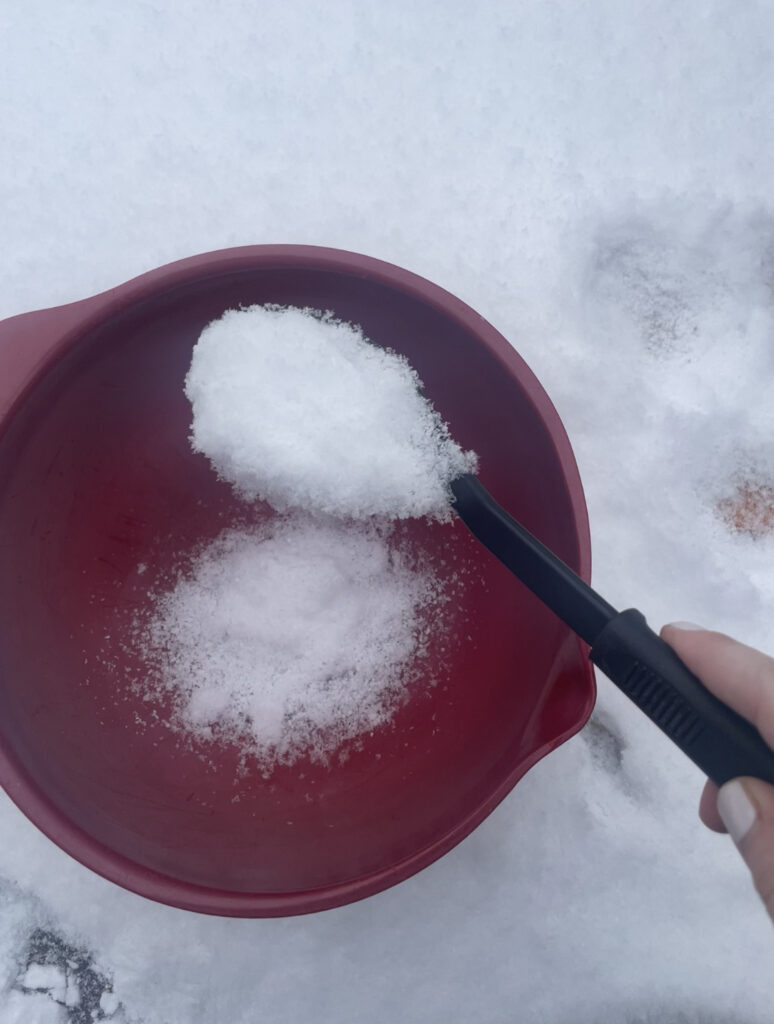
Prepare the Snow Tie Dye Setup:
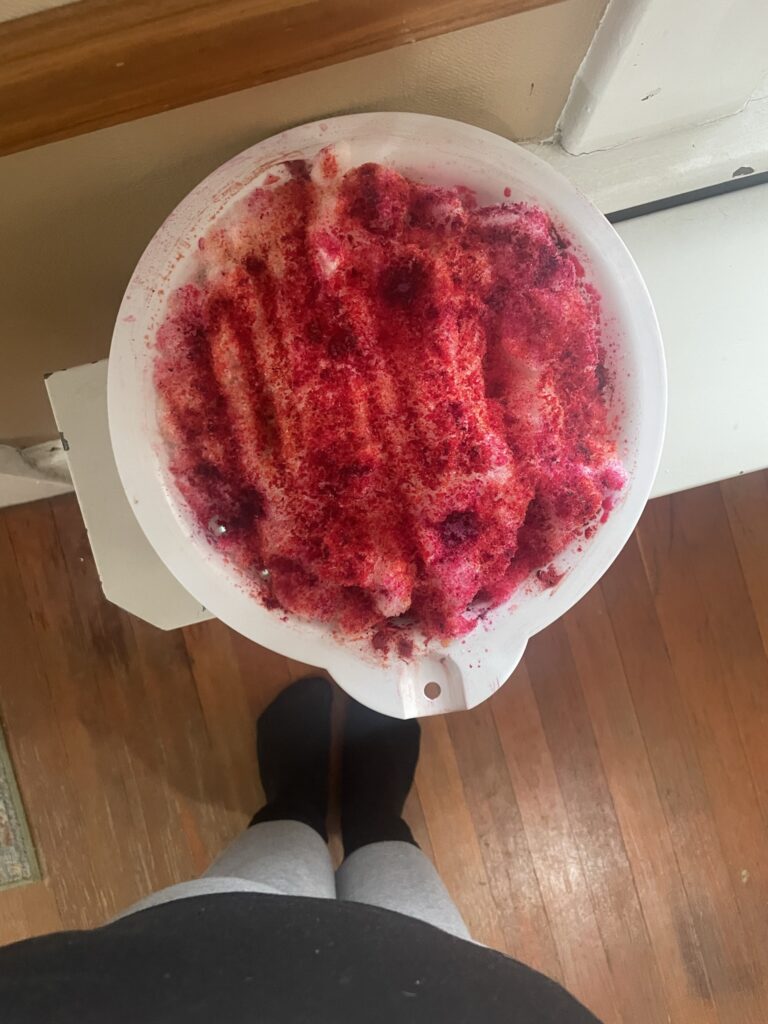
a. Take a damp sweatshirt and place it in a strainer.
b. Put the strainer in a baking dish to catch excess water.
c. Pile fresh snow onto the sweatshirt, covering it completely.
d. Sprinkle the various fabric dye colors all over the snow-covered sweatshirt.
Let Nature Work Its Magic: a. Allow the snow to melt, carrying the dye into the fabric. b. Leave the sweatshirt until all snow has melted (about 2-3 hours, I put my dish on my heater to speed up the process).
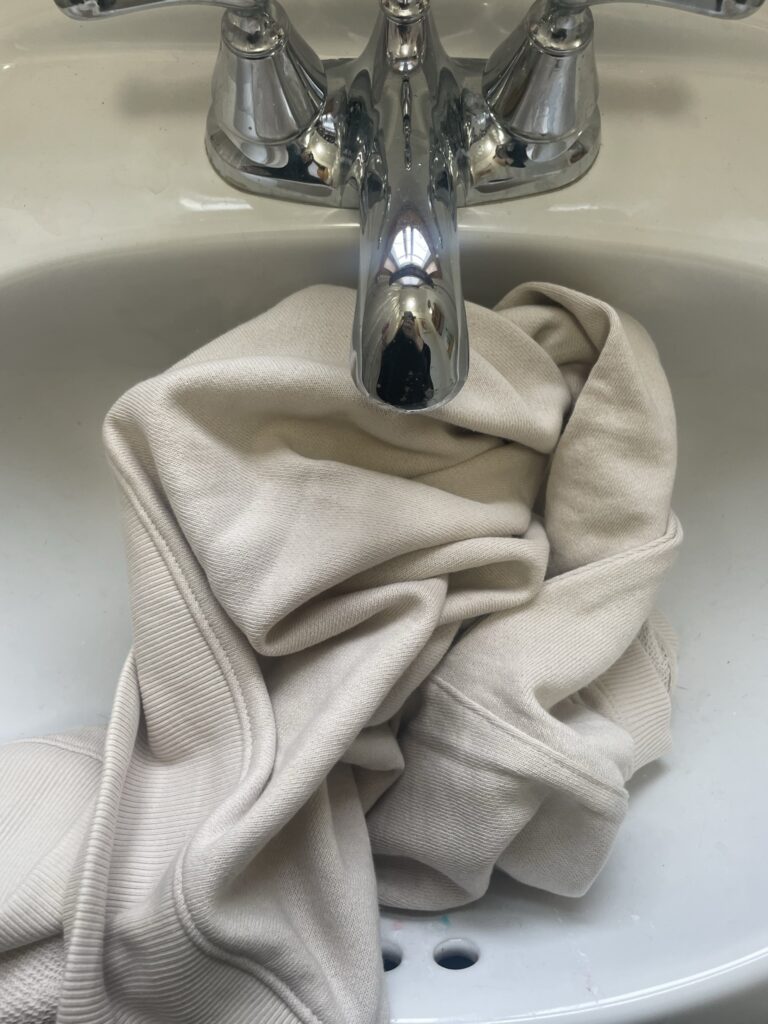
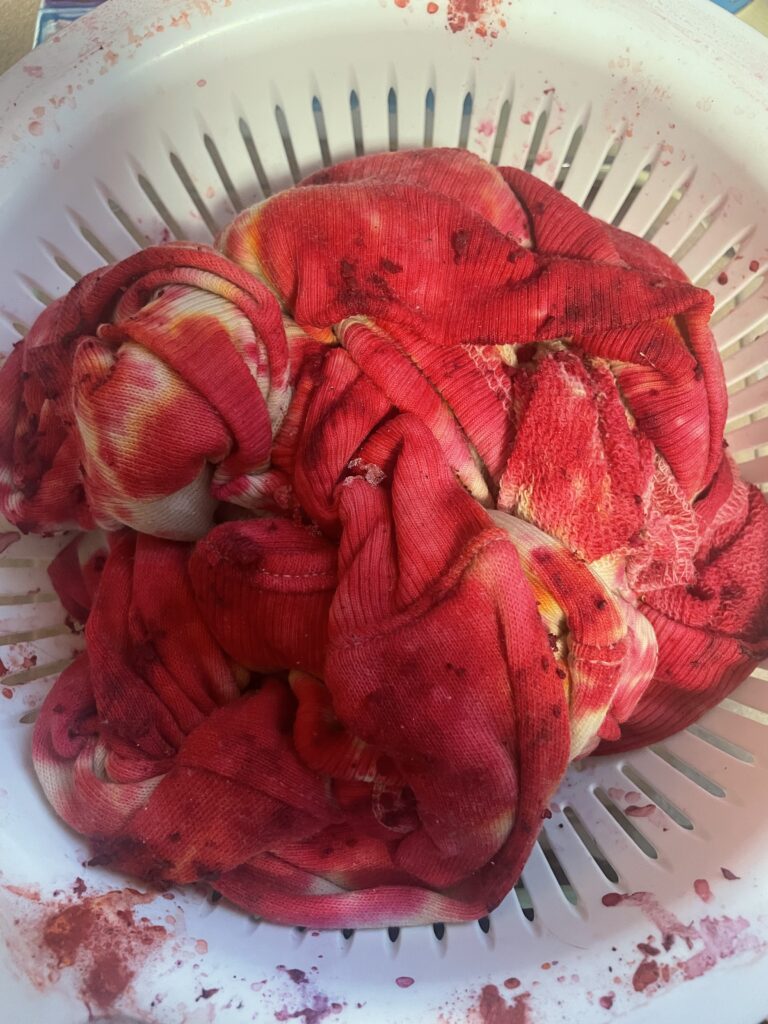
Rinse and Dry: a. Rinse the sweatshirt under cold water until the water runs clear. b. Put in dryer or hang to dry.
Vinyl Decal Addition (Optional): a. Choose your favorite SVG design from the downloaded files. b. Cut the design using a vinyl cutter or scissors. c. Place the decal on the sweatshirt and use an iron or heat press to apply.
Enjoy Your Unique Creation: a. Admire your snow tie-dyed masterpiece!
Snow tie dyeing is not only a fantastic way to embrace winter but also a chance to unleash your creativity. By adding a vinyl decal, you can personalize your creation further. Download my SVG designs, follow the steps, and let the snowy day become the canvas for your vibrant imagination!
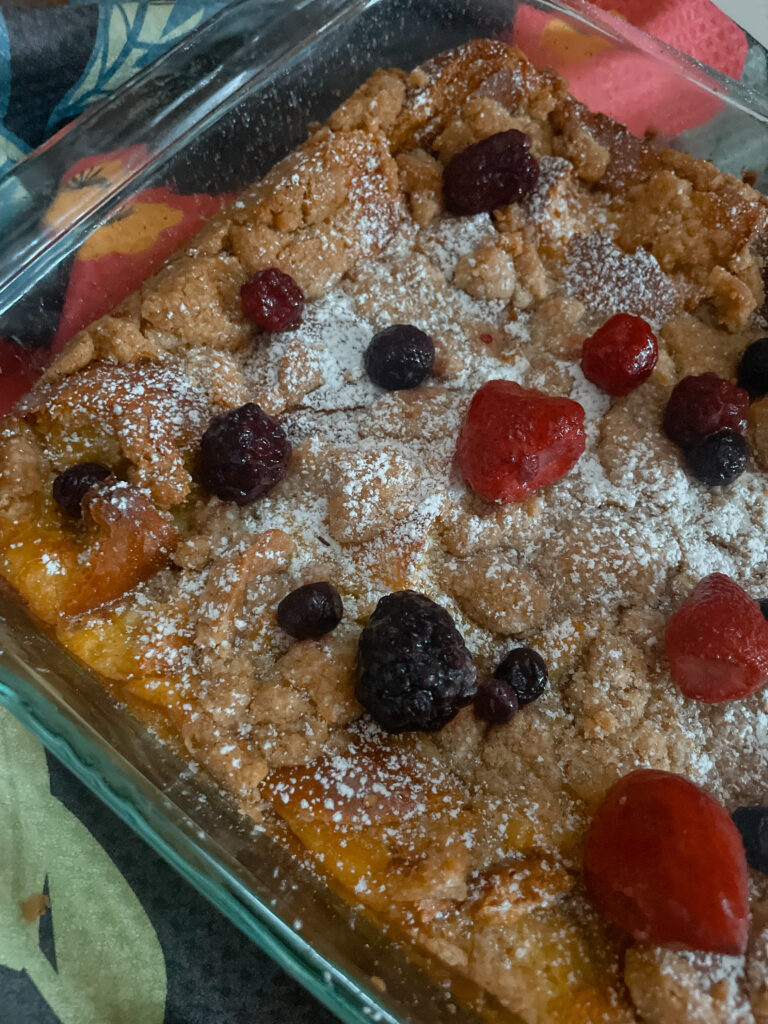
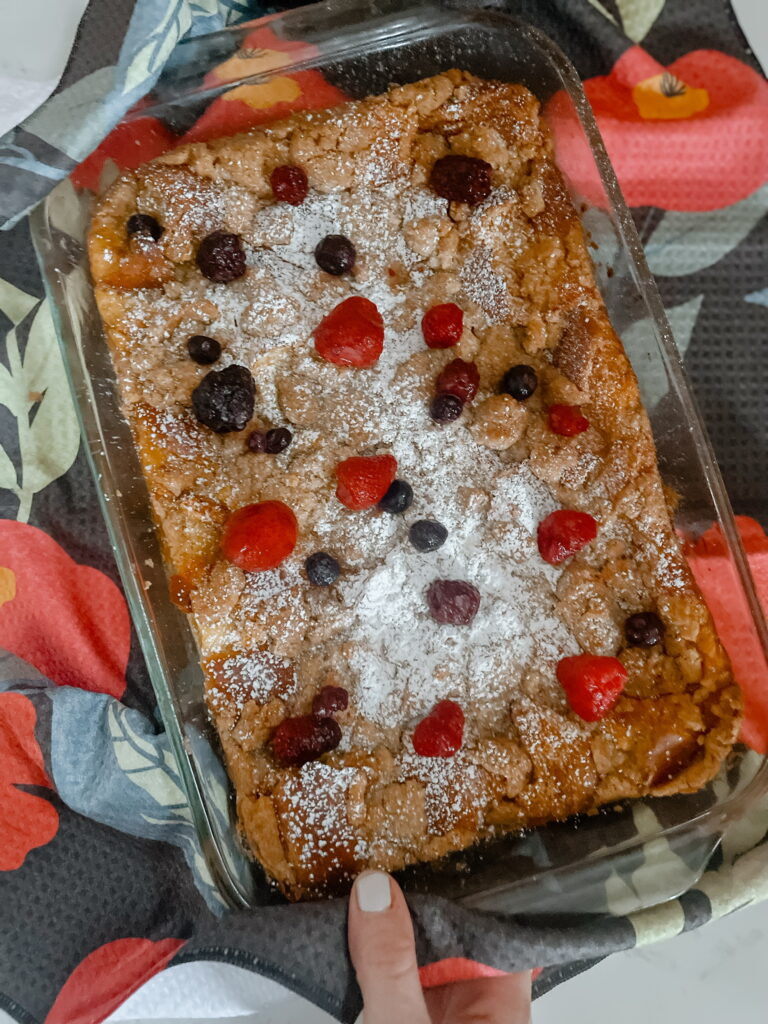
In the realm of decadent desserts, this challah bread pudding recipe stands out as a timeless classic. Combining the rich, eggy goodness of challah bread with a medley of flavorful ingredients, this dessert is a celebration of comfort and indulgence.
Ingredients:
Challah Bread – 1 loaf, cubed
Eggs – 4 large
Milk – 2 cups
Heavy Cream – 1 cup
Granulated Sugar – 1 cup
Vanilla Extract – 1 teaspoon
Cinnamon – 1 teaspoon
All-Purpose Flour – 2 tablespoons
Brown Sugar – ½ cup
Butter – ½ cup, melted
Salt – ¼ teaspoon
Berry assortment (optional)
Powdered sugar (optional)
Instructions:
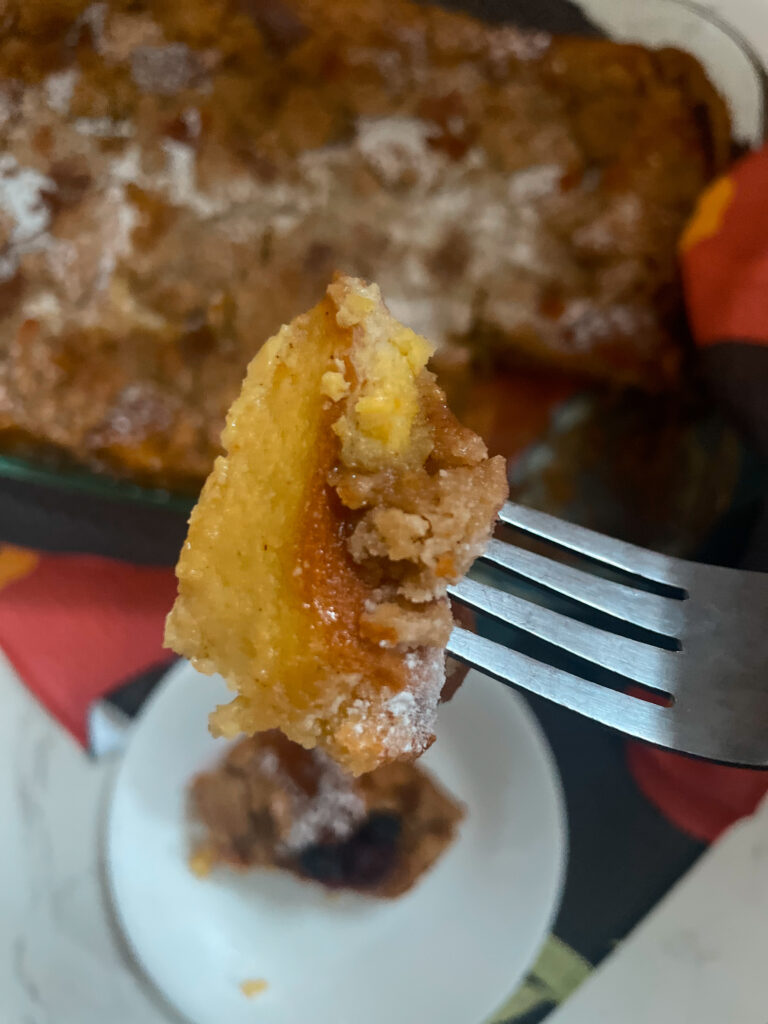
Prep the Challah Bread: Begin by cubing the challah bread into bite-sized pieces. The airy texture of challah adds a delightful dimension to the pudding.
Whisk the Wet Ingredients: In a large mixing bowl, whisk together eggs, milk, heavy cream, granulated sugar, vanilla extract, and a dash of cinnamon. This forms the luscious custard base.
Combine Dry Ingredients: In a separate bowl, mix all-purpose flour, brown sugar, melted butter, and a pinch of salt. This crumbly mixture will form a delectable streusel topping for added texture. This can go in the refrigerator until ready to use.
Layering the Goodness: Place half of the cubed challah bread in a greased baking dish. Pour half of the wet custard mixture over the bread, ensuring each piece is coated. Repeat the process with the remaining bread and custard. Place in refrigerator for at least two hours. For best results, have it sit overnight.
Streusel Topping: Sprinkle the prepared streusel topping evenly over the bread and custard layers. This will bake into a golden, crunchy crust that contrasts perfectly with the creamy interior.
Baking Magic: Bake the pudding in a preheated oven at 350°F (175°C) for approximately 45-50 minutes, or until the top is golden brown and the custard is set.
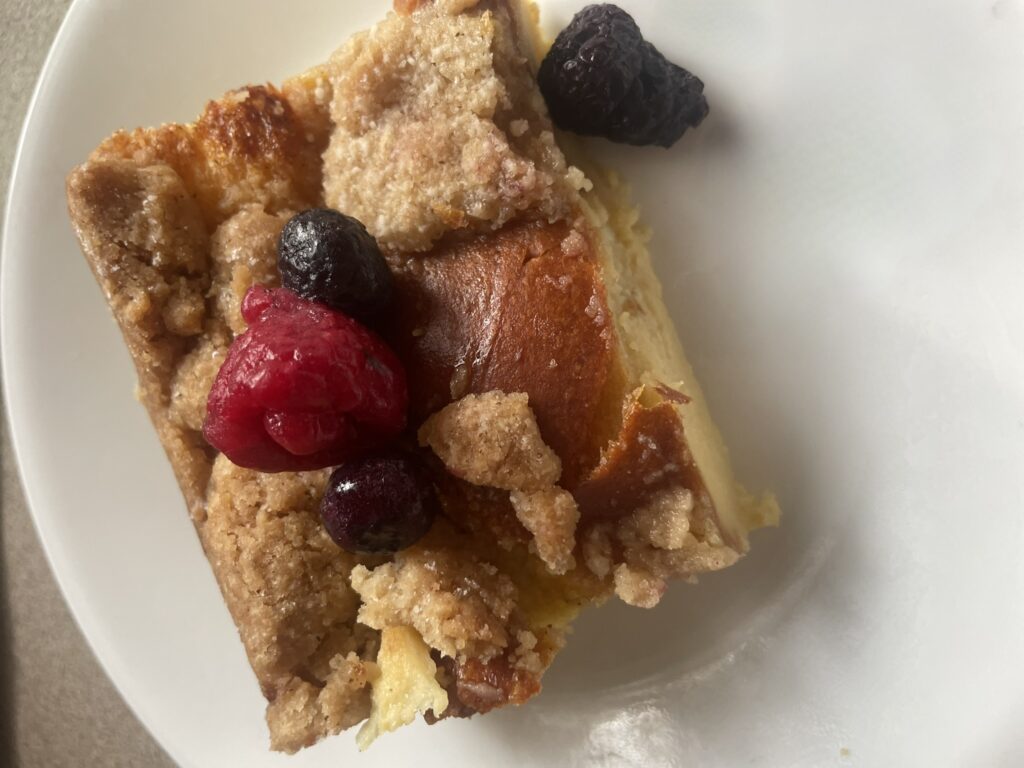
Serve and Enjoy: Allow the challah bread pudding to cool slightly before adding powdered sugar. Whether enjoyed warm or at room temperature, each spoonful is a symphony of textures and flavors. Add assorted berries or other toppings such as chocolate chips, pecans or bananas if you wish!
Enjoy!
Challah bread pudding is a delightful twist on a classic dessert, elevating humble ingredients into a culinary masterpiece. With its golden crust, creamy custard, and the sweet aroma of cinnamon, this recipe is sure to become a cherished favorite for both casual gatherings and special occasions. Indulge in the richness of tradition and taste with this heavenly treat.
Love my dish towel?
I have been using Geometry kitchen tea towels for almost everything in my kitchen and I am in love! They are designed to dry faster which means more time between washes and an overall fresher kitchen towel experience. Their fabric results in an increased drying and cleaning surface area that is perfectly soft and powerfully effective when taking care of spills, drying dishes, or wiping down countertops, all without scratching. Check out their other prints and use code 15NICOLEROSE for a special discount!
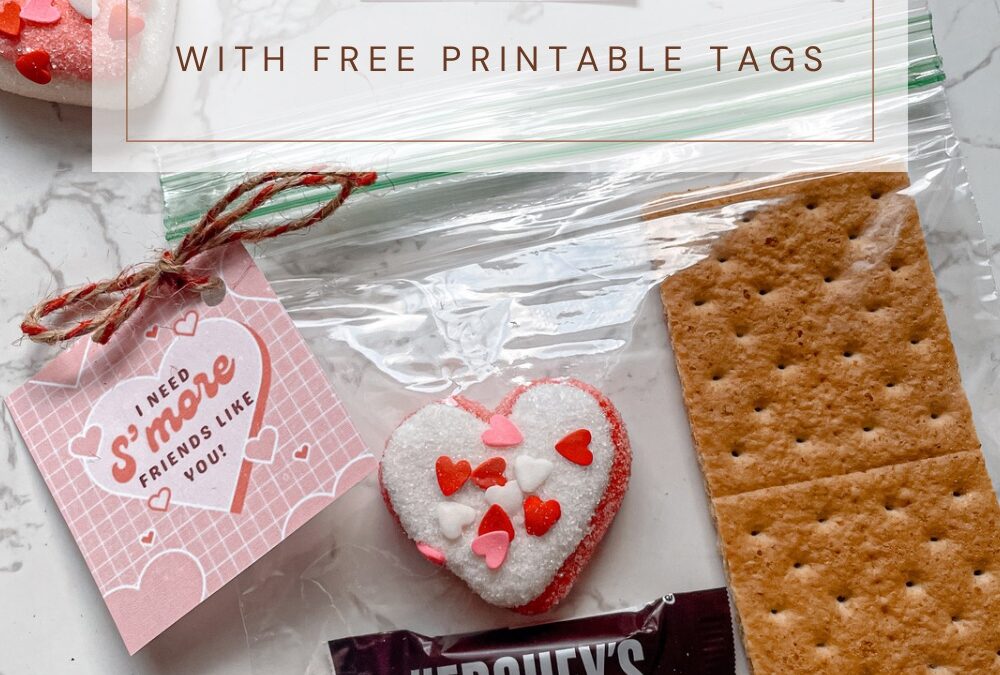
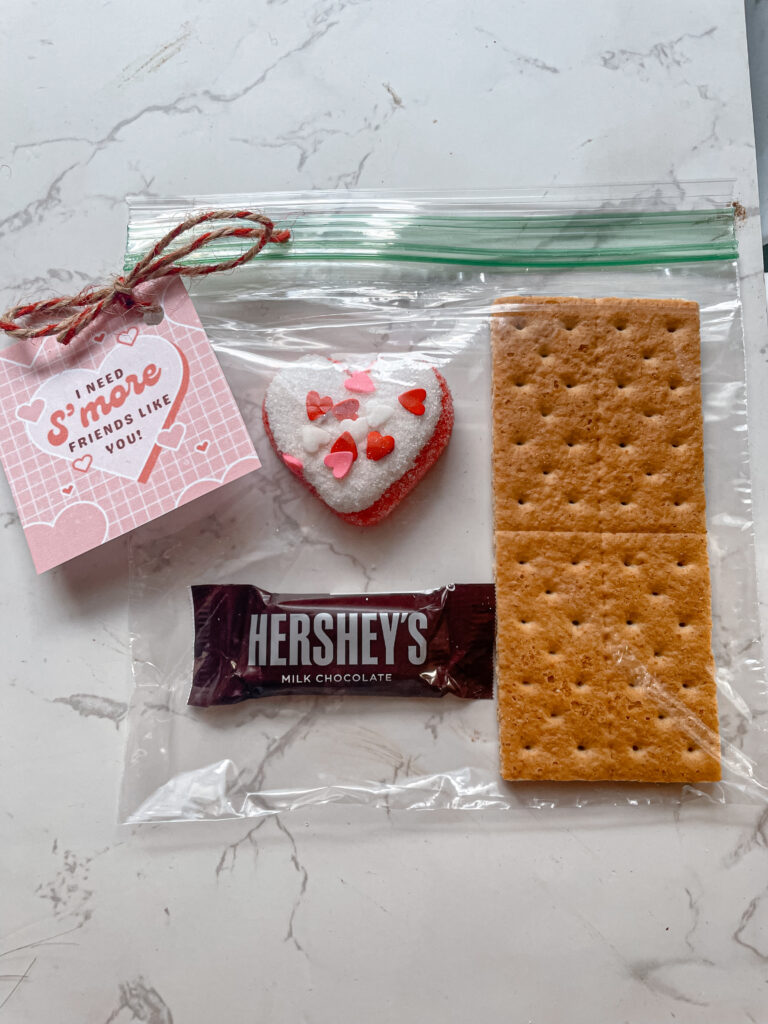
Sweet Love Served: DIY S’more Valentines with Free Printable Tags
Valentine’s Day is all about expressing love, and what better way to do that than with a sweet treat? This year, add a touch of warmth to your celebrations with DIY S’more Valentines. Simple, delightful, and made with love, these treats are not just delicious but also come with free printable tags to add an extra special touch. Let’s dive into the easy steps to create these heartwarming goodies.
Ingredients:
Graham crackers, broken into squares
Heart-shaped marshmallows
Chocolate squares (dark, milk, or your favorite)
Clear plastic treat bags
Ribbon or twine
Free printable tags (download them below)
Instructions:
Gather Your Ingredients: Collect graham crackers, heart-shaped marshmallows, and chocolate squares. Ensure you have enough to create multiple S’more Valentines.
Assemble the S’mores: Place one graham cracker square at the bottom, add a piece of chocolate, and top it with a heart-shaped marshmallow. Complete the S’more by adding another graham cracker square on top, creating a sweet and stackable delight.
Prepare for Gifting: Carefully place each S’more into clear plastic treat bags, creating a visually appealing presentation. This step not only keeps the treats fresh but also showcases the layers of goodness within.
Add a Personal Touch: Cut and attach a festive ribbon or twine to secure the bag. This not only adds a decorative element but also allows you to tie a heartfelt bow around your delightful creation.
Download and Print Free Tags: Elevate your S’more Valentines with our free printable tags. Download them [here]. Print the tags on cardstock for durability.
Attach the Tags: Once printed, cut out the tags and attach them to the ribbon or twine. Each tag is designed to add a touch of charm and a sweet message to your S’more Valentines.
Share the Love: Now that your S’more Valentines are ready, share them with friends, family, or that special someone. These treats are not just delicious; they carry the warmth of your affection.
This Valentine’s Day, spread love one S’more at a time. These DIY S’more Valentines, adorned with heart-shaped marshmallows and rich chocolate, are a delightful way to show someone you care. With the added touch of free printable tags, your sweet creations will not only taste divine but also carry a personalized message straight from the heart. Share the love and enjoy a truly heartwarming Valentine’s Day!
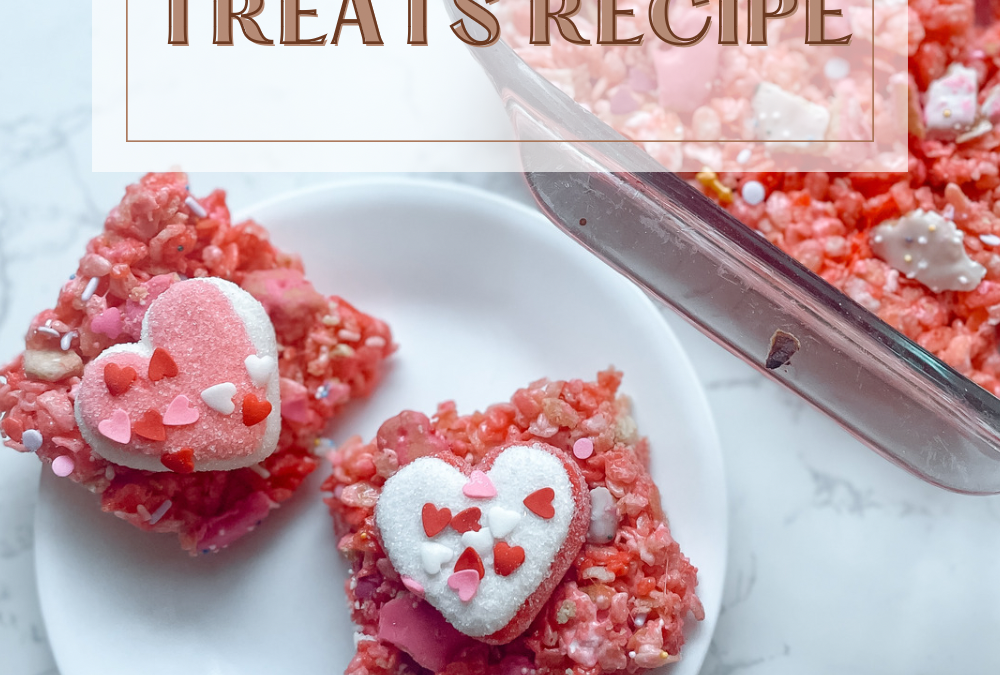
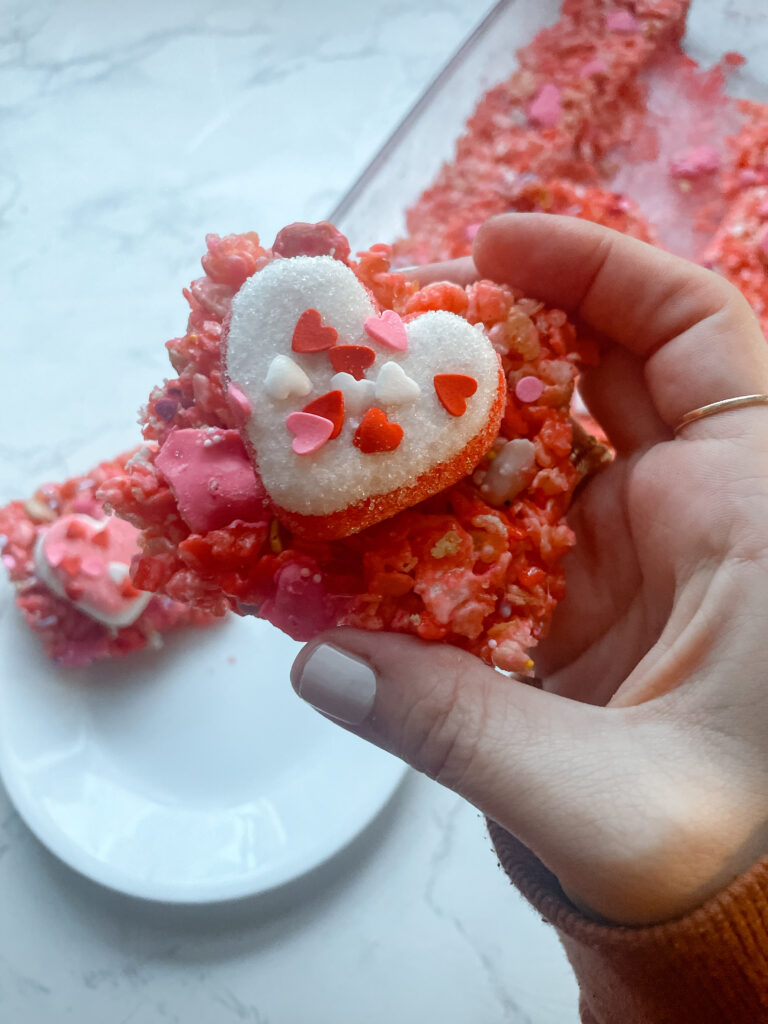
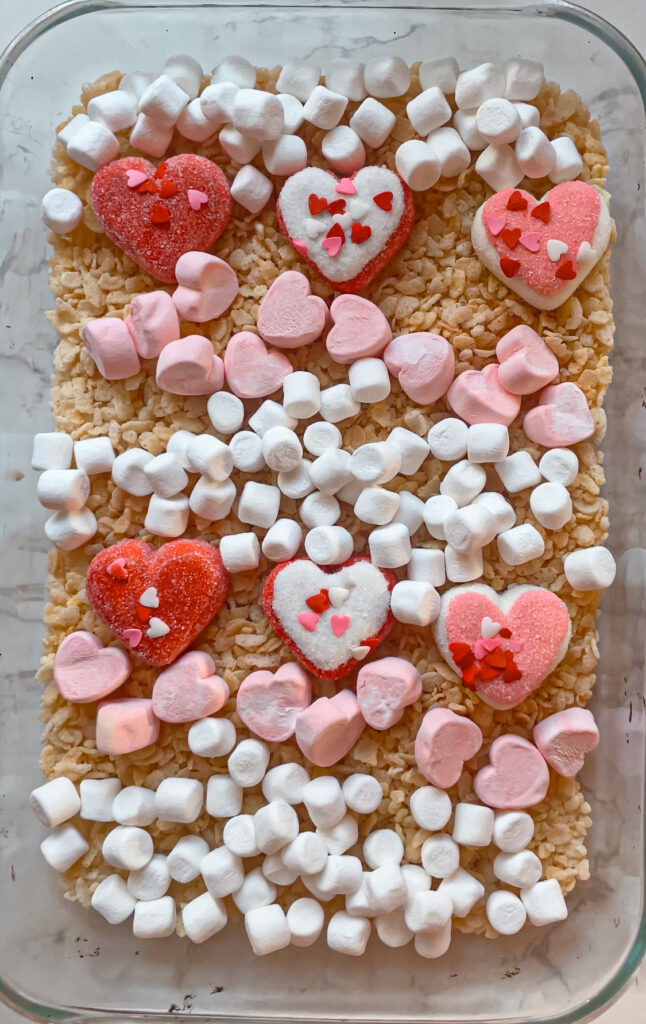
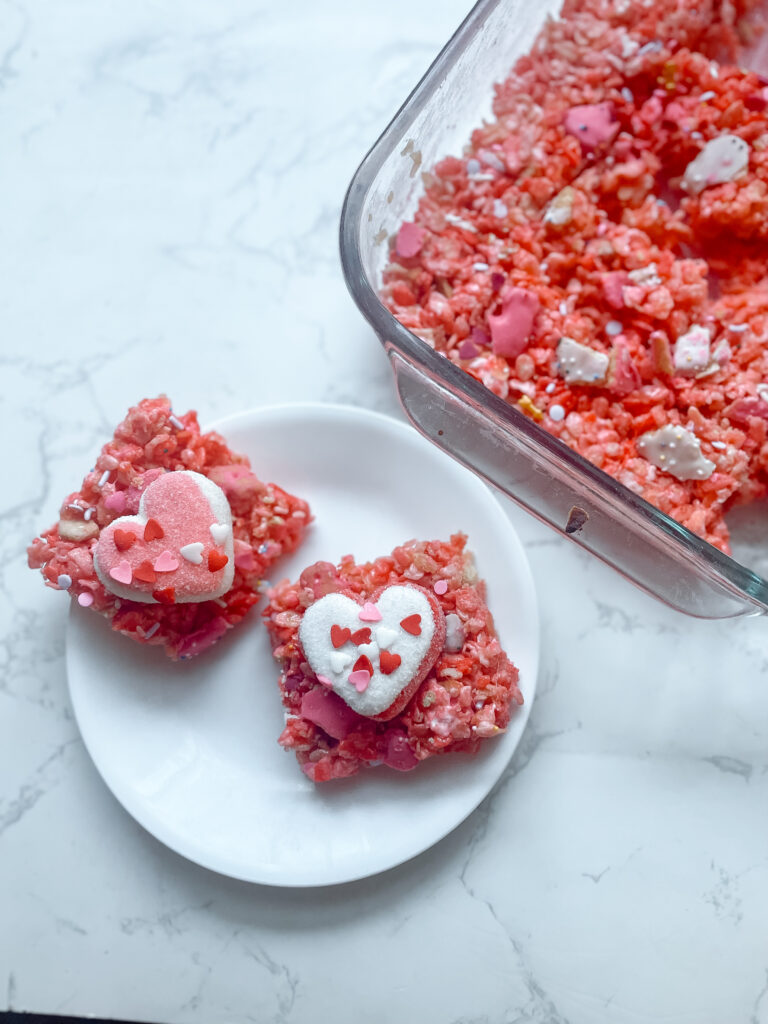
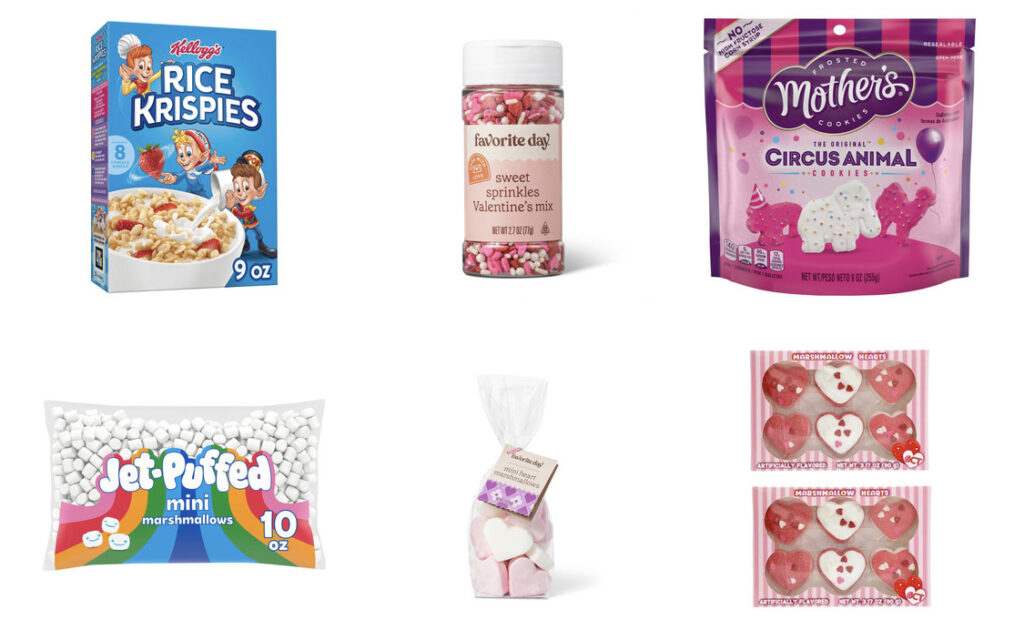
Sweet Love in Every Bite: Valentine’s Day Rice Krispie Treats Recipe
Valentine’s Day is just around the corner, and what better way to celebrate love than with a delightful homemade treat? These Valentine’s Day Rice Krispie Treats are not only delicious but also heartwarming in every sense. The combination of crispy Rice Krispies, heart-shaped marshmallows, and a touch of butter creates a perfect symphony of flavors. Let’s dive into the simple yet charming recipe that will surely steal your heart.
Ingredients:
6 cups of Rice Krispies cereal
Heart-shaped marshmallows
1 stick of butter, thinly sliced
Frosted animal crackers
Festive sprinkles
Instructions:
Preheat your oven to 350°F (175°C) and grease a baking dish.
In a large mixing bowl, pour 6 cups of Rice Krispies cereal, ensuring a generous crunch in every bite.
Arrange heart-shaped marshmallows evenly over the cereal, symbolizing the love that goes into these treats.
Take one stick of butter and slice it thinly. Distribute the butter slices across the Rice Krispies and marshmallows, allowing it to melt and infuse a rich, buttery flavor.
Place the baking dish in the preheated oven and bake for about 10-15 minutes or until the marshmallows are gooey and golden.
Once out of the oven, mix until everything is evenly mixed.
Sprinkle the top with frosted animal crackers for a playful crunch and festive sprinkles to add a pop of color and joy.
Flatten with a spatula so everything is even.
Result:
The result is a batch of Valentine’s Day Rice Krispie Treats that are not only visually appealing but also bursting with flavor. The crispy texture of the cereal, combined with the gooey marshmallows and the buttery richness, creates a heavenly experience for your taste buds.
Enjoy!
This Valentine’s Day, spread love through the joy of homemade treats. The simplicity of this Rice Krispie Treats recipe, enhanced with heart-shaped marshmallows and a touch of butter, makes it a delightful choice for celebrating the season of love. So, gather your ingredients, preheat that oven, and create a sweet symphony that will surely leave a lasting impression on your loved ones. Happy Valentine’s Day!
If motherhood has you stressed and you feel like you’ve lost your creativity, I am here to help! Here you will find easy recipes, simple DIY’s, affordable styles, and what to read next. I believe we all have a creative side, some of us just need a little help to find it. I will help inspire you to have creative expression without standards.