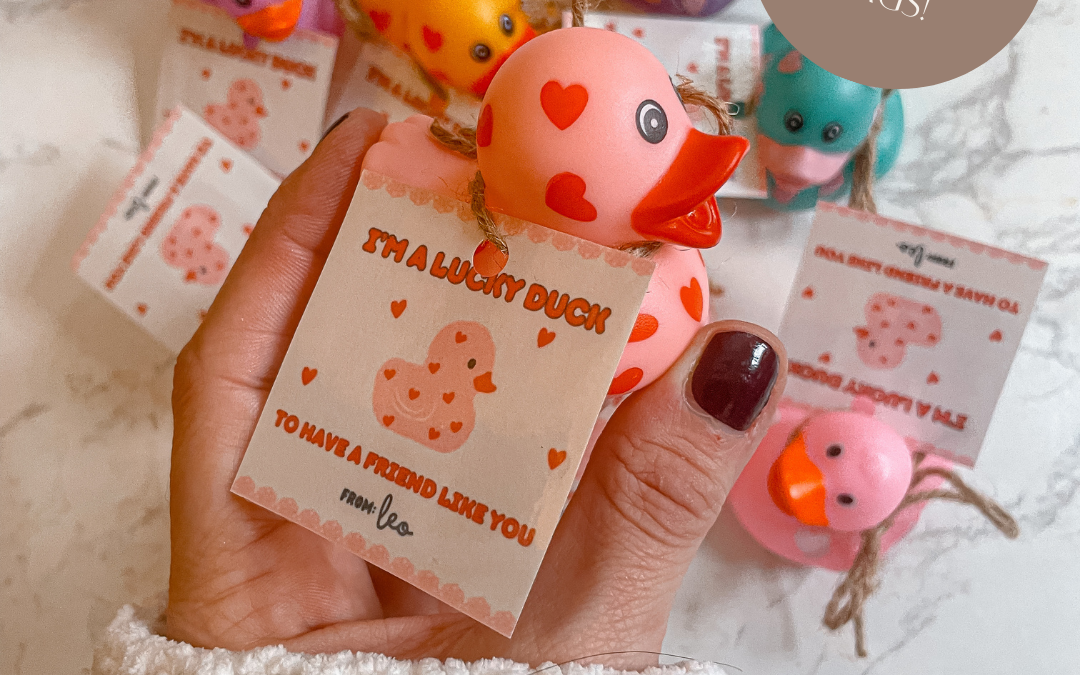
Valentine’s Day is right around the corner, and if you’re looking for a creative, non-candy idea for your little one’s daycare or preschool class, mini rubber duckies might just be the perfect fit! These adorable little toys bring smiles to kids’ faces without the sugar rush, making them a fun and practical alternative to traditional Valentine’s treats.
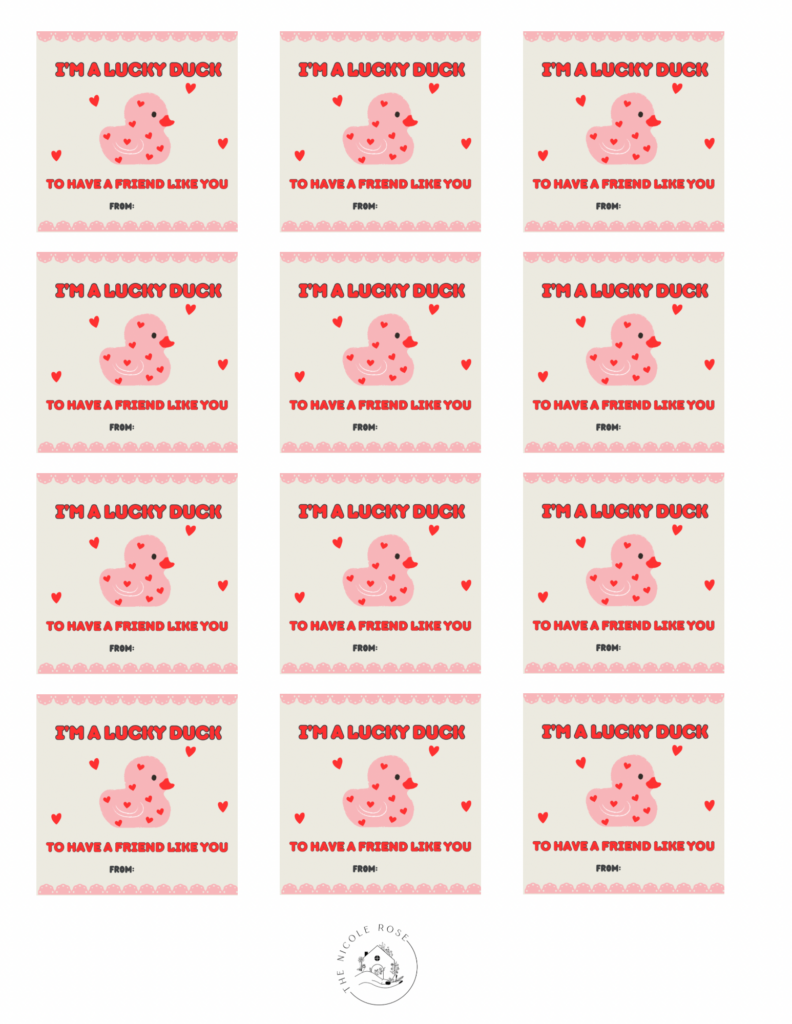
To make things even easier, I’ve created a free printable tag that pairs perfectly with the duckies! It’s simple to put together and adds a thoughtful touch to this already delightful Valentine.
Why Mini Rubber Duckies Make Perfect Valentines
If you’re tired of the usual cards and candy, mini rubber duckies are a refreshing change. Here’s why they’re a great choice for young children:
• Safe and Playful for Little Ones: Perfectly sized for little hands, these rubber duckies are great for kids of all ages, especially toddlers and preschoolers. No choking hazards, no mess—just good, clean fun!
• A Fun Alternative to Candy: With so many treats handed out on Valentine’s Day, it’s nice to have a non-edible option that parents will appreciate too. Plus, it’s allergy-friendly!
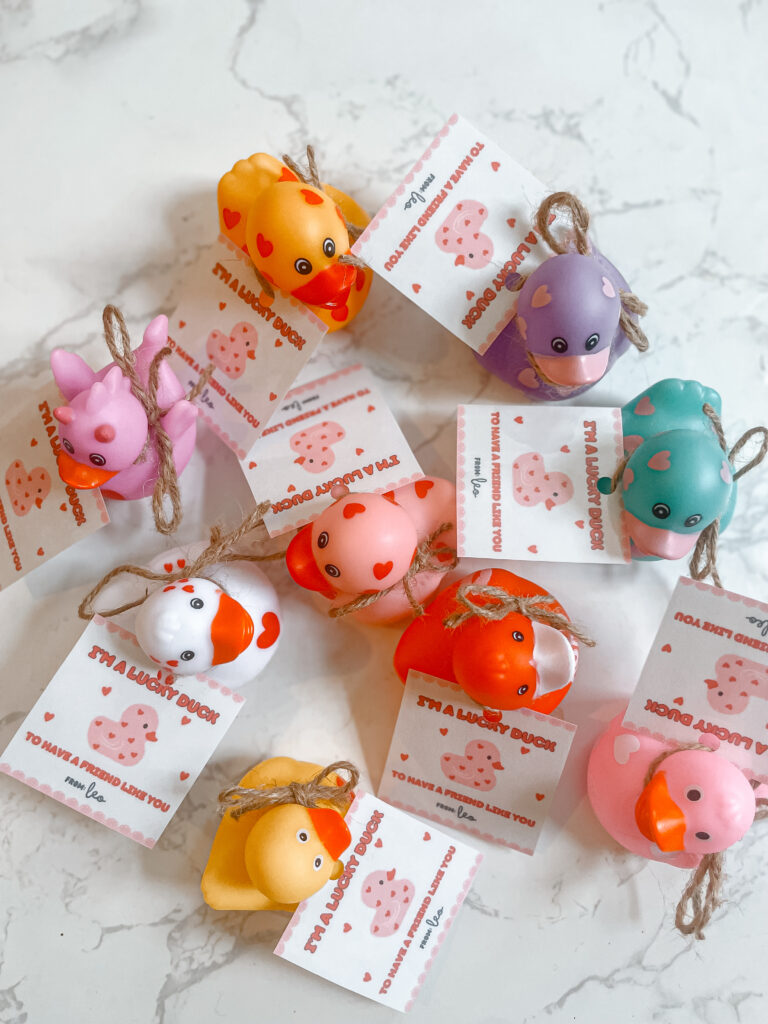
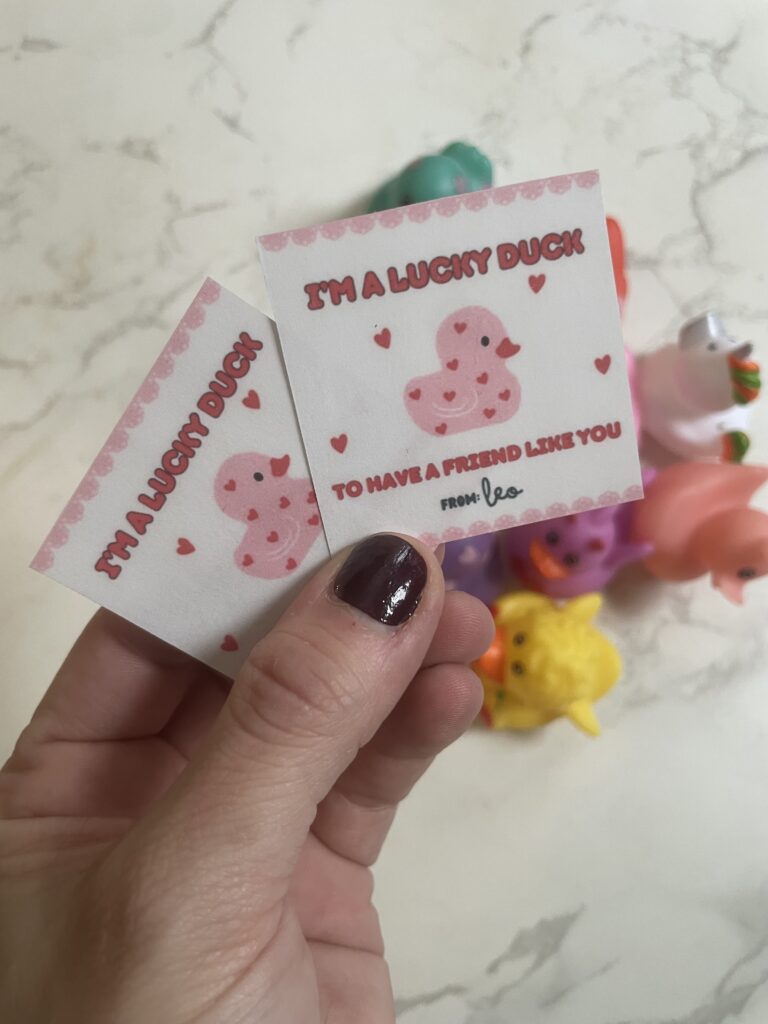
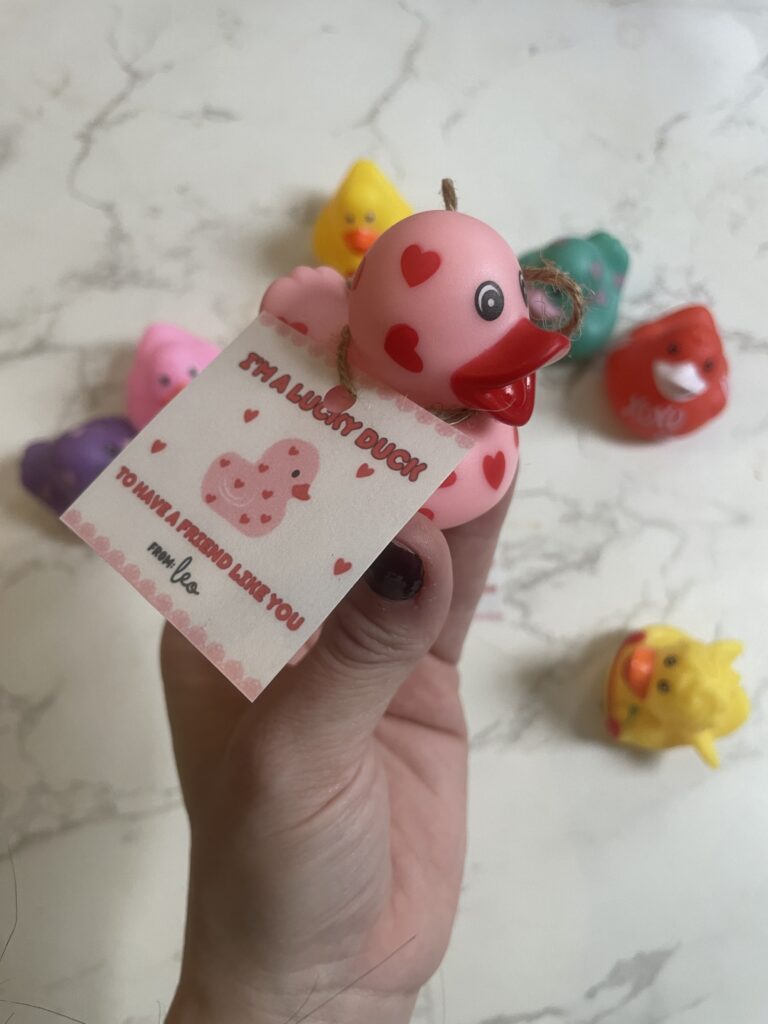
• Customizable with Printable Tags: The free tag makes it easy to add a festive Valentine’s message and turns a simple toy into a charming little gift.
How to Assemble Your Mini Rubber Ducky Valentines
Creating these Valentines is quick and easy! Here’s what you’ll need:
• Printable Valentine’s Day tags (download below!)
• Ribbon, twine, or small clear treat bags (optional)
• Scissors and a hole punch
Optional: Laminator to make tags thick and sturdy
Steps
1. Print the Tags: Download the free printable (link below) and print them on cardstock for a sturdy, professional look.
2. Cut Out the Tags: Use scissors or a paper trimmer to neatly cut out each tag.
3. Attach to the Duckies: Use a hole punch to make a hole in each tag. Then, either tie the tags to the ducks with ribbon/twine or place the ducks in small treat bags with the tag inside.
4. Optional Step: Add a personal touch by writing your child’s name on the tag!
And that’s it! These Valentines are easy to assemble and don’t require any special crafting skills—perfect for busy parents.
Download Your Free Printable Tags
To make your mini rubber ducky Valentines even more special, I’ve created a free printable tag that says, “You’re Just Ducky, Valentine!” These tags add a sweet finishing touch and make your gifts classroom-ready.
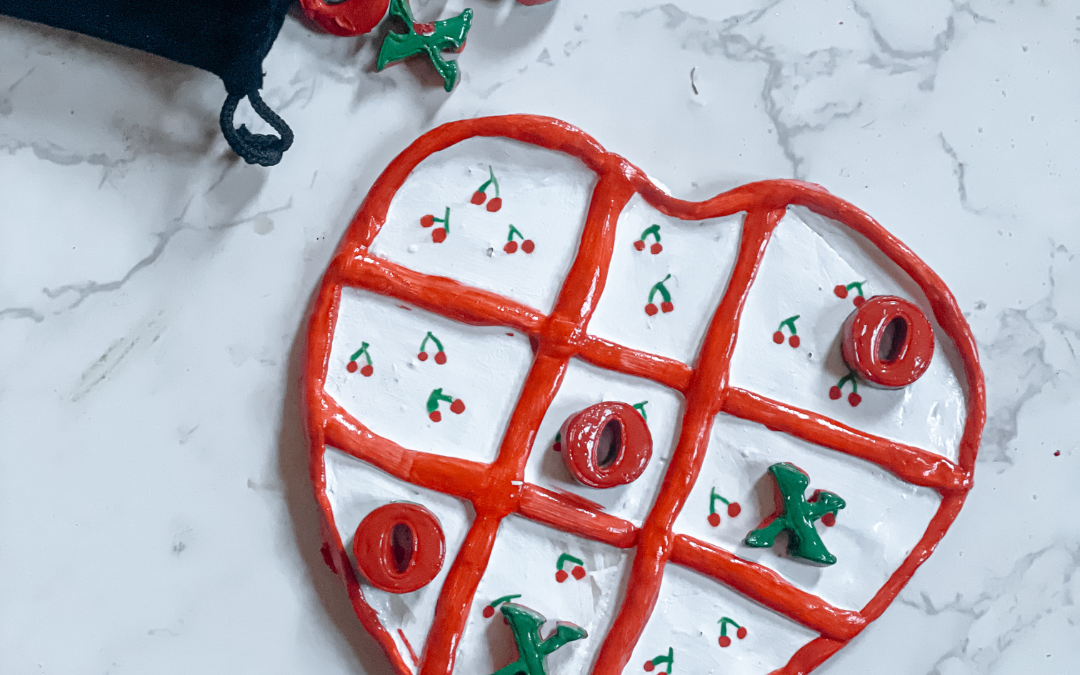
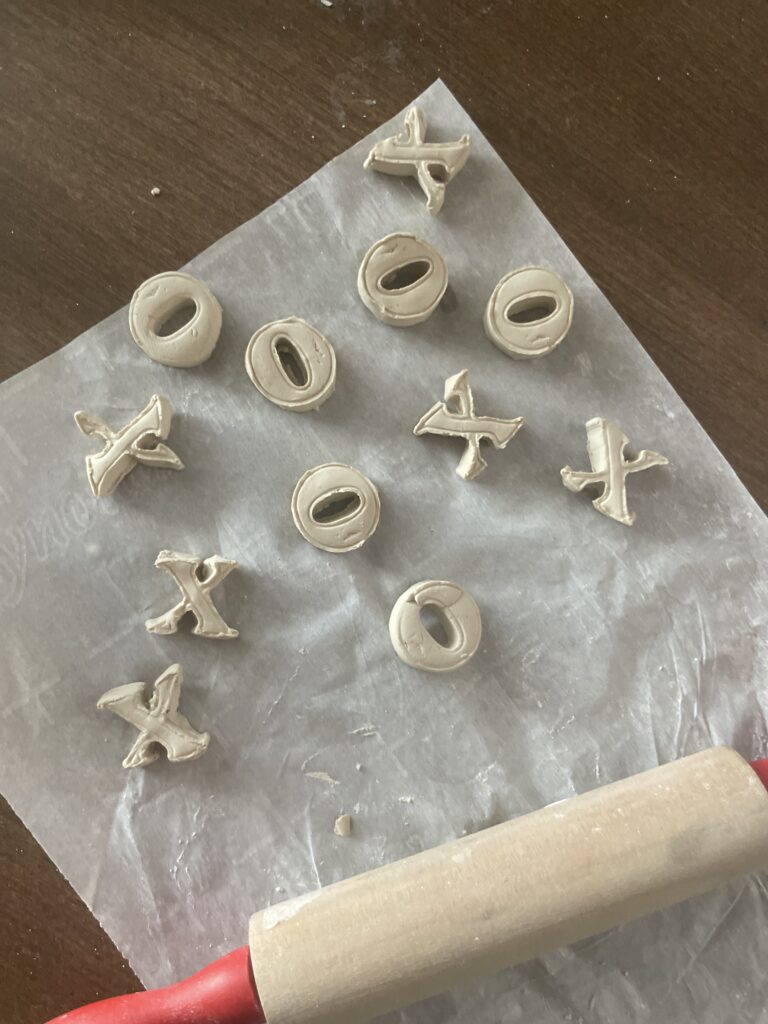
Valentine’s Day is the perfect time to create heartfelt crafts that add a touch of love to your home or serve as unique gifts. This DIY air-dry clay tic-tac-toe board is a simple yet charming project that combines creativity and functionality.
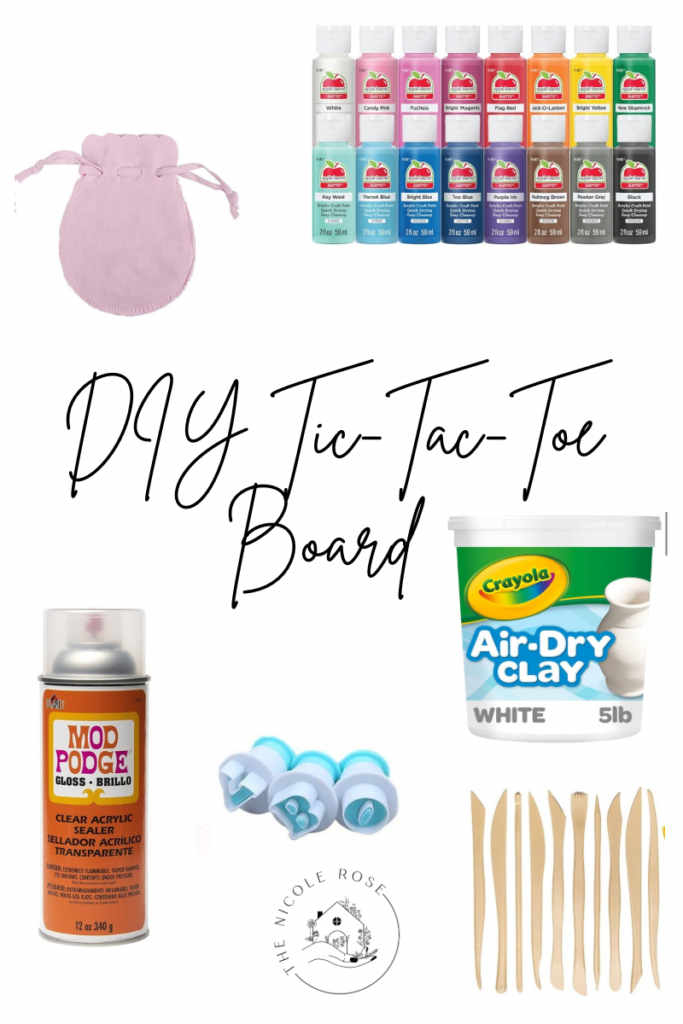
Materials You’ll Need:
• Air-dry clay (white or your preferred base color)
• Rolling pin
• Craft knife or clay cutter
• Acrylic paint (in Valentine’s Day colors like red, pink, and white)
• Paintbrushes
• Ruler
• Small heart-shaped cutter (optional)
• Sandpaper (fine grit, for smoothing edges)
• Sealer or varnish (optional, for durability)
Instructions:
1. Prepare the Clay
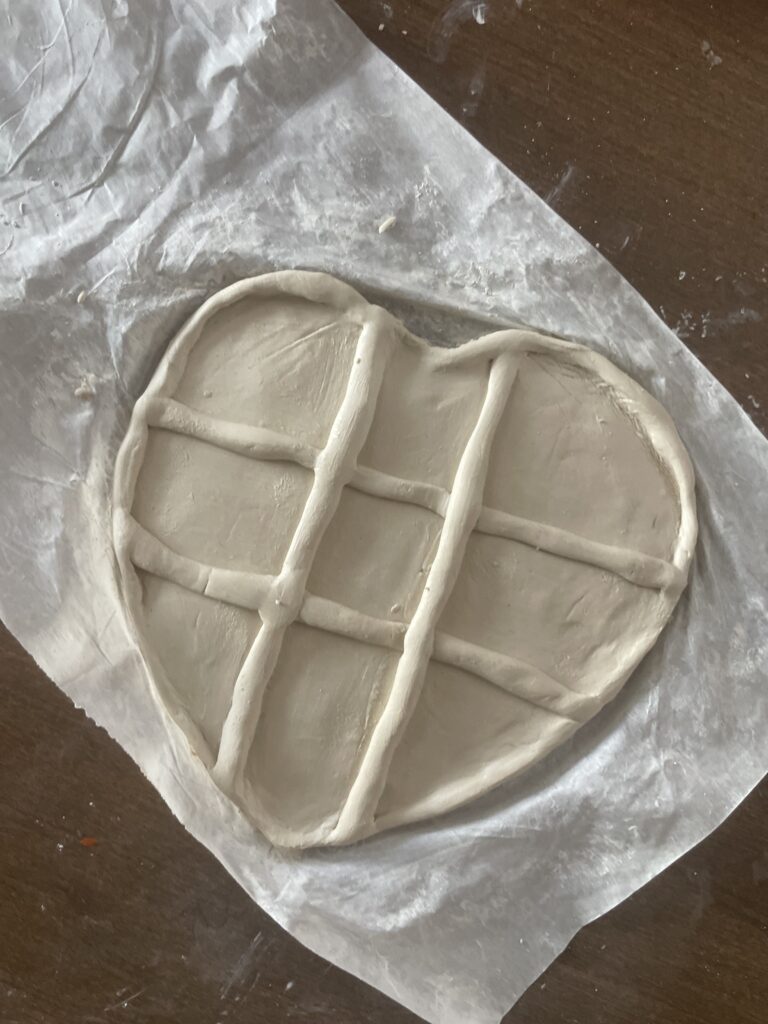
Start by kneading a chunk of air-dry clay to make it soft and pliable. Roll it out evenly with a rolling pin to about ¼-inch thickness. This will form the base of your tic-tac-toe board.
2. Shape the Board
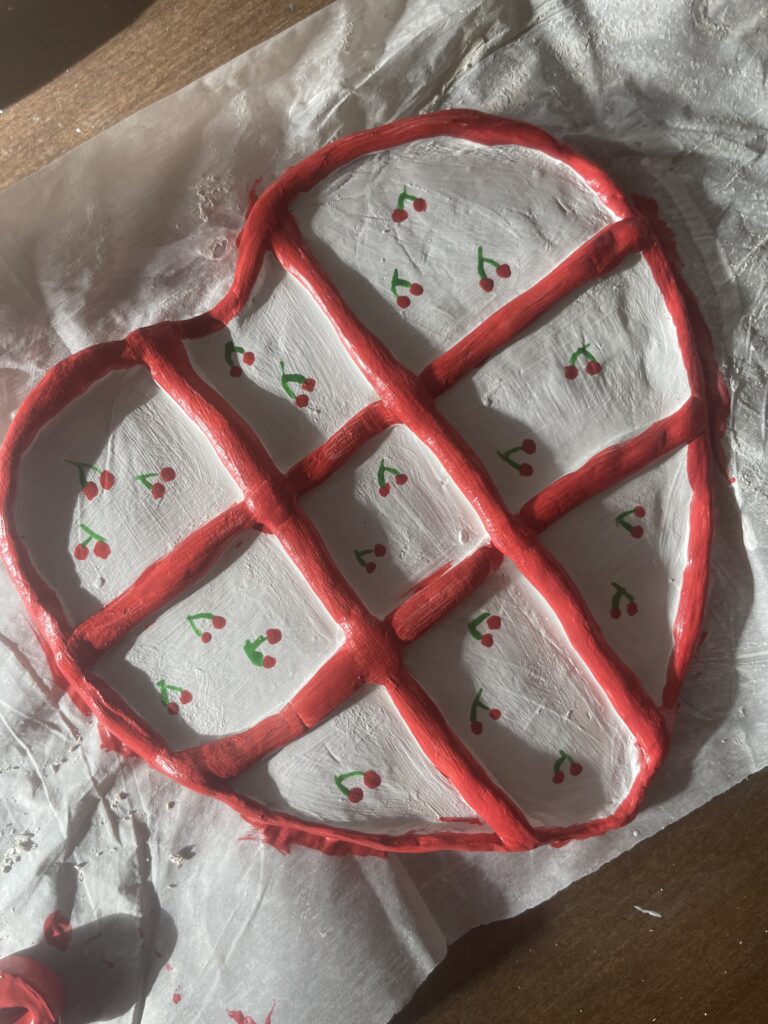
Using a ruler and craft knife, cut out a square (approximately 6×6 inches or adjust as desired). Smooth out the edges with your fingers or sandpaper to ensure they’re even and clean.
3. Create the Grid
Lightly mark a 3×3 grid on the clay using the ruler and a craft knife or toothpick. Press gently to create lines without cutting through the clay. Roll thin pieces of clay and add to the dish, blending to make sure they stick together.
4. Make the Playing Pieces
Roll out additional clay and use a small heart-shaped cutter to create five “X” pieces and five “O” pieces. If you don’t have a cutter, you can shape the pieces by hand or use a knife for simple shapes. Smooth the edges of each piece.
5. Let the Clay Dry
Place all clay pieces on a flat surface and let them air dry for 24-48 hours. Be sure to flip the pieces occasionally to ensure even drying.
6. Paint Your Design
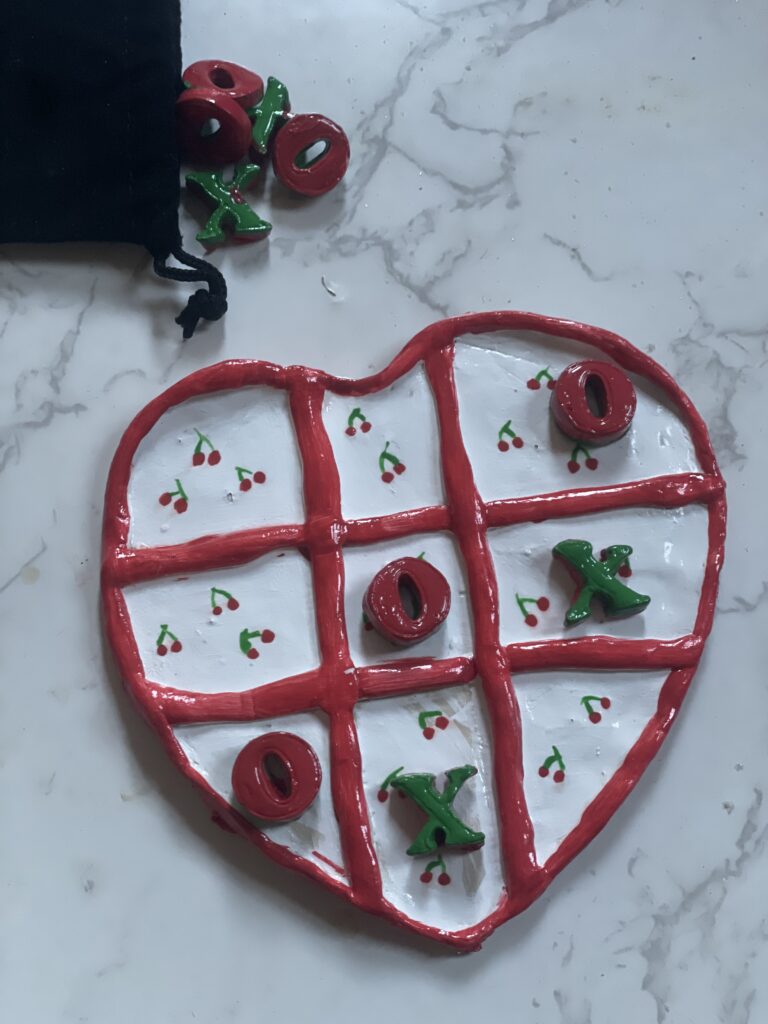
Once the clay is fully dry, it’s time to add some color! Paint the board in your desired base color—white or pastel pink works beautifully for Valentine’s Day. Use contrasting colors for the grid lines. Paint the Xs and Os in complementary shades like red and pink. I made mine with cherries.
7. Seal for Durability
If you want your tic-tac-toe board to last longer, apply a coat of sealer or varnish to the board and pieces once the paint is dry.
8. Assemble and Play!
Arrange the grid lines on the board and place your painted Xs and Os in a small bowl or bag for easy storage. Your Valentine’s Day tic-tac-toe set is now ready to use!
Creative Tips:
• Add personal touches by customizing the colors or painting tiny designs like polka dots or stripes on the playing pieces.
• Use glitter paint for extra sparkle!
• Pair the tic-tac-toe board with a small pouch for storage, decorated with hearts or love-themed patterns.
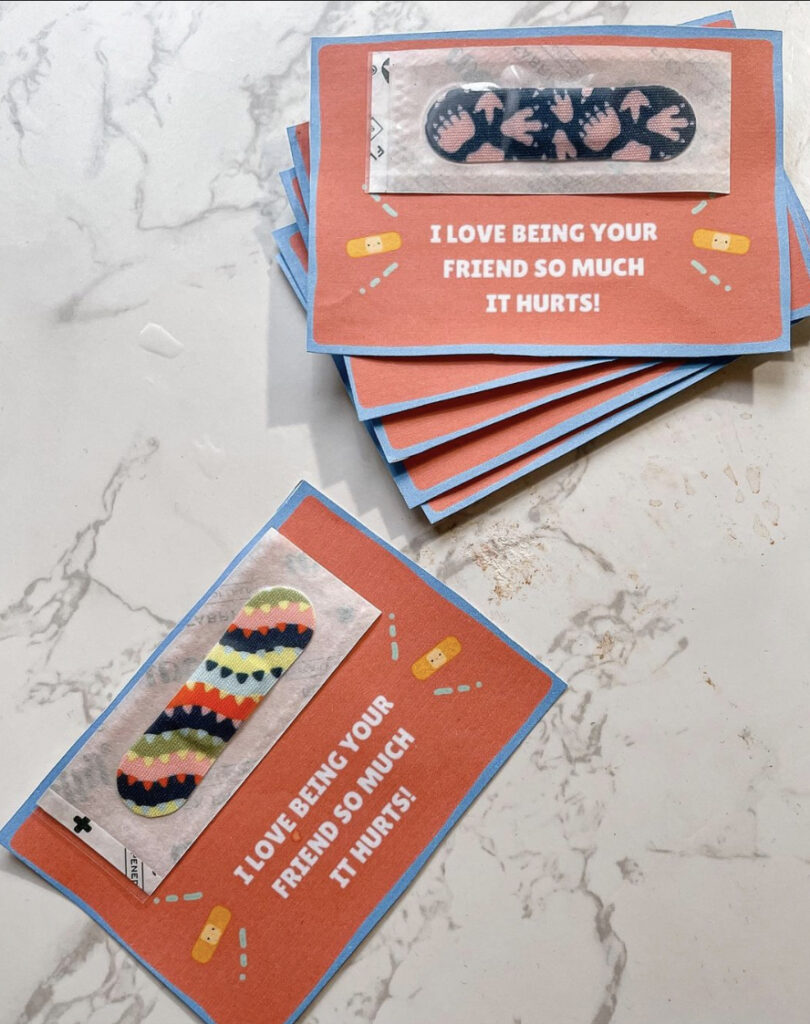
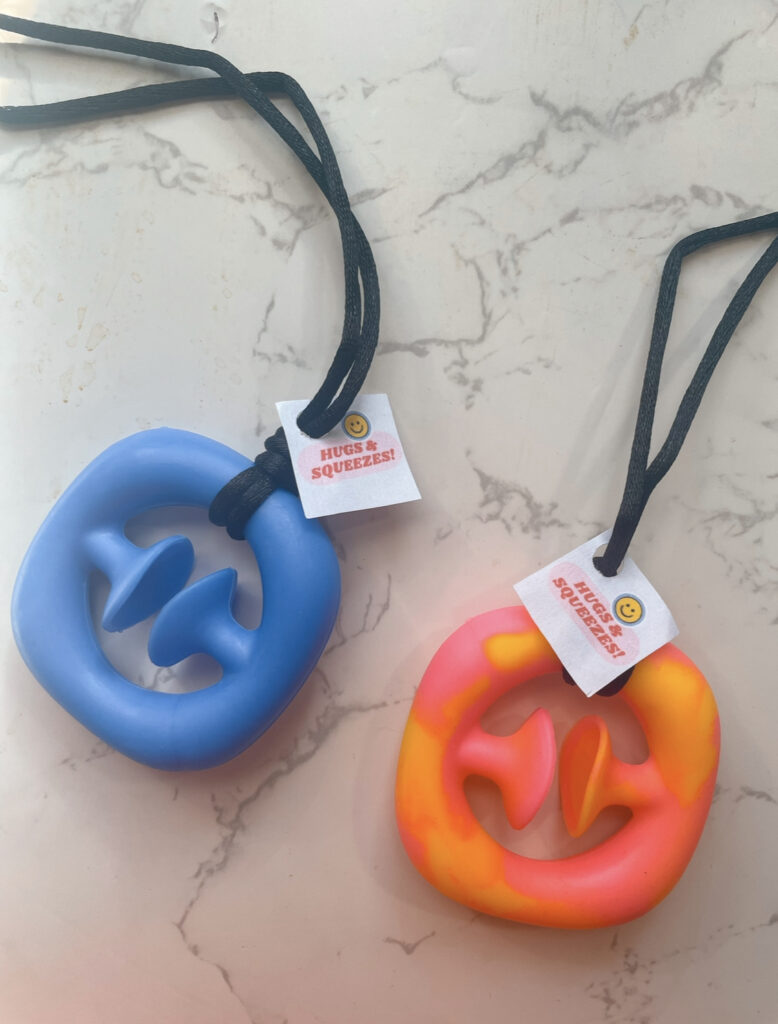
Valentine’s Day for your little ones may be a little different this year. They may be able to celebrate in school or they may not, but I am sharing these cute Valentine’s that can be shared with anyone!
These cute Valentine’s are perfect to spread some cheer around your neighborhood. These are guaranteed to put a smile on your neighbors face.
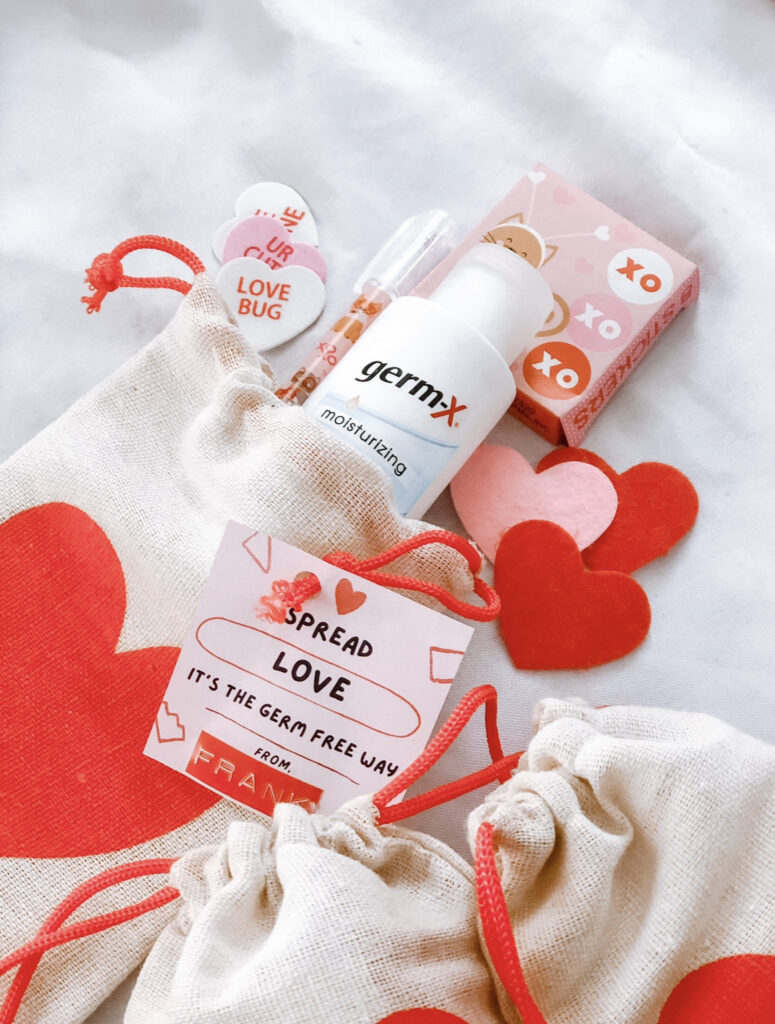
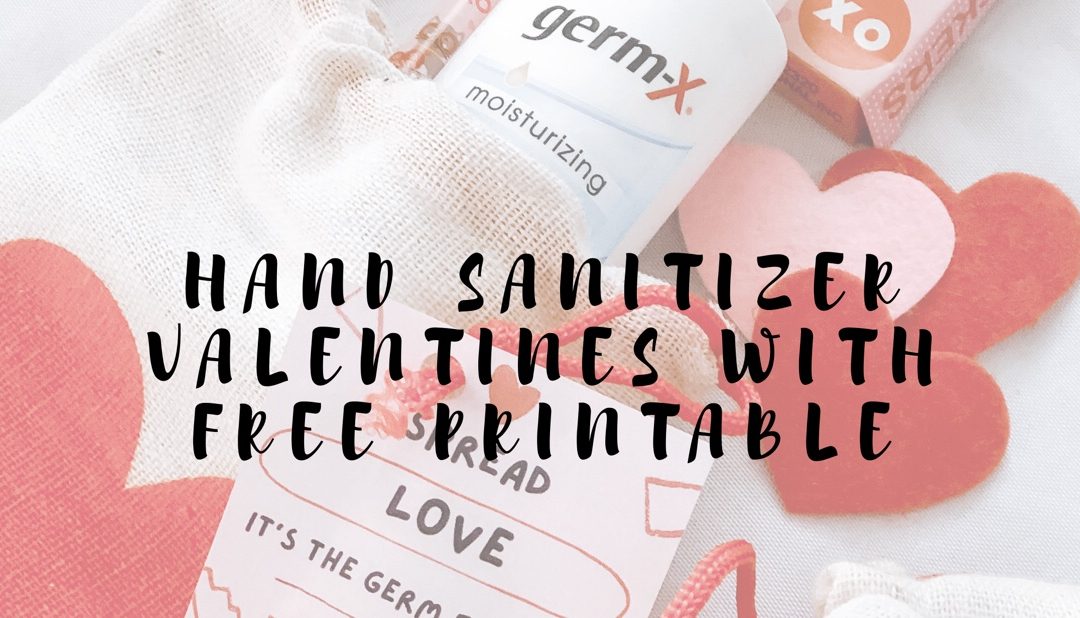
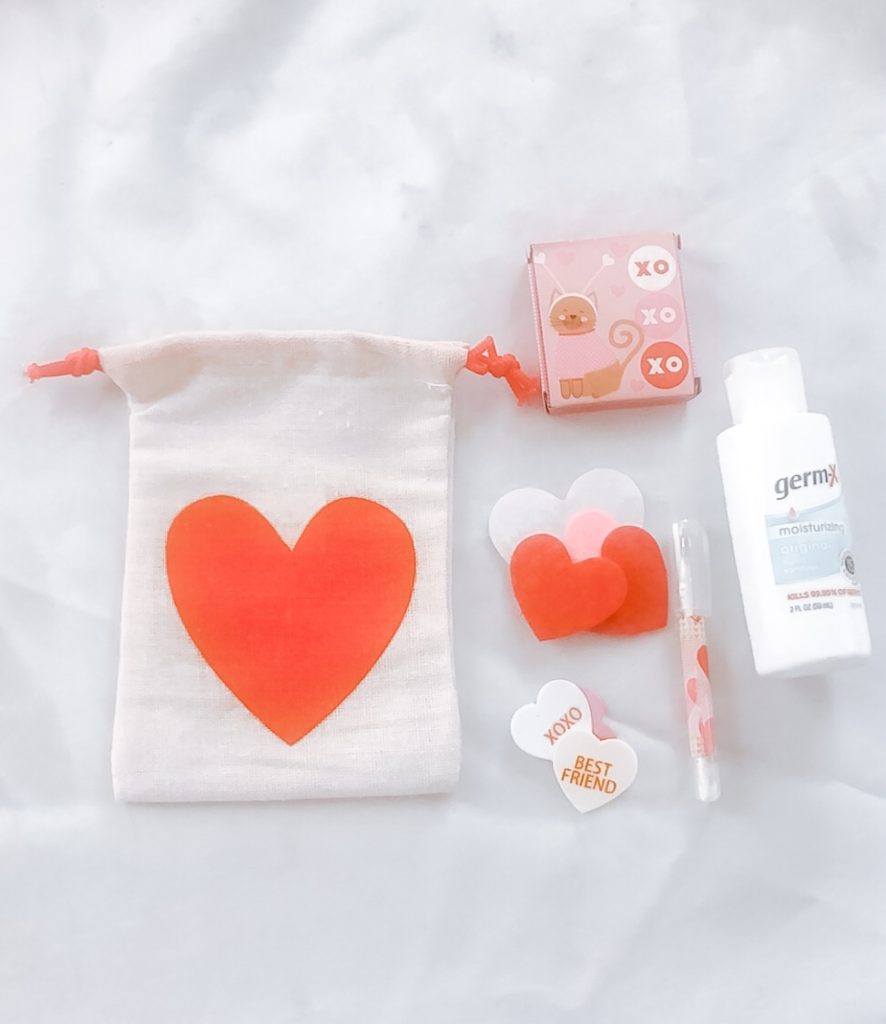
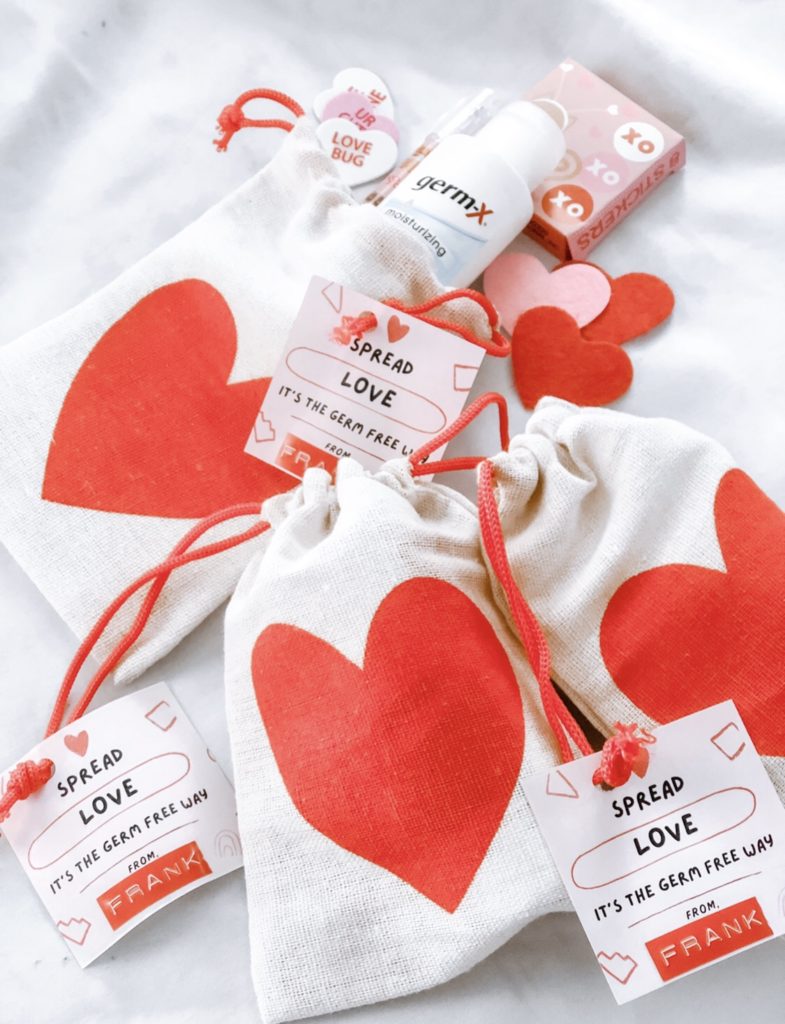
The best part (once again) is that everything here is from Dollar Tree! Fill these treat bags up with hand sanitizer and goodies of your choice. This is what we chose below.
We added pens and sticker assortments in this fun canvas bag.
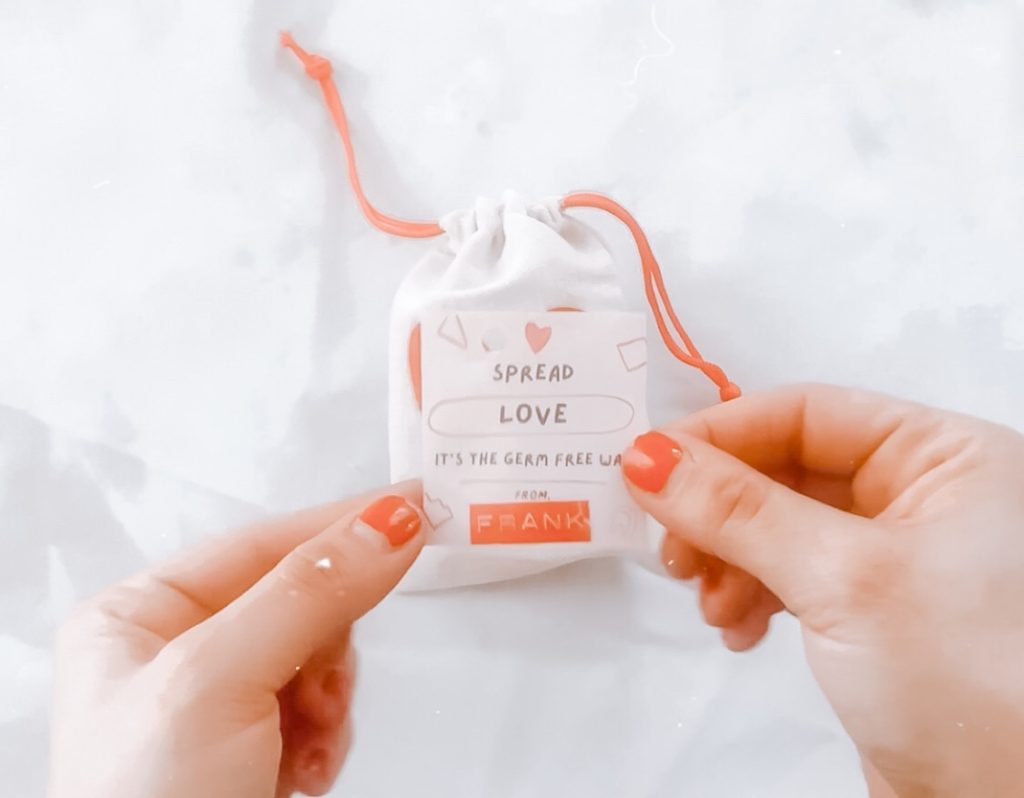
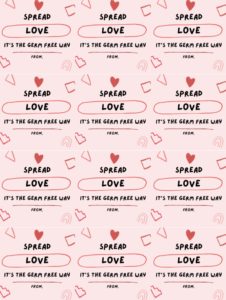
Pack up your bags and print these gift tags. Add your little ones name by writing it or using a label embosser. It is my favorite way to label things. I have one from when I was a kid, but you can get one here.
Now that they are signed and sealed, time to get them delivered!
I would love to see what you decide to make so be sure to tag me on Instagram!
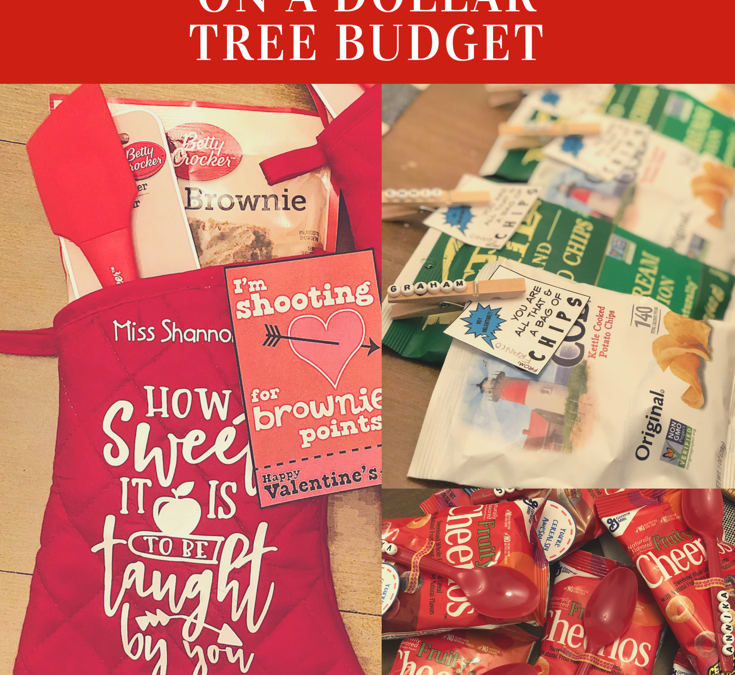
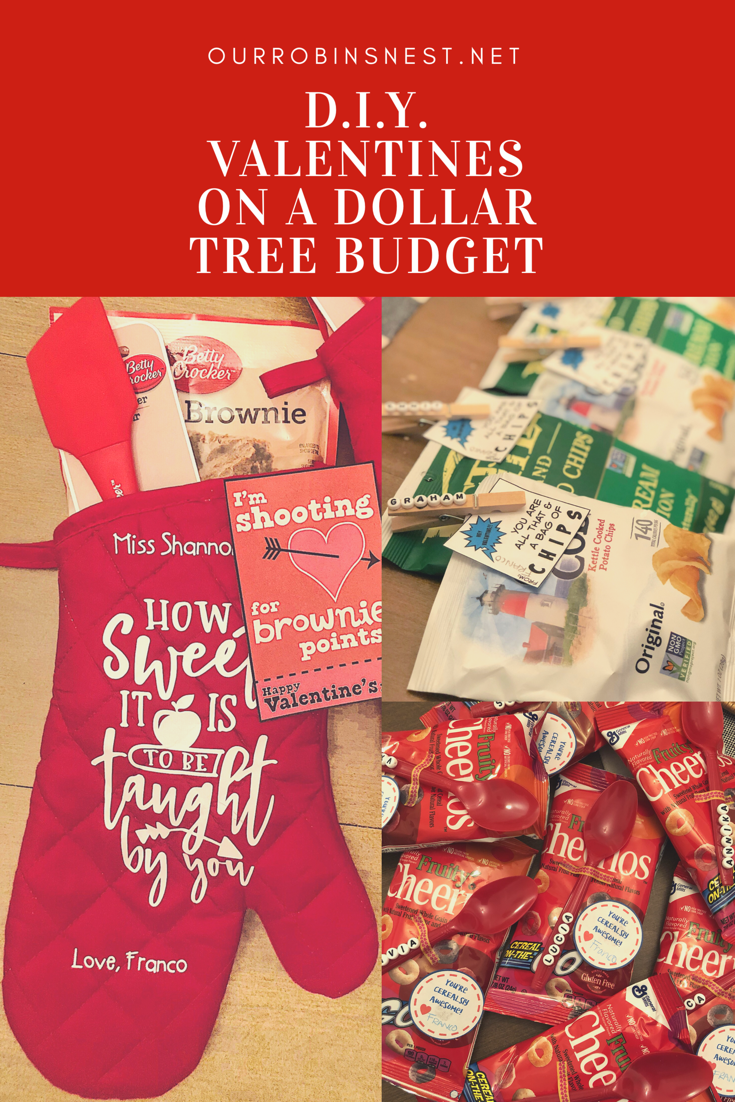
There is no holiday that I do not like; I make the best of all of them! I especially love giving gifts when I add my own touch to them. Now that Franco is almost three years old and he just moved up to Preschool a few weeks ago, he has a better understanding of holidays and what they mean. I wanted to involve Franco with creating Valentine’s for his new friends this year, and he had a blast!
His favorite store is Dollar Tree, so whats a better place to take him for fun Valentine’s Day ideas!?
When shopping at Dollar Tree, you can make adorable things on a budget, and guarantee it is one of a kind! I am going to share what we came up with with majority of our findings from Dollar Tree!
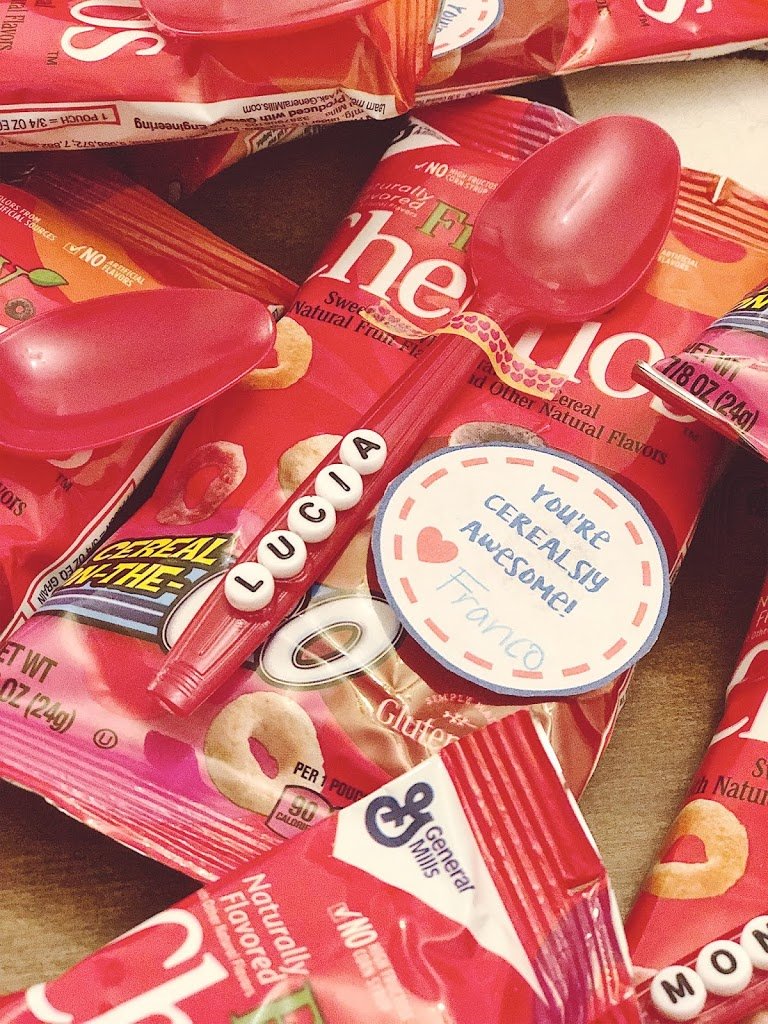
For the girls in Franco’s class we decided to give them single serving cereal packets with personalized spoons. Check out how cute these are!
We found the Fruity Cheerios in packs of four for a dollar along with red plastic spoons and adorable washi tape. I had letter beads at home so I thought it was cute to personalize the spoons, plus Franco helped me with picking out the letters we needed. I found the perfect gift tags here. They came out pretty cute if I say so myself!
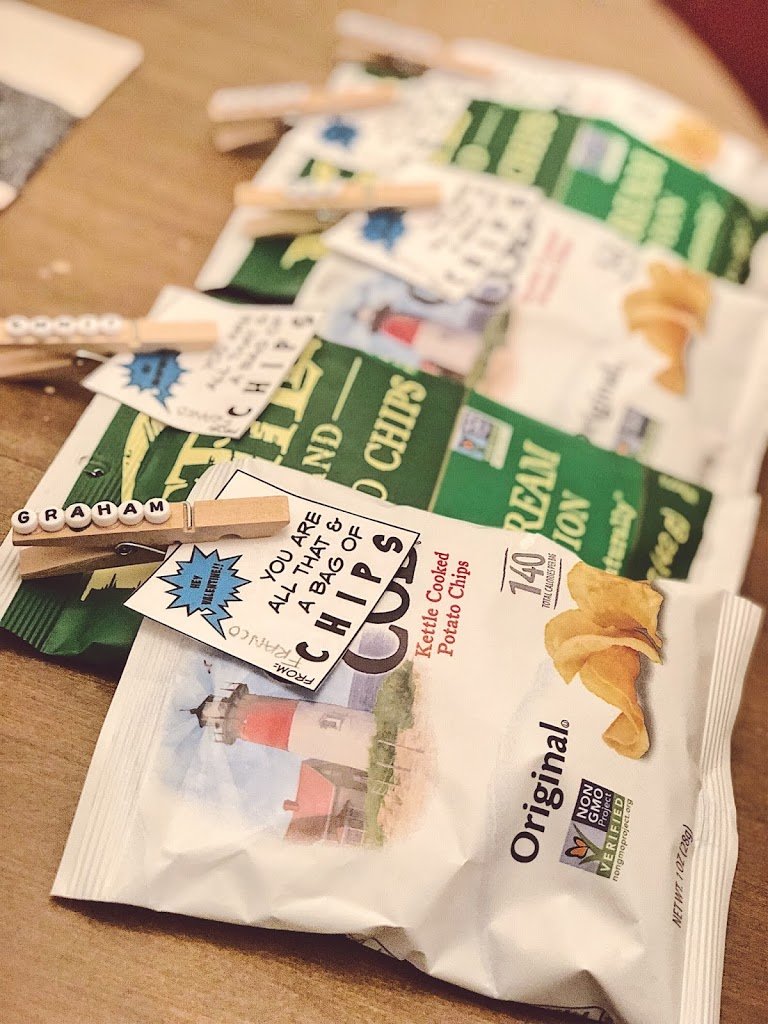
For the boys we decided to do single bags of chips. We found a bag of clothes pins at Dollar Tree and these were perfect to personalize with the letter beads. Walmart was having a sale for an assortment of chips- four dollars for 16 bags, we had a bunch left over so it was a win win!
We found another free printable gift tag here. They were too adoarble not to use!
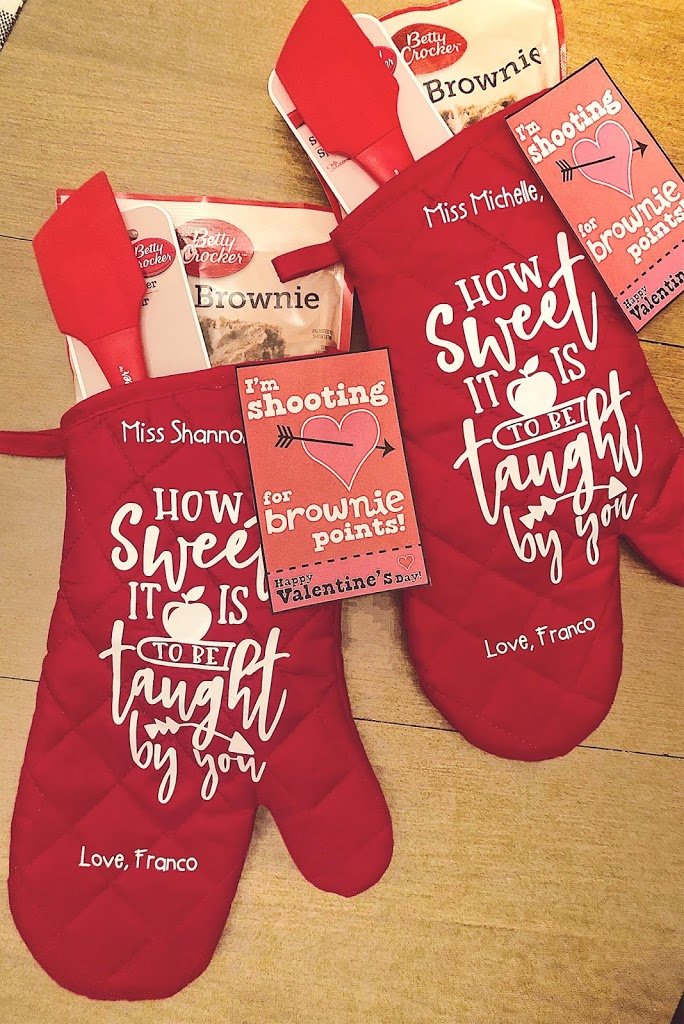
Since I could not leave Franco’s teacher’s out, I decided we should make a good impression with these adorable gifts. Dollar Tree had everything we needed- a red oven mitt, a spatula and brownie mix. I added a cute touch by using my Cricut machine but you can certainly use these free printables only and still have it look great! If you do have Cricut or Silhouette machine, I found this cute file for free!
I hope these ideas got your creative juices flowing! Dollar Tree is always a great place to make personalized gifts that mean a lot, but not cost a lot. I hope you all have a wonderdul Valentine’s Day!
Welcome!
If motherhood has you stressed and you feel like you’ve lost your creativity, I am here to help! Here you will find easy recipes, simple DIY’s, affordable styles, and what to read next. I believe we all have a creative side, some of us just need a little help to find it. I will help inspire you to have creative expression without standards.