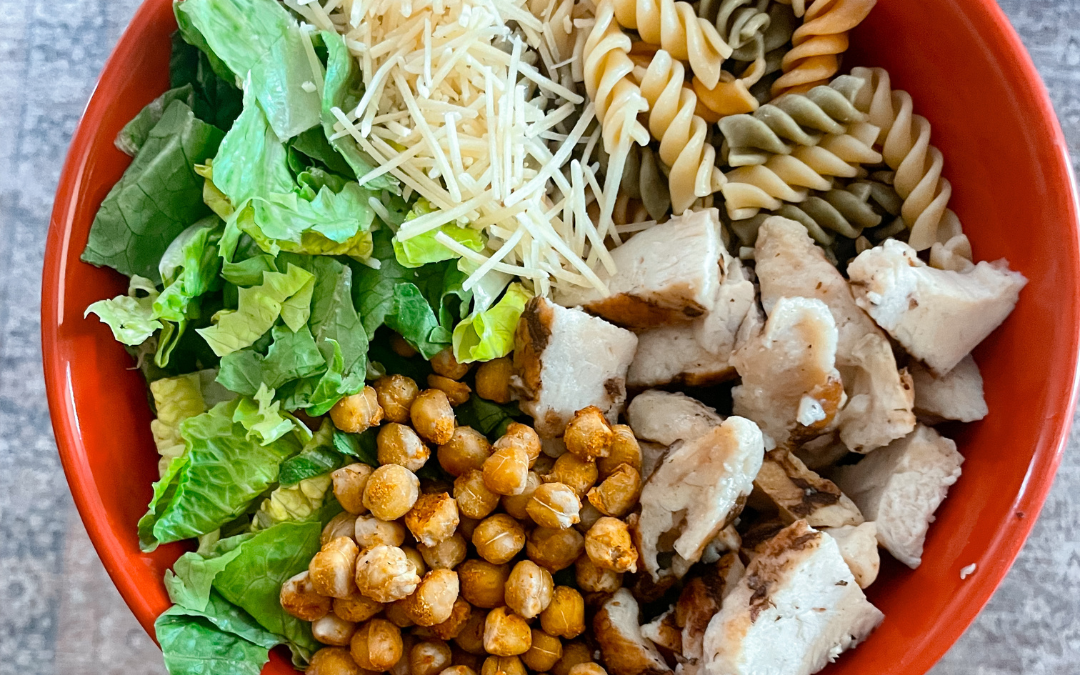
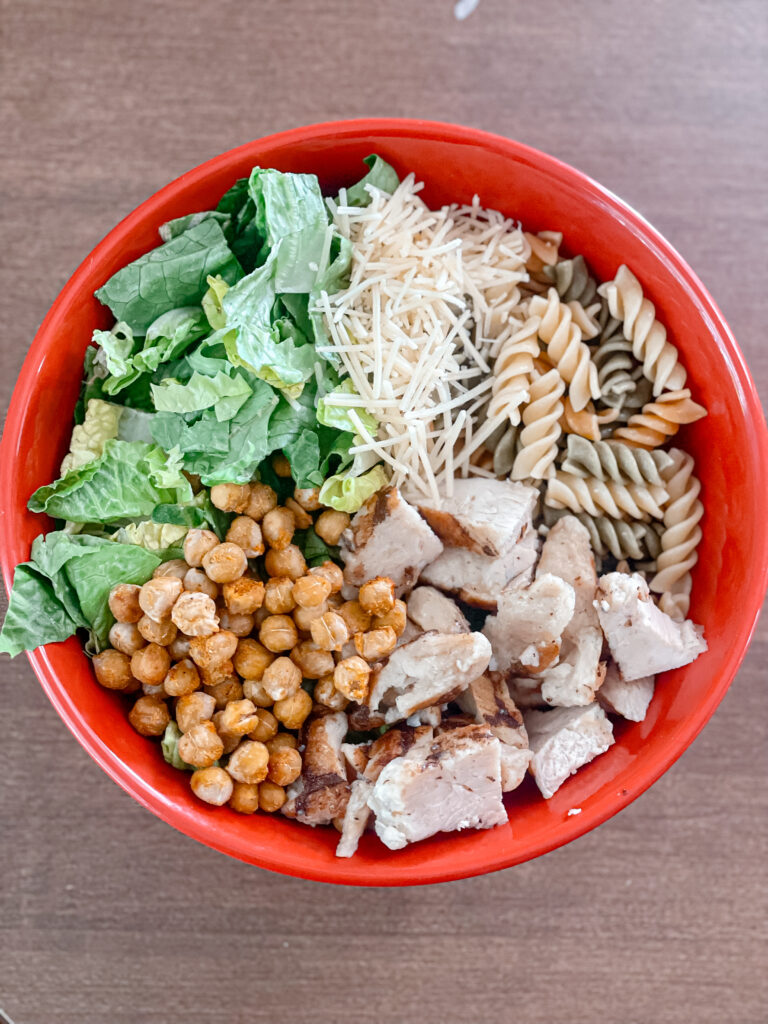
Quick and Easy Chicken Caesar Pasta Salad with Chickpea Croutons
This summer I am bringing you a quick and easy recipe for Chicken Caesar Pasta Salad with Chickpea Croutons. Using a Caesar salad kit, this recipe simplifies the process while still delivering delicious, homemade flavors. Perfect for busy weeknights, potlucks, or as a fresh summer meal, this dish combines tender chicken, al dente pasta, and crispy chickpea croutons.
Ingredients
For the Salad:
1 Caesar salad kit (remove the croutons)
2 cups cooked chicken breast, shredded or diced
3 cups cooked pasta (fusilli, penne, or bow-tie)
1/4 cup red onion, thinly sliced (optional)
For the Chickpea Croutons:
1 can (15 oz) chickpeas, drained and rinsed
1 tablespoon olive oil
1 teaspoon garlic powder
1 teaspoon smoked paprika
1/2 teaspoon salt
1/2 teaspoon black pepper
Instructions
Making the Chickpea Croutons:
Preheat your oven to 400°F (200°C).
Spread the drained and rinsed chickpeas on a clean kitchen towel and pat them dry.
In a mixing bowl, toss the chickpeas with olive oil, garlic powder, smoked paprika, salt, and black pepper until evenly coated.
Spread the chickpeas on a baking sheet lined with parchment paper.
Roast in the preheated oven for 25-30 minutes, shaking the pan halfway through, until the chickpeas are crispy and golden brown.
Remove from the oven and let them cool while you prepare the rest of the salad.
Assembling the Salad:
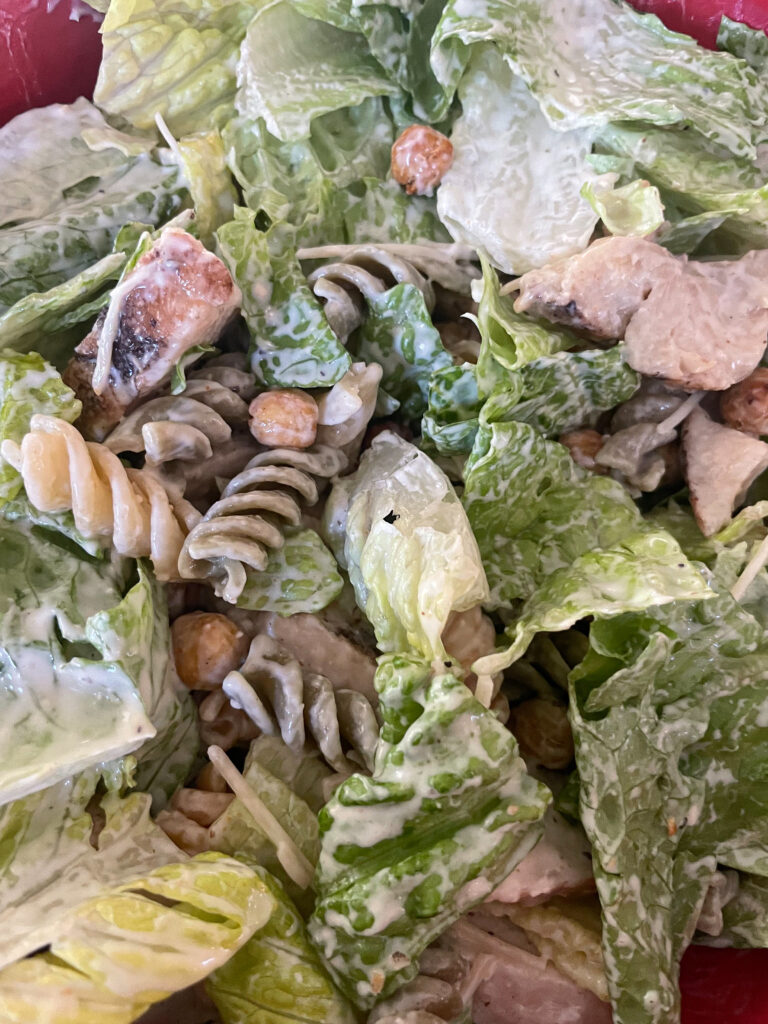
Cook the pasta according to the package instructions. Drain and let it cool.
In a large salad bowl, combine the contents of the Caesar salad kit (lettuce, parmesan cheese and dressing), cooked pasta, and shredded chicken.
If using, add cherry tomatoes and red onion for extra color and flavor.
Toss everything together until evenly coated with the Caesar dressing.
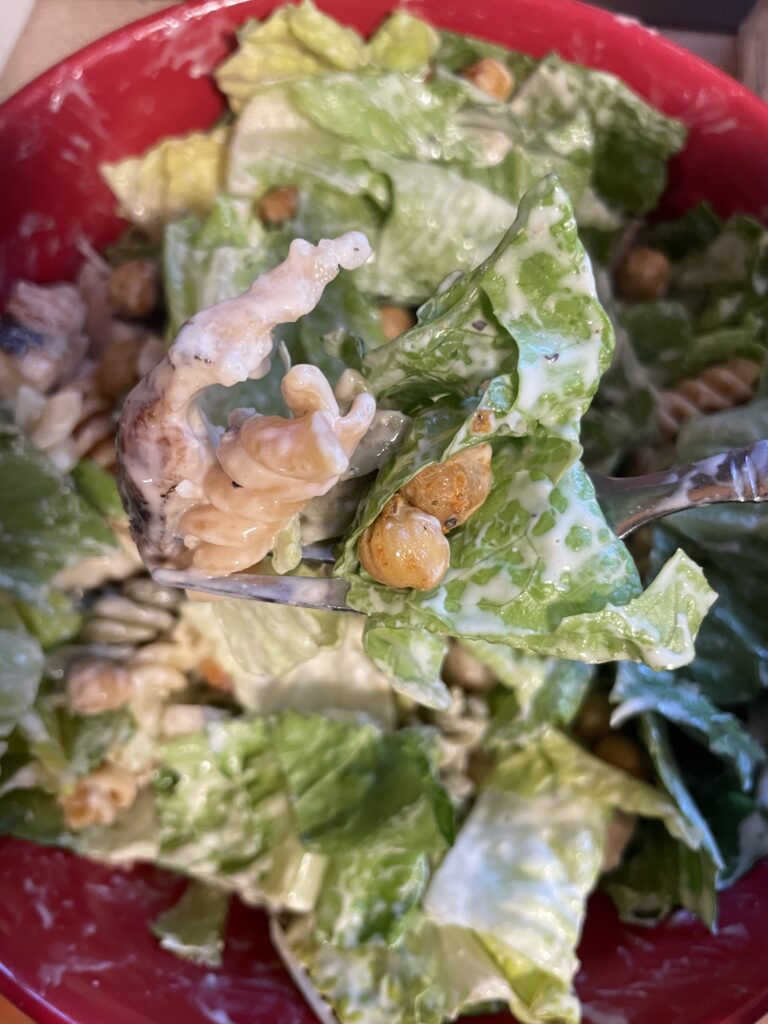
Serving:
Serve the salad in individual bowls or on a large platter.
Top each serving with a generous handful of crispy chickpea croutons and parmesan cheese.
Tips and Variations:
Add Extra Veggies: Feel free to add other vegetables like cucumbers, bell peppers, or avocado for extra color and nutrition.
Breaded Chicken: For extra flavor, use grilled chicken breast instead of grilled or baked.
Vegan Option: Substitute the chicken with grilled tofu or tempeh and use a vegan Caesar salad kit.
This Chicken Caesar Pasta Salad with Chickpea Croutons is a delightful and effortless twist on a classic favorite. It’s perfect for those who want a quick yet flavorful meal this summer.
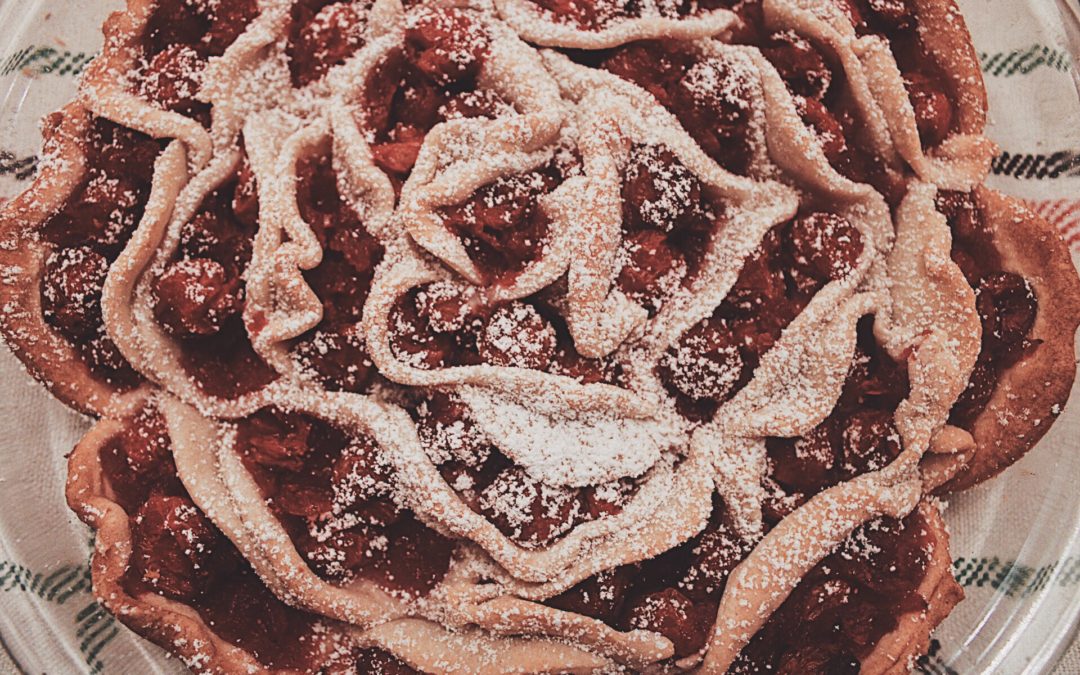
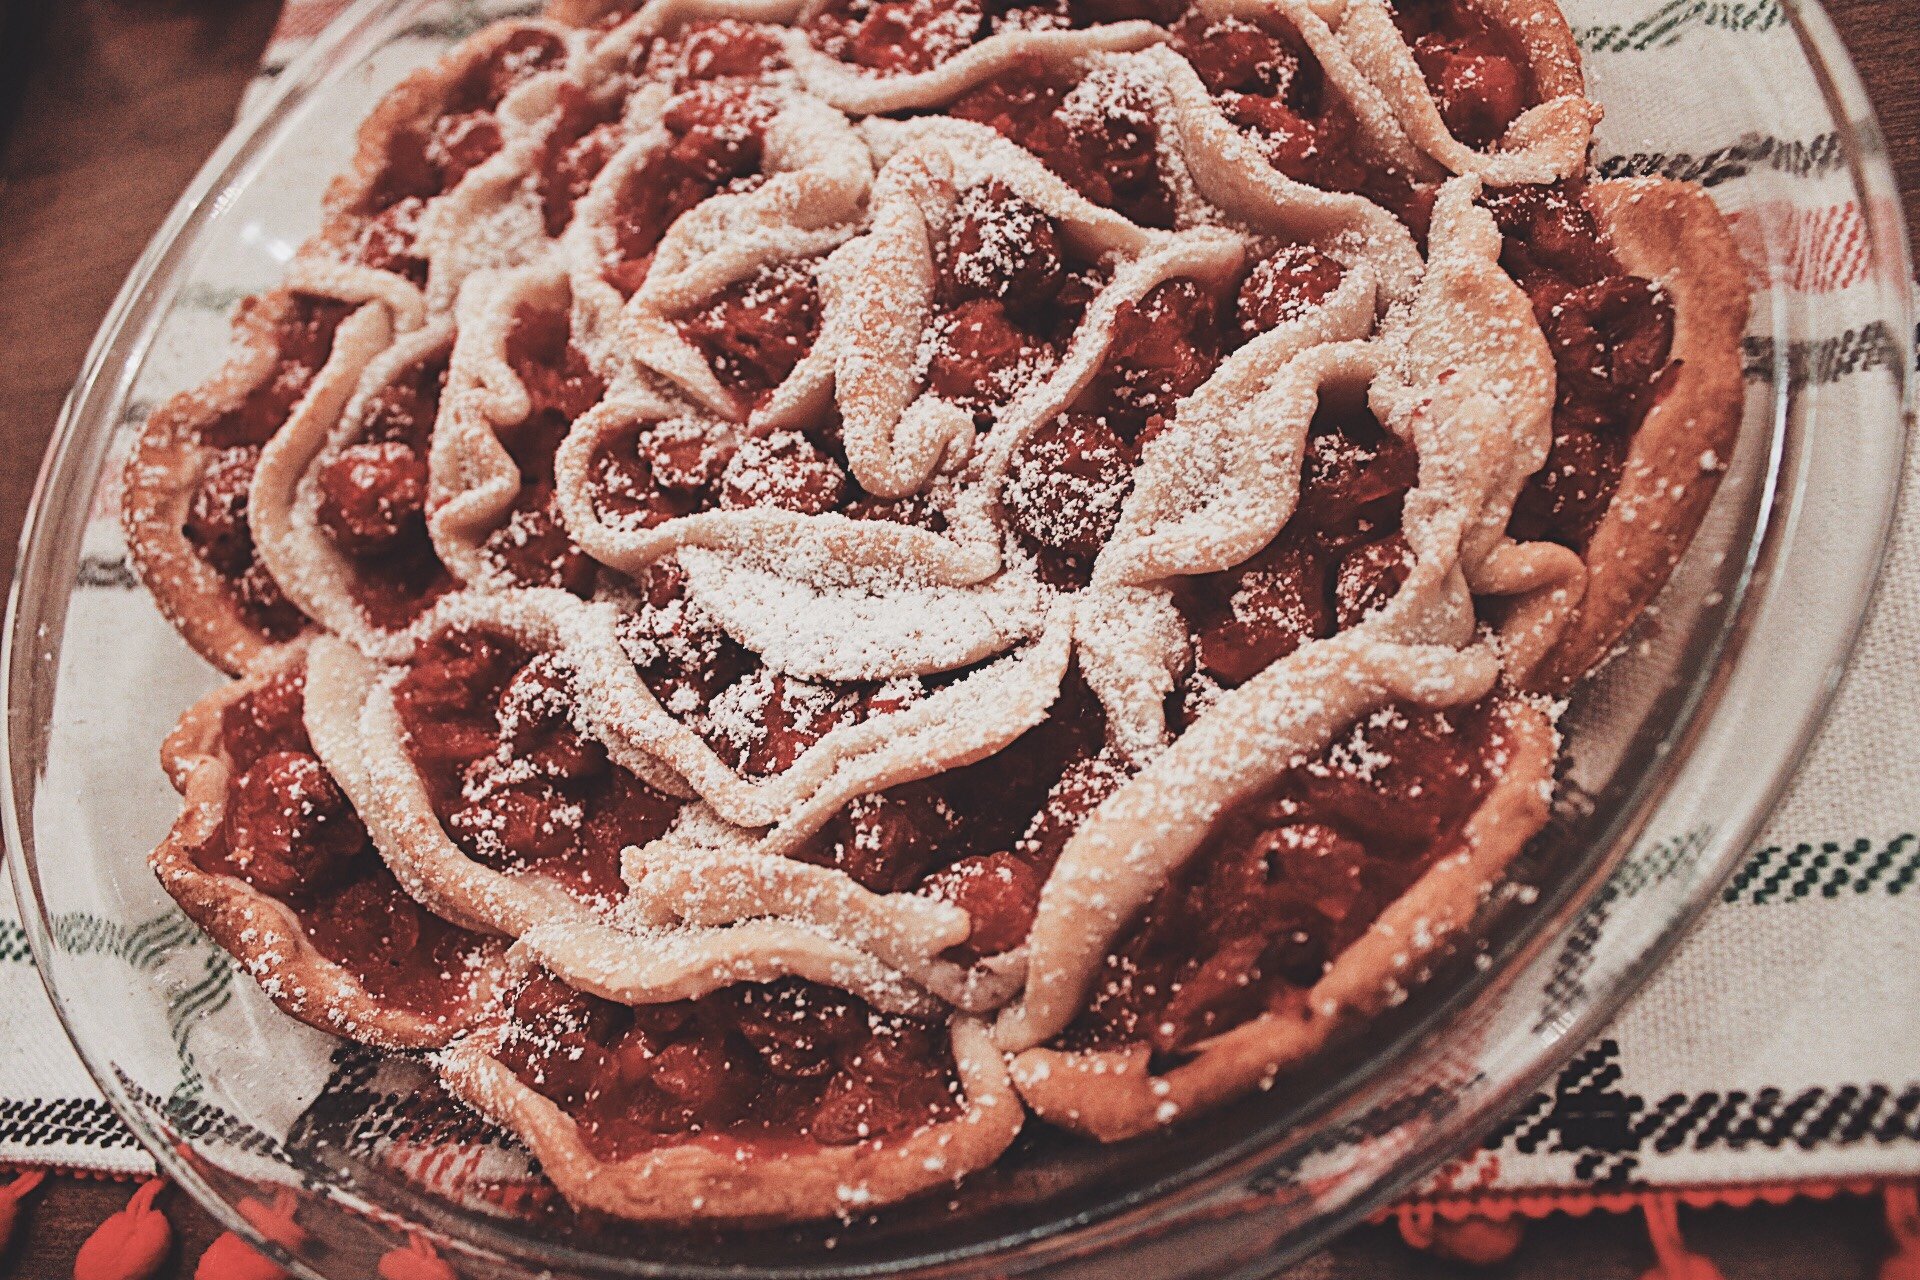
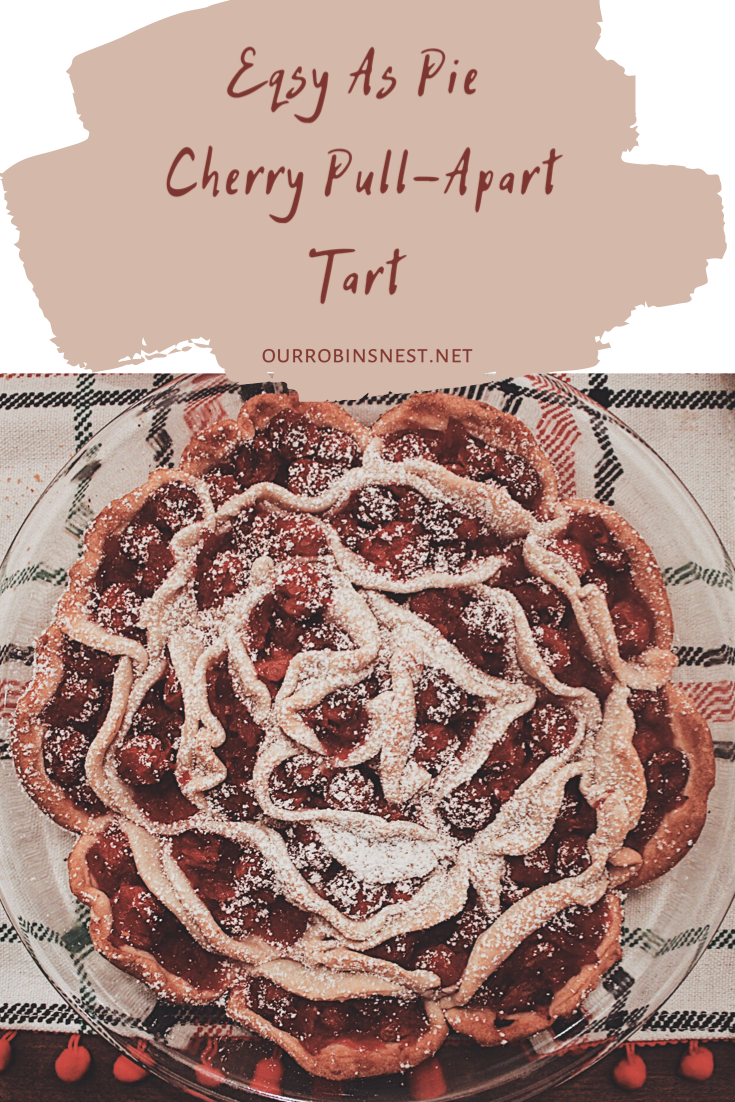
Bake tart cherry filling in pieces of simple pie dough and you’ve got yourself a delicious holiday dessert that any one can make!
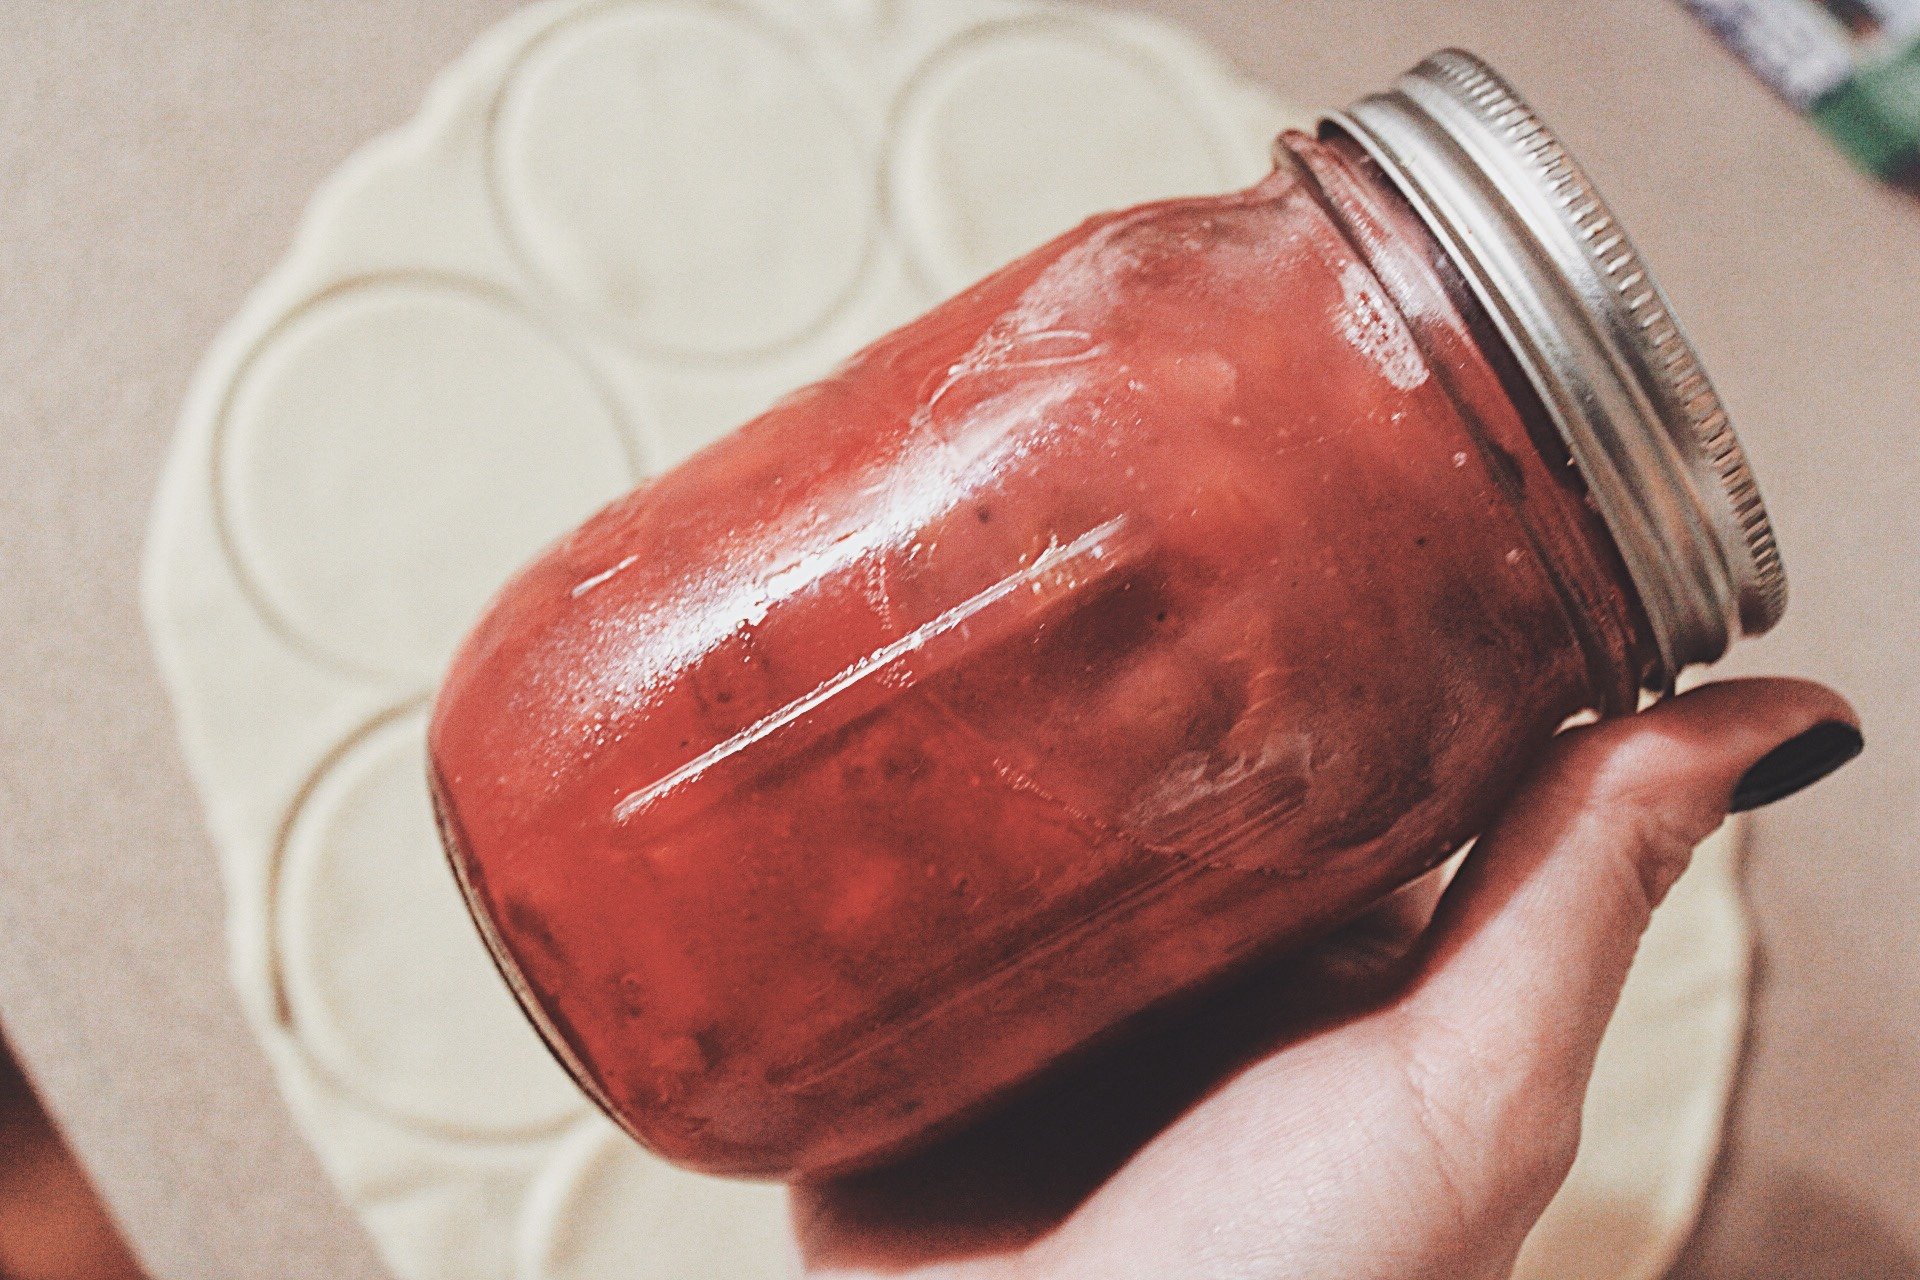
The holidays are quickly approaching and I am giving it a little twist with this new and easy dessert. Remember my homemade cherry pie filling that I made over the summer? I am so thankful I did this because I whipped up this crowd pleasing Cherry Pull-Apart Tart.
I am sure there will be many little fingers running around this holiday season whether you are at a party or home on Christmas morning. This tart gives the perfect portion with one bite pieces with a huge tart and juicy flavor.
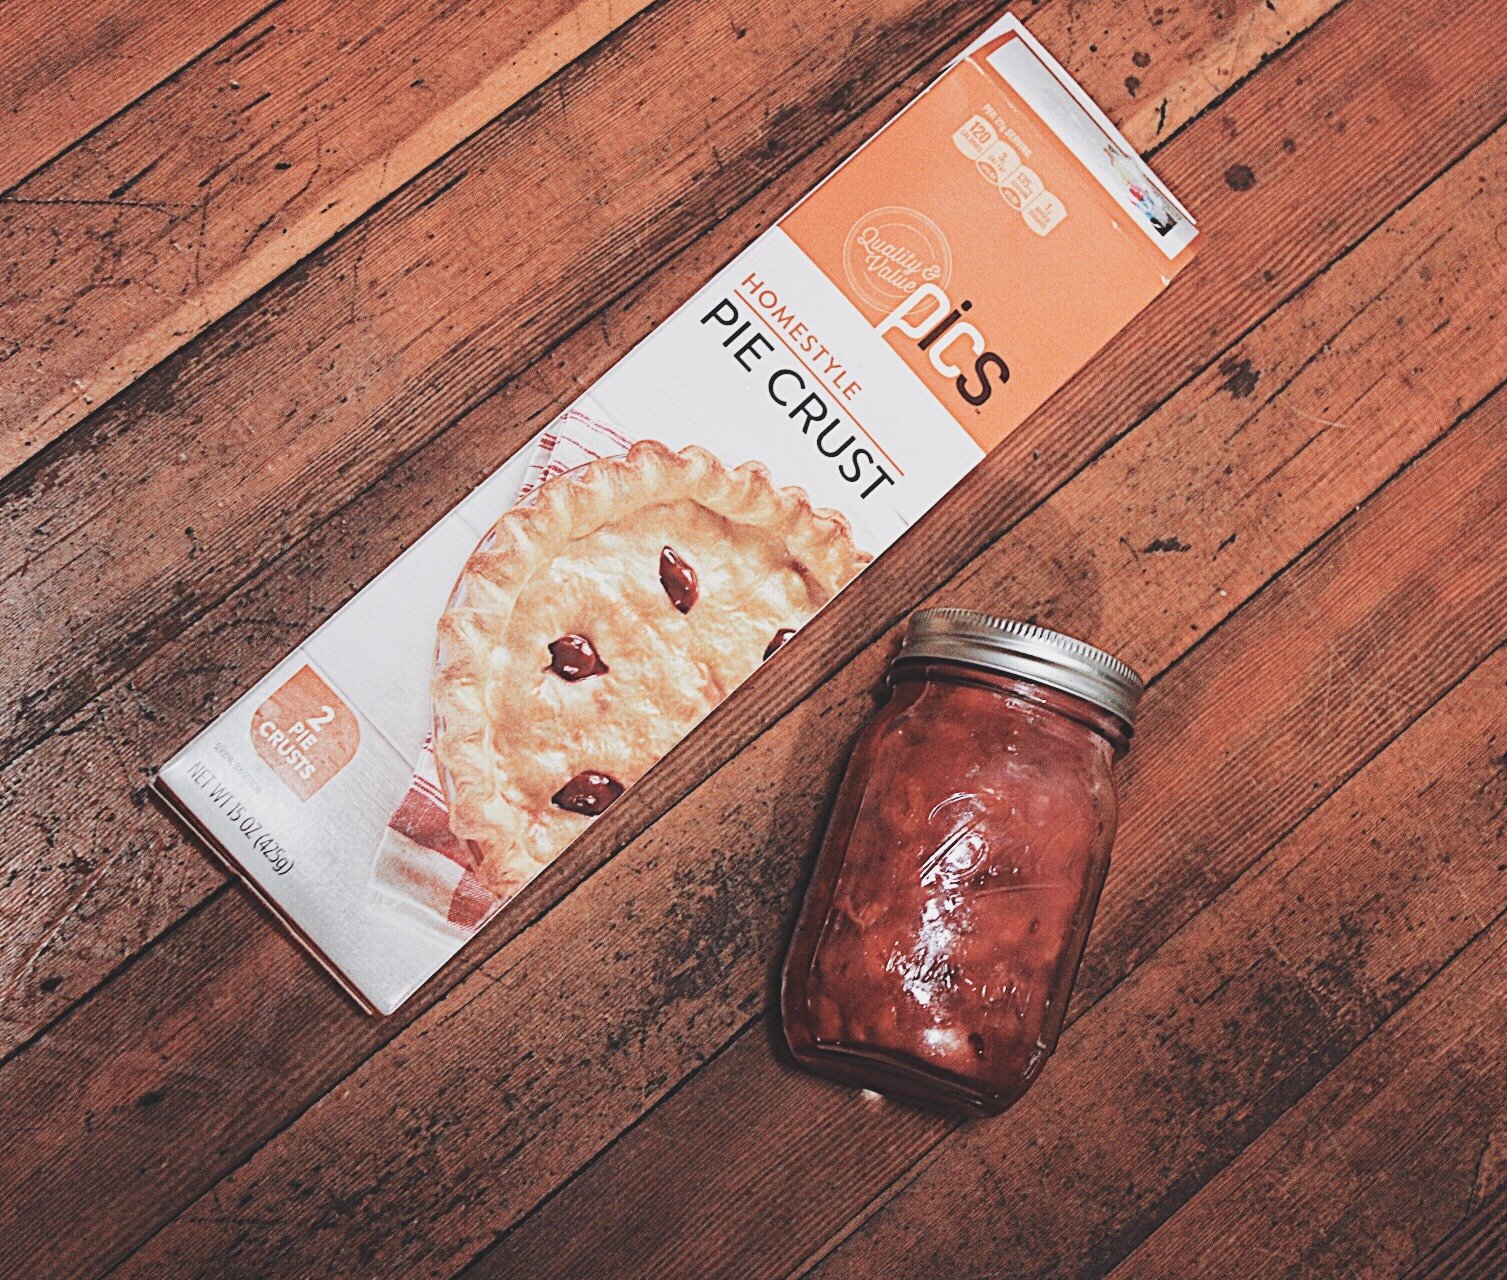
This recipe is super easy because I am using already made pie crust and if you don’t have fresh cherries, feel free to use store bought! The holidays are meant to spend time with friends and family not in the kitchen.
Ingredients:
-1 package of home style pie crust (there are two in a package)
– 21 oz. can of cherry pie filling or you can use my homemade cherry pie filling here
-1 egg
Directions:
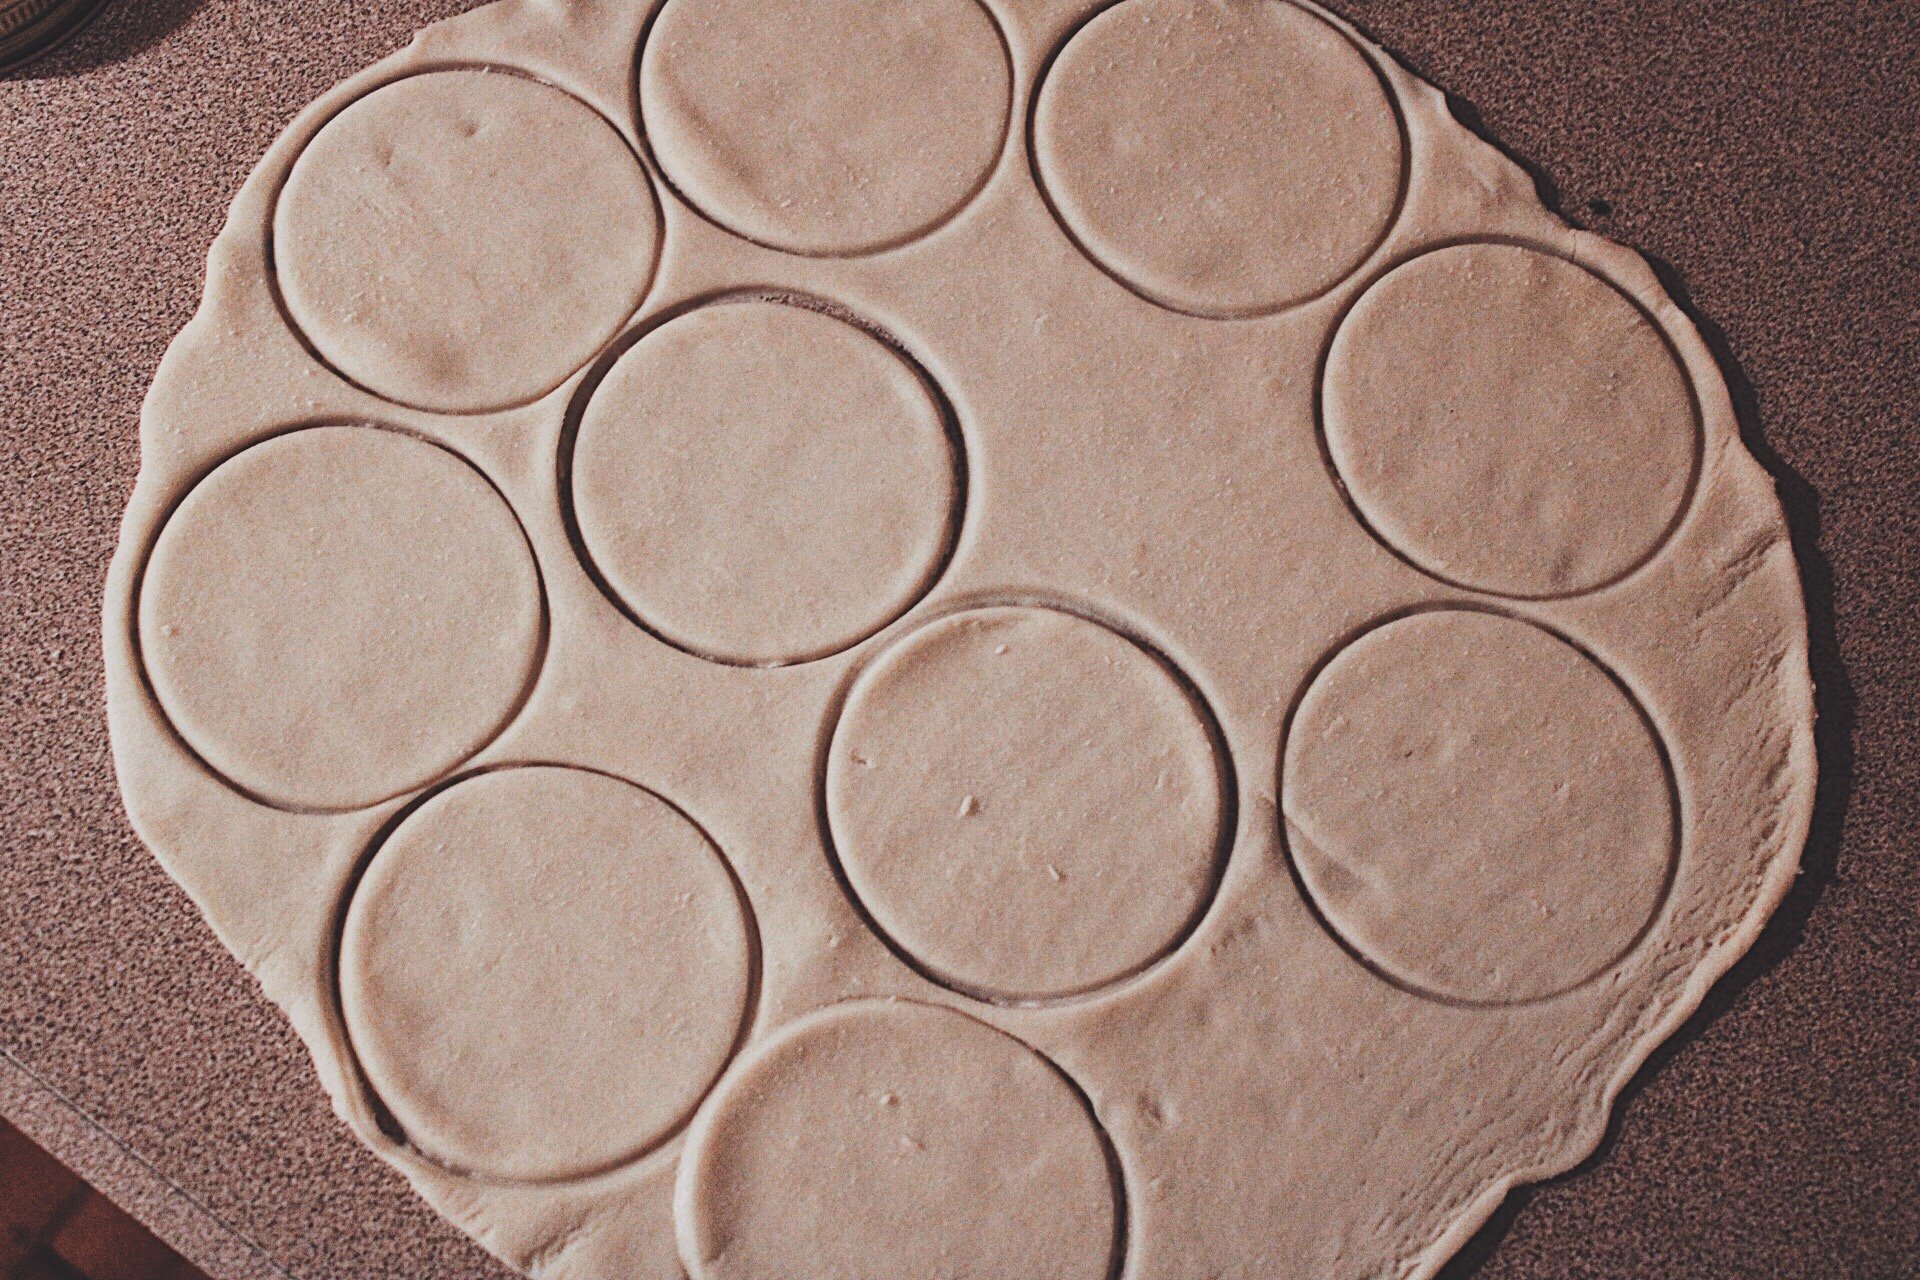
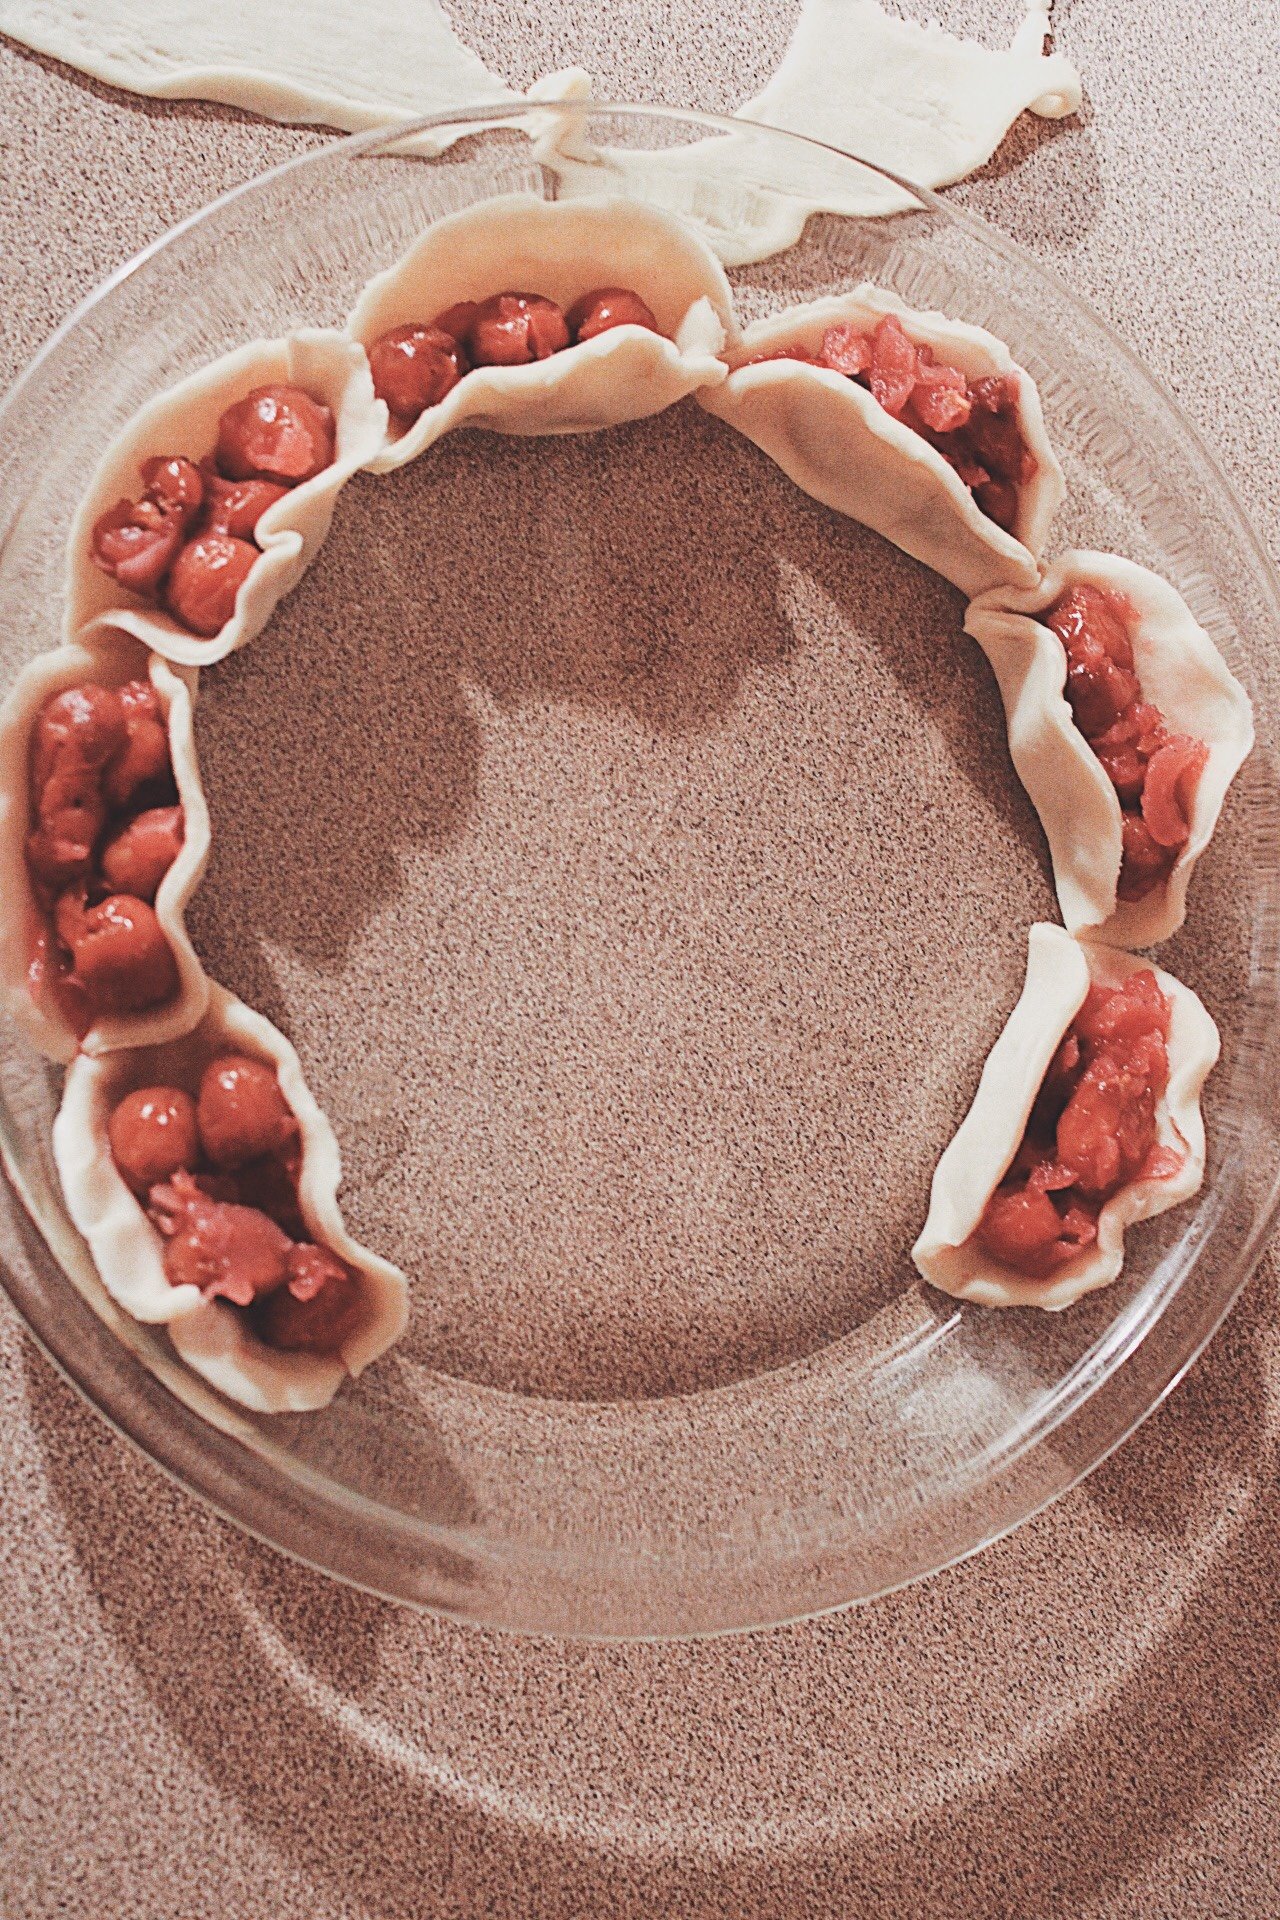
Roll out both of your pie crusts and cut out as many circles as you can with a mason jar lid.
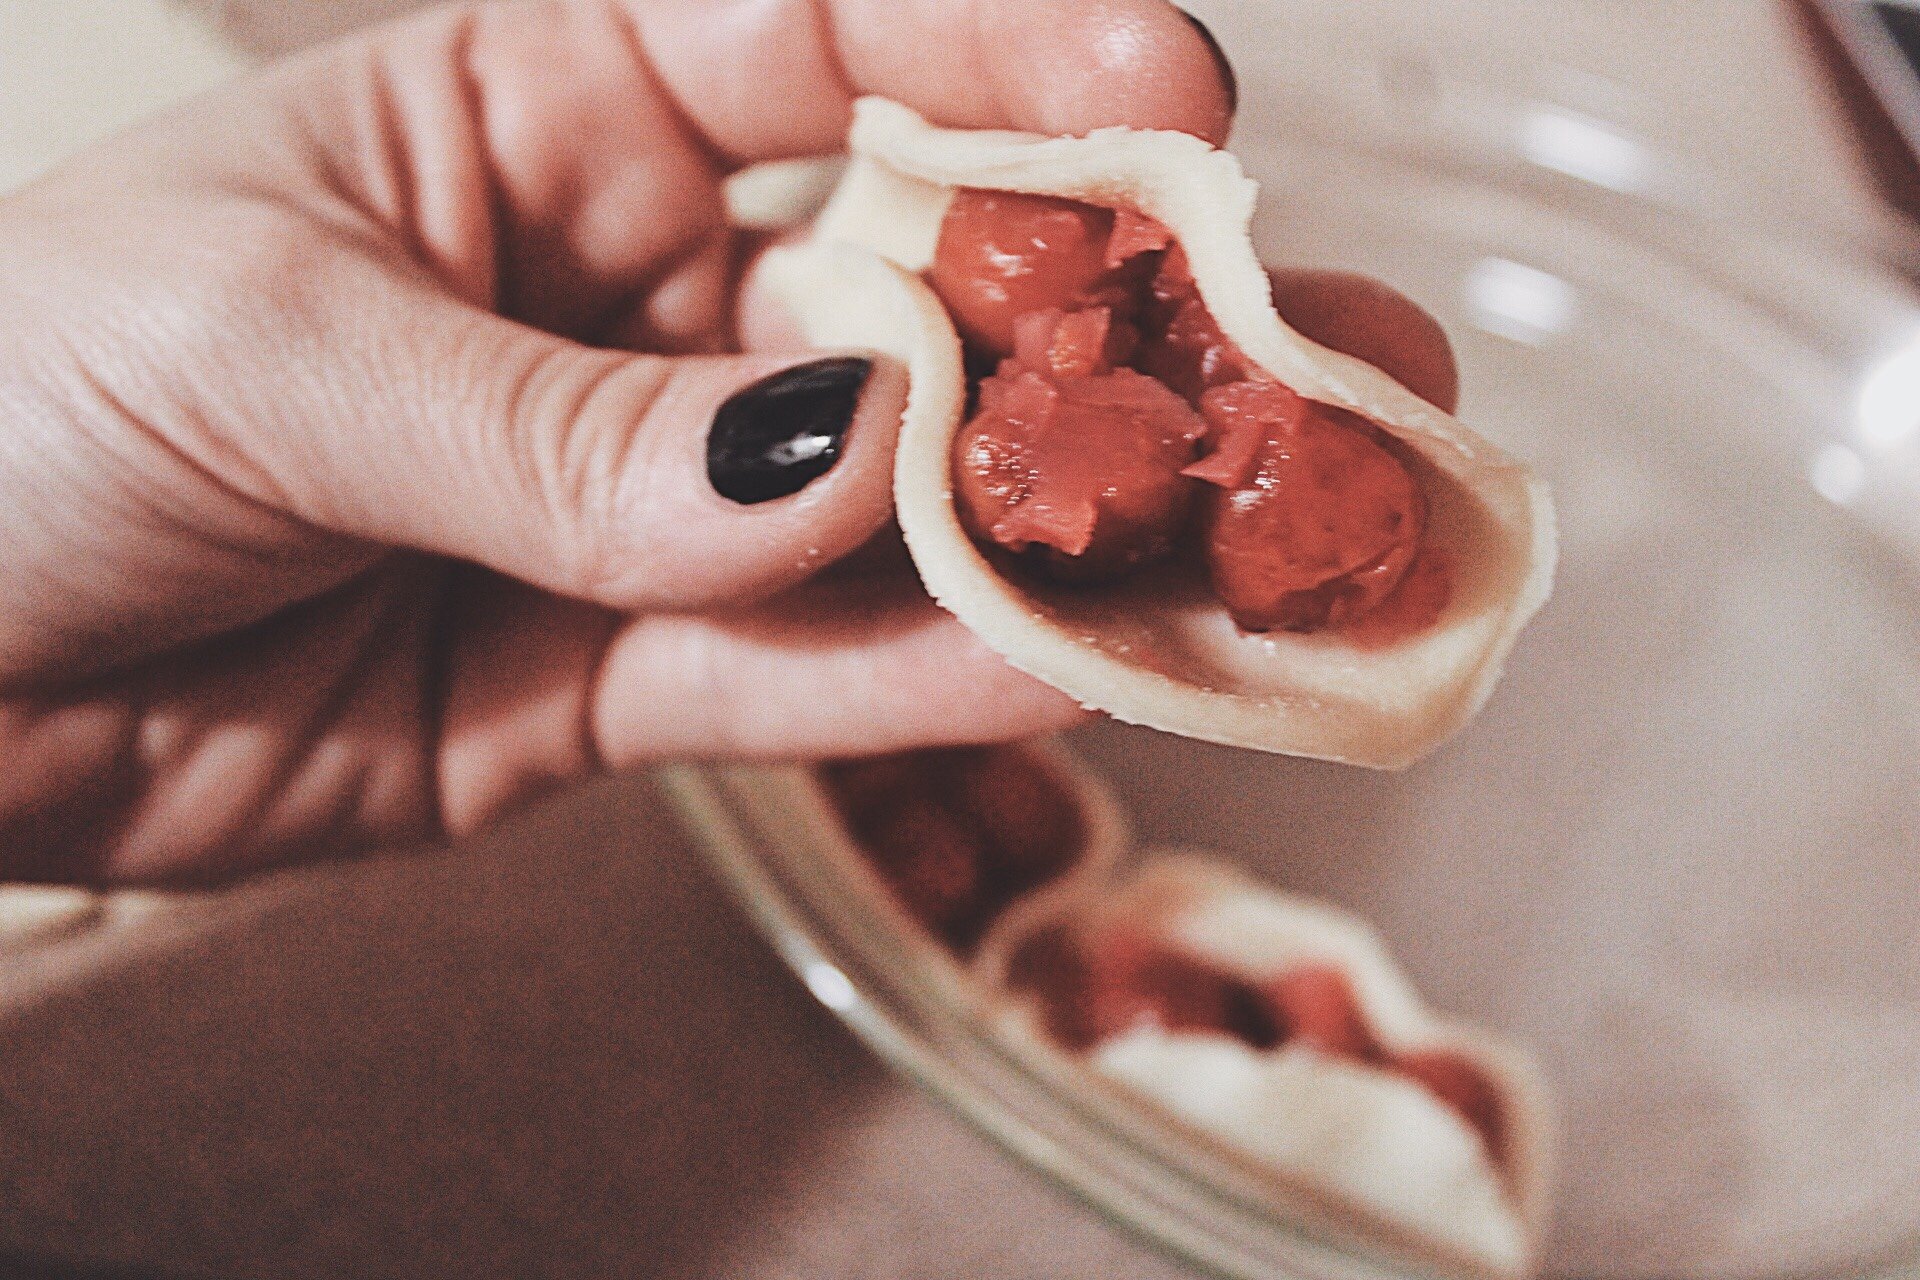
Take one circle and fold it like a taco shell, take a small spoonful of cherry filling and place it in the shell. Pinch both ends and place in a round baking dish.
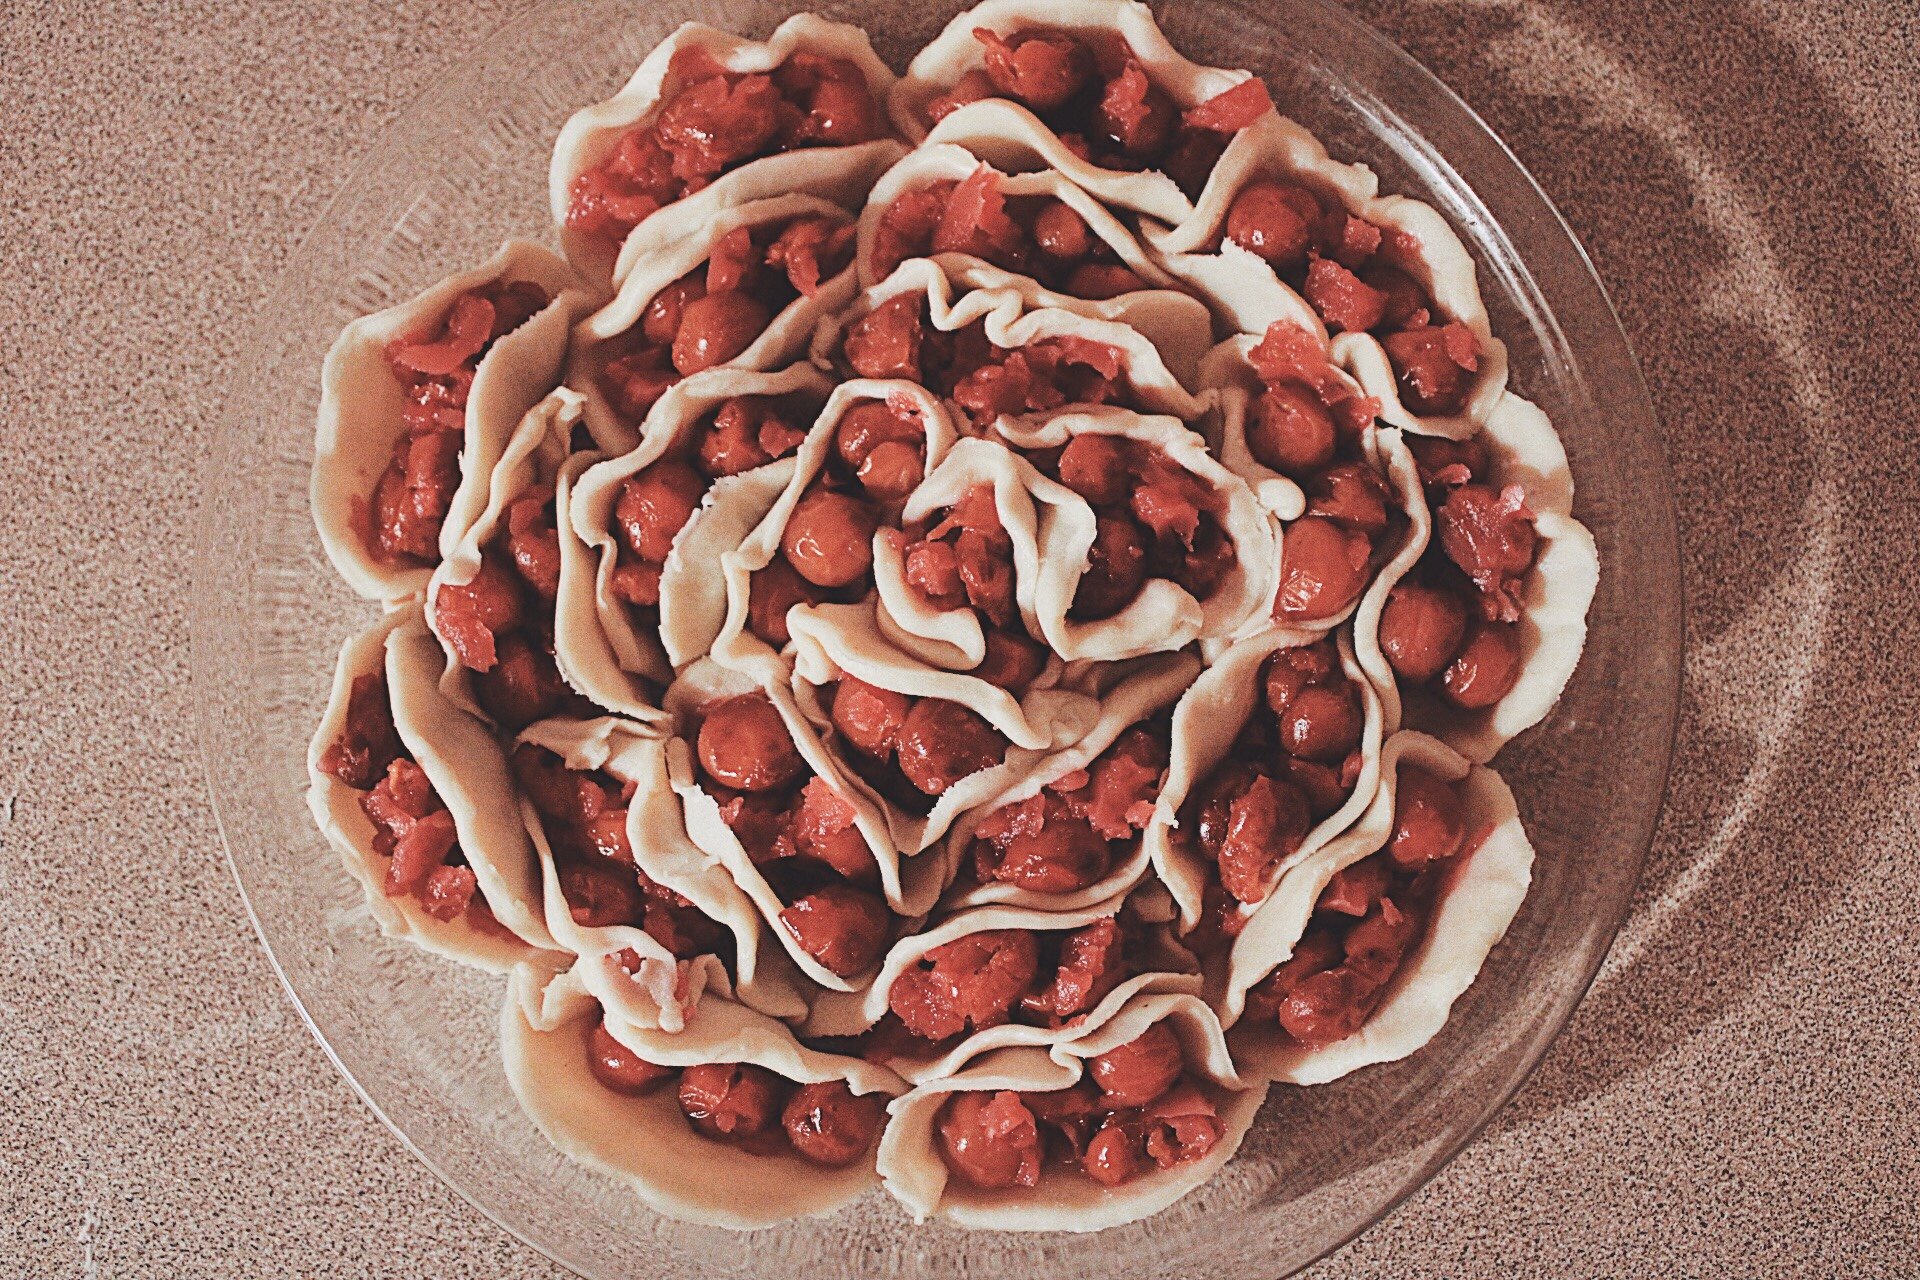
Continue doing this in a spiral until your baking dish is filled.
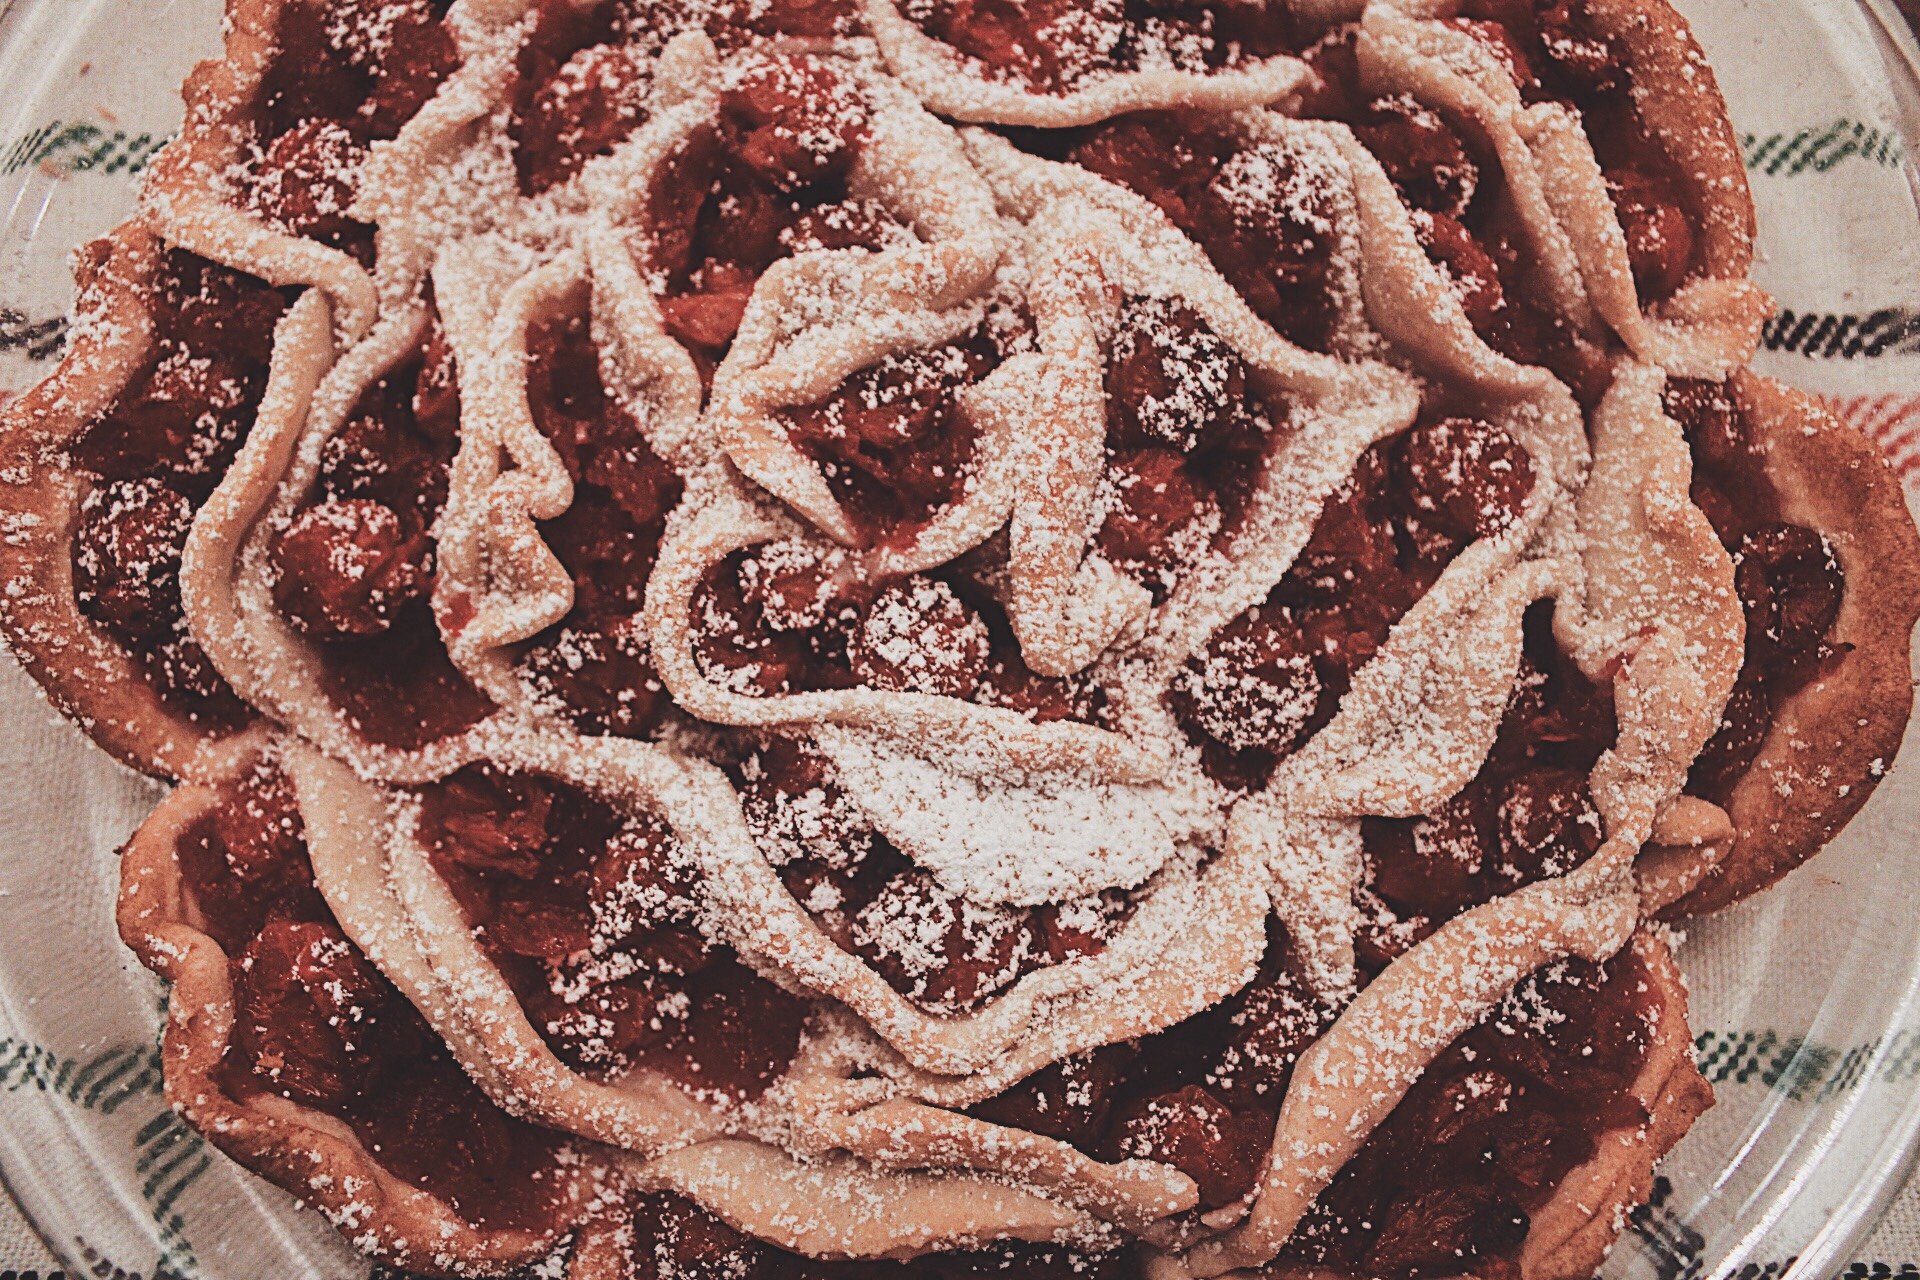
Mix your egg with a splash of water to make an egg wash. Brush the wash all over the edges of each shell.
In a preheated oven of 425 degree F, bake tart for about 25-30 minutes.
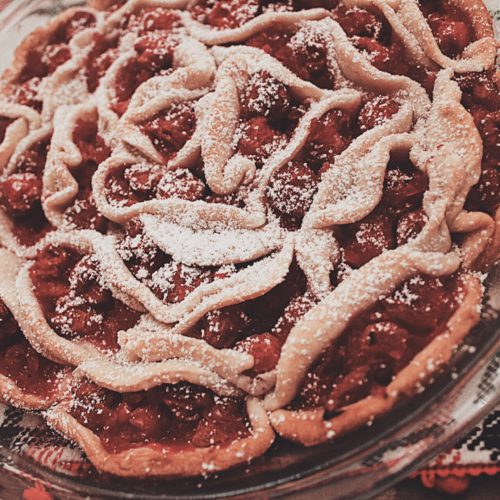
Once cooled, feel free to sprinkle with powdered sugar. Enjoy!
1packagehome style pie crust(there are 2 in a package)
21ozcherry pie fillingfresh or store bought
1 egg
Instructions
Preheat oven to 425 degrees F.
Roll out both of your pie crusts and cut out as many circles as you can using a mason jar lid or something similar.
Take one circle at a time and fold it like a taco shell. Take a small spoonful of cherry pie filling and place it in the shell. Pinch both ends of the dough and place it in a round baking dish.
Continue doing this in spiral until your baking dish is filled.
Mix egg with a splash of water and brush all of the edges of each shell.
Bake for about 25-30 minutes or until browned on top.
Once cooled, feel free to sprinkle with powdered sugar.
Welcome!
If motherhood has you stressed and you feel like you’ve lost your creativity, I am here to help! Here you will find easy recipes, simple DIY’s, affordable styles, and what to read next. I believe we all have a creative side, some of us just need a little help to find it. I will help inspire you to have creative expression without standards.