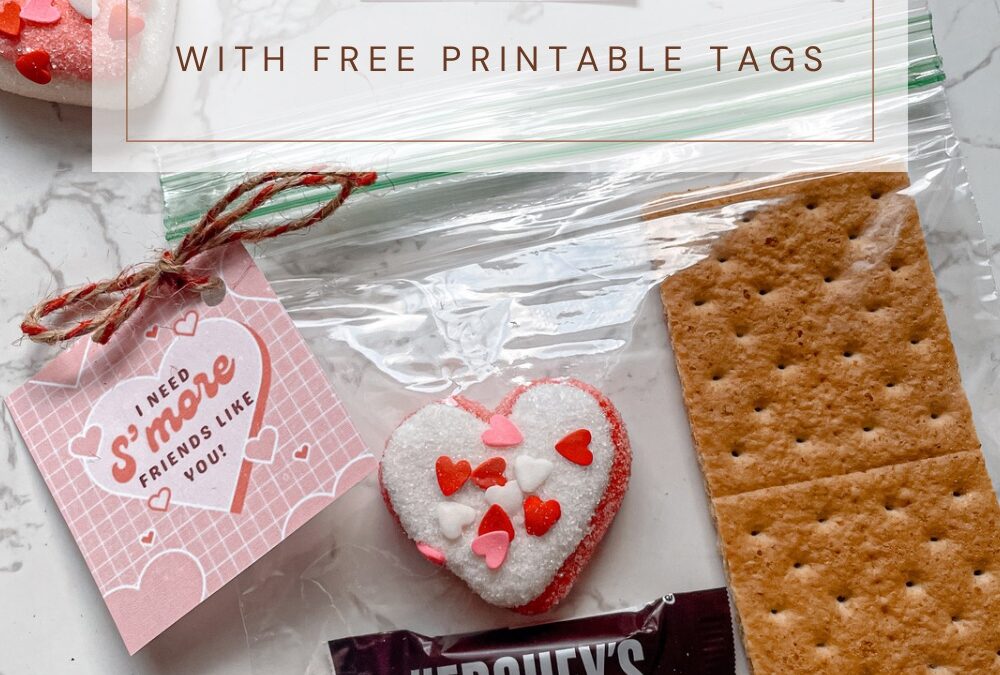
Sweet Love Served: DIY S’more Valentines with Free Printable Tags
Valentine’s Day is all about expressing love, and what better way to do that than with a sweet treat? This year, add a touch of warmth to your celebrations with DIY S’more Valentines. Simple, delightful, and made with love, these treats are not just delicious but also come with free printable tags to add an extra special touch. Let’s dive into the easy steps to create these heartwarming goodies.
Ingredients:
Graham crackers, broken into squares
Heart-shaped marshmallows
Chocolate squares (dark, milk, or your favorite)
Clear plastic treat bags
Ribbon or twine
Free printable tags (download them below)
Instructions:
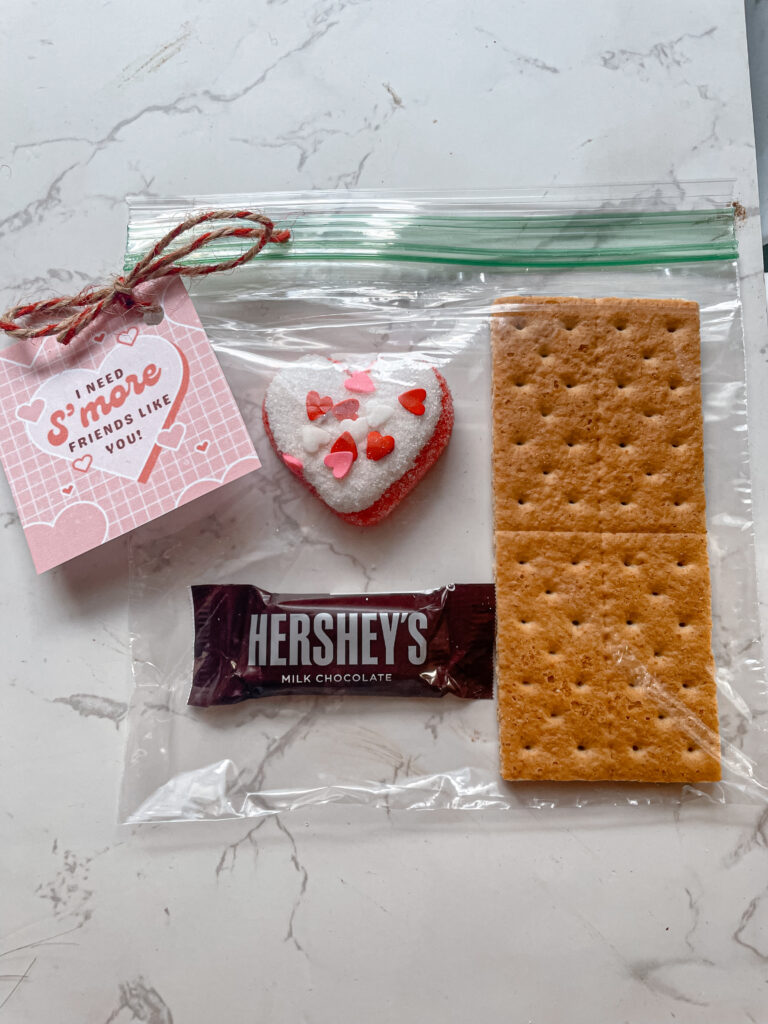
Gather Your Ingredients: Collect graham crackers, heart-shaped marshmallows, and chocolate squares. Ensure you have enough to create multiple S’more Valentines.
Assemble the S’mores: Place one graham cracker square at the bottom, add a piece of chocolate, and top it with a heart-shaped marshmallow. Complete the S’more by adding another graham cracker square on top, creating a sweet and stackable delight.
Prepare for Gifting: Carefully place each S’more into clear plastic treat bags, creating a visually appealing presentation. This step not only keeps the treats fresh but also showcases the layers of goodness within.
Add a Personal Touch: Cut and attach a festive ribbon or twine to secure the bag. This not only adds a decorative element but also allows you to tie a heartfelt bow around your delightful creation.
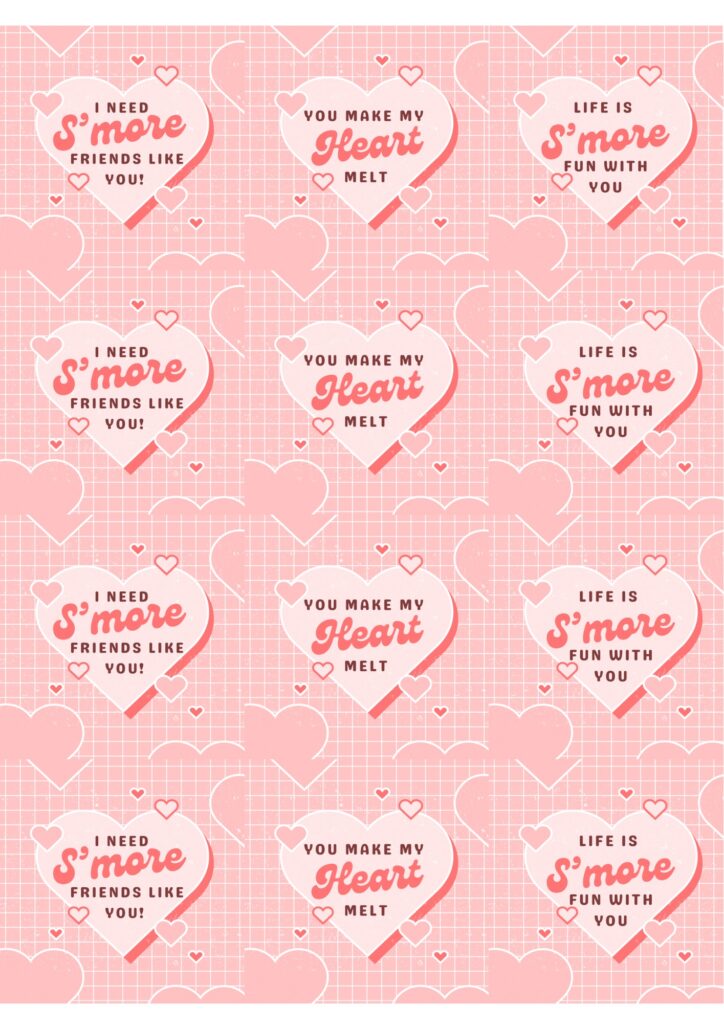
Download and Print Free Tags: Elevate your S’more Valentines with our free printable tags. Download them [here]. Print the tags on cardstock for durability.
Attach the Tags: Once printed, cut out the tags and attach them to the ribbon or twine. Each tag is designed to add a touch of charm and a sweet message to your S’more Valentines.
Share the Love: Now that your S’more Valentines are ready, share them with friends, family, or that special someone. These treats are not just delicious; they carry the warmth of your affection.
This Valentine’s Day, spread love one S’more at a time. These DIY S’more Valentines, adorned with heart-shaped marshmallows and rich chocolate, are a delightful way to show someone you care. With the added touch of free printable tags, your sweet creations will not only taste divine but also carry a personalized message straight from the heart. Share the love and enjoy a truly heartwarming Valentine’s Day!
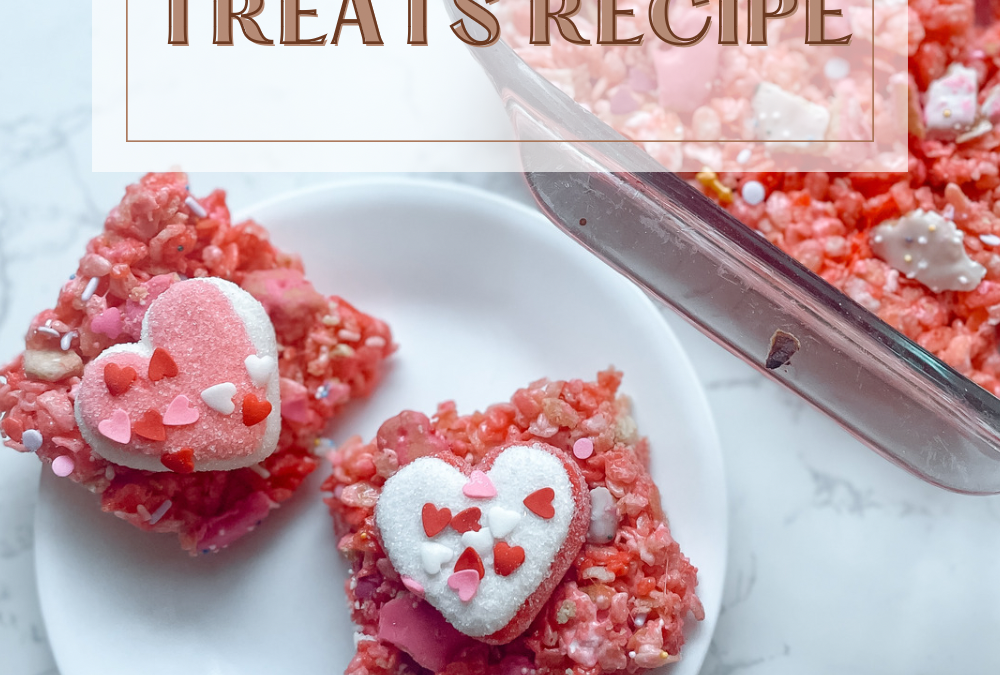
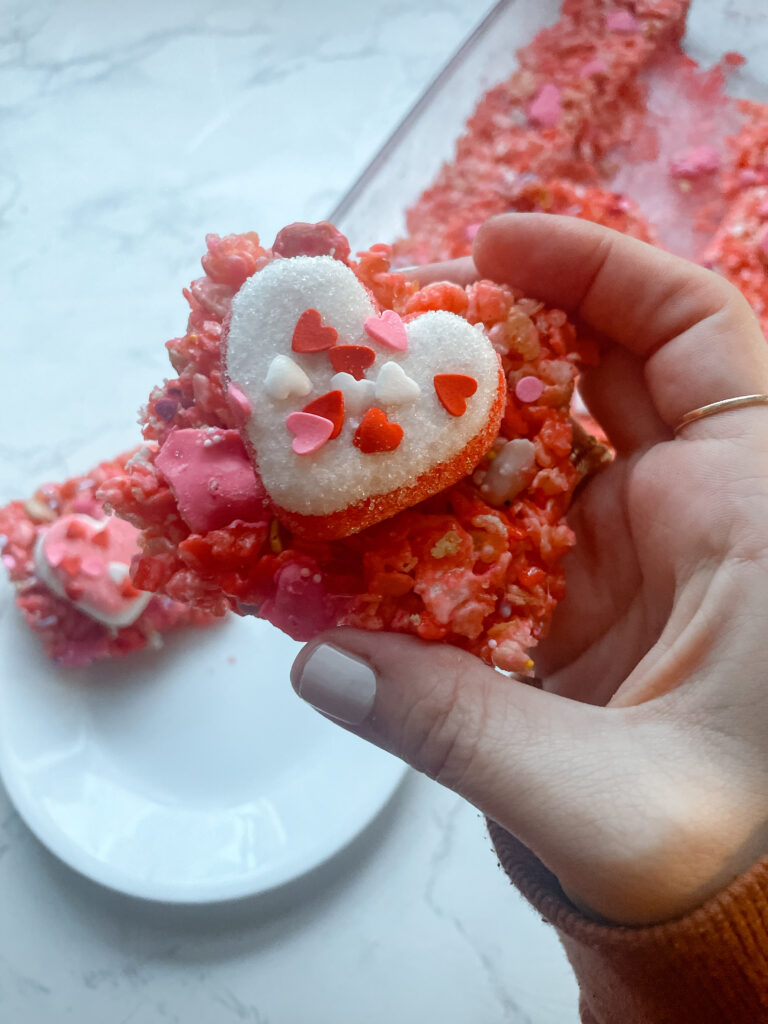
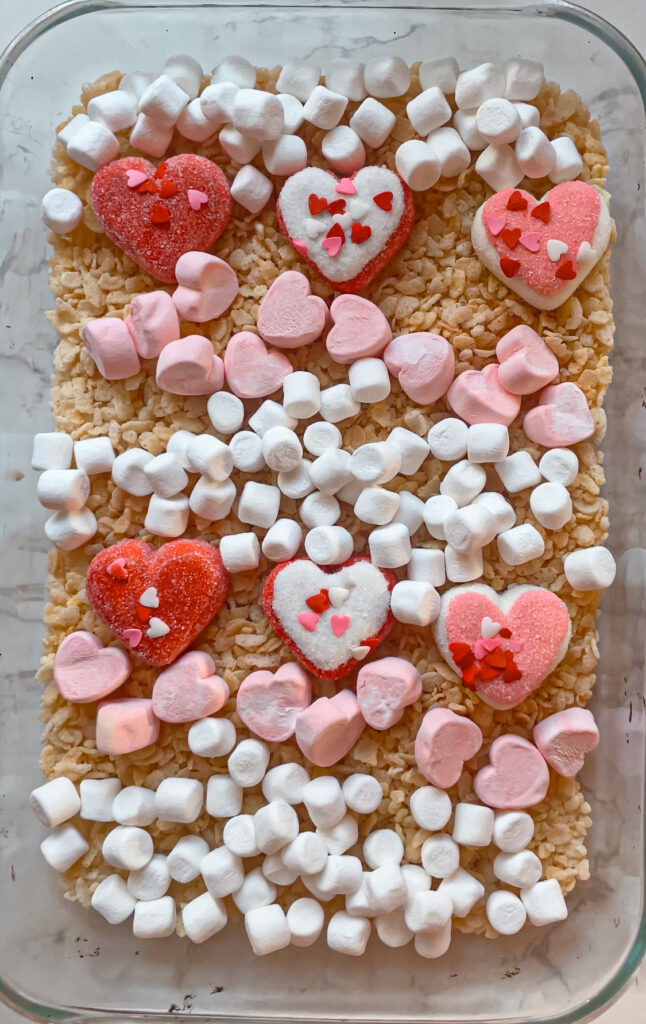
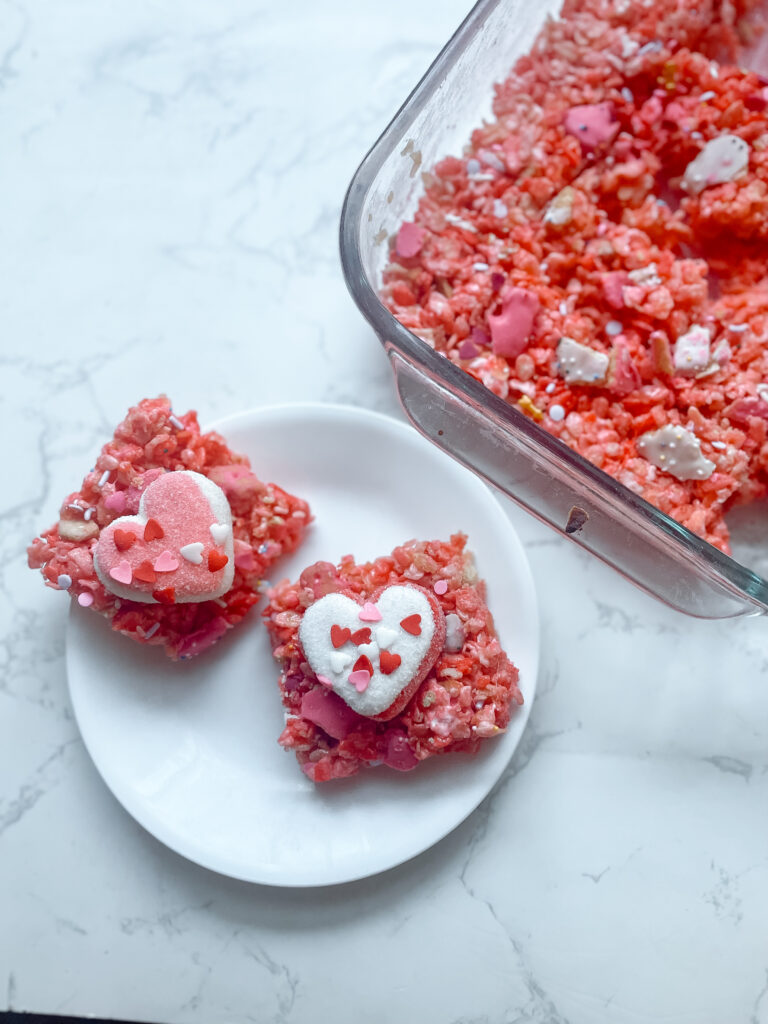
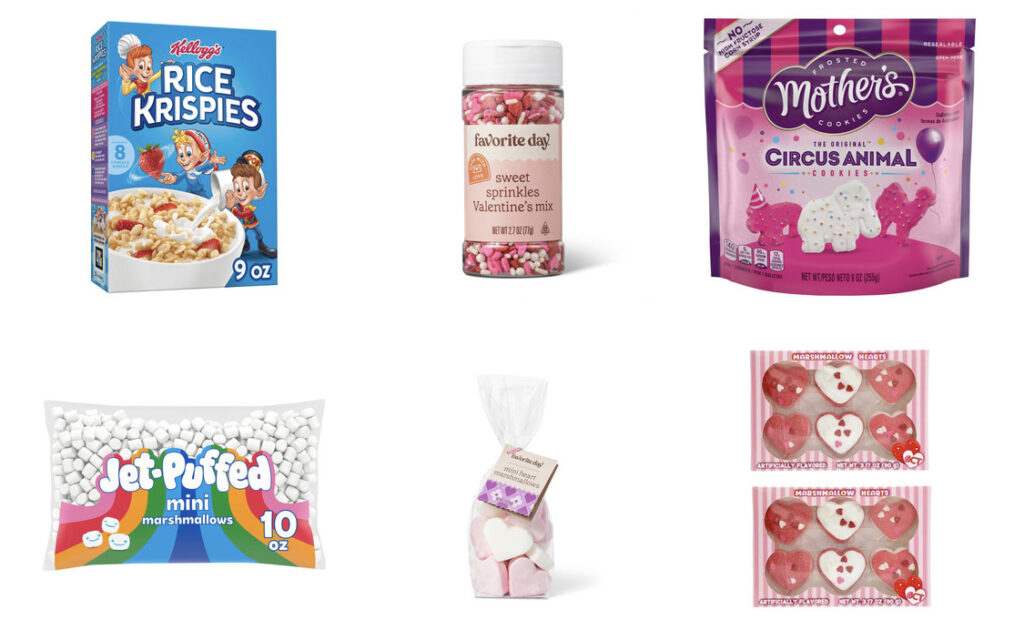
Sweet Love in Every Bite: Valentine’s Day Rice Krispie Treats Recipe
Valentine’s Day is just around the corner, and what better way to celebrate love than with a delightful homemade treat? These Valentine’s Day Rice Krispie Treats are not only delicious but also heartwarming in every sense. The combination of crispy Rice Krispies, heart-shaped marshmallows, and a touch of butter creates a perfect symphony of flavors. Let’s dive into the simple yet charming recipe that will surely steal your heart.
Ingredients:
6 cups of Rice Krispies cereal
Heart-shaped marshmallows
1 stick of butter, thinly sliced
Frosted animal crackers
Festive sprinkles
Instructions:
Preheat your oven to 350°F (175°C) and grease a baking dish.
In a large mixing bowl, pour 6 cups of Rice Krispies cereal, ensuring a generous crunch in every bite.
Arrange heart-shaped marshmallows evenly over the cereal, symbolizing the love that goes into these treats.
Take one stick of butter and slice it thinly. Distribute the butter slices across the Rice Krispies and marshmallows, allowing it to melt and infuse a rich, buttery flavor.
Place the baking dish in the preheated oven and bake for about 10-15 minutes or until the marshmallows are gooey and golden.
Once out of the oven, mix until everything is evenly mixed.
Sprinkle the top with frosted animal crackers for a playful crunch and festive sprinkles to add a pop of color and joy.
Flatten with a spatula so everything is even.
Result:
The result is a batch of Valentine’s Day Rice Krispie Treats that are not only visually appealing but also bursting with flavor. The crispy texture of the cereal, combined with the gooey marshmallows and the buttery richness, creates a heavenly experience for your taste buds.
Enjoy!
This Valentine’s Day, spread love through the joy of homemade treats. The simplicity of this Rice Krispie Treats recipe, enhanced with heart-shaped marshmallows and a touch of butter, makes it a delightful choice for celebrating the season of love. So, gather your ingredients, preheat that oven, and create a sweet symphony that will surely leave a lasting impression on your loved ones. Happy Valentine’s Day!
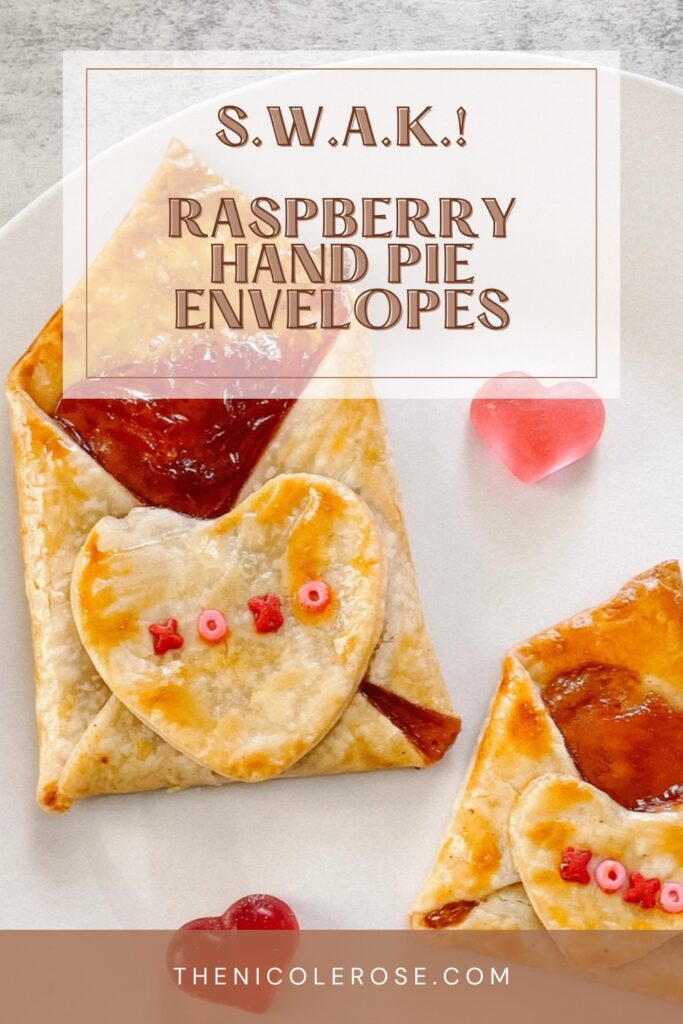
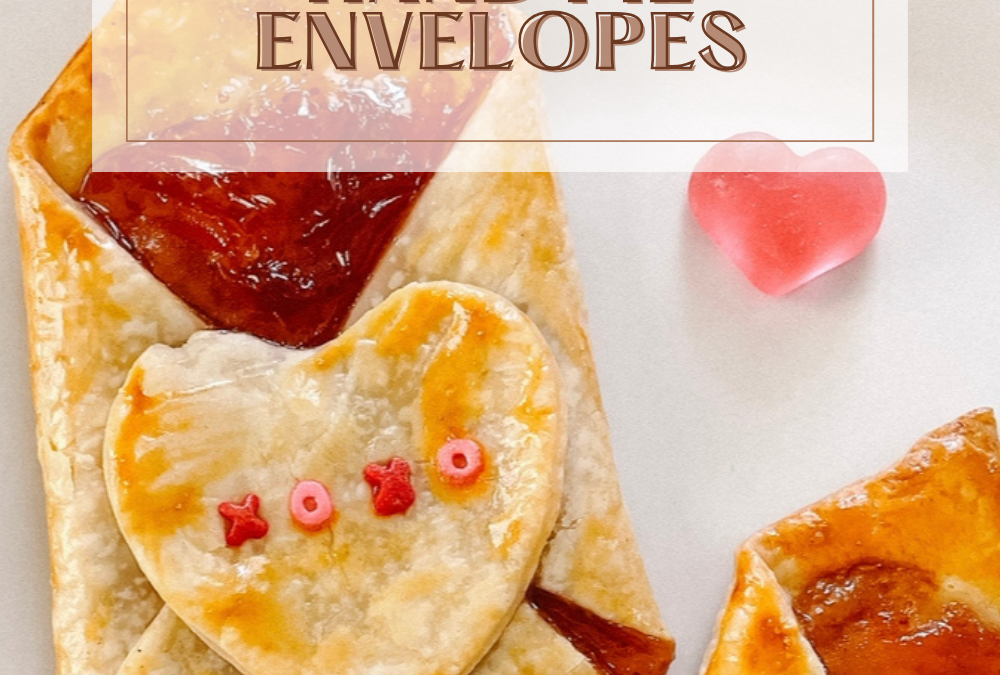
S.W.A.K- Raspberry Hand Pie Envelopes with a Sweet Heart Surprise
Elevate your dessert game with these delightful Raspberry Hand Pie Envelopes, a charming treat that combines the rich flavors of raspberry pie with a touch of whimsy. This simple yet impressive recipe is perfect for special occasions, especially Valentines Day! Let’s dive into the steps to create these adorable, heartwarming pastries.
Ingredients:
1 package refrigerated pie crust
Raspberry Jam
Egg wash
One small heart-shaped cookie cutter
Sprinkles
Instructions:
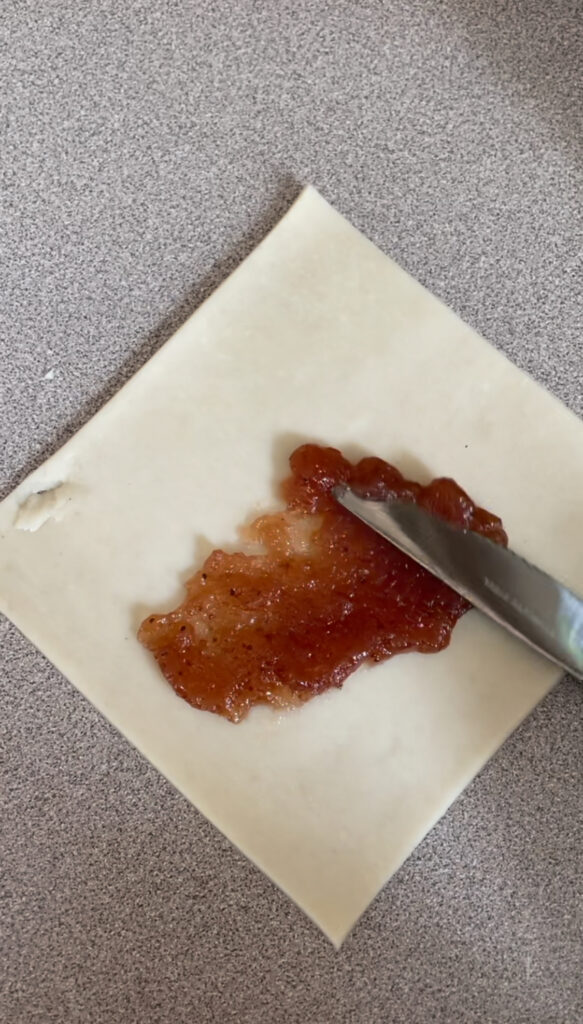
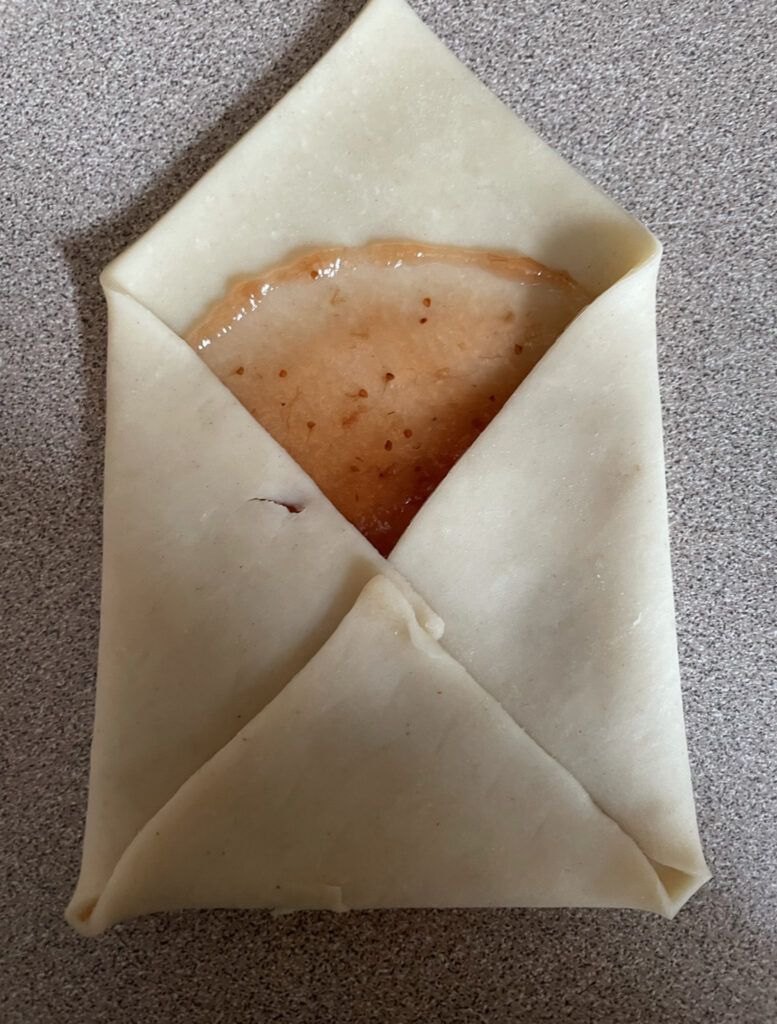
Begin by unrolling the pastry on a floured surface, providing a canvas for your delectable creation.
Use a small square napkin to trace the pattern onto parchment paper and create your guide.
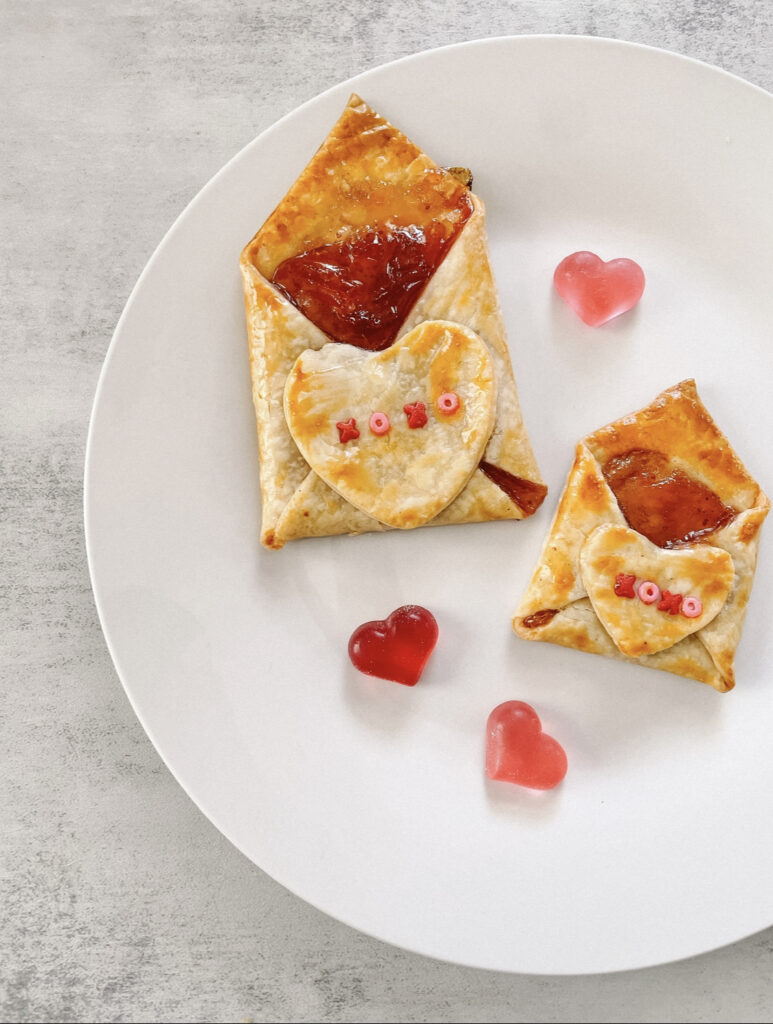
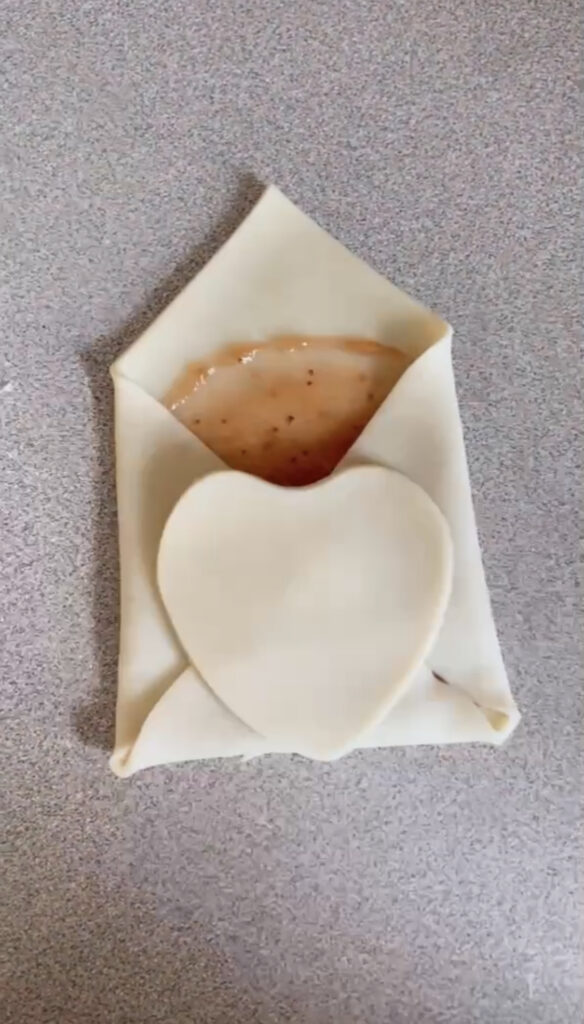
Cut the pastry into four envelopes and four small heart-shaped cutouts using the traced pattern as your reference.
Carefully fill each pastry envelope with the raspberry jam, making sure to avoid spreading it on the back flap.
Following the folds of the paper envelope pattern, elegantly fold the cutout pastry, leaving the upper flap open for a charming presentation.
Add an extra touch of love by placing a heart-shaped cutout on the folded edges of each pastry envelope.
Arrange the prepared pastries on a parchment-lined baking sheet, ready to transform in the oven.
Brush the folded pastries with egg wash, imparting a delightful richness, add sprinkles if you prefer.
Bake the pastries at 375 degrees for 15-20 minutes or until they achieve a light, golden brown perfection. Patience is key – avoid removing them from the baking sheet until completely cool to preserve their structure.
Indulge your taste buds in the enchanting combination of flaky pastry and sweet fruity filling with these Raspberry Hand Pie Envelopes. Whether shared with loved ones or savored as a personal treat, these heartwarming pastries are sure to leave a lasting impression. Enjoy the simplicity of this recipe and the joy it brings to every bite!
Snow Day Bliss: Crafting Hot Chocolate Ice Cream with Fresh Snow
Celebrate the whimsy of a snow day by elevating the joy of freshly fallen snow to a whole new level. In this blog post, we’ll explore the delight of creating a luscious hot chocolate snow ice cream that turns your winter wonderland into a delicious frozen treat. Get ready to embrace the chill and indulge in the magic of a snow day with this simple and scrumptious recipe.
Ingredients:
Fresh, clean snow (about 8 cups)
1 cup of hot chocolate (prepared with milk)
1/4 cup of unsweetened cocoa powder
1/4 cup of granulated sugar
Toppings of your choice (chocolate chips, crushed peppermint, etc.)
Instructions:
Gather Fresh Snow:
Collect approximately 8 cups of fresh, clean snow from a pollution-free area.
Make Hot Chocolate:
Prepare 1 cup of hot chocolate using milk. You can use your favorite hot chocolate mix.
Combine with Snow:
In a large mixing bowl, pour the hot chocolate over the snow.
Add Cocoa Powder and Sugar:
Sprinkle 1/4 cup of unsweetened cocoa powder and 1/4 cup of granulated sugar over the snow and hot chocolate.
Mix Well:
Gently fold the ingredients together until you achieve a smooth and creamy consistency.
Taste and Adjust:
Taste the mixture and adjust sweetness or chocolate intensity as needed.
Serve with Toppings:
Scoop the hot chocolate snow ice cream into bowls or cones.
Top it off with your favorite toppings like chocolate chips or marshmallows.
Enjoy Instant Winter Bliss:
Indulge in the delightful contrast of warm chocolate and cold snow, savoring the essence of winter in every bite.
This simplified recipe ensures a quick and delicious hot chocolate snow ice cream for a delightful snowy day treat!
Cheers to Noon Year’s Eve: 4 Kid-Friendly Mocktails for a Festive Toast
Welcome to the ultimate Noon Year’s Eve celebration for your little ones! Whether you’re bidding farewell to the current year or just looking for a reason to enjoy some delightful mocktails, we’ve got you covered. These four kid-friendly concoctions are not only delicious but also add a touch of sparkle to your festivities. Get ready to raise your plastic champagne flutes and toast to a sweet and fizzy Noon Year!
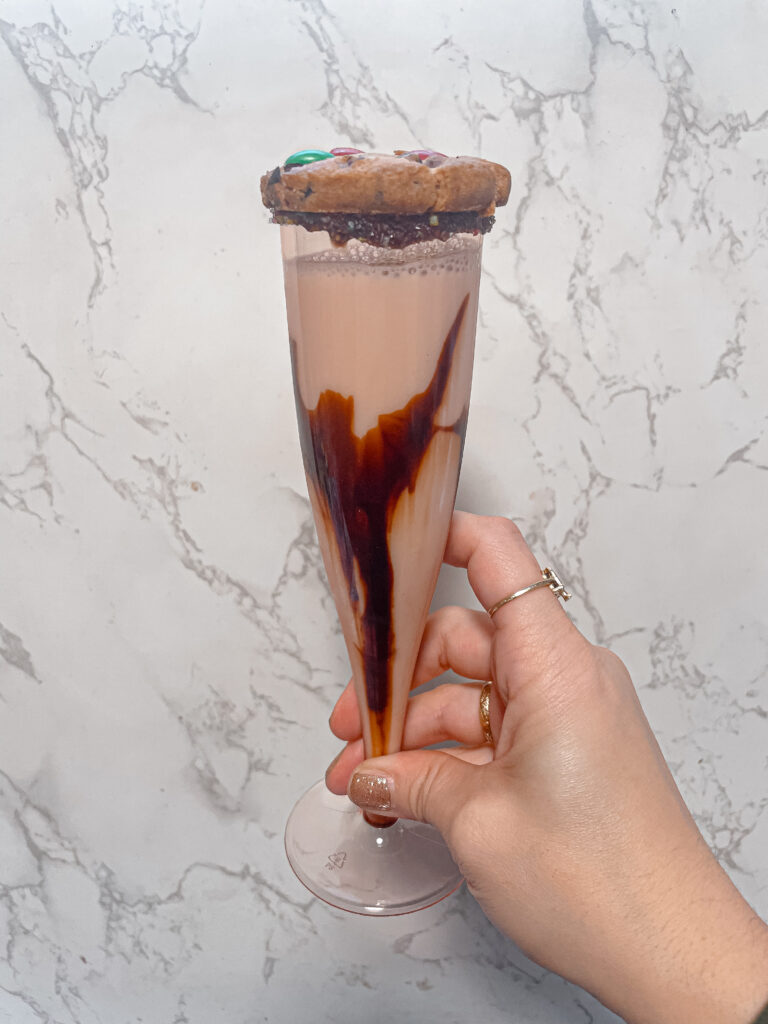
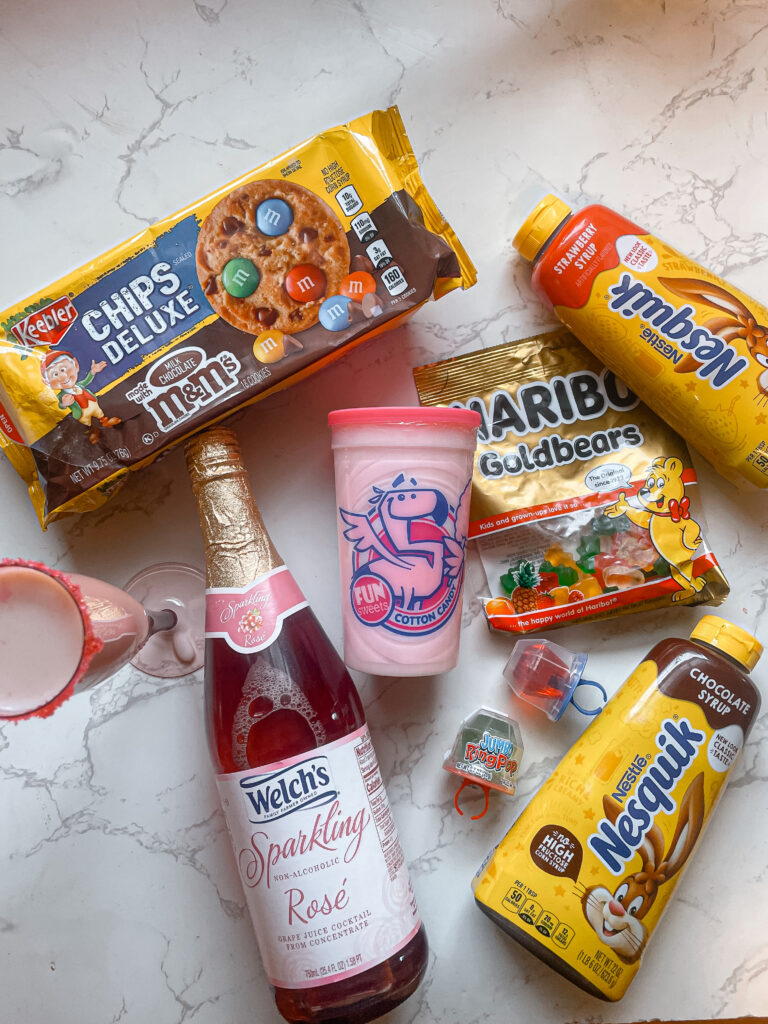
Milk and Cookies Mocktail: Ingredients:
Milk
Chocolate chip cookie
Chocolate syrup
Sprinkles for rim
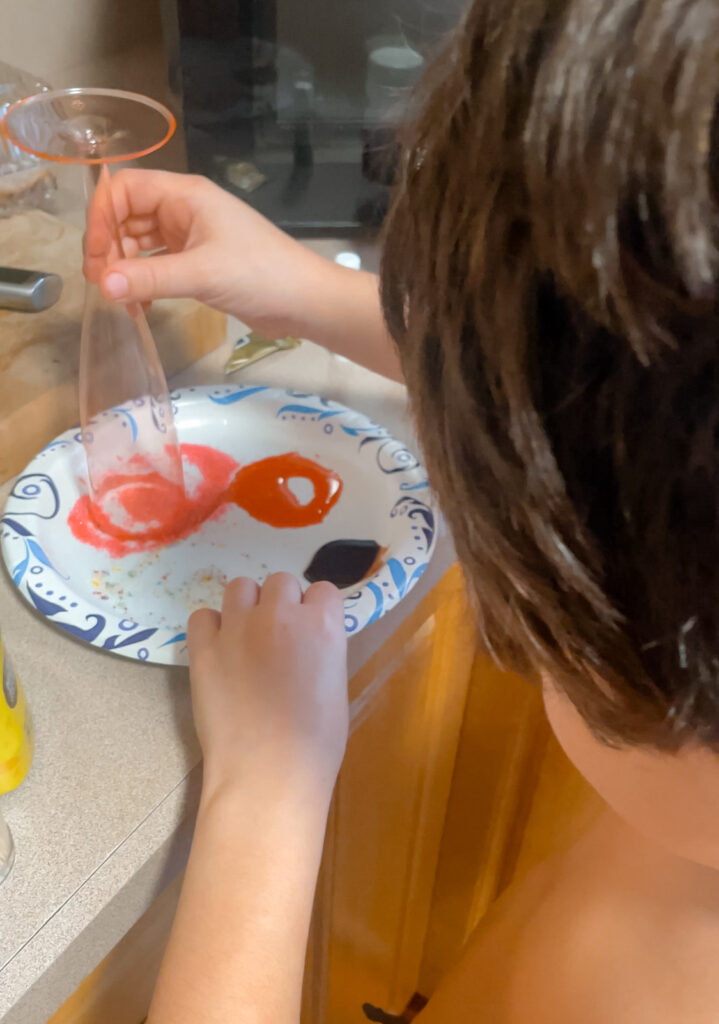
Instructions: Dip the rim of the plastic champagne flute in chocolate syrup, then coat it with colorful sprinkles. Pour in milk and garnish with a chocolate chip cookie. Cheers to the classic taste of milk and cookies in a bubbly twist!
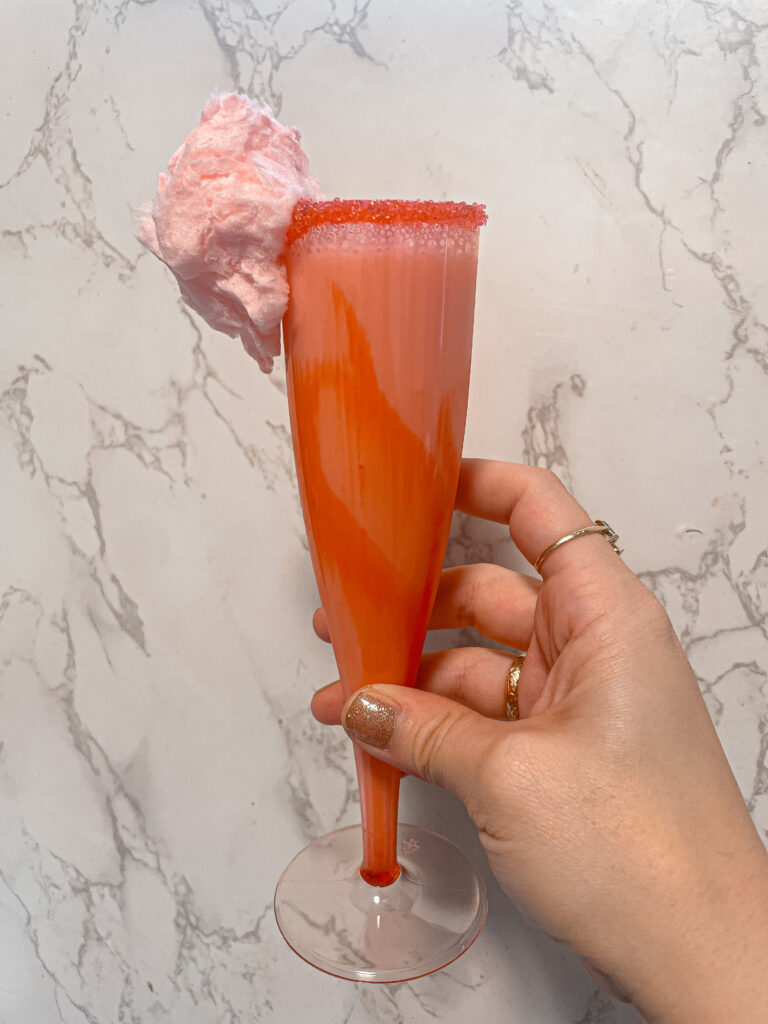
Strawberry Milk and Cotton Candy Fizz: Ingredients:
Milk
Strawberry syrup
Cotton candy
Sprinkles for rim
Instructions: Create a vibrant rim by dipping the flute in strawberry syrup and sprinkles. Pour in milk and top it off with a fluffy cloud of cotton candy. Watch the cotton candy dissolve into a sweet and fizzy delight – a treat for both the eyes and taste buds!
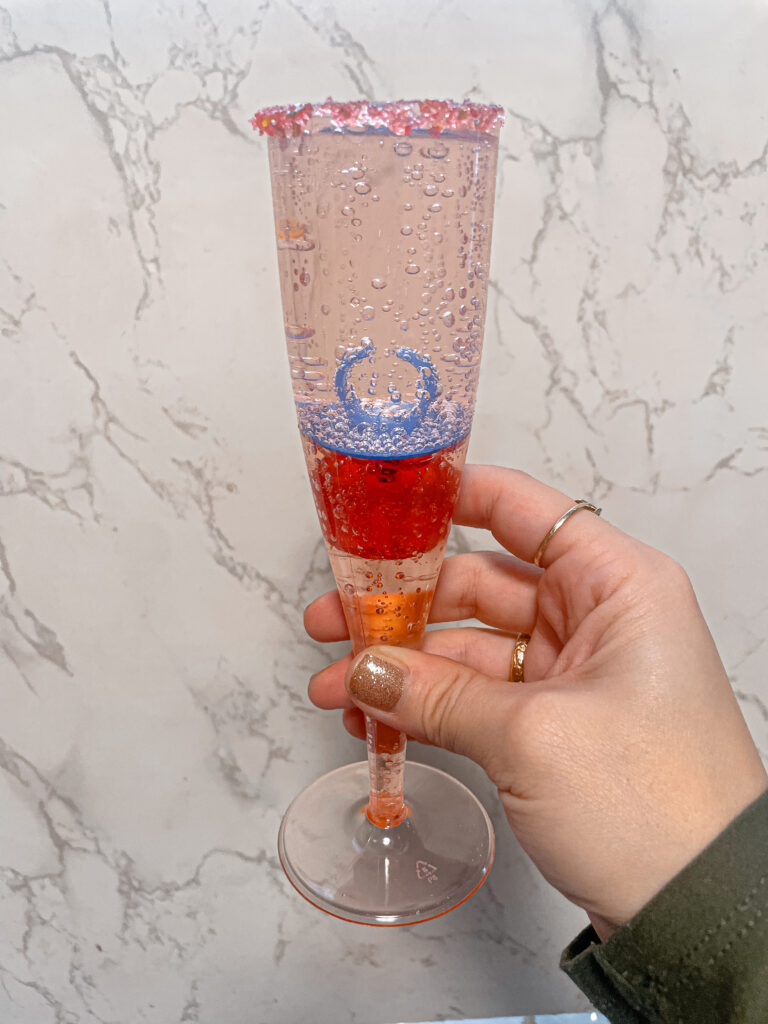
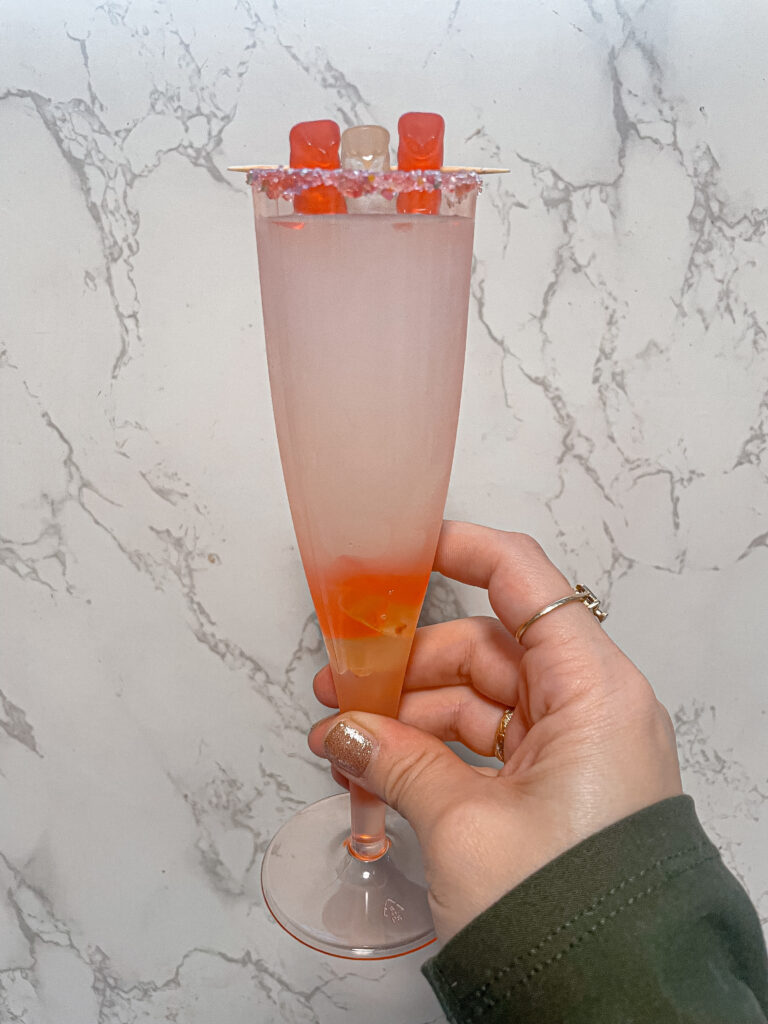
Sparkling Grape Juice with Ring Pop: Ingredients:
Sparkling grape juice
Ring Pop (any flavor)
Instructions: Pop open the sparkling grape juice and pour it into the flute. Add a splash of whimsy by placing a colorful Ring Pop on top. It’s a sparkling toast that combines the joy of bubbles with the fun of a sweet, wearable treat!
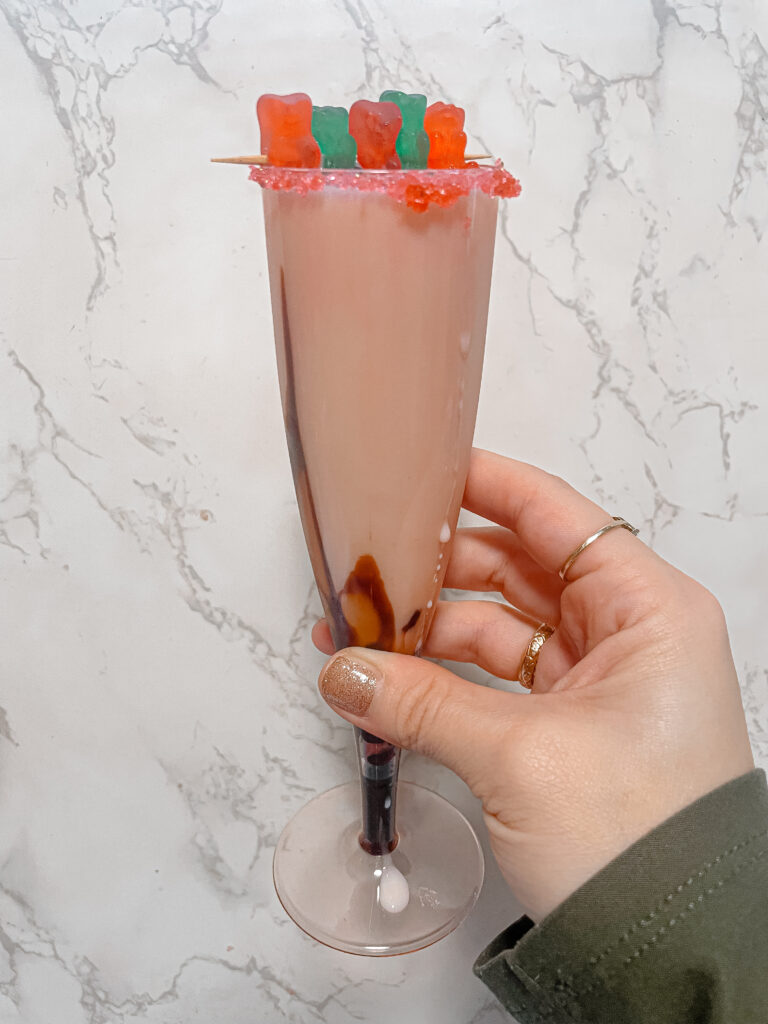
Gummy Bears and Lemonade Sparkle: Ingredients:
Gummy bears
Sparkling lemonade
Instructions: Drop a handful of gummy bears into the flute and pour in the sparkling lemonade. The gummy bears will soak up the bubbly goodness, creating a playful and flavorful sip. It’s a delightful fusion of chewy and fizzy fun!
Cheers! These Noon Year’s Eve mocktails are sure to make your celebration extra special. Whether your little ones are toasting with milk and cookies or sipping on gummy bears and juice, these festive drinks add a touch of magic to the countdown. So, gather your plastic champagne flutes, raise them high, and cheers to ringing in the Noon Year with delicious memories!
If motherhood has you stressed and you feel like you’ve lost your creativity, I am here to help! Here you will find easy recipes, simple DIY’s, affordable styles, and what to read next. I believe we all have a creative side, some of us just need a little help to find it. I will help inspire you to have creative expression without standards.