Summer is the perfect time to embrace light, refreshing meals that showcase the bounty of the season. One of my favorite summer dishes is my homemade eggplant burger patties. They are a delightful vegetarian option that’s both hearty and satisfying. Today, I’ll share not only the recipe for these delicious patties but also some ideas for creating a complete summer meal around them.
The Star of the Show: Eggplant Burger Patties
Ingredients:
1 large eggplant, peeled and diced
1 small onion, finely chopped
2 cloves garlic, minced
1 cup breadcrumbs
1/4 cup grated Parmesan cheese (optional)
1 egg, beaten
1 teaspoon dried oregano
1 teaspoon dried basil
Salt and pepper to taste
Olive oil for cooking
Instructions:
Prepare the Eggplant:
Begin by peeling and dicing the eggplant into small cubes.
Heat a tablespoon of olive oil in a large skillet over medium heat.
Add the diced eggplant and cook until it becomes soft and golden brown, about 10 minutes. Remove from heat and let it cool slightly.
Mix the Ingredients:
In a large mixing bowl, combine the cooked eggplant, chopped onion, minced garlic, breadcrumbs, grated Parmesan (if using), beaten egg, oregano, basil, salt, and pepper.
Mix until all ingredients are well incorporated.
Form the Patties:
Using your hands, form the mixture into burger-sized patties.
If the mixture is too wet, add a bit more breadcrumbs until you reach the desired consistency.
Cook the Patties:
Heat a tablespoon of olive oil in a skillet over medium heat.
Cook the patties for about 4-5 minutes on each side, or until they are golden brown and firm.
Serve:
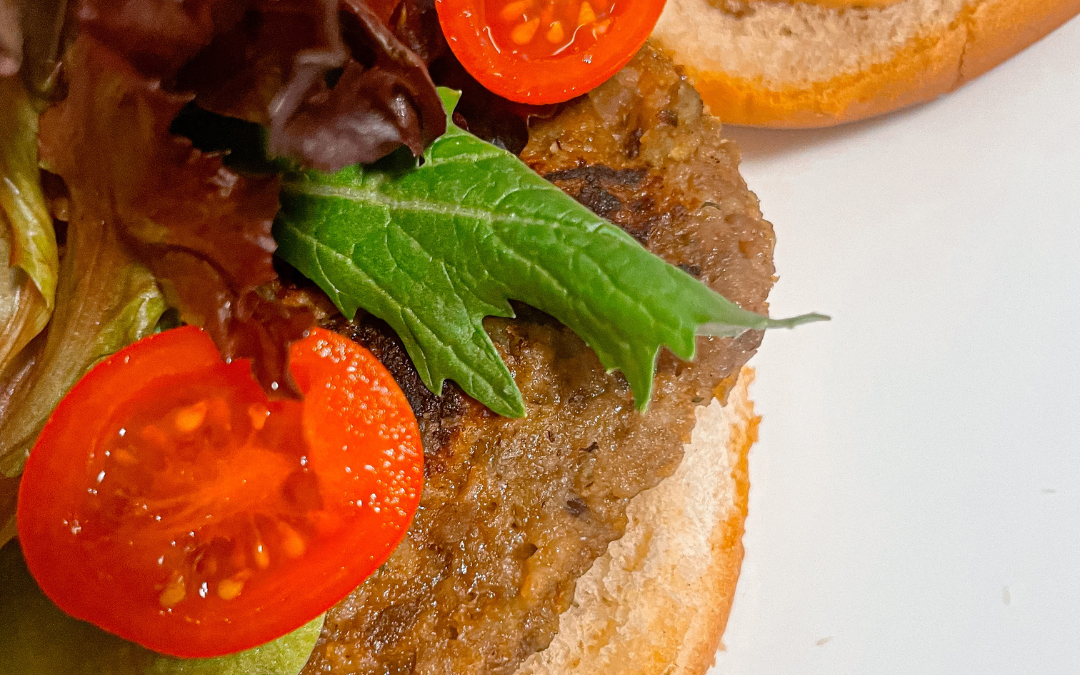
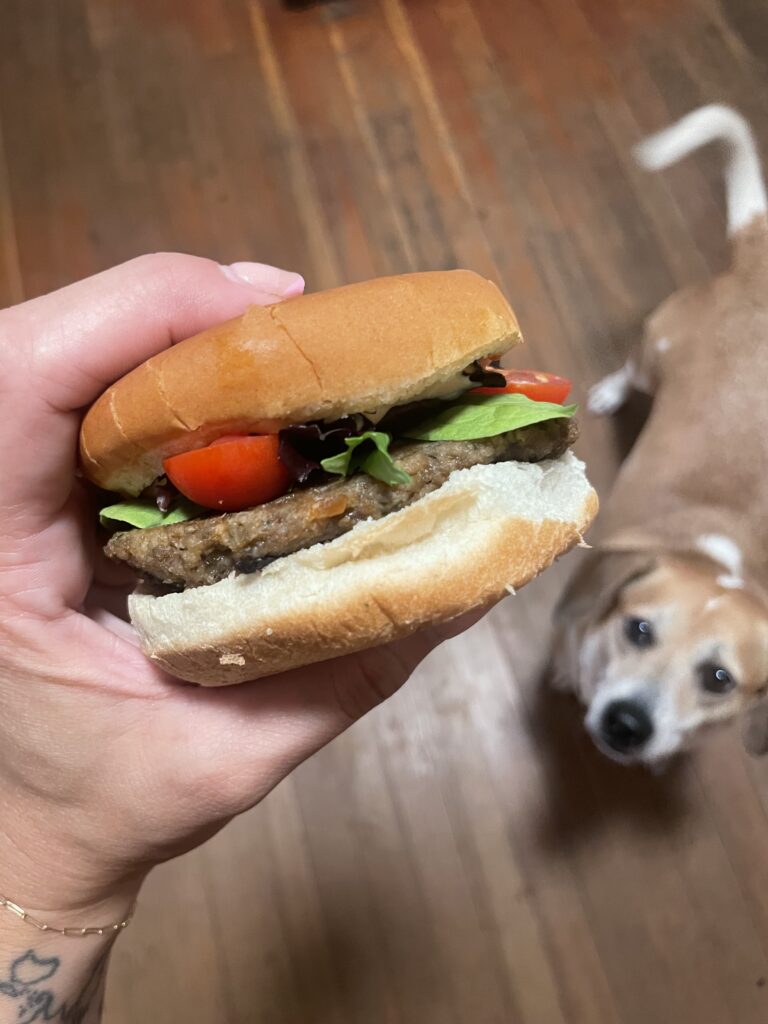
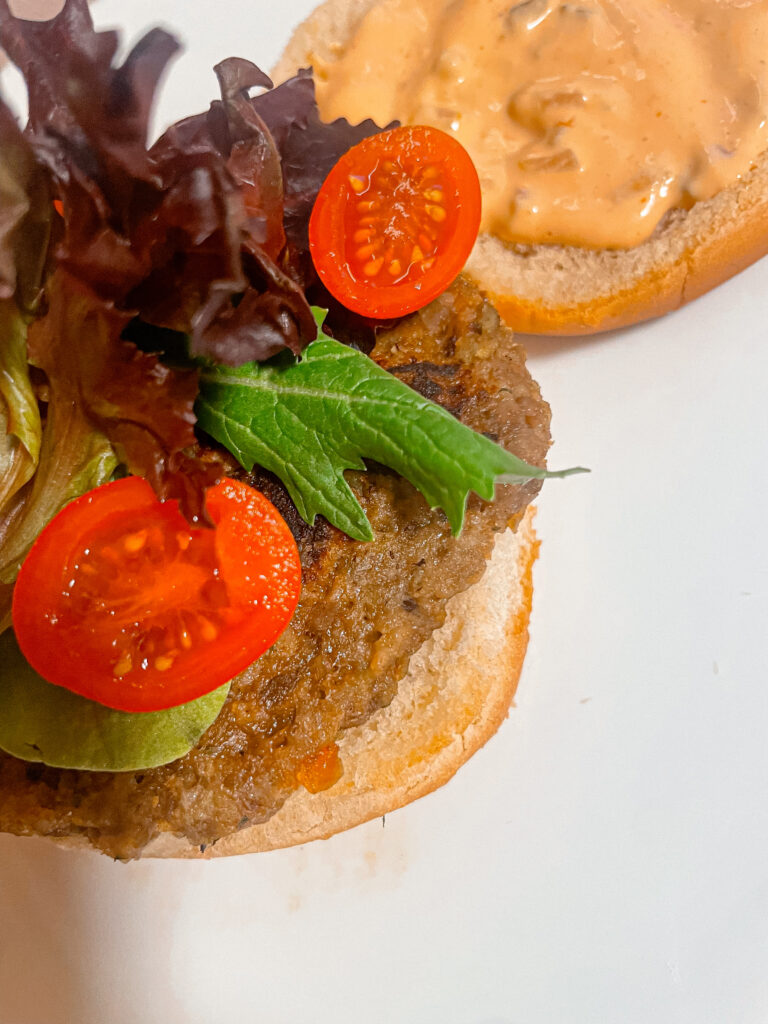
Serve the patties on toasted buns with your favorite toppings and condiments. I love adding fresh lettuce, tomato slices, and a dollop of tzatziki or homemade secret sauce.
Building the Perfect Summer Meal
Now that you have your delicious eggplant burger patties, let’s build a complete summer meal around them.
1. Fresh Summer Salad: A crisp, refreshing salad pairs perfectly with these savory patties. Try a Greek salad with tomatoes, cucumbers, red onions, Kalamata olives, and feta cheese, drizzled with a simple lemon vinaigrette.
2. Grilled Vegetables: Take advantage of summer’s vegetable bounty by grilling some bell peppers, zucchini, and corn on the cob. A light brush of olive oil and a sprinkle of salt and pepper is all you need to enhance their natural flavors.
This eggplant burger patties recipe is a versatile and delightful addition to any summer menu. It’s a wonderful way to enjoy the flavors of the season while keeping your meal light and nutritious. Whether you’re hosting a backyard barbecue or simply enjoying a quiet dinner on the patio, these patties will be a hit. Enjoy the taste of summer with every bite!
How to Make Shamrock Shaped Cinnamon Rolls: A Festive Twist on a Classic Treat
Get ready to add a touch of luck to your breakfast or brunch with these delightful shamrock shaped cinnamon rolls! Perfect for St. Patrick’s Day or any time you want to infuse a bit of whimsy into your baking routine, these cinnamon rolls are not only adorable but also incredibly easy to make. Using prepackaged cinnamon rolls makes this recipe a breeze, while a few simple steps transform them into festive shamrocks that will charm your taste buds. Let’s dive into the recipe!
Ingredients:
1 can of prepackaged cinnamon rolls (8-count)
Green food coloring
Green shimmer sprinkles (optional)
Instructions:
Preheat your oven to the temperature specified on the cinnamon roll package.
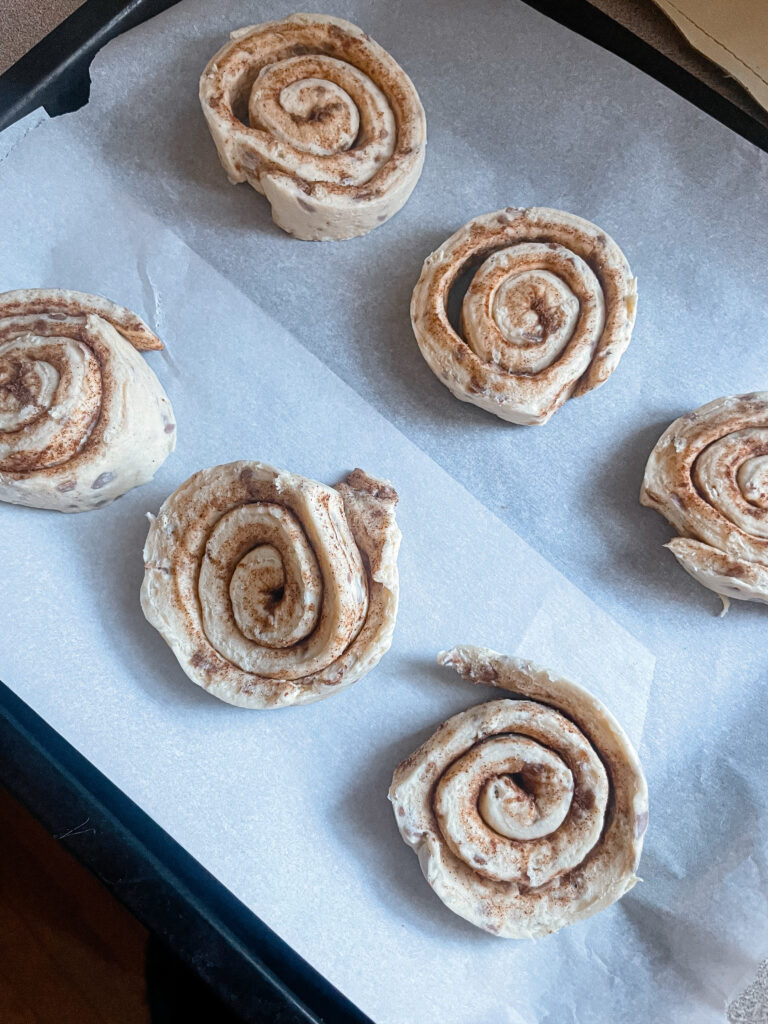
Open the can of cinnamon rolls and unroll each cinnamon roll one at a time. Use kitchen scissors to cut the cinnamon rolls into 2-3″ pieces.
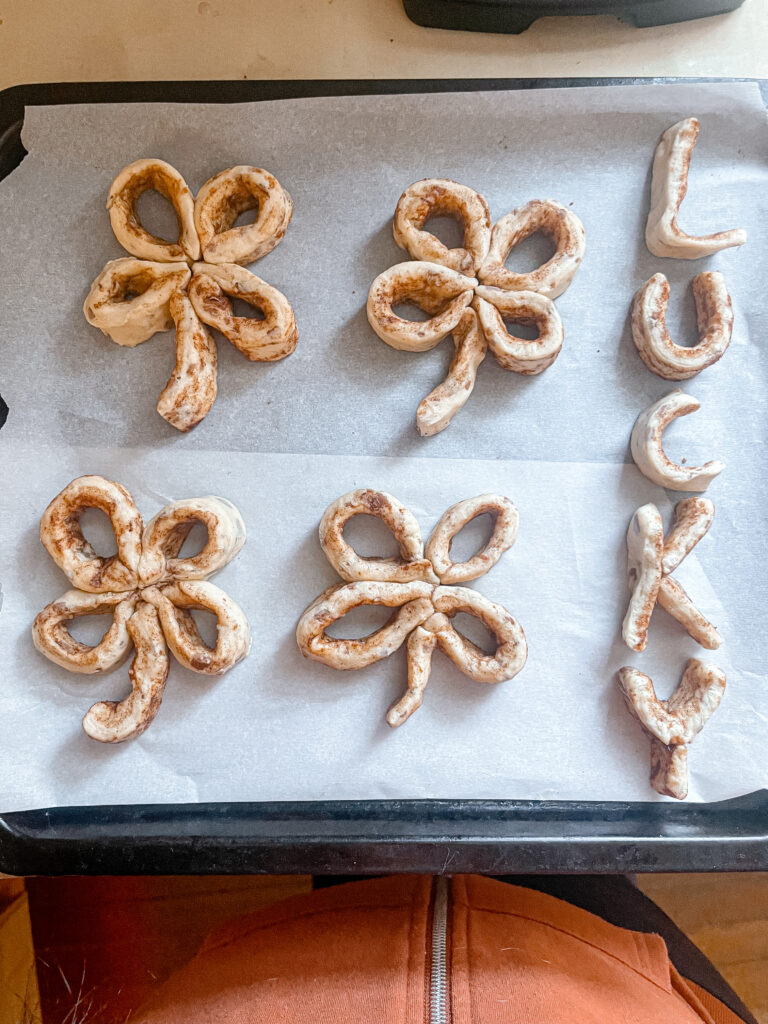
Gently fold each cut piece in half and arrange them in the shape of a shamrock on your baking sheet lined with parchment paper or lightly greased. Refer to the provided photos for guidance on shaping the shamrocks.
Once you’ve formed the shamrocks, use a small piece of dough to create a stem for each one. Simply roll a small portion of dough between your hands to form a thin rope-like shape, and attach it to the bottom of each shamrock.
Bake the cinnamon rolls according to the instructions on the package, or until they are golden brown and cooked through.
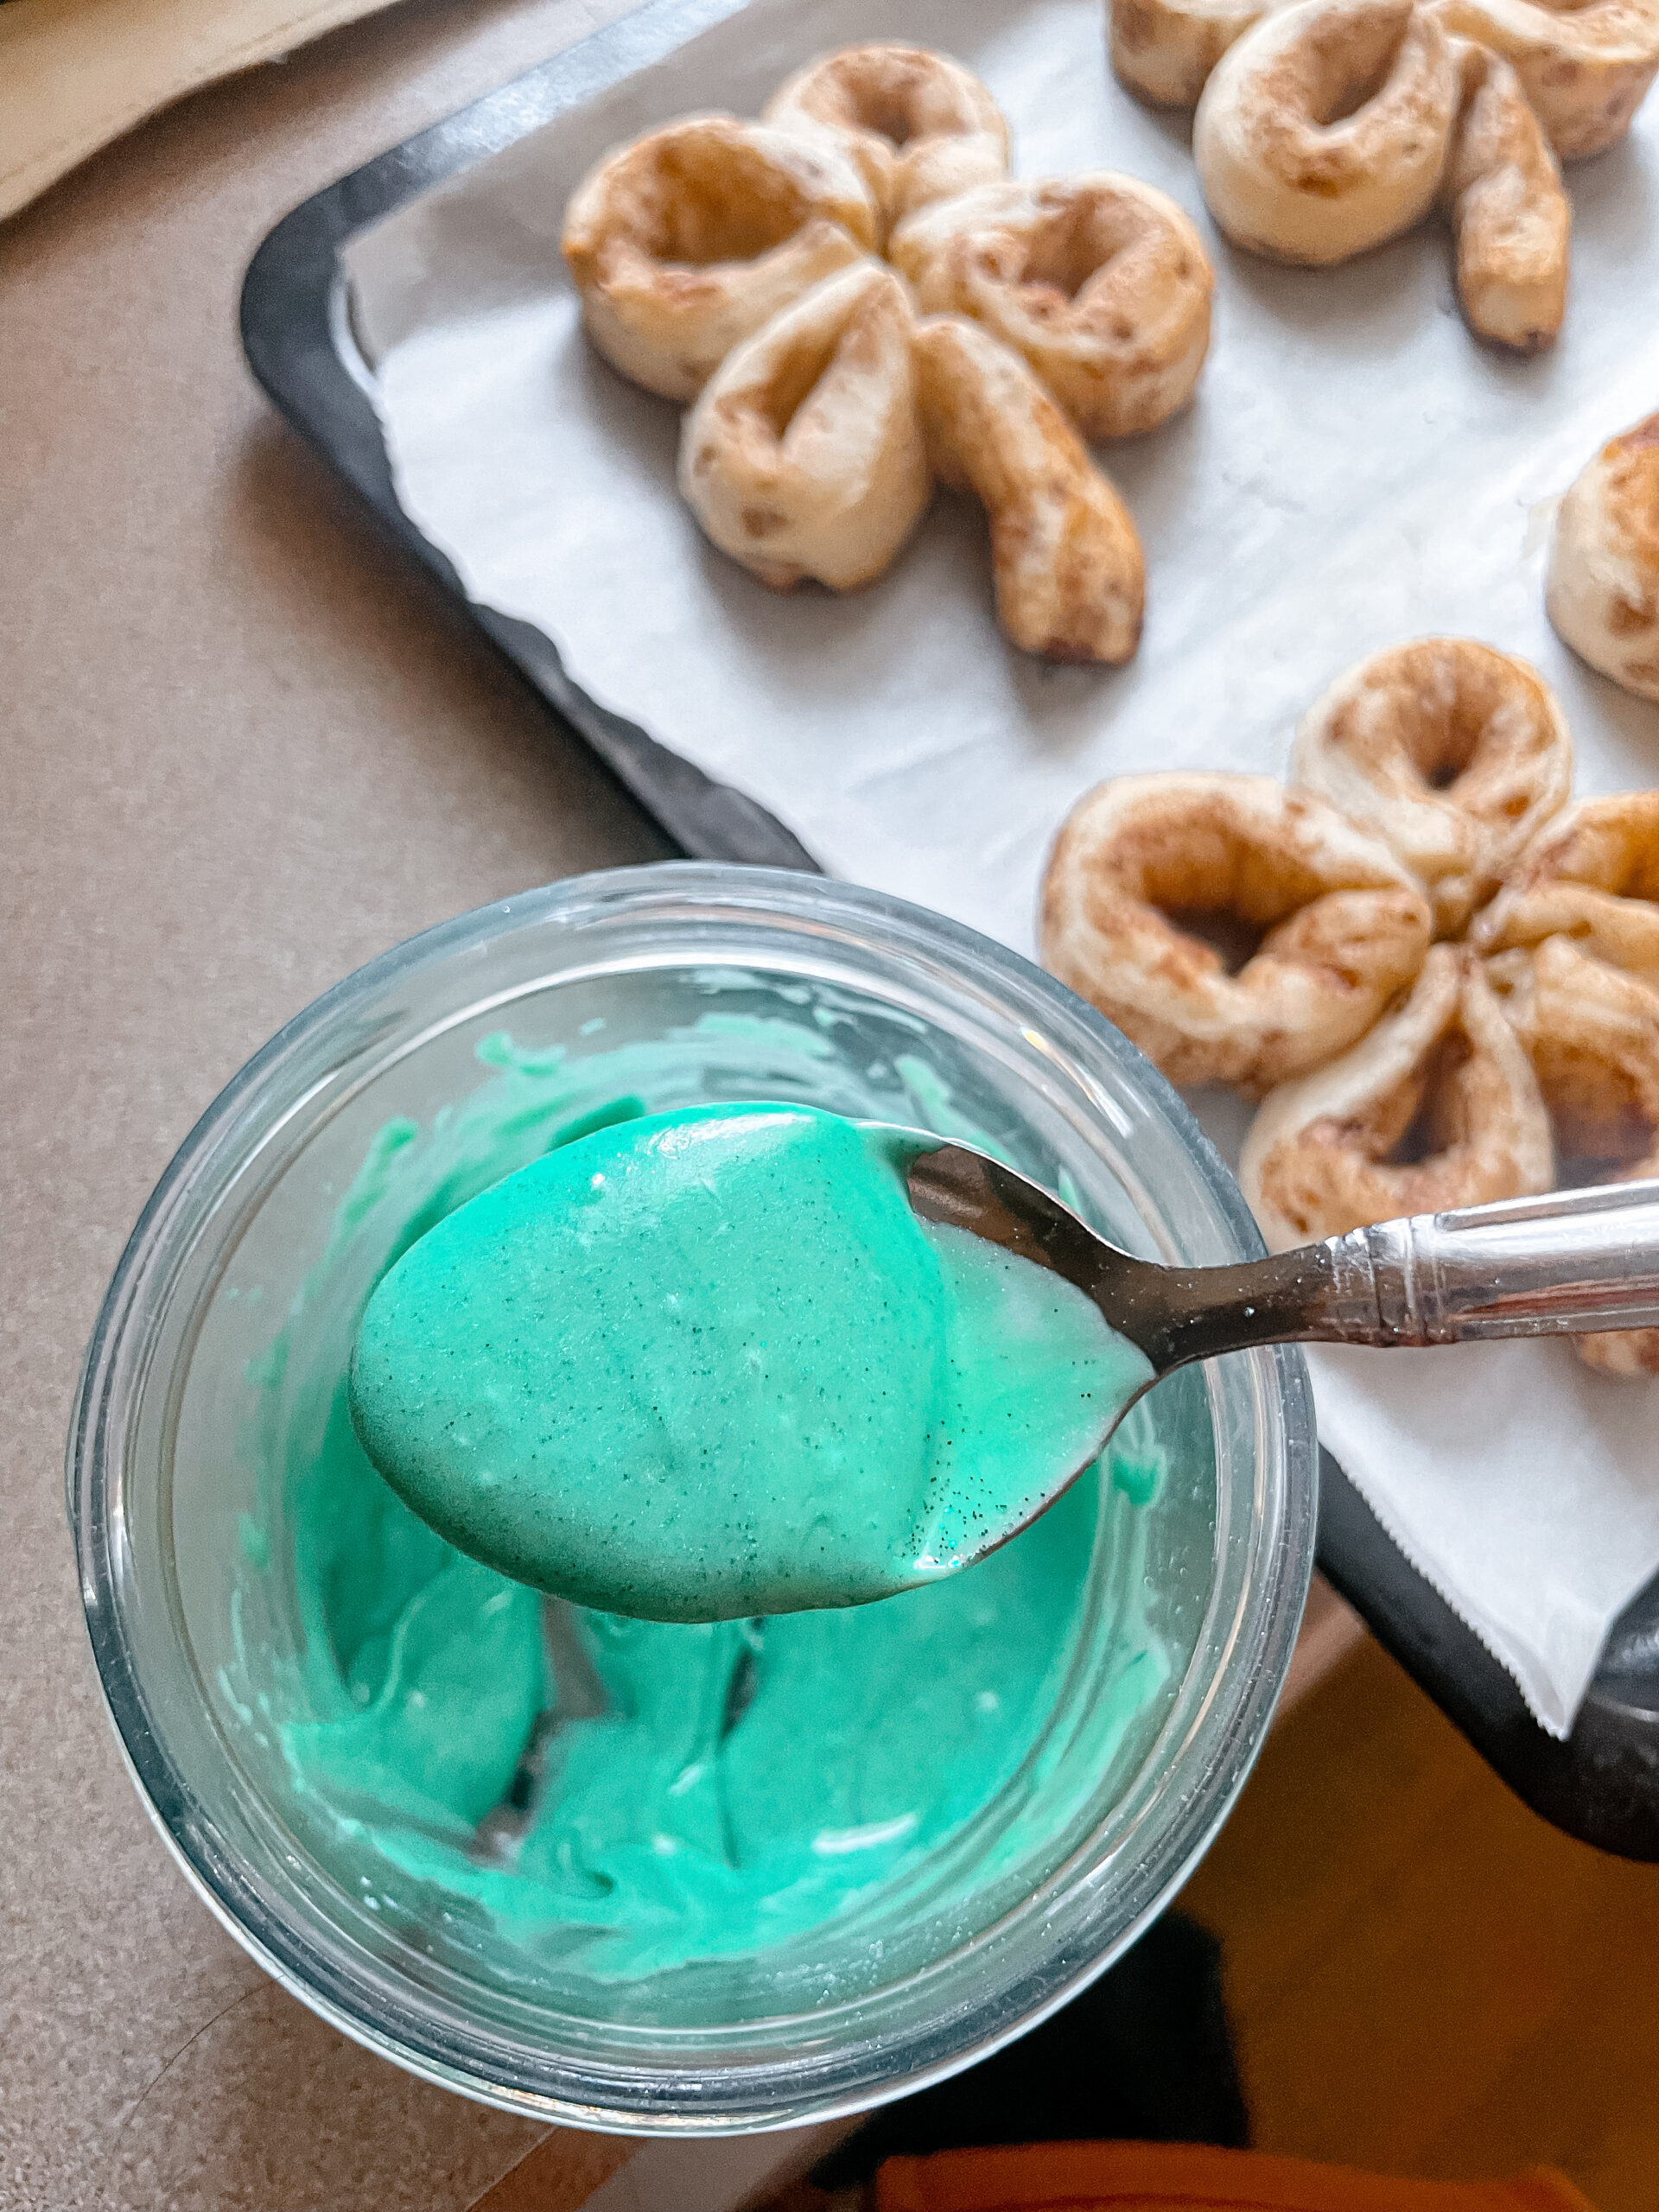
While the cinnamon rolls are baking, prepare the icing by combining the provided icing packet with a few drops of green food coloring. Mix until the desired shade of green is achieved.
Once the cinnamon rolls are done baking, remove them from the oven and allow them to cool slightly on a wire rack.
Drizzle the green icing over the warm cinnamon rolls, ensuring that each shamrock is evenly coated.
For an extra festive touch, sprinkle green shimmer sprinkles over the icing to add a hint of sparkle and shine.
Serve your shamrock shaped cinnamon rolls warm and enjoy the festive treat with your loved ones!
With just a few simple steps, you can create these charming shamrock shaped cinnamon rolls that are sure to delight everyone who tries them. Whether you’re celebrating St. Patrick’s Day or simply looking to add some fun to your breakfast routine, these cinnamon rolls are a delicious and festive choice. So go ahead, gather your ingredients, and get ready to bake up a bit of luck in the form of delicious cinnamon rolls!
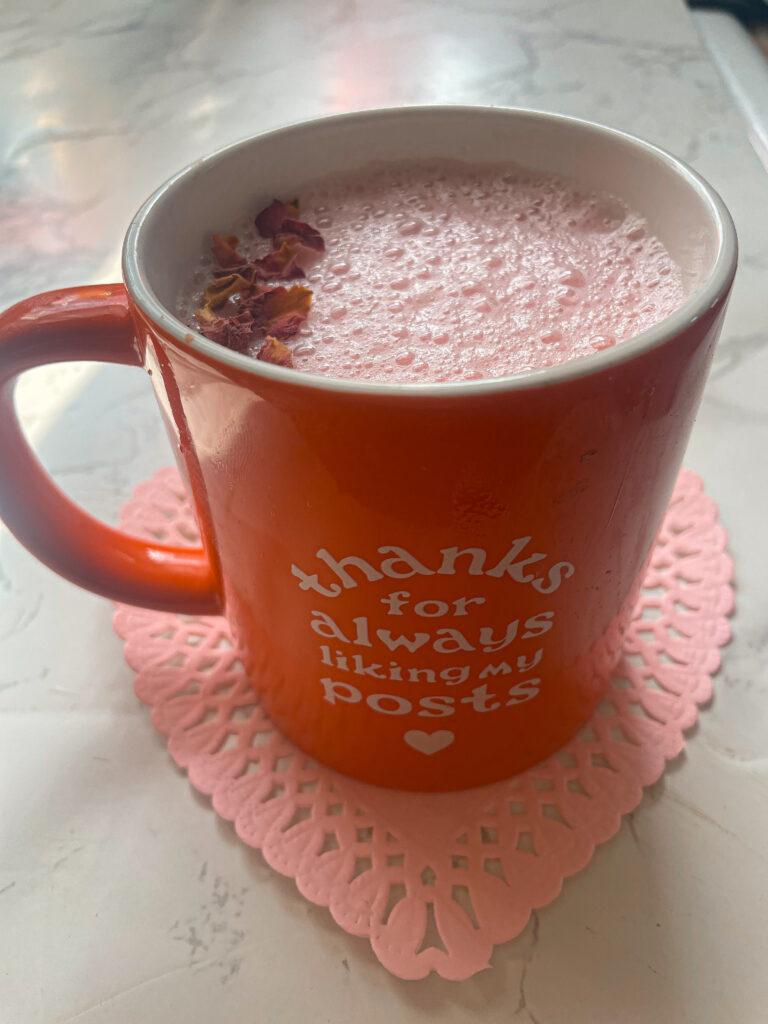
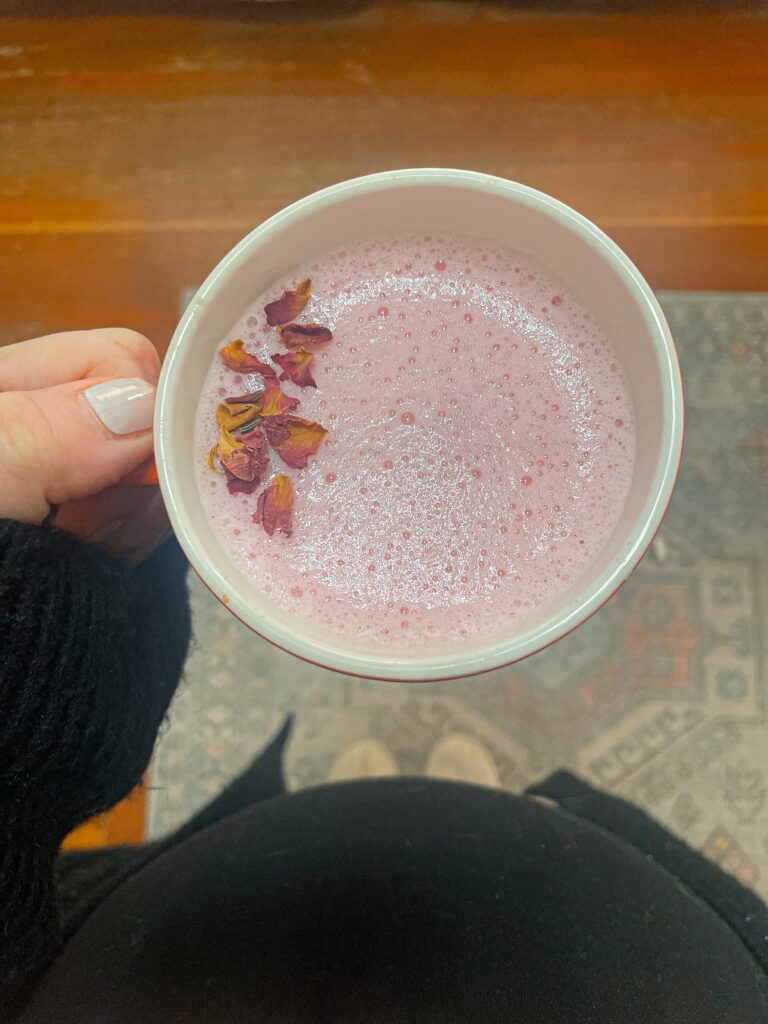
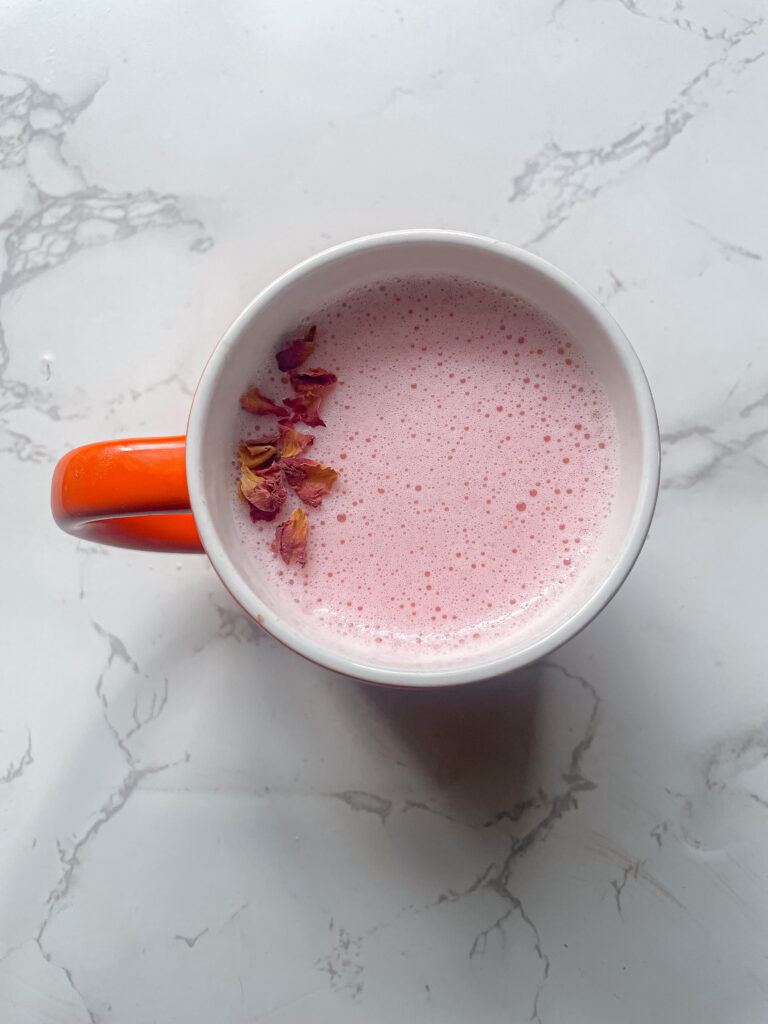
Navigating Pregnancy Sickness: Embracing Natural Support and Cherry Almond Moon Milk
Being sick during pregnancy can be challenging, especially when traditional medications are limited. I’ve been dealing with an awful cold and Covid for the past two months, and it has been draining. I wanted to explore the journey of finding natural support for wellness while pregnant and learn about the benefits of tart cherry juice. I want to share a delightful recipe for Cherry Almond Moon Milk since it has helped me significantly these past few weeks.
Benefits of Cherry Juice:
Cherry juice is a powerhouse of antioxidants and anti-inflammatory compounds. It can help alleviate symptoms like nausea and inflammation during pregnancy, providing a natural boost to your immune system.
Understanding Moon Milk:
Moon milk, a trendy bedtime drink, combines warm milk with various herbs and spices known for their calming properties. This soothing elixir can be customized to suit your preferences and needs.
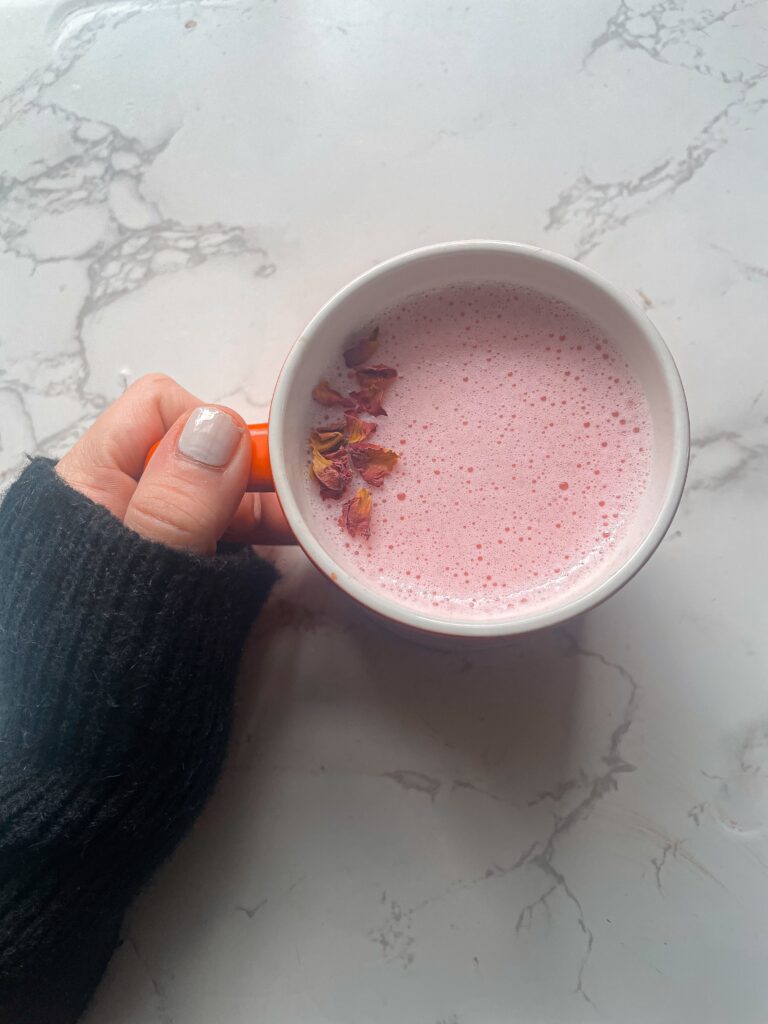
Cherry Almond Moon Milk Recipe:
Ingredients:
1 cup warm almond milk
1 1/3 cup tart cherry juice (not from concentrate)
1 teaspoon honey (adjust to taste)
1/2 teaspoon vanilla extract
A pinch of ground cinnamon
Instructions:
Heat the milk and cherry juice in a saucepan until warm but not boiling.
In a mug, combine honey and vanilla extract.
Pour the warm cherry milk into the mug and whisk until well combined.
Sprinkle a pinch of ground cinnamon on top for added flavor.
Stir gently or use a frother to make it extra creamy, and enjoy the comforting Cherry Almond Moon Milk.
I also added some dried rose petals for extra aroma.
Embracing natural remedies during pregnancy can be empowering. Incorporating cherry juice and soothing moon milk into your routine might just be the key to finding relief without relying on traditional medications. Let me know what you think!
Remember to consult with your healthcare provider before making significant changes to your diet during pregnancy.
Sweet Love in Every Bite: Valentine’s Day Rice Krispie Treats Recipe
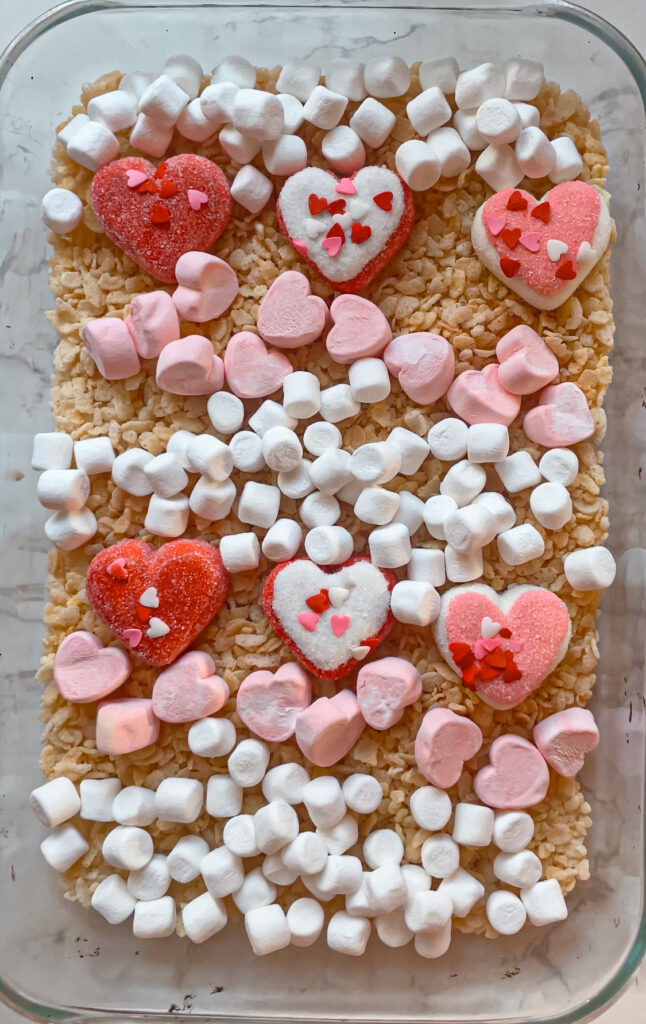
Valentine’s Day is just around the corner, and what better way to celebrate love than with a delightful homemade treat? These Valentine’s Day Rice Krispie Treats are not only delicious but also heartwarming in every sense. The combination of crispy Rice Krispies, heart-shaped marshmallows, and a touch of butter creates a perfect symphony of flavors. Let’s dive into the simple yet charming recipe that will surely steal your heart.
Ingredients:
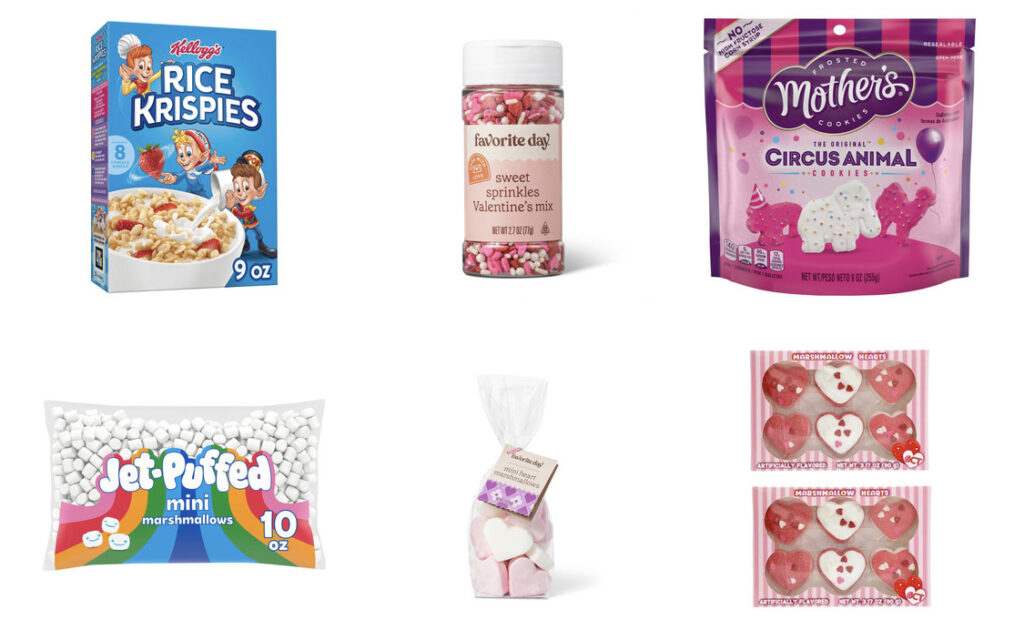
6 cups of Rice Krispies cereal
Heart-shaped marshmallows
1 stick of butter, thinly sliced
Frosted animal crackers
Festive sprinkles
Instructions:
Preheat your oven to 350°F (175°C) and grease a baking dish.
In a large mixing bowl, pour 6 cups of Rice Krispies cereal, ensuring a generous crunch in every bite.
Arrange heart-shaped marshmallows evenly over the cereal, symbolizing the love that goes into these treats.
Take one stick of butter and slice it thinly. Distribute the butter slices across the Rice Krispies and marshmallows, allowing it to melt and infuse a rich, buttery flavor.
Place the baking dish in the preheated oven and bake for about 10-15 minutes or until the marshmallows are gooey and golden.
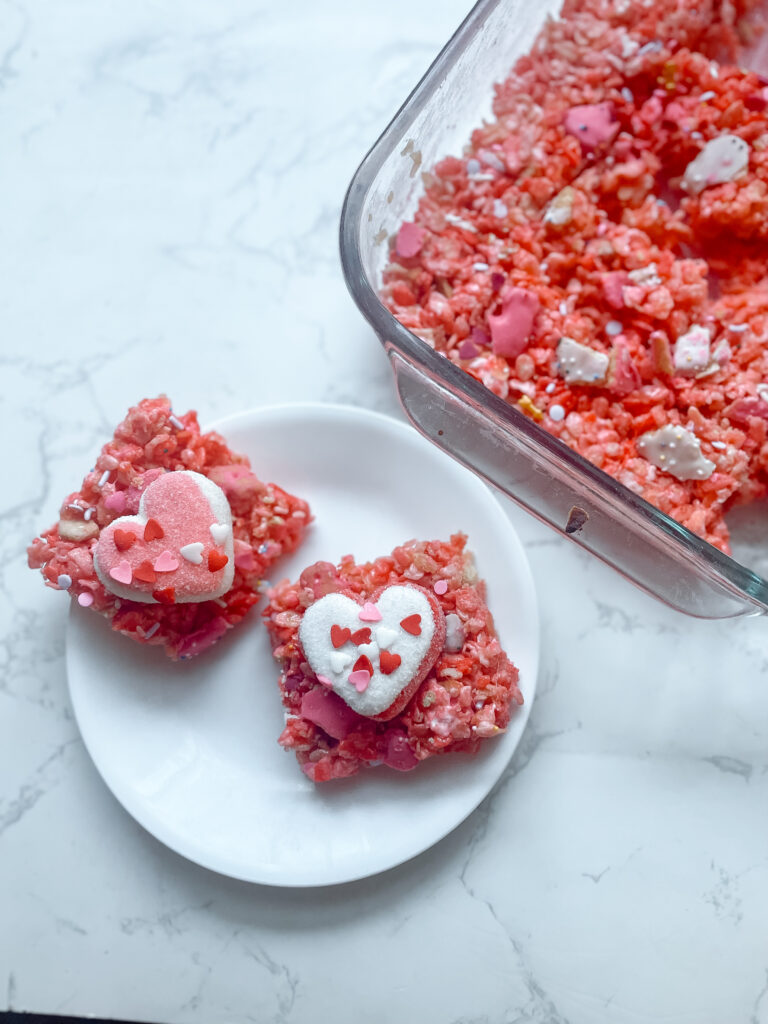
Once out of the oven, mix until everything is evenly mixed.
Sprinkle the top with frosted animal crackers for a playful crunch and festive sprinkles to add a pop of color and joy.
Flatten with a spatula so everything is even.
Result:
The result is a batch of Valentine’s Day Rice Krispie Treats that are not only visually appealing but also bursting with flavor. The crispy texture of the cereal, combined with the gooey marshmallows and the buttery richness, creates a heavenly experience for your taste buds.
Enjoy!
This Valentine’s Day, spread love through the joy of homemade treats. The simplicity of this Rice Krispie Treats recipe, enhanced with heart-shaped marshmallows and a touch of butter, makes it a delightful choice for celebrating the season of love. So, gather your ingredients, preheat that oven, and create a sweet symphony that will surely leave a lasting impression on your loved ones. Happy Valentine’s Day!
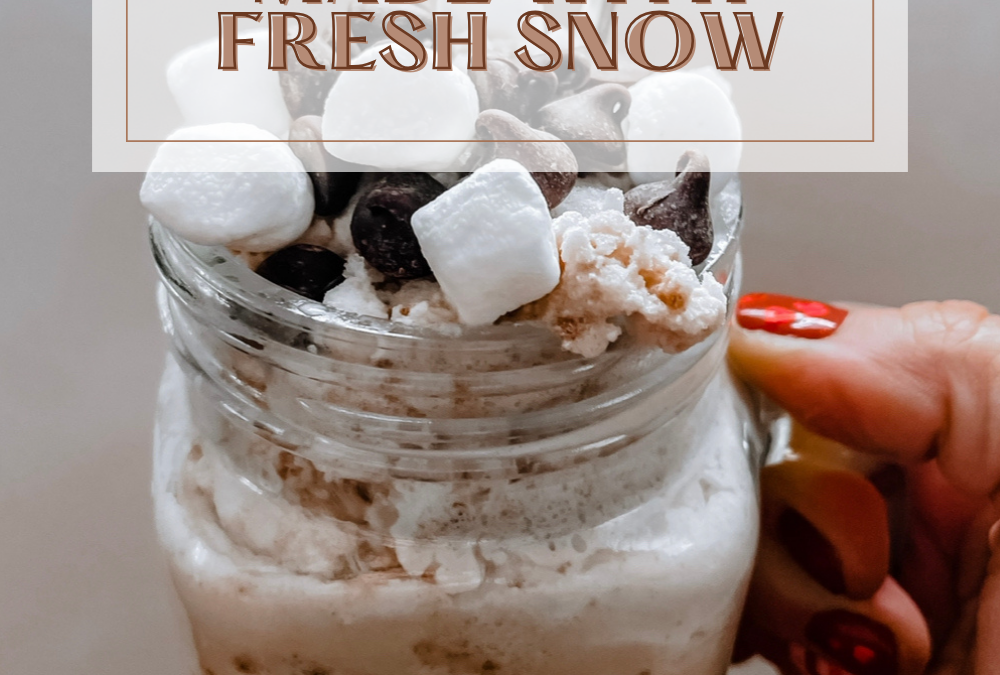
Snow Day Bliss: Crafting Hot Chocolate Ice Cream with Fresh Snow
Celebrate the whimsy of a snow day by elevating the joy of freshly fallen snow to a whole new level. In this blog post, we’ll explore the delight of creating a luscious hot chocolate snow ice cream that turns your winter wonderland into a delicious frozen treat. Get ready to embrace the chill and indulge in the magic of a snow day with this simple and scrumptious recipe.
Ingredients:
Fresh, clean snow (about 8 cups)
1 cup of hot chocolate (prepared with milk)
1/4 cup of unsweetened cocoa powder
1/4 cup of granulated sugar
Toppings of your choice (chocolate chips, crushed peppermint, etc.)
Instructions:
Gather Fresh Snow:
Collect approximately 8 cups of fresh, clean snow from a pollution-free area.
Make Hot Chocolate:
Prepare 1 cup of hot chocolate using milk. You can use your favorite hot chocolate mix.
Combine with Snow:
In a large mixing bowl, pour the hot chocolate over the snow.
Add Cocoa Powder and Sugar:
Sprinkle 1/4 cup of unsweetened cocoa powder and 1/4 cup of granulated sugar over the snow and hot chocolate.
Mix Well:
Gently fold the ingredients together until you achieve a smooth and creamy consistency.
Taste and Adjust:
Taste the mixture and adjust sweetness or chocolate intensity as needed.
Serve with Toppings:
Scoop the hot chocolate snow ice cream into bowls or cones.
Top it off with your favorite toppings like chocolate chips or marshmallows.
Enjoy Instant Winter Bliss:
Indulge in the delightful contrast of warm chocolate and cold snow, savoring the essence of winter in every bite.
This simplified recipe ensures a quick and delicious hot chocolate snow ice cream for a delightful snowy day treat!
If motherhood has you stressed and you feel like you’ve lost your creativity, I am here to help! Here you will find easy recipes, simple DIY’s, affordable styles, and what to read next. I believe we all have a creative side, some of us just need a little help to find it. I will help inspire you to have creative expression without standards.