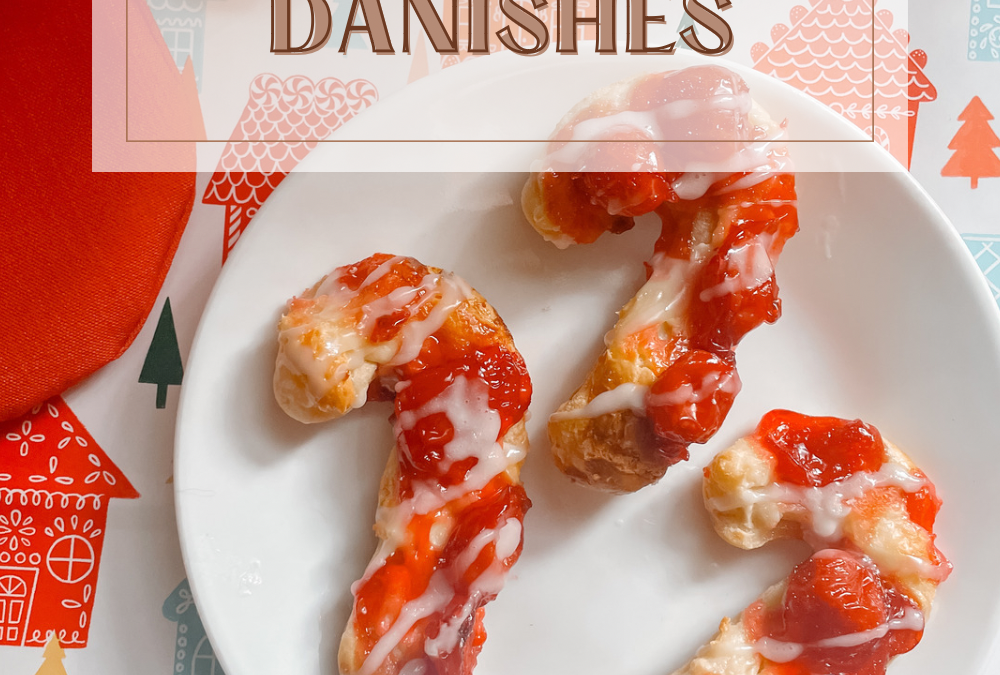
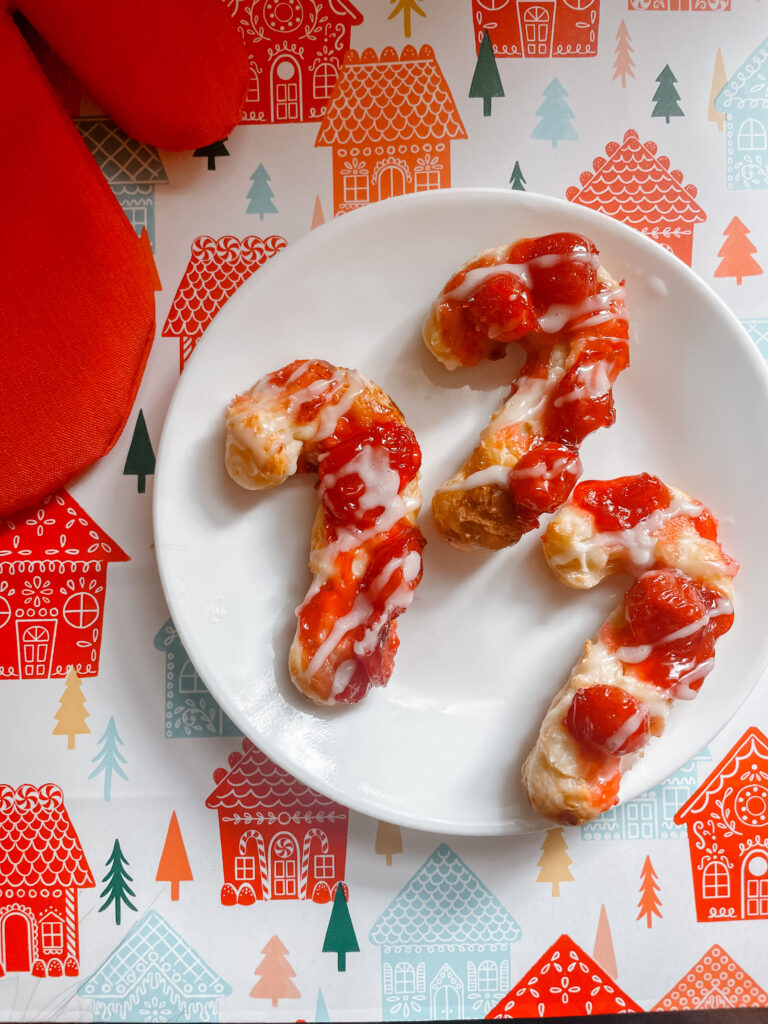
When it comes to holiday baking, there’s nothing quite like the joy of crafting delicious and visually appealing treats. This year, we’re bringing a twist to the classic cherry cream cheese danish by transforming them into candy cane shapes. These festive pastries are not only a delight to your taste buds but also a feast for the eyes.
Ingredients:
To make these cherry cream cheese danishes in candy cane shapes, you’ll need the following ingredients:
For the Pastry:
1 sheet of puff pastry, thawed
For the Filling:
8 ounces cream cheese, softened
1/4 cup granulated sugar
1 teaspoon vanilla extract
1/2 cup cherry pie filling
For the Glaze:
1/2 cup powdered sugar
1-2 tablespoons milk
1/2 teaspoon vanilla extract
Instructions:
Preheat your oven to 400°F (200°C) and line a baking sheet with parchment paper.
In a mixing bowl, combine the softened cream cheese, granulated sugar, and vanilla extract. Mix until smooth and well combined.
Roll out the thawed puff pastry sheet into a rectangular shape. Using a candy cane cookie cutter, cut out each shape until all dough is used.
Spoon a small amount of the cream cheese mixture onto one end of each strip and top it with a spoonful of cherry pie filling.
Bake in the preheated oven for 12-15 minutes, or until the pastries are puffed and golden.
While the pastries are baking, prepare the glaze by mixing the powdered sugar, milk, and vanilla extract in a small bowl until smooth.
Once the pastries are done baking, remove them from the oven and let them cool slightly.
Drizzle the glaze over the candy cane-shaped danishes.
These cherry cream cheese danishes in candy cane shapes are the perfect addition to your holiday dessert spread. Their delightful appearance and scrumptious taste will impress your guests and add a touch of festive flair to your celebrations. With this easy-to-follow recipe, you can create these treats with confidence and share the joy of holiday baking with your family and friends.
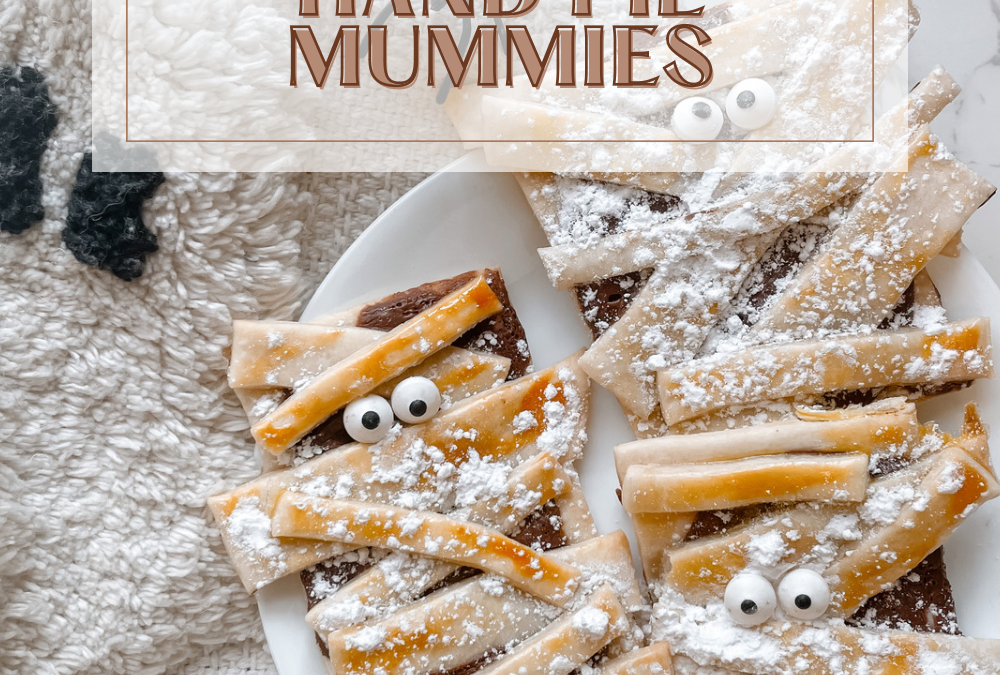
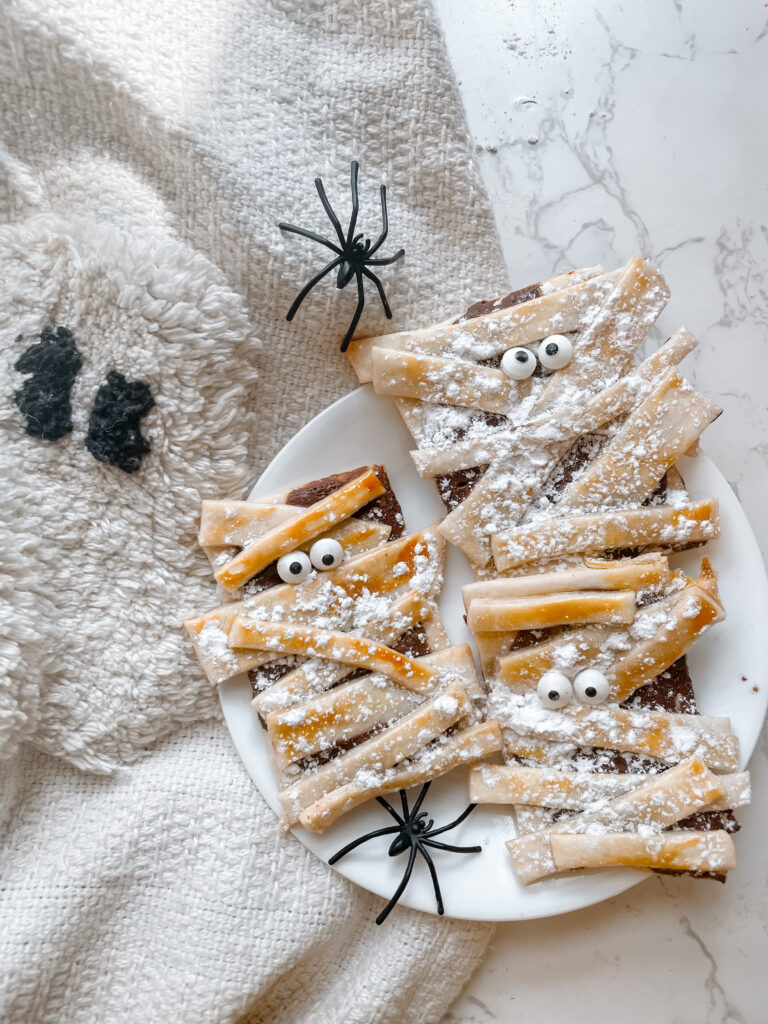
Halloween is a time for ghosts, ghouls, and, most importantly, delicious treats! If you’re looking for a fun and spooky snack that will delight kids and adults alike, you’re in for a treat. In this blog post, I’m going to show you how to make Chocolate Peanut Butter Hand Pie Mummies. These adorable mummy-shaped hand pies are not only delicious but also a perfect addition to your Halloween party spread. Best of all, they’re easy to make, and kids can join in on the fun!
To get started on these delectable mummy hand pies, you’ll need the following ingredients:
Ingredients:
Pre-made pie crusts (store-bought or homemade)
Chocolate peanut butter (or a mixture of chocolate spread and regular peanut butter)
Sprinkles for eyes
Egg wash (1 egg mixed with water)
Confectioners sugar
Instructions:
Roll Out the Pie Crusts: Start by rolling out your pre-made pie crusts on a floured surface. This will make the dough easier to work with. Using a rectangle cookie cutter, cut out circles from the pie crusts. These will serve as the base for your mummy hand pies.
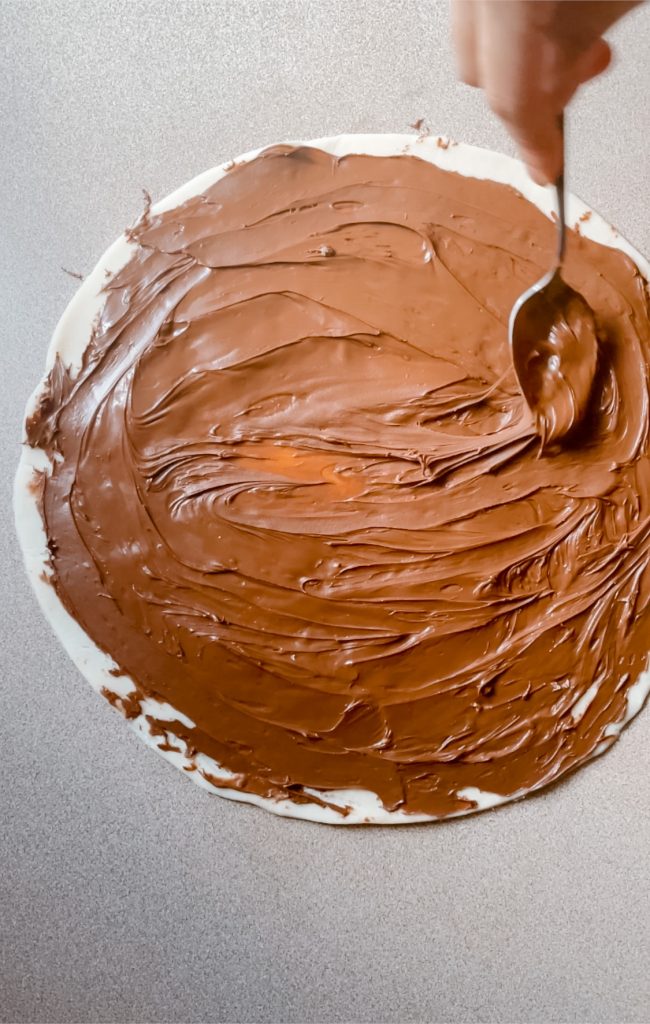
Add Chocolate Peanut Butter: Take each rectangle and spread a generous amount of chocolate peanut butter (or a mixture of chocolate spread and regular peanut butter) in the center. Leave some space around the edges to seal the hand pies later.
Create the Mummy Look: To give your hand pies a mummy appearance, take another small piece of pie crust dough and cut it into thin strips. Lay these strips over the chocolate peanut butter-covered circles to create the “bandages.” Make sure to leave a small gap for the eyes.
Add Mini Chocolate Chip Eyes: Place two mini chocolate chips on each hand pie to serve as the mummy’s eyes. You can use a bit of the peanut butter mixture to help them stick in place.
Brush the mummies with egg wash.
Bake: Preheat your oven to the temperature recommended on the pie crust packaging. Place your mummy hand pies on a baking sheet lined with parchment paper. Bake them for the recommended time or until they turn golden brown.
Serve and Enjoy: Once your mummy hand pies are out of the oven and have cooled down a bit, sprinkles with confectioners sugar and these spooky treats to your little goblins! They’re perfect for Halloween parties, school lunches, or a fun family baking project.
These Chocolate Peanut Butter Hand Pie Mummies are a delightful Halloween treat that kids and adults will adore. The combination of chocolate and peanut butter encased in a cute mummy-shaped pie crust is both delicious and visually appealing. They’re a wonderful addition to your Halloween snack lineup, and you can get creative with the bandage designs. So, this Halloween, get ready to impress your guests with these adorable and scrumptious hand pies!
Halloween is the perfect time to get creative in the kitchen, and what’s more fun than preparing deliciously eerie treats that will spook and satisfy your guests? This year, we’re diving into the world of Spooky Puff Pastry Pizzas. These little pizzas are not only a visual delight but also incredibly tasty. So, grab your apron and get ready to conjure up these ghostly delights for your Halloween gathering.
Ingredients:
For the Puff Pastry Ghosts:
1 sheet of puff pastry (thawed)
1 egg (for egg wash)
Black olives (for eyes)
For the Pizza Sauce:
1/2 cup tomato sauce
1/2 teaspoon dried oregano
1/2 teaspoon garlic powder
Salt and pepper to taste
For Toppings:
Shredded mozzarella cheese
Sliced black olives
Sliced red bell pepper
Sliced green bell pepper
Sliced mushrooms
Sliced pepperoni
Instructions:
Preheat your oven to 375°F (190°C).
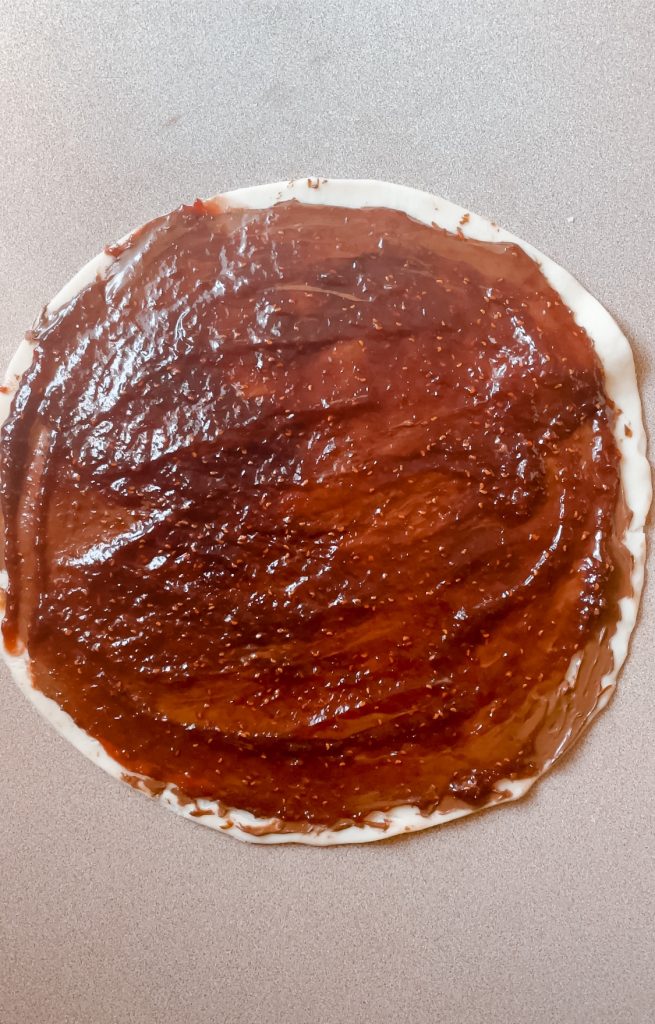
Start by preparing the pizza sauce. In a small bowl, mix together the tomato sauce, dried oregano, garlic powder, salt, and pepper. Set it aside.
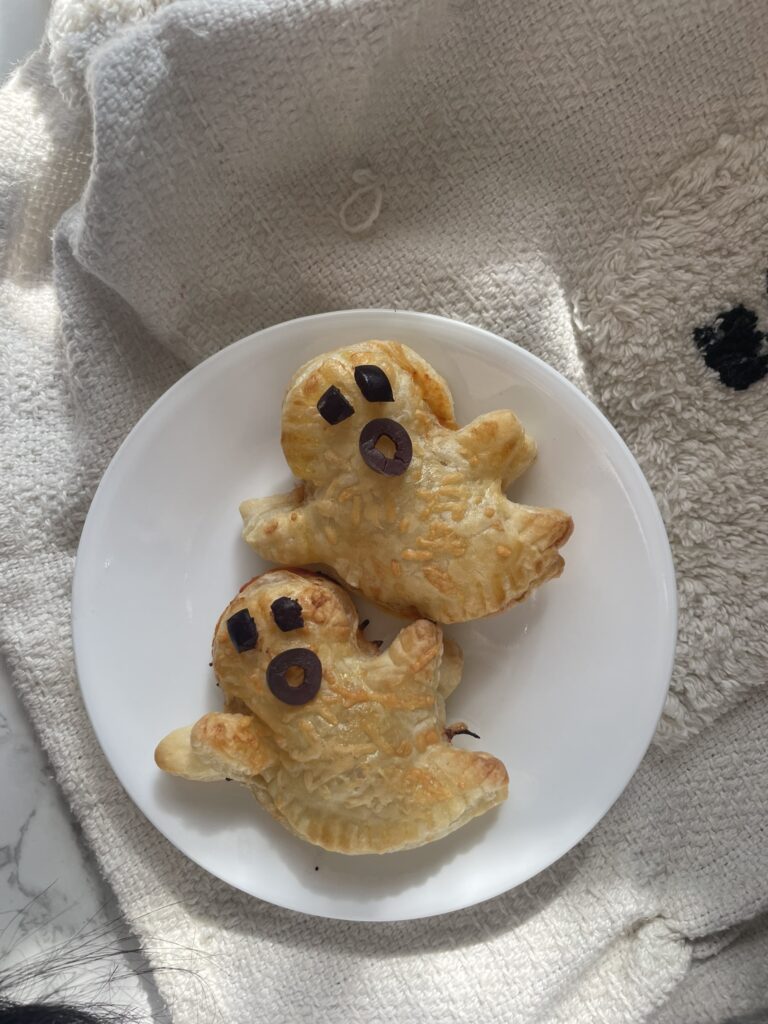
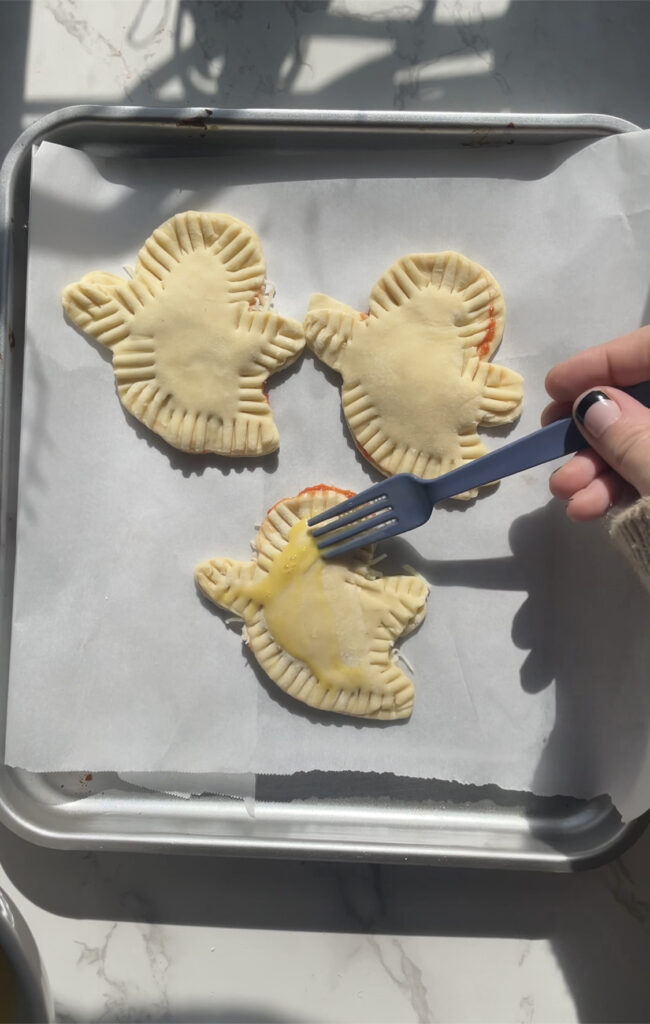
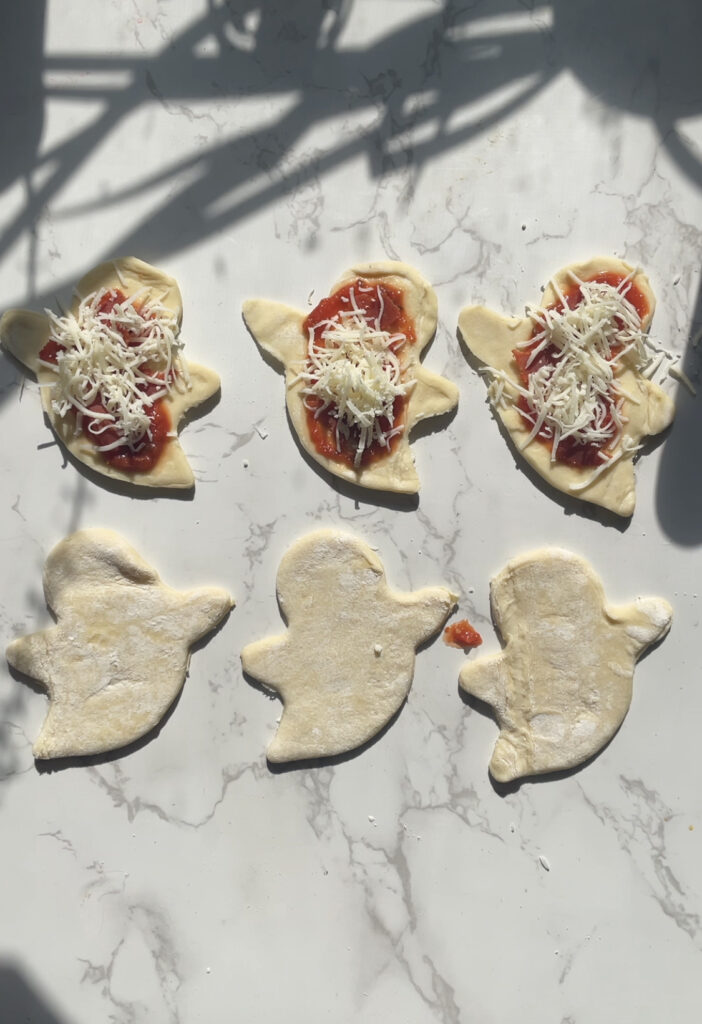
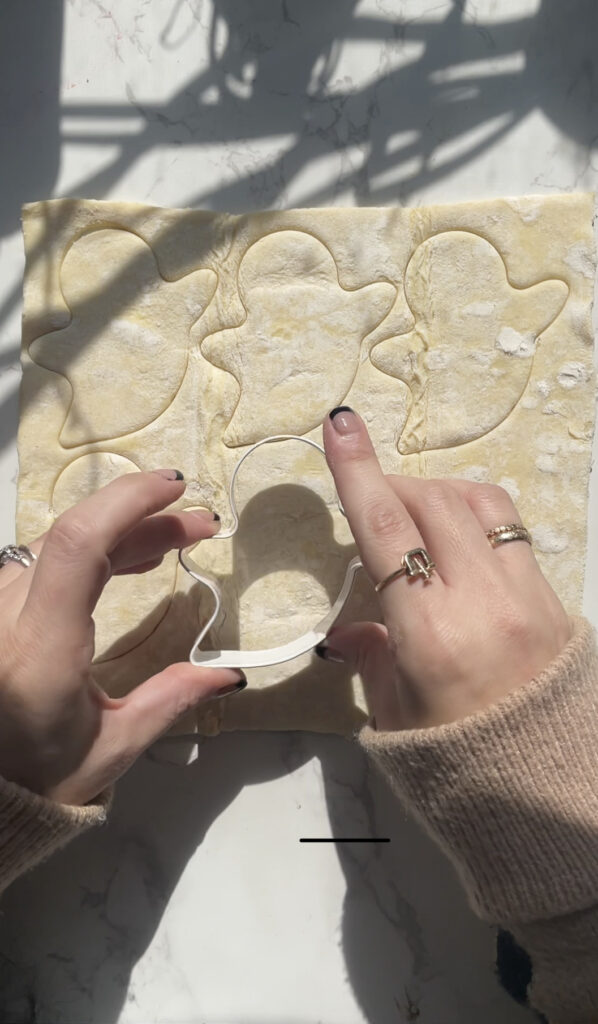
Roll out the puff pastry sheet on a lightly floured surface. Using a ghost-shaped cookie cutter, cut out ghost shapes from the puff pastry. Place them on a baking sheet lined with parchment paper.
Now it’s time to assemble the ghosts. Spread a thin layer of pizza sauce on each ghost, leaving a small border around the edges.
Add a generous sprinkle of shredded mozzarella cheese on top of the sauce.
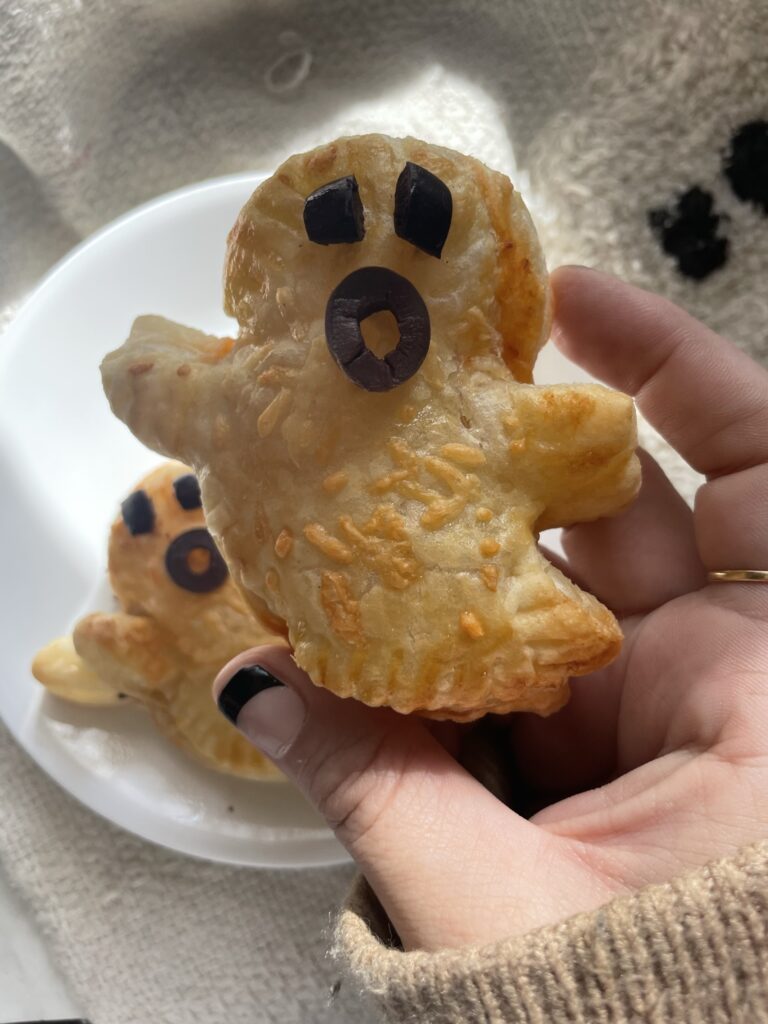
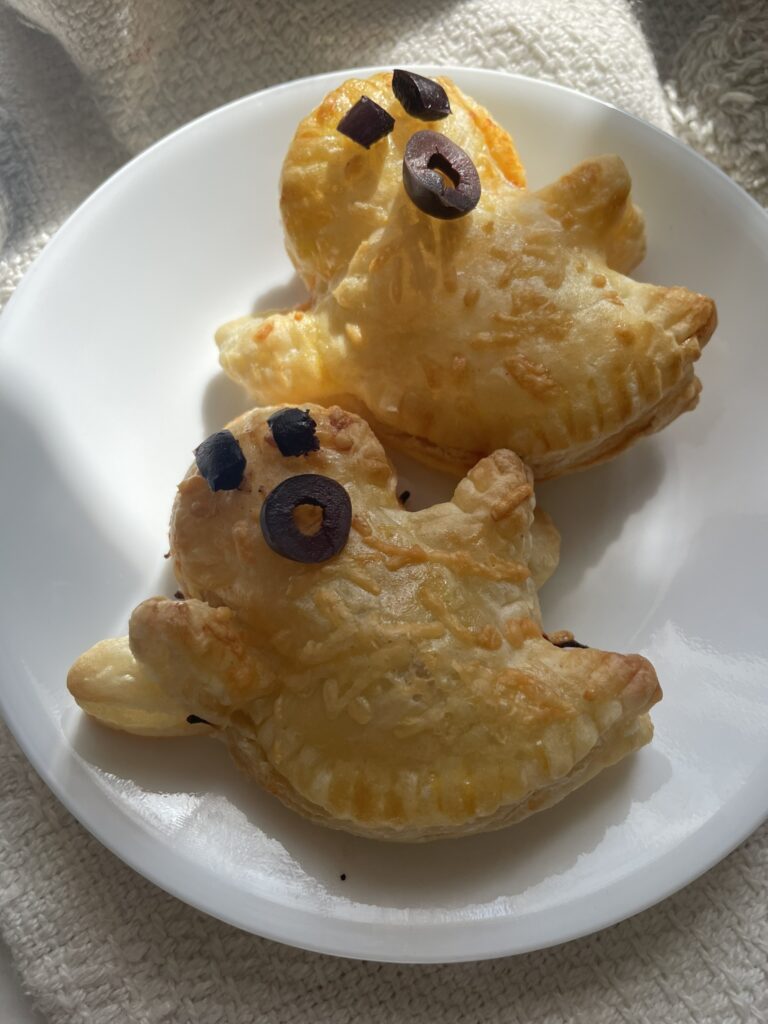
Decorate your ghost puff pastries with various toppings like sliced black olives for the eyes, red and green bell peppers for a mouth, and mushrooms for a spooky aura. Get creative with different toppings to make each ghost unique.
Top with another ghost and seal them together using a fork.
Brush the ghosts with egg wash.
Bake in the preheated oven for 12-15 minutes or until the puff pastry turns golden brown, and the cheese is bubbling.
Remove your Ghost Puff Pastry Pizzas from the oven and let them cool for a few minutes before serving.
Arrange your ghostly creations on a spooky platter, and watch as your guests are delighted by these adorable and delicious treats!
Ghost Puff Pastry Pizzas are the perfect addition to your Halloween menu, combining the flavors of a classic pizza with a hauntingly cute twist. They’re a hit with kids and adults alike, making them an ideal choice for your Halloween party. So, whip up a batch of these delightful, edible specters and get ready to celebrate a spooktacular Halloween with your friends and family. Happy Haunting!
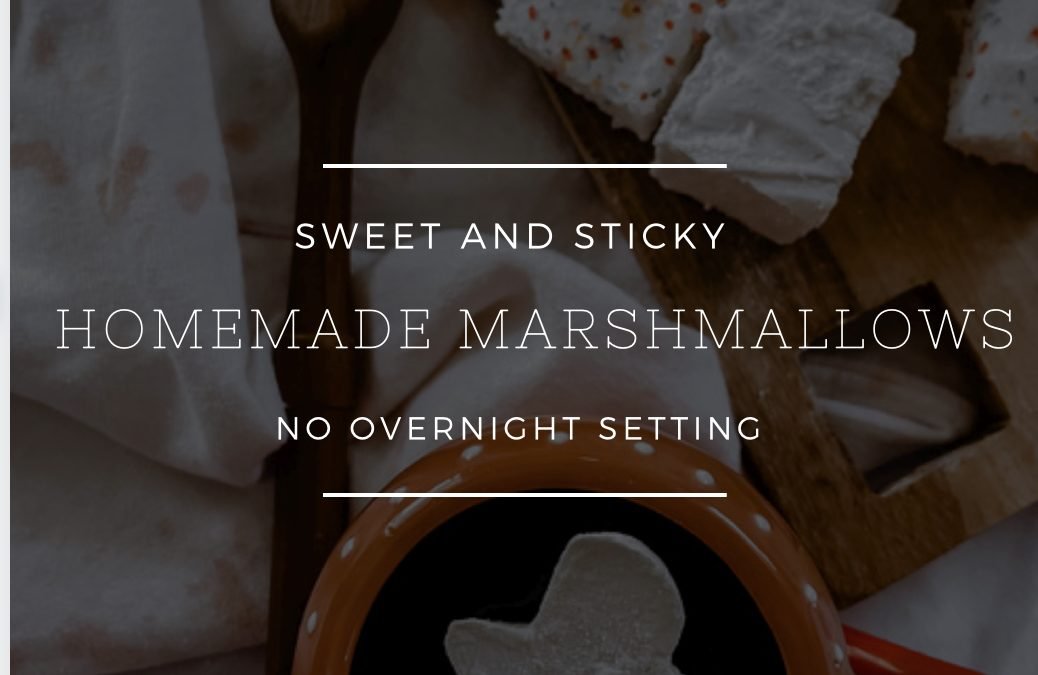
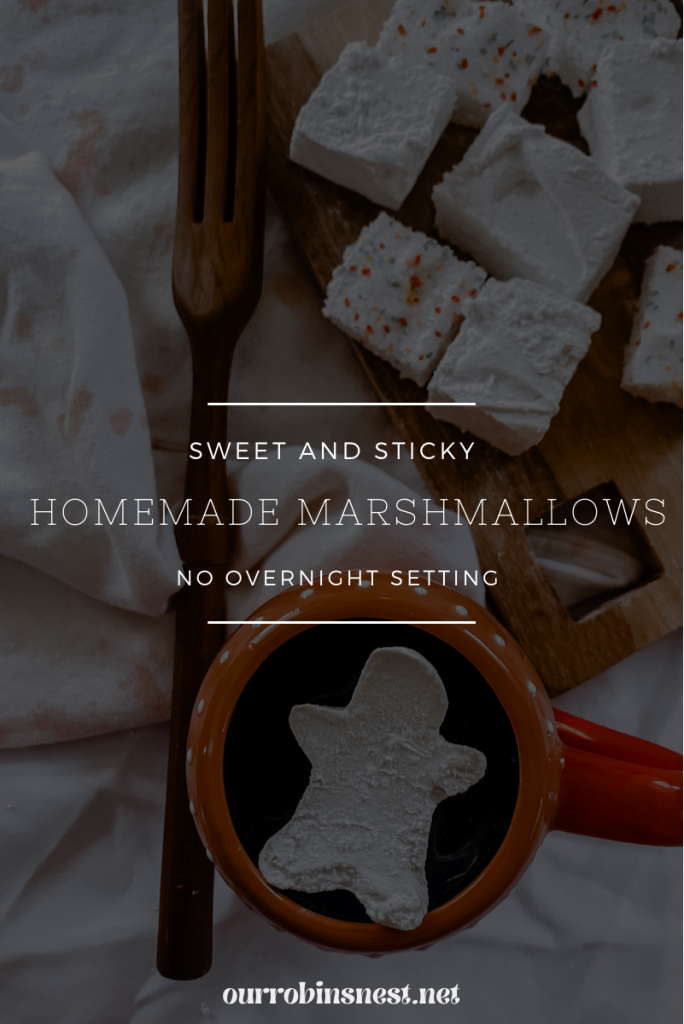
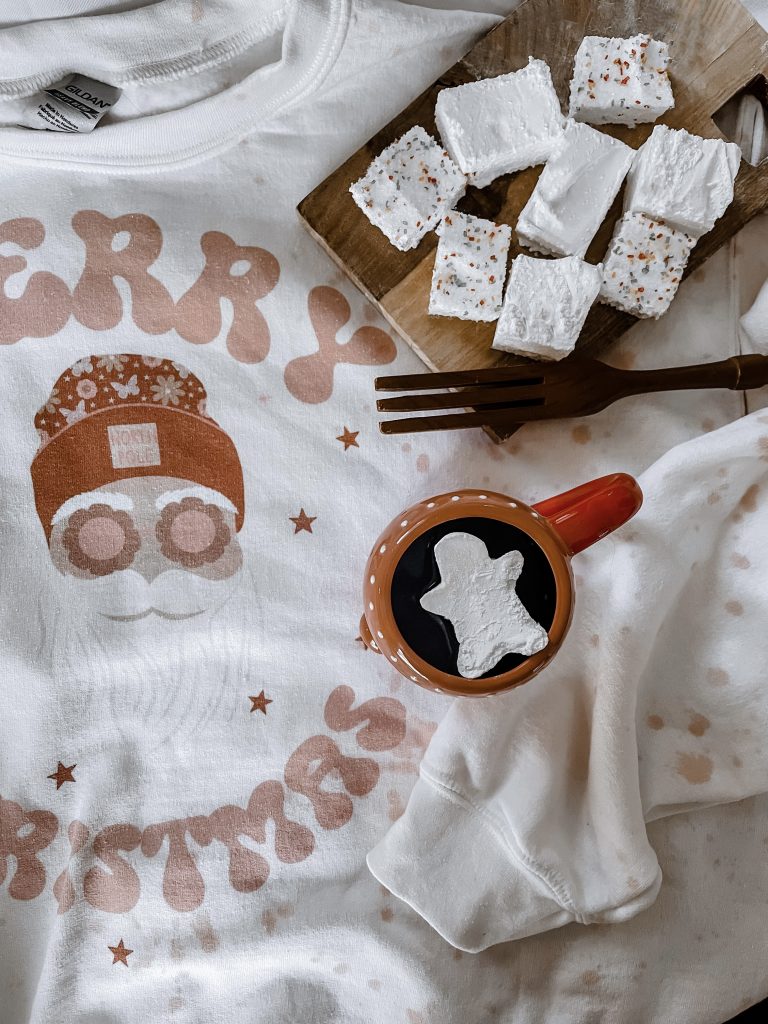
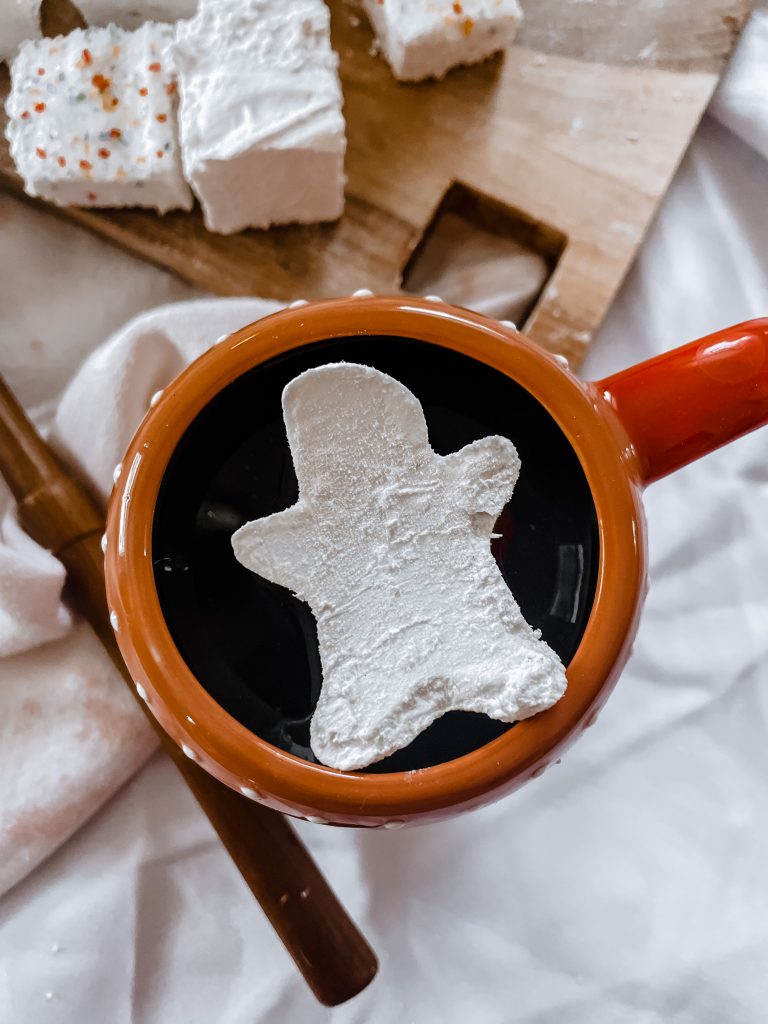
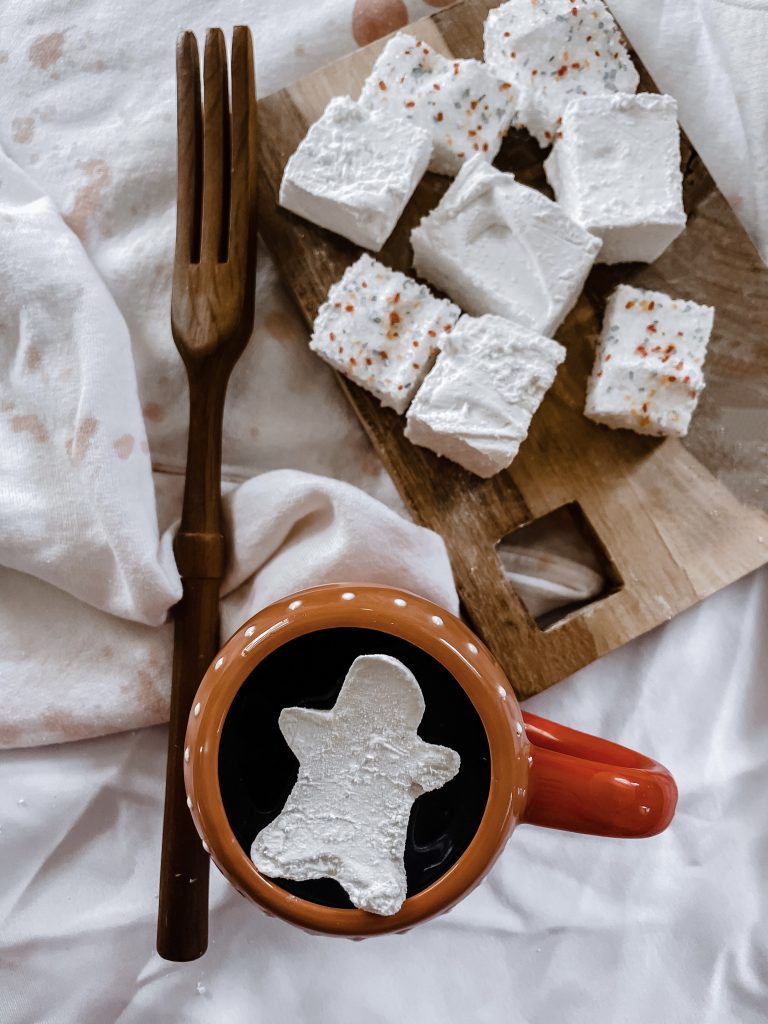
I’ve been wanting to make homemade marshmallows for a while now and I finally got around to making some. We had our first real snowfall of the season and since I only like snow before Christmas, I figured this is the best time to make some for our hot chocolate.
Homemade marshmallows just hit differently. You have control of the size and shape of them and it makes an abundance amount!
Hear it from me first because I learned the hard way- use a large pot when making homemade marshmallows. My stove may never recover from what happened!
I’ve tried a few different ways to make homemade marshmallows, but I’m impatient and want things to be done as soon as possible. A lot of recipes that I found required the recipe to set over night while everything solidified. I wanted something where I could eat this within 3 hours or longer if I really wanted to. This recipe is perfect if you are impatient like me.
Ingredients
2 tbs gelatin
1 cup cold water
2 cups granulated sugar
½ cup powdered sugar
1/2 teaspoon salt
2 teaspoons vanilla extract
Line baking pan with parchment paper and dust with powdered sugar.
Mix together gelatin and 1/2 cup cold water. Stir lightly. Set aside for about 10 minutes.
Place the remaining 1/2 cup of water and sugar over medium heat.
Add the gelatin and bring to a rolling boil until it reaches 240°F. Do not stir while boiling.
Remove from the heat and pour into an electric mixer.
Stir in the salt and vanilla extract.
Beat on low for 2 minutes then increase to high until soft and doubled in volume, around 15 minutes.
Pour into the prepared pan and smooth with a greased spatula.
Add sprinkles on top if you prefer.
Cool in the pan uncovered, until firm, for about 3 hours.
Cut with a greased knife or greased cookie cutters of your choice.
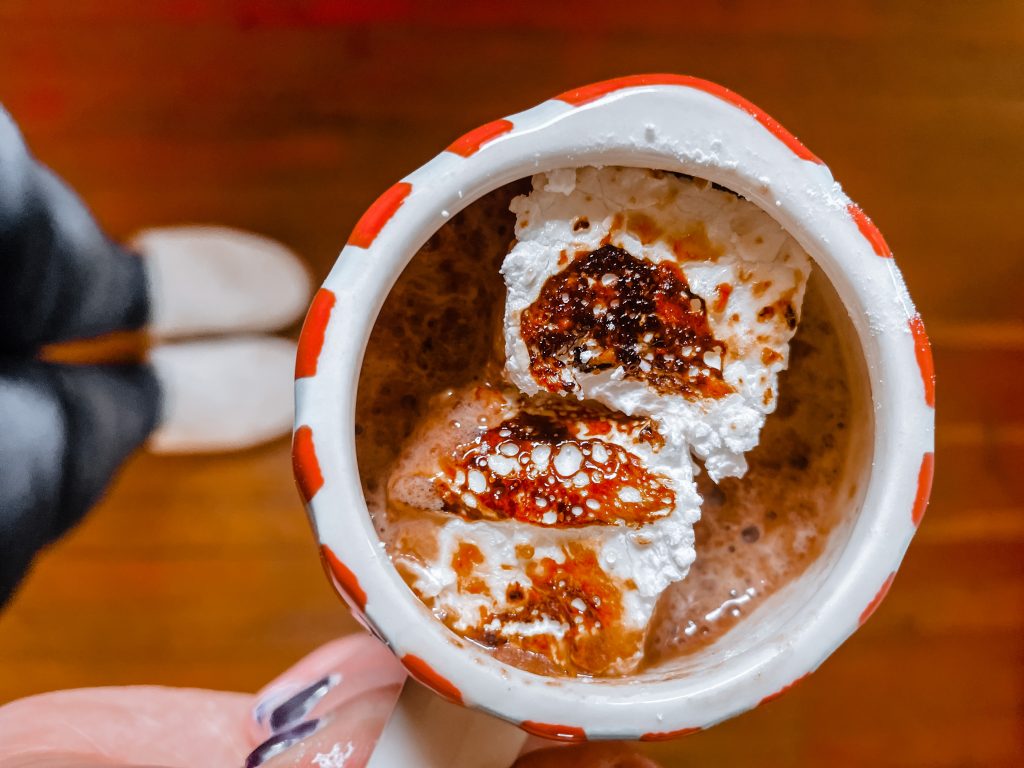
I have a mini blow torch that made the marshmallows perfectly roasted. Definitely worth a try if you know how to use one!
If motherhood has you stressed and you feel like you’ve lost your creativity, I am here to help! Here you will find easy recipes, simple DIY’s, affordable styles, and what to read next. I believe we all have a creative side, some of us just need a little help to find it. I will help inspire you to have creative expression without standards.