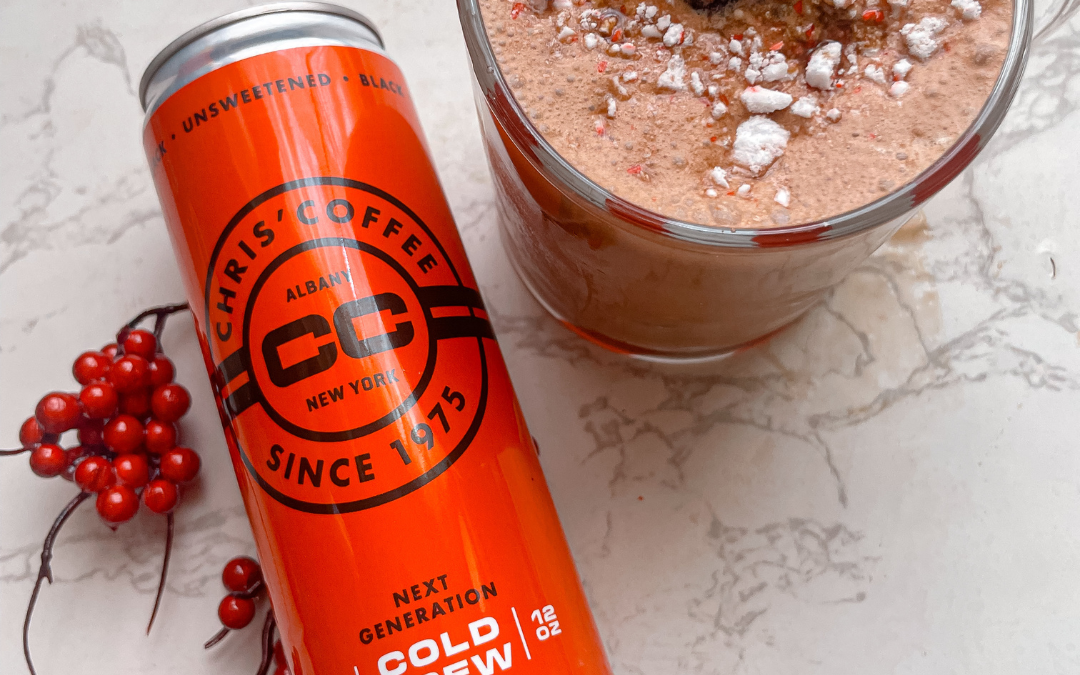
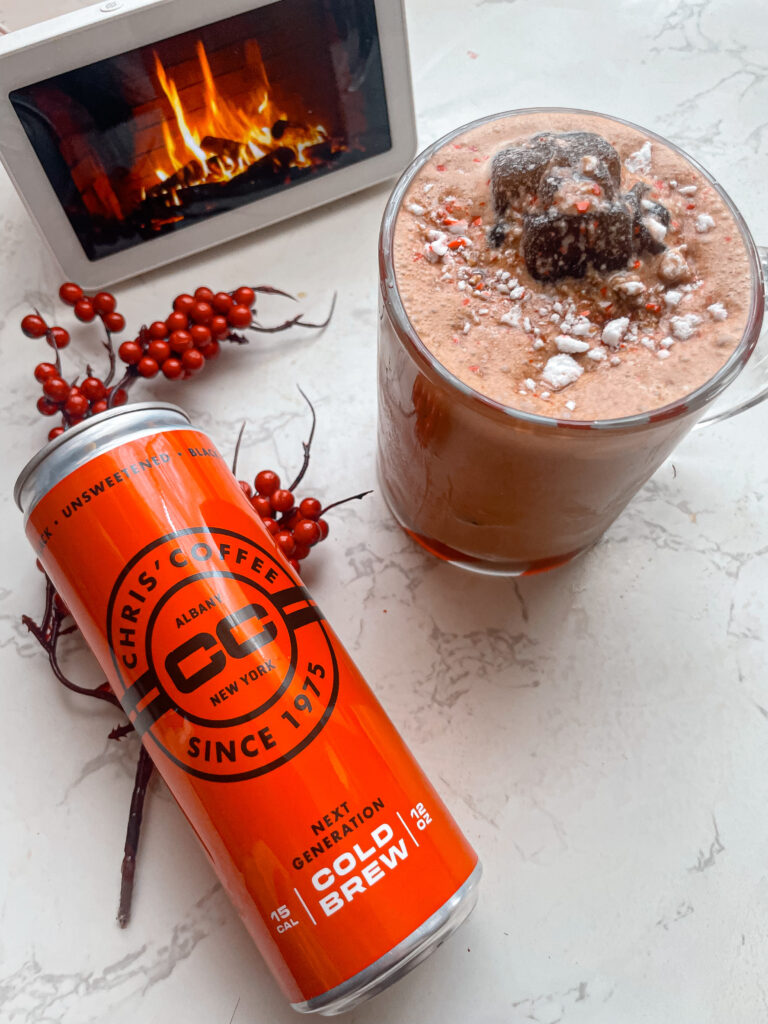
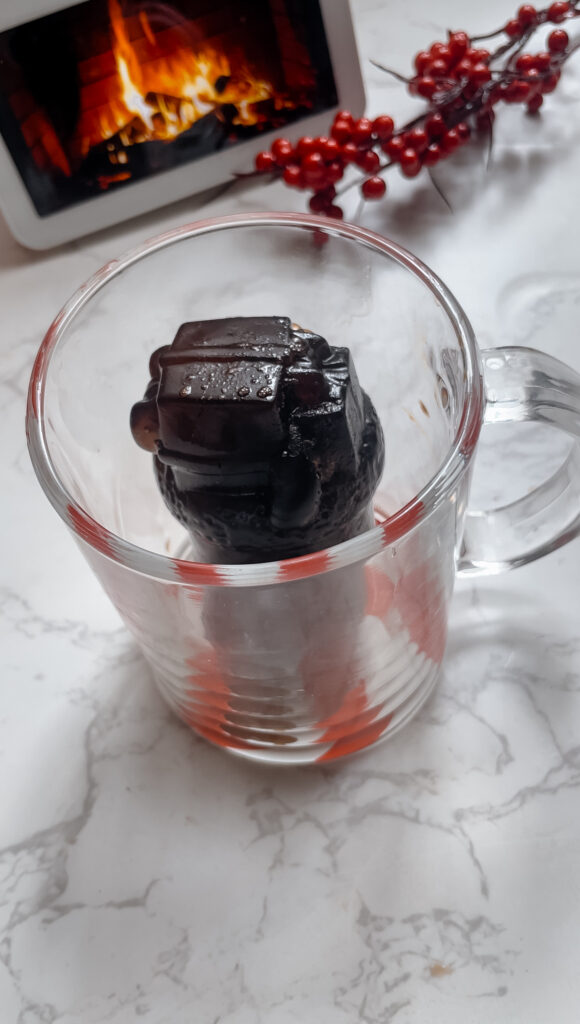
The holidays are here, and what better way to celebrate than with a festive and flavorful peppermint mocha cold foam cold brew? This peppermint mocha cold foam cold brew features the smooth, rich flavor of Chris’s Coffee as the base, complemented by holiday-inspired ingredients.
This is a sponsored post.
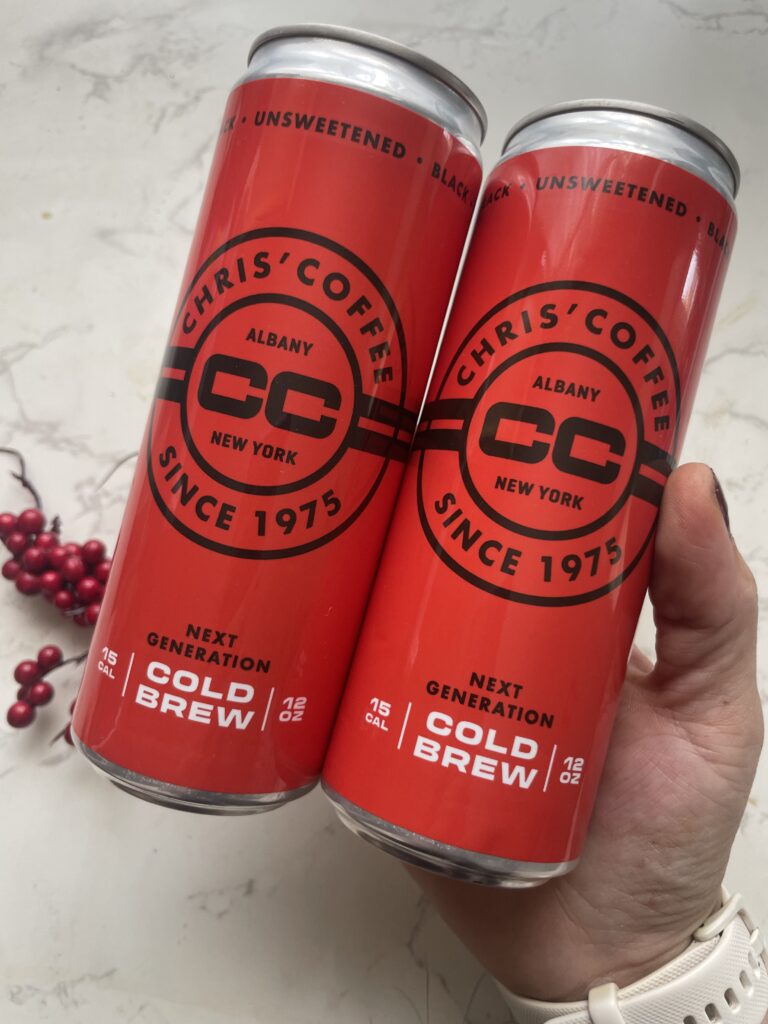
Why Chris’s Coffee Is the Perfect Choice
Chris’s Coffee is known worldwide for its exceptional quality and signature blends, making it a standout option for any coffee lover. As a leading importer of Italian-made home espresso machines, Chris’s Coffee also provides a wide range of products to enhance your at-home brewing experience. The unique, bold taste of their cold brew makes this peppermint mocha recipe truly shine.
2. Sweeten Your Coffee: Add 1 tablespoon of peppermint simple syrup to the cold brew and stir until combined. The peppermint syrup infuses the drink with a refreshing and festive flavor that pairs beautifully with the coffee.
3. Make the Peppermint Mocha Cold Foam: In a small mixing container, combine ¼ cup of heavy cream, 1 tablespoon of chocolate syrup, and ¼ teaspoon of peppermint extract. Use a handheld milk frother to whip the mixture until it becomes light and fluffy. This rich cold foam adds a decadent layer of flavor to the drink.
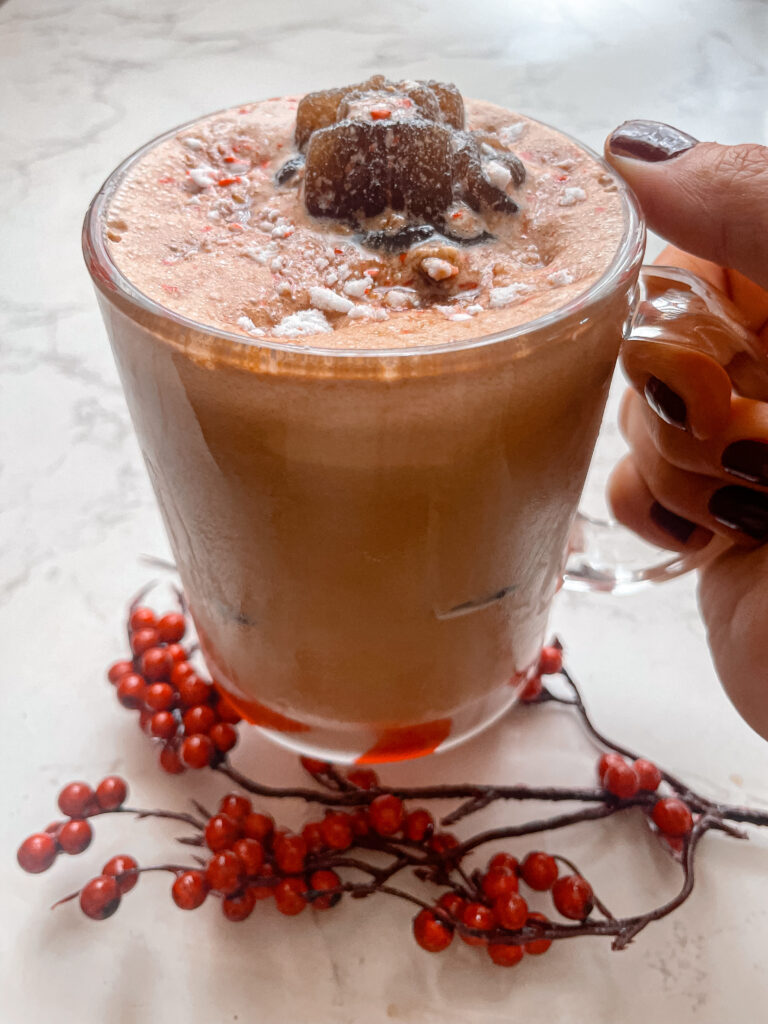
4. Assemble the Drink: Gently spoon the peppermint mocha cold foam over the top of the cold brew. The creamy foam floats beautifully and infuses the drink with chocolate and peppermint goodness.
5. Add a Festive Garnish: Sprinkle crushed candy cane over the cold foam for a final holiday touch. The red and white candy cane pieces add a pop of color and a satisfying peppermint crunch.
Why This Recipe Stands Out
The combination of Chris’s Coffee and festive ingredients makes this drink a standout holiday treat. The bold, smooth cold brew pair perfectly with the creamy chocolate and refreshing peppermint. The drink is indulgent yet refreshing, perfect for celebrating the holiday season.
Enjoy the Holiday Spirit with Chris’s Coffee
This peppermint mocha cold foam cold brew is a simple way to bring holiday cheer into your everyday coffee routine. Using Chris’s Coffee ensures a rich and flavorful experience, making this recipe a must-try for any coffee lover.
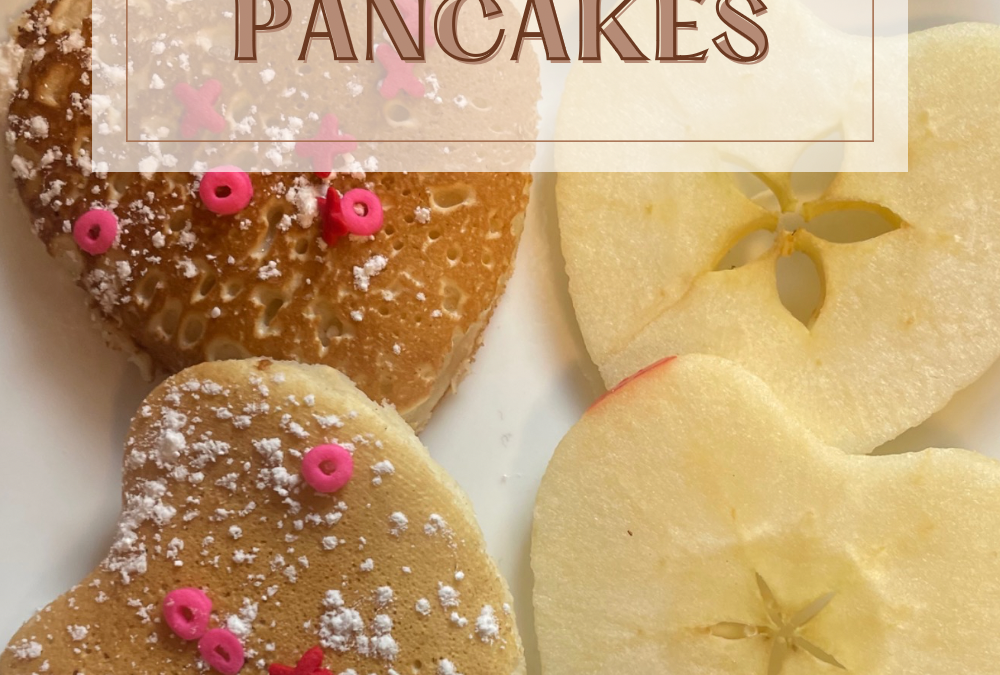
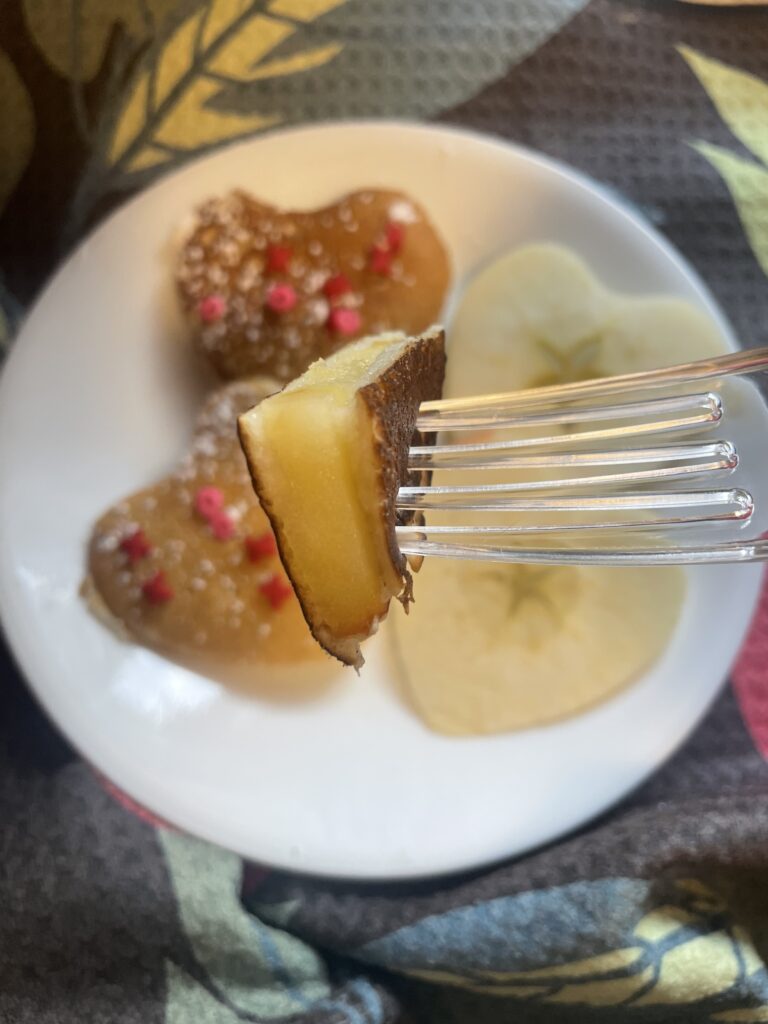
Heart-Shaped Apple Slice Pancakes: A Sweet Treat for Valentine’s Day
Valentine’s Day is around the corner, and what better way to celebrate than with a delightful breakfast treat? If you’re looking to impress your loved ones with a delicious and adorable dish, look no further than heart-shaped apple slice pancakes! This recipe combines the classic comfort of pancakes with the sweetness of apples, creating a perfect harmony of flavors and shapes that will surely make hearts flutter.
Ingredients:
1 cup all-purpose flour
1 tablespoon sugar
2 teaspoons baking powder
1/2 teaspoon salt
1 egg
3/4 cup milk
2 tablespoons unsalted butter, melted
1 apple, thinly sliced
Maple syrup and powdered sugar for serving
Instructions:
Prepare the pancake batter by mixing together the flour, sugar, baking powder, and salt in a large bowl.
In a separate bowl, beat the egg and then stir in the milk and melted butter until well combined.
Pour the wet ingredients into the dry ingredients and mix until just combined. Be careful not to overmix, as this can result in tough pancakes.
Heat a non-stick skillet or griddle over medium heat and lightly grease with butter or cooking spray.
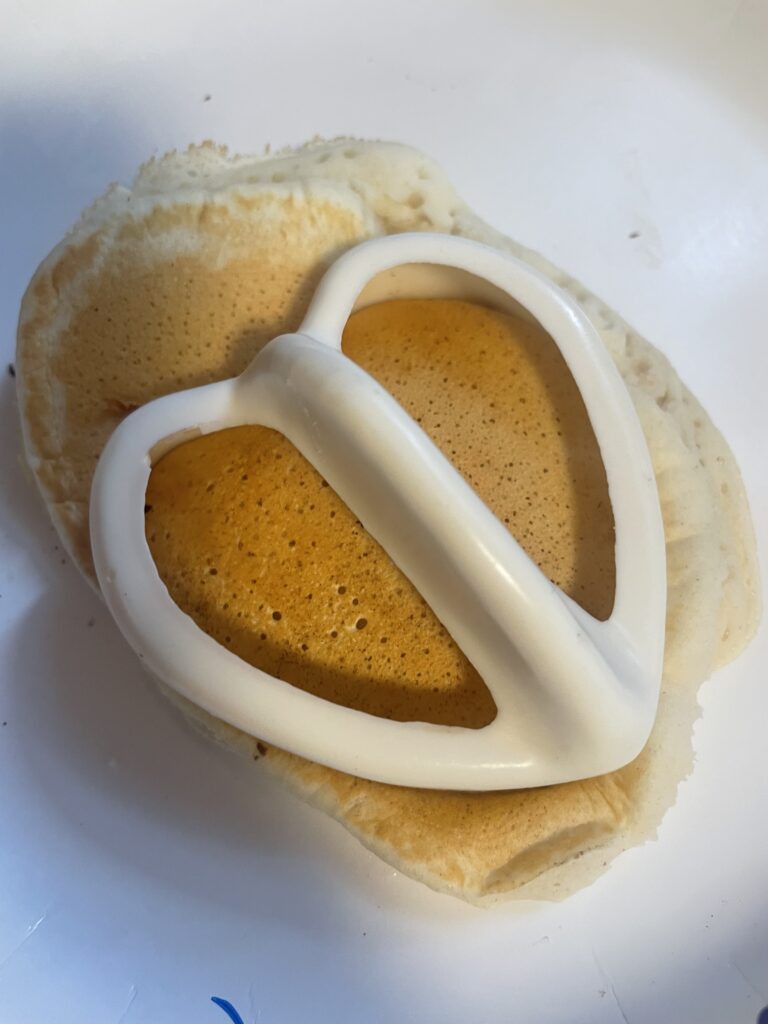
Place a heart-shaped cookie cutter onto the skillet and pour a small amount of batter into the center of the cutter.
Quickly place apple slices on top of the batter in the shape of a heart, pressing them gently into the batter.
Carefully remove the cookie cutter and cook the pancake until bubbles form on the surface, then flip and cook until golden brown on both sides.
Repeat with the remaining batter and apple slices, re-greasing the skillet as needed.
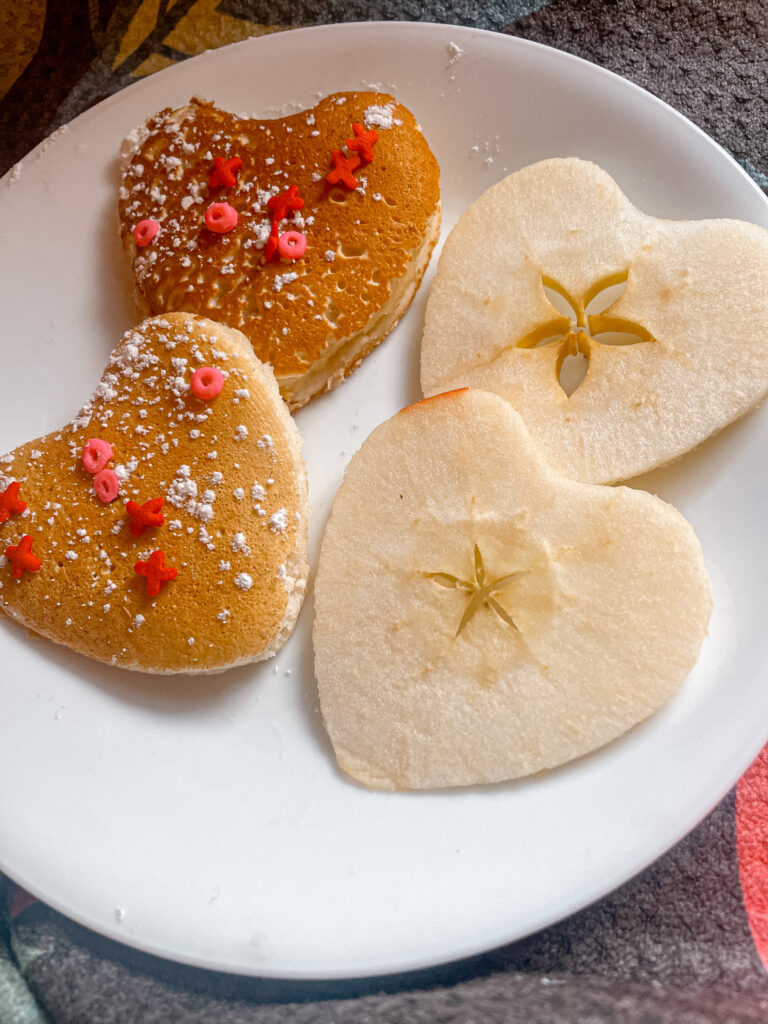
Serve the heart-shaped apple slice pancakes warm, drizzled with maple syrup and dusted with powdered sugar.
Enjoy these adorable and delicious pancakes with your loved ones on Valentine’s Day morning!
Tips for Success:
Use a firm apple variety like Granny Smith or Honeycrisp for the best results.
Make sure to slice the apples thinly to ensure they cook through evenly.
If you don’t have a heart-shaped cookie cutter, you can freehand the shapes using a spoon or ladle to pour the batter into heart shapes.
Keep the pancakes warm in a low oven while you cook the remaining batches.
Additional Note:
For those short on time or looking for an even easier option, you can absolutely use ready-made pancake mix for this recipe! Simply follow the instructions on the pancake mix package to prepare the batter, then proceed with steps 4 through 10 as outlined above. Using pre-made pancake mix not only saves time but also ensures consistent results, making this Valentine’s Day treat even more accessible for busy mornings or last-minute celebrations.
You can also make the pancakes round and then cut them with a heart shaped cookie cutter after they are cooked and cooled.
Enjoy!
These heart-shaped apple slice pancakes are the perfect way to start Valentine’s Day off on a sweet note. Whether you’re enjoying them with your significant other, your family, or even just by yourself, they’re sure to bring a smile to everyone’s face. So whip up a batch of these delightful pancakes and spread the love this Valentine’s Day!
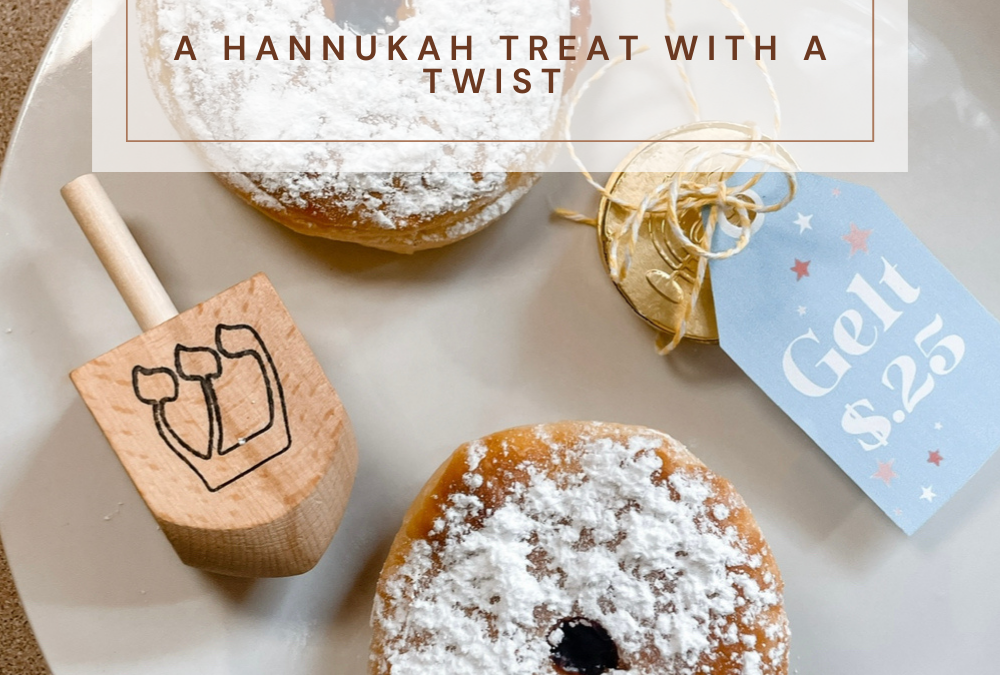
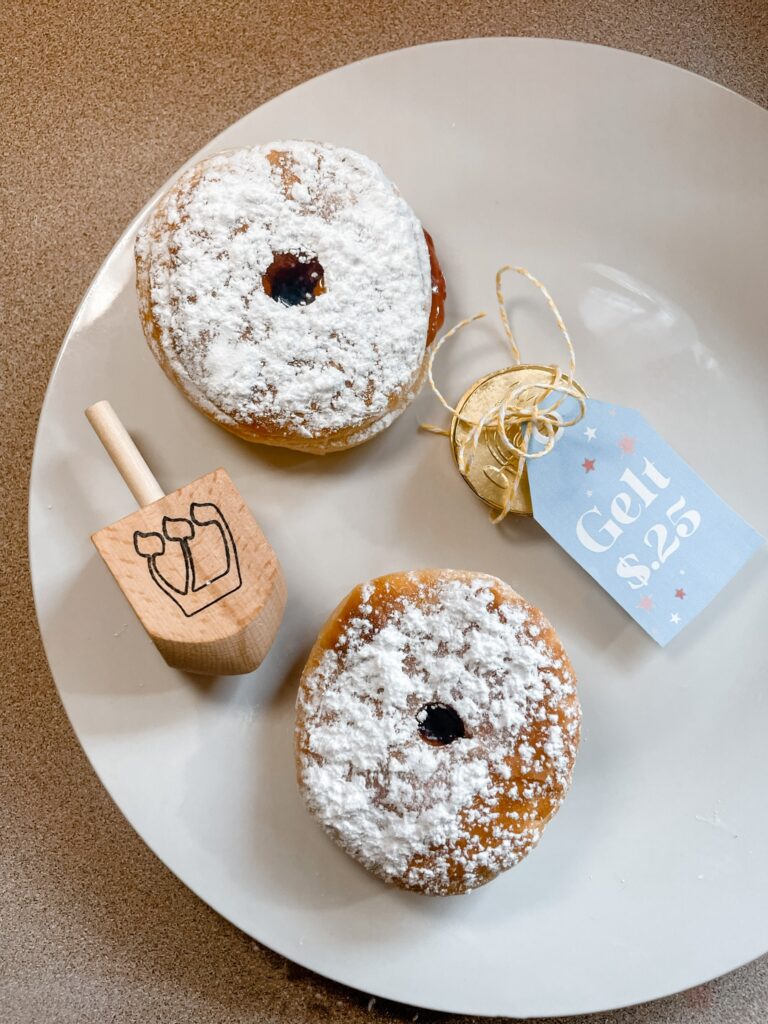
Hanukkah festivities are all about embracing tradition with a touch of innovation. Elevate your celebration with a modern twist on the classic jelly donut. In this blog post, I’ll guide you through the process of making air-fried jelly donuts using Pillsbury Grands biscuits, allowing you to add your favorite jam or jelly after the biscuits are cooked, ensuring a burst of flavor in every bite.
Why jelly donuts on Hanukkah?
Jelly donuts, known as sufganiyot in Hebrew, are a traditional Hanukkah treat. They are deep-fried and often filled with jelly or other sweet fillings. The significance lies in the oil used for frying, symbolizing the miracle of the oil in the Hanukkah story where a small amount of oil lasted for eight days in the temple menorah.
Ingredients:
Pillsbury Grands biscuits (1 can)
Jam or jelly of your choice (strawberry, raspberry, or grape work well)
Powdered sugar for dusting
Instructions:
1. Gather Your Ingredients:
Ensure you have all your ingredients ready to create a delightful combination of flaky biscuit dough, sweet fruit filling, and a finishing touch of powdered sugar.
2. Preheat Your Air Fryer:
Set your air fryer to 350°F (180°C) and allow it to preheat. This ensures your biscuits cook evenly and achieve a golden-brown perfection.
3. Air Fry the Biscuits:
Separate the Pillsbury Grands biscuits and lay them out on a clean surface. Flatten each biscuit as instructed on the package. Air fry the biscuits 6-8 minutes or until they reach a golden-brown color.
4. Cool and Create a Pocket:
Allow the air-fried biscuits to cool slightly. Once cooled, use a small knife to create a pocket in each biscuit by gently cutting a slit into the side, being careful not to cut through entirely.
5. Fill with Jelly:
Take your favorite jam or jelly and carefully inject it into each biscuit pocket. Ensure an even distribution of the fruity goodness, allowing the biscuit to soak up the flavors.
6. Dust with Powdered Sugar:
After injecting the jelly, dust the air-fried jelly donuts generously with powdered sugar. This adds a touch of sweetness and a visually appealing finish.
7. Serve and Enjoy:
Present your jelly-filled donuts on a festive platter. These delightful treats are ready to be enjoyed by family and friends. The combination of the flaky biscuit and the burst of fruity jelly creates a memorable Hanukkah experience.
This Hanukkah, savor the best of both worlds with air-fried jelly donuts that combine tradition with a modern twist. Share these delectable treats as a symbol of the joy and innovation that make the Festival of Lights truly special.
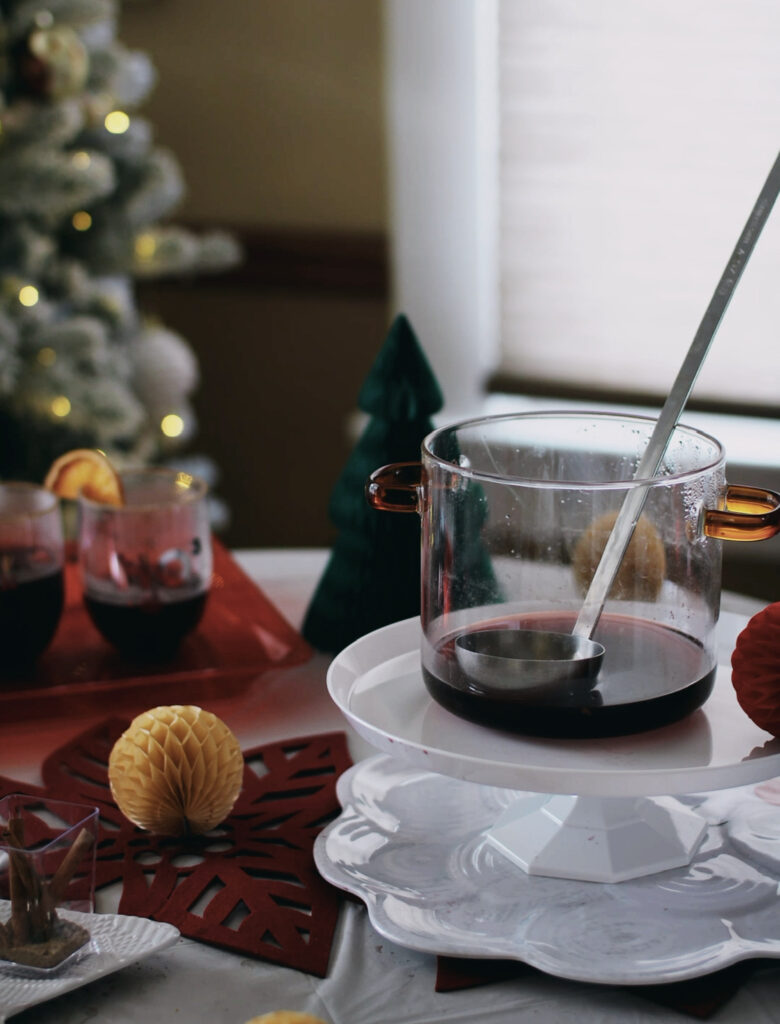
The holiday season is the perfect time to gather friends and family for a cozy get-together, and what better way to spread warmth and cheer than with a mulled wine bar? Transform your home into a winter wonderland by hosting a delightful evening filled with the rich aromas and flavors of spiced wine. Here’s a guide to creating the ultimate mulled wine experience and allowing your guests to craft their own unique concoctions.
Mulled Wine Base:
Ingredients:
2 bottles of red wine (e.g., Merlot or Cabernet Sauvignon)
1/2 cup of brandy
1/2 cup of honey or sugar
1 orange (sliced)
8 whole cloves
2 cinnamon sticks
2 star anise
Optional: 1/2 cup of cranberries for a festive touch
Instructions:
In a large pot, combine the red wine, brandy, honey (or sugar), orange slices, cloves, cinnamon sticks, and star anise.
Heat the mixture over low-medium heat until it reaches a gentle simmer. Avoid boiling to preserve the flavors.
Let it simmer for at least 15-20 minutes to allow the spices to infuse. Stir occasionally.
Strain the mixture to remove the spices and orange slices.
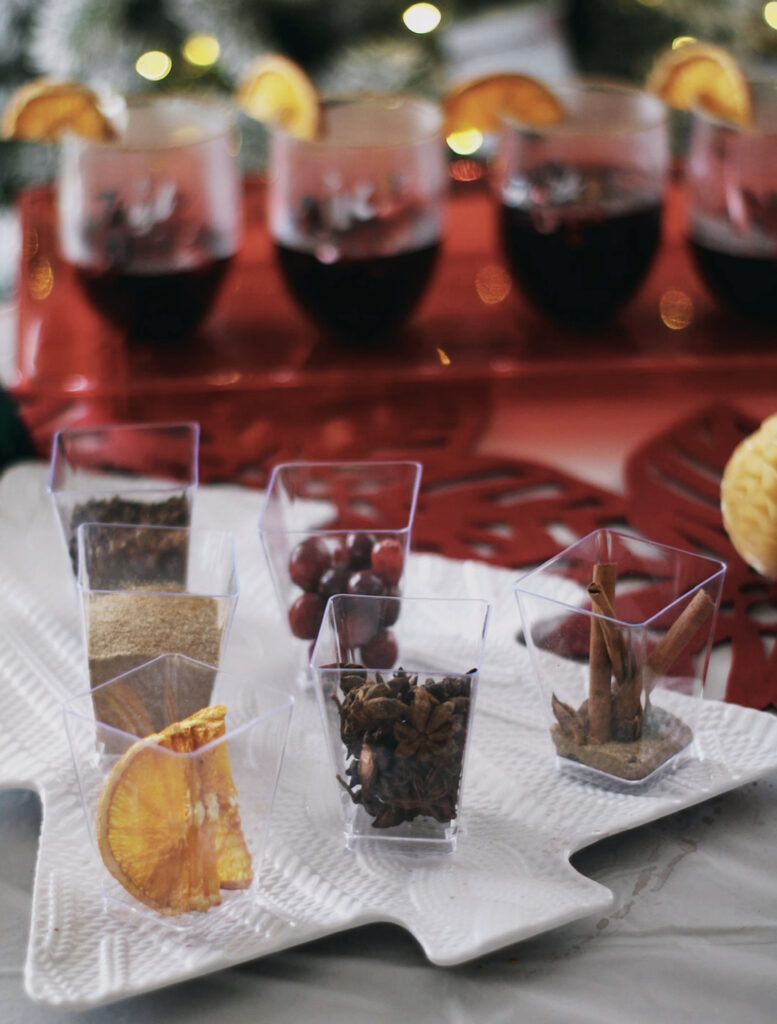
Personalizing Your Mulled Wine:
Now, let your guests unleash their creativity by offering an array of add-ins to personalize their mulled wine. Set up a designated station with the following options:
Fresh Fruits:
Sliced apples
Berries (strawberries, blueberries, or raspberries)
Pear slices
Citrus Zest:
Lemon or lime zest for a citrusy kick
Nuts and Dried Fruits:
Cinnamon-roasted almonds
Dried apricots or figs
Herbal Infusions:
Peppermint leaves
Rosemary sprigs
Additional Spirits:
Offer a selection of flavored liqueurs like orange liqueur or amaretto for an extra layer of complexity.
Sweeteners:
Brown sugar or maple syrup for those who prefer a sweeter touch.
Encourage your guests to experiment with different combinations, creating their own signature mulled wine blend. Provide recipe cards or a chalkboard with suggested pairings to inspire their creativity.
Atmosphere and Ambiance:
Enhance the festive atmosphere by complementing your mulled wine bar with cozy decor. Dim the lights, light some candles, and play soft holiday tunes in the background. Consider adding a touch of greenery with pine branches or wreaths to evoke the spirit of the season.
Hosting a mulled wine bar allows your guests to share in the joy of crafting their own delightful holiday drinks, making your gathering not only memorable but also a unique experience for everyone involved. Cheers to a warm and festive celebration!
Gingerbread houses are a delightful holiday tradition that brings joy and creativity to the festive season. If you’re looking for a fun and budget-friendly alternative to traditional gingerbread, why not try making salt dough gingerbread houses so they last years to come? In this blog post, I’ll guide you through the process and provide a free gingerbread house template to make your crafting experience even more enjoyable. They also smell amazing!
Ingredients:
2 cups all-purpose flour
1 cup salt
3/4 cup cinnamon
1 cup water
Gingerbread house template (provided below)
Rolling pin
Baking sheets
White puff paint
Hot glue gun
Instructions:
Prepare the Salt Dough:
In a mixing bowl, combine the flour, salt, cinnamon and water.
Knead the mixture until it forms a smooth, pliable dough.
Print and Cut the Gingerbread House Template:
Download the free gingerbread house template provided [here].
Print the template on sturdy paper and carefully cut along the outlined edges.
Roll Out the Dough:
Preheat your oven to 200°F (93°C).
Roll out the salt dough on a floured surface to approximately 1/4 inch thickness.
Cut and Bake:
Place the gingerbread house template pieces onto the rolled-out dough.
Carefully cut around the template using a knife.
Transfer the cut pieces onto a baking sheet.
Bake for 2-3 hours or until the dough is completely dry. Keep an eye on them to prevent burning.
Let it Cool:
Allow the baked pieces to cool completely before assembling the gingerbread house.
Decorate and Glue Together:
Use white puff paint to decorate your house.
Once the paint is dried, hot glue pieces together.
Creating salt dough gingerbread houses is a delightful and budget-friendly way to celebrate the holiday season with loved ones. With our free gingerbread house template and easy-to-follow instructions, you’re all set to embark on a fun and festive crafting adventure. Enjoy making memories as you decorate and share the joy of your unique salt dough gingerbread creation!
If motherhood has you stressed and you feel like you’ve lost your creativity, I am here to help! Here you will find easy recipes, simple DIY’s, affordable styles, and what to read next. I believe we all have a creative side, some of us just need a little help to find it. I will help inspire you to have creative expression without standards.