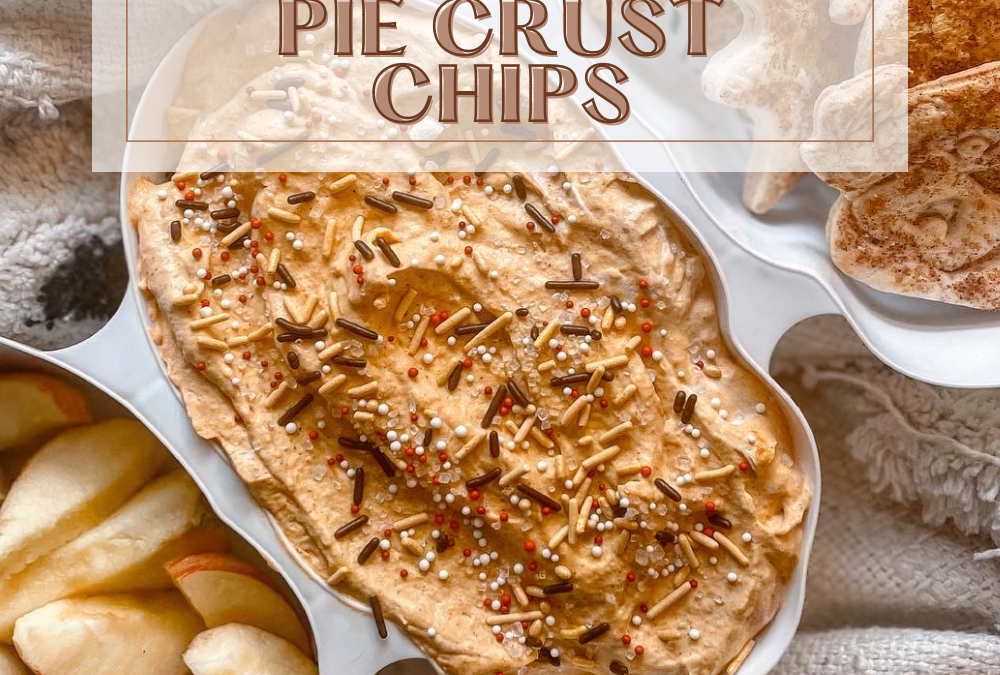
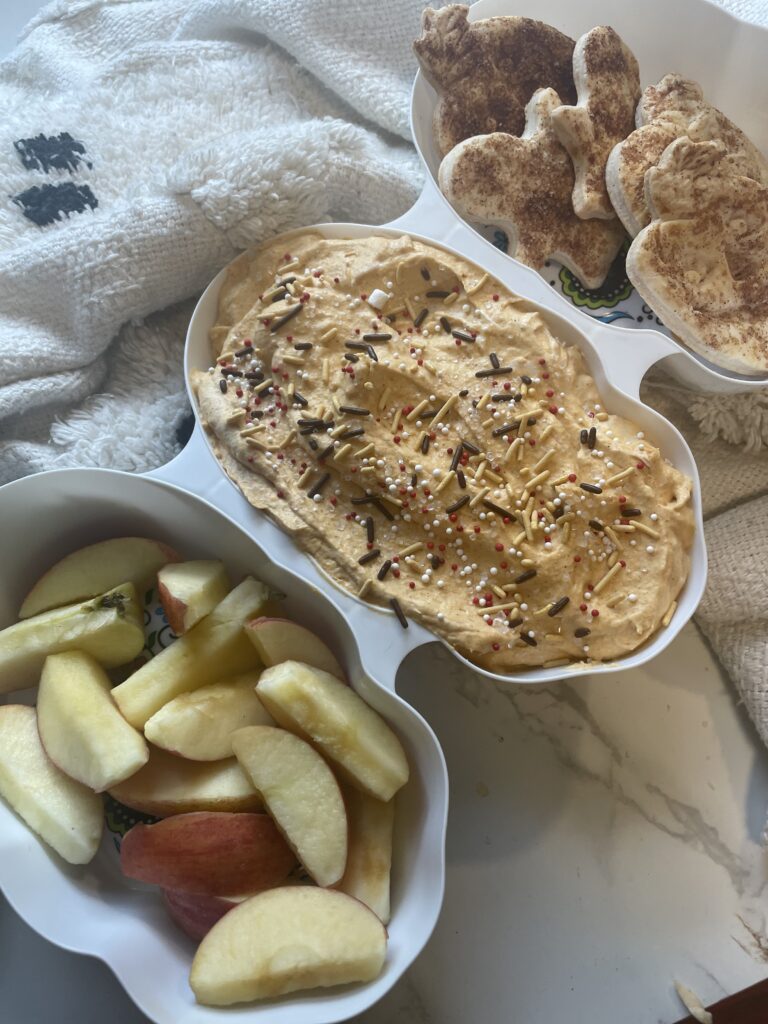
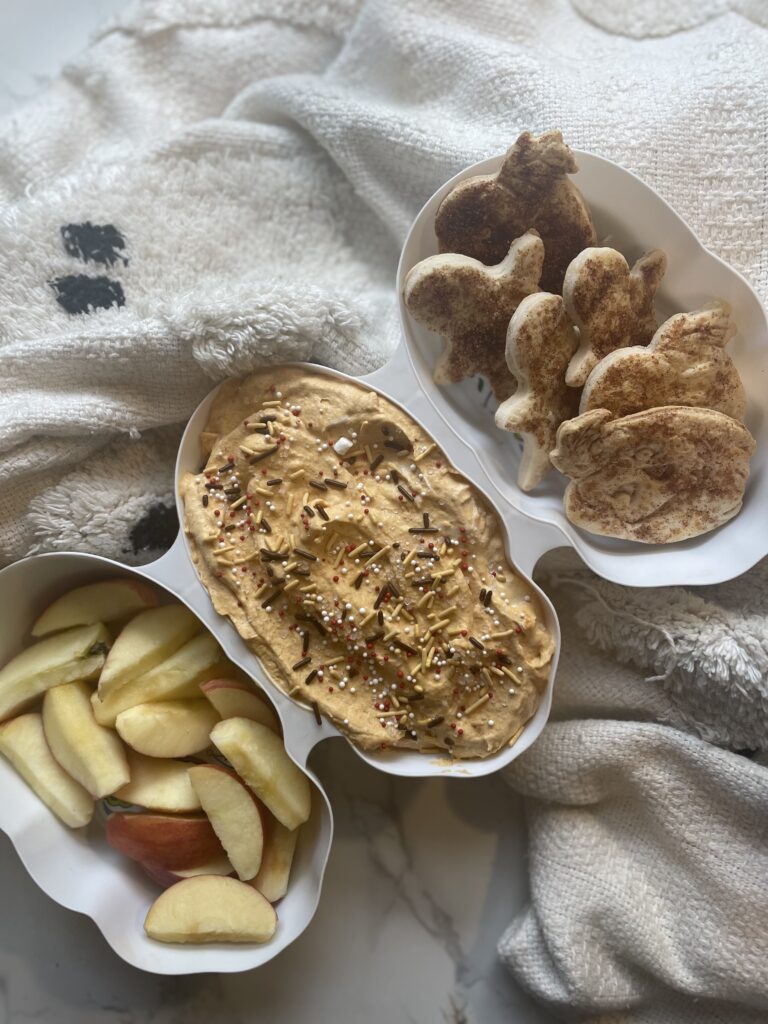
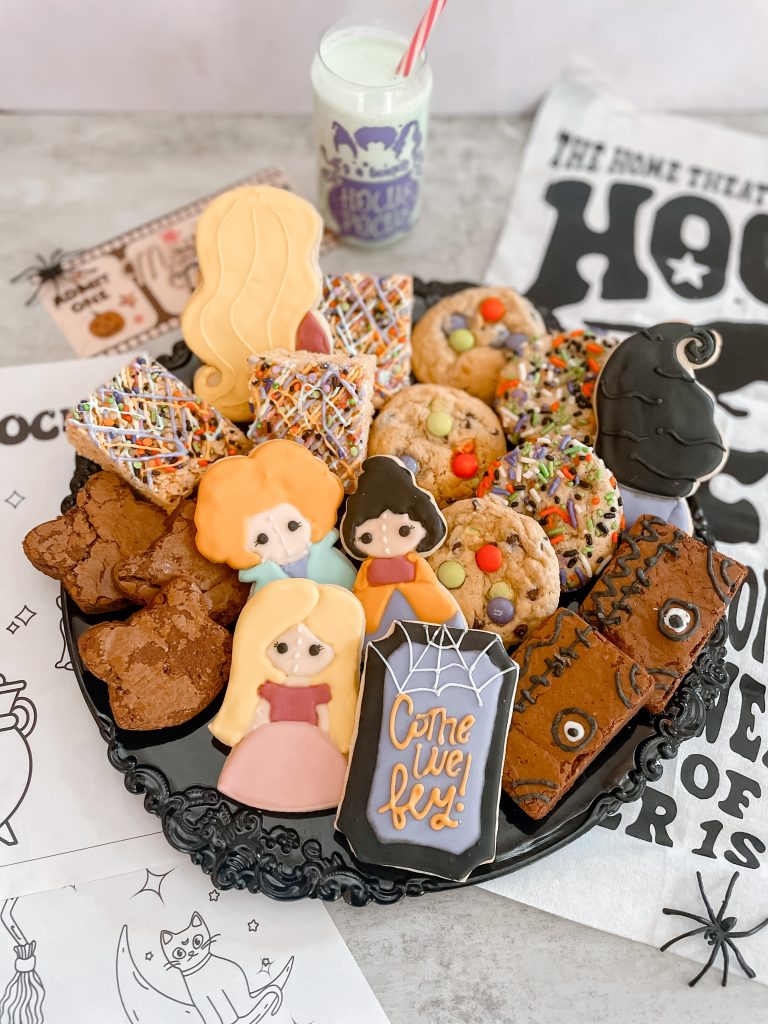
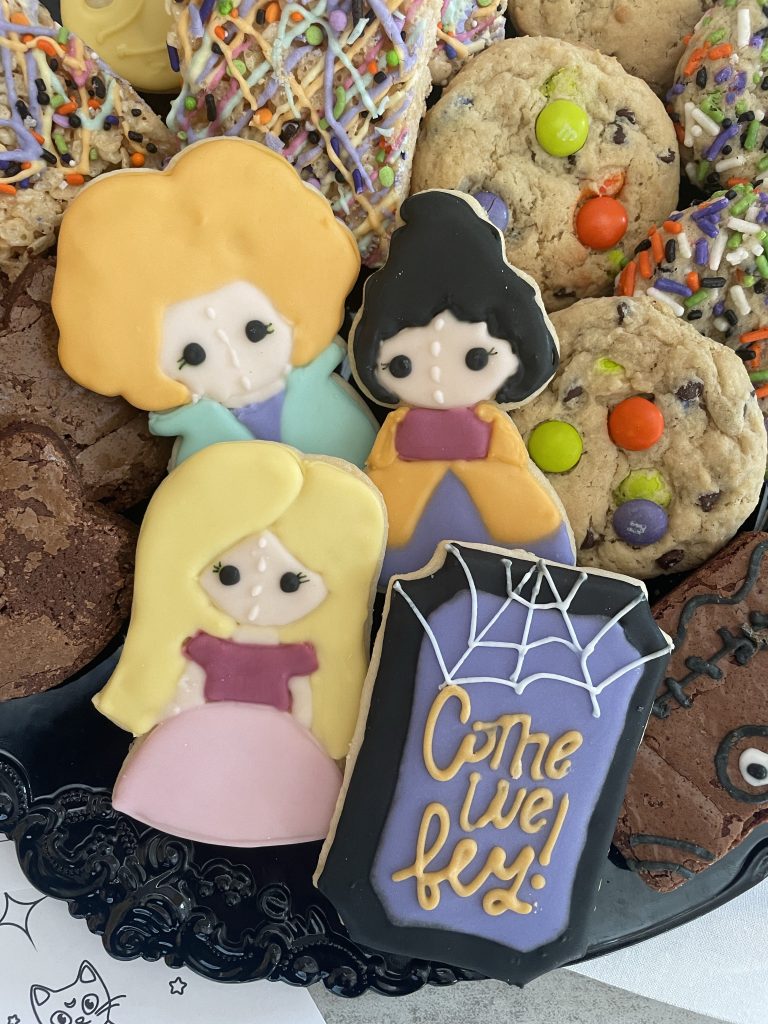
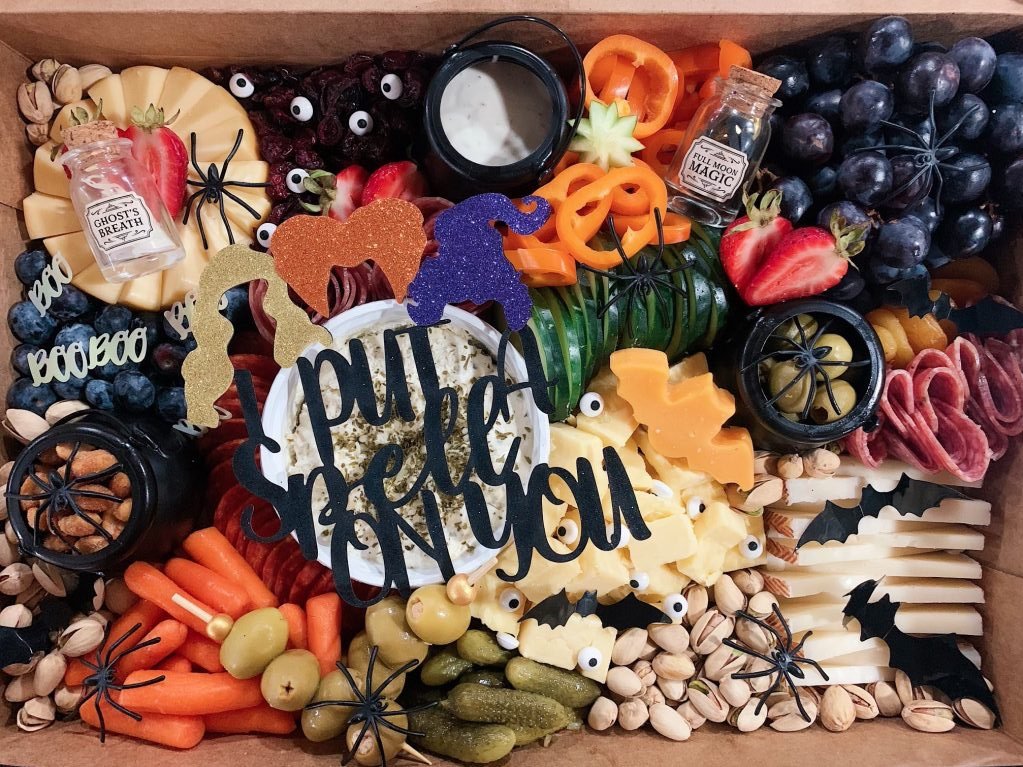
As the leaves turn vibrant shades of orange and the air becomes crisp, there’s a special kind of excitement that fills the air – it’s Halloween season! And what better way to celebrate this spooky time of year than by whipping up some deliciously festive treats? One of my absolute favorites is making Halloween-themed goodies, and today, I’m thrilled to share my love for creating a scrumptious Pumpkin Pie Dip with Pie Crust Chips. This delightful concoction is the perfect blend of sweet and spicy, making it an irresistible treat for your Halloween festivities.
Ingredients You’ll Need
For the Pumpkin Pie Dip:
1 cup of pumpkin purée
1 package (3.4 oz) of vanilla instant pudding mix
1 cup of Cool Whip (or a similar whipped topping)
1 teaspoon of cinnamon sugar (adjust to taste)
1 teaspoon of pumpkin pie spice (adjust to taste)
Milk (for adjusting the dip’s consistency)
For the Pie Crust Chips:
Premade pie crusts (you can use refrigerated or frozen pie crusts)
Milk (for brushing the pie crusts)
Instructions:
Making the Pumpkin Pie Dip:
In a mixing bowl, combine the pumpkin purée, vanilla instant pudding mix, and Cool Whip.
Stir the ingredients together until you achieve a smooth and creamy consistency.
Gradually add the cinnamon sugar and pumpkin pie spice to the mixture, adjusting the quantities to your personal taste. Feel free to add more or less to suit your preferences.
Once you’re satisfied with the taste and consistency, cover the dip and refrigerate it for at least an hour to allow the flavors to meld together. You can also refrigerate it longer for a richer flavor.
Preparing the Pie Crust Chips:
Preheat your oven according to the instructions on the premade pie crust packaging.
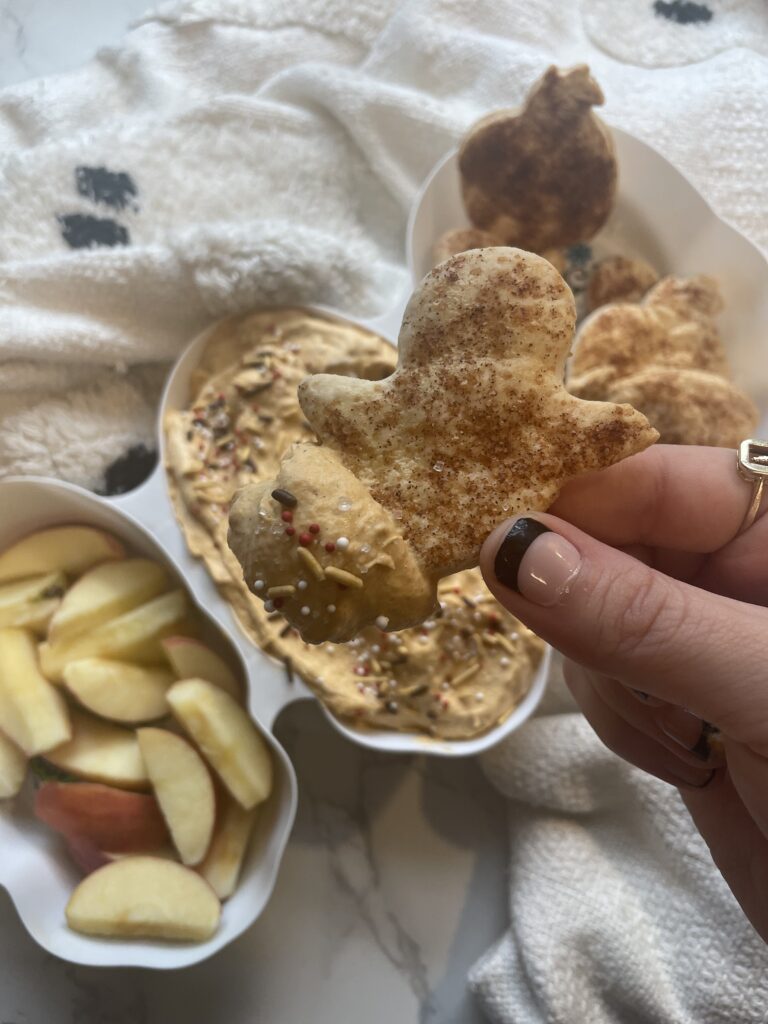
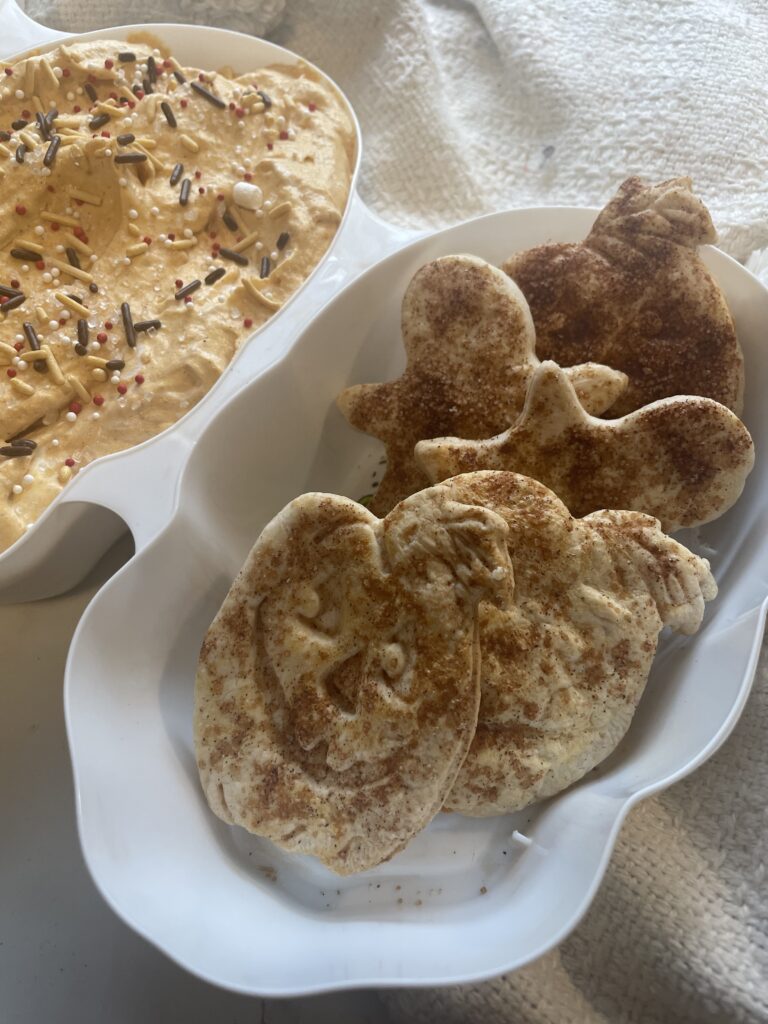
Roll out the premade pie crusts on a lightly floured surface. Using Halloween-themed cookie cutters, cut out various spooky shapes from the dough.
Place the pie crust shapes on a baking sheet lined with parchment paper.
Brush each shape with a bit of milk to help them turn golden brown while baking.
Sprinkle the shapes with additional cinnamon sugar for extra flavor.
Bake the pie crust chips in the preheated oven as per the package instructions, usually around 8-10 minutes or until they turn golden brown and crispy.
Putting It All Together
Now that you have your Pumpkin Pie Dip and Pie Crust Chips ready, it’s time to assemble your Halloween masterpiece. Arrange the golden pie crust chips around your Pumpkin Pie Dip, and watch as your guests are delighted by this enchanting and delicious Halloween treat. You can also add fruit, cookies and crackers along with your pie crust chips!
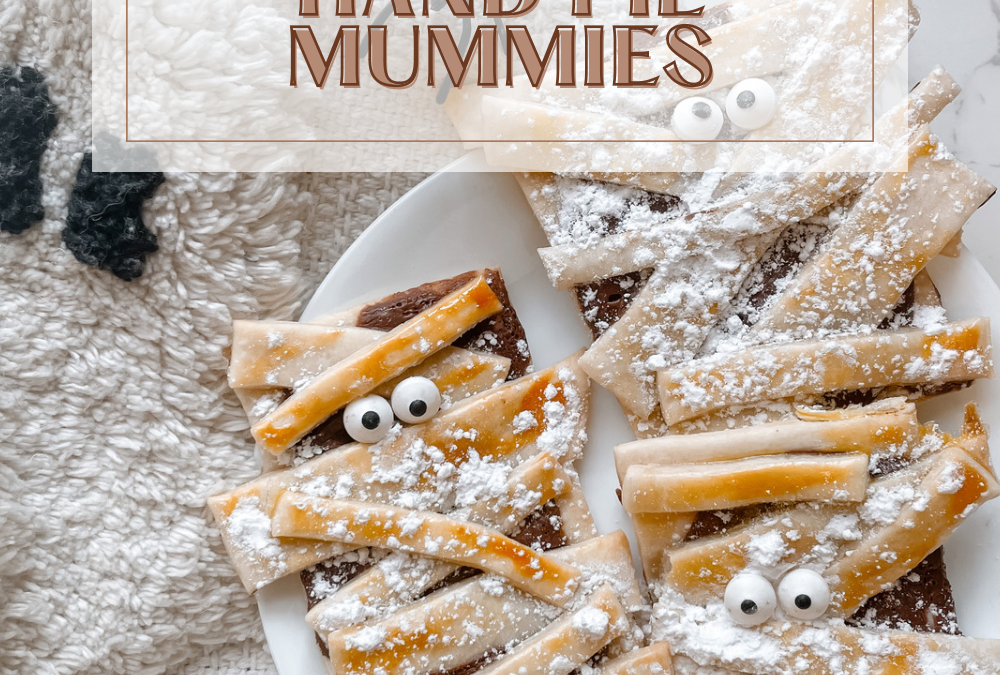
Halloween is a time for ghosts, ghouls, and, most importantly, delicious treats! If you’re looking for a fun and spooky snack that will delight kids and adults alike, you’re in for a treat. In this blog post, I’m going to show you how to make Chocolate Peanut Butter Hand Pie Mummies. These adorable mummy-shaped hand pies are not only delicious but also a perfect addition to your Halloween party spread. Best of all, they’re easy to make, and kids can join in on the fun!
To get started on these delectable mummy hand pies, you’ll need the following ingredients:
Ingredients:
Pre-made pie crusts (store-bought or homemade)
Chocolate peanut butter (or a mixture of chocolate spread and regular peanut butter)
Sprinkles for eyes
Egg wash (1 egg mixed with water)
Confectioners sugar
Instructions:
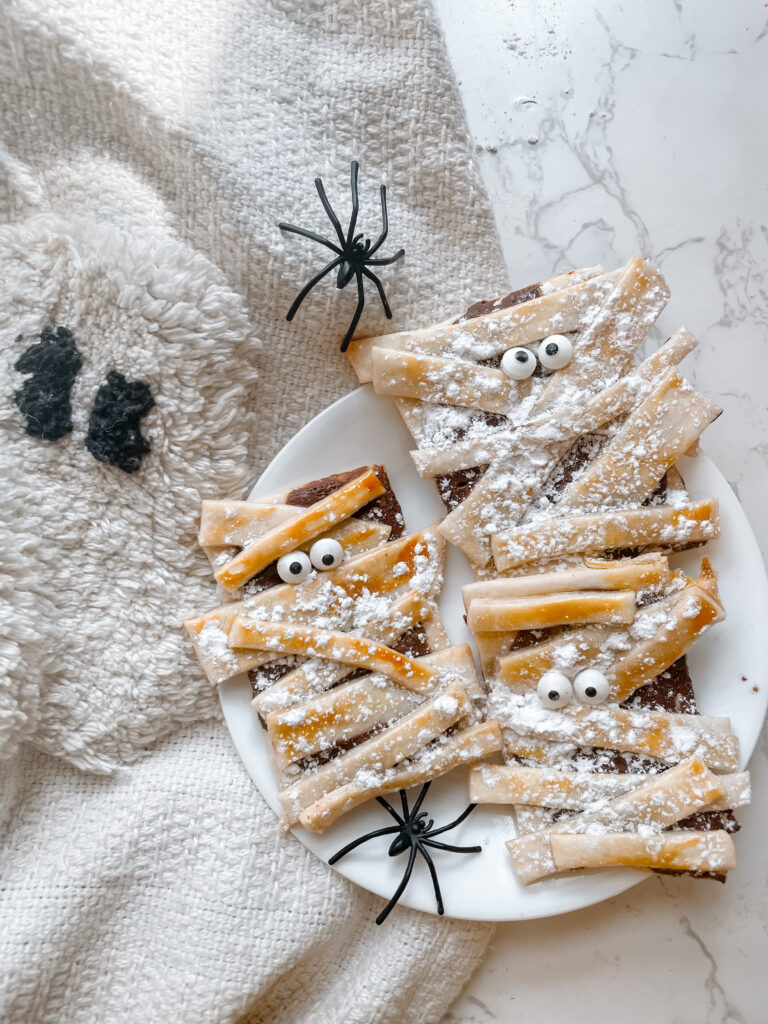
Roll Out the Pie Crusts: Start by rolling out your pre-made pie crusts on a floured surface. This will make the dough easier to work with. Using a rectangle cookie cutter, cut out circles from the pie crusts. These will serve as the base for your mummy hand pies.
Add Chocolate Peanut Butter: Take each rectangle and spread a generous amount of chocolate peanut butter (or a mixture of chocolate spread and regular peanut butter) in the center. Leave some space around the edges to seal the hand pies later.
Create the Mummy Look: To give your hand pies a mummy appearance, take another small piece of pie crust dough and cut it into thin strips. Lay these strips over the chocolate peanut butter-covered circles to create the “bandages.” Make sure to leave a small gap for the eyes.
Add Mini Chocolate Chip Eyes: Place two mini chocolate chips on each hand pie to serve as the mummy’s eyes. You can use a bit of the peanut butter mixture to help them stick in place.
Brush the mummies with egg wash.
Bake: Preheat your oven to the temperature recommended on the pie crust packaging. Place your mummy hand pies on a baking sheet lined with parchment paper. Bake them for the recommended time or until they turn golden brown.
Serve and Enjoy: Once your mummy hand pies are out of the oven and have cooled down a bit, sprinkles with confectioners sugar and these spooky treats to your little goblins! They’re perfect for Halloween parties, school lunches, or a fun family baking project.
These Chocolate Peanut Butter Hand Pie Mummies are a delightful Halloween treat that kids and adults will adore. The combination of chocolate and peanut butter encased in a cute mummy-shaped pie crust is both delicious and visually appealing. They’re a wonderful addition to your Halloween snack lineup, and you can get creative with the bandage designs. So, this Halloween, get ready to impress your guests with these adorable and scrumptious hand pies!
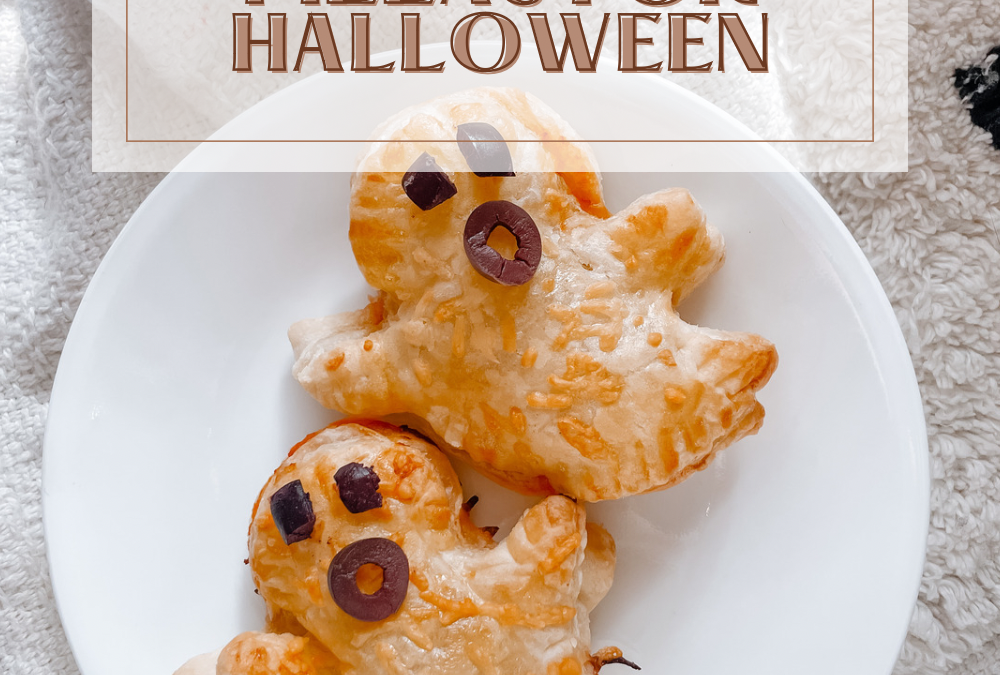
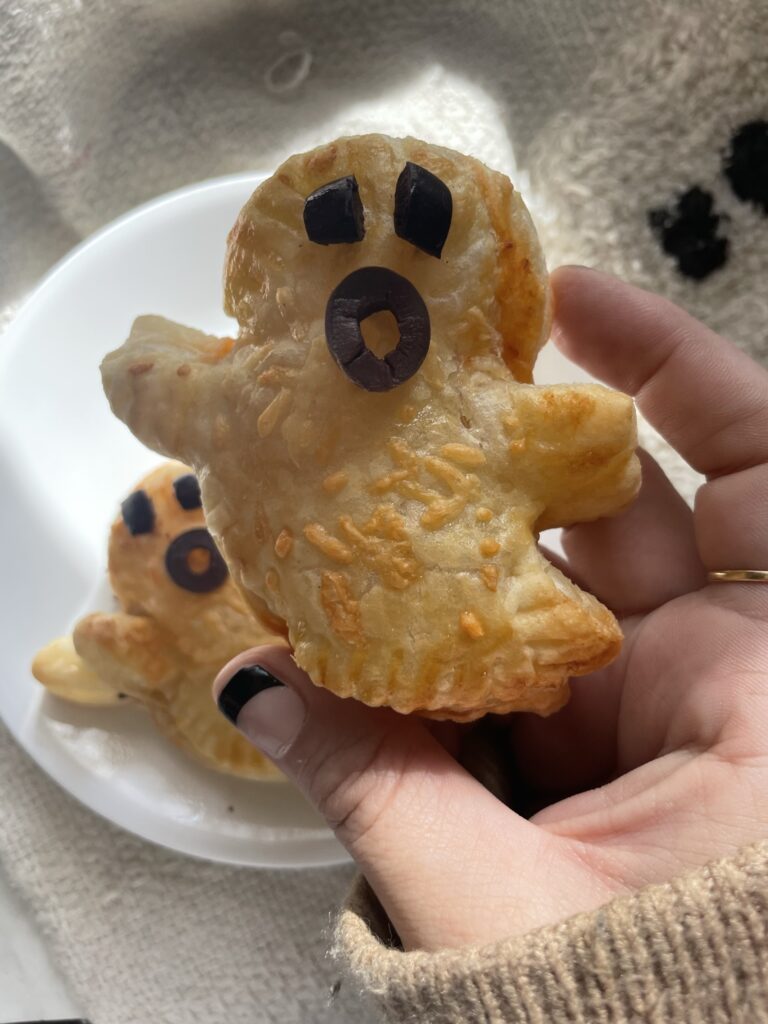
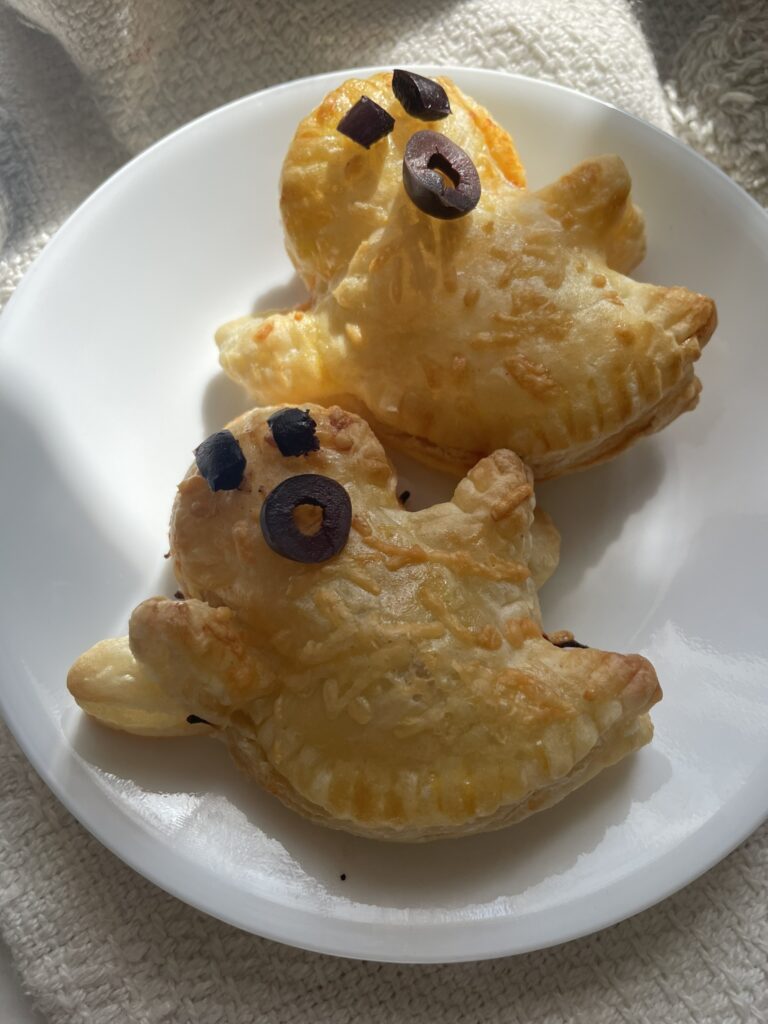
Halloween is the perfect time to get creative in the kitchen, and what’s more fun than preparing deliciously eerie treats that will spook and satisfy your guests? This year, we’re diving into the world of Spooky Puff Pastry Pizzas. These little pizzas are not only a visual delight but also incredibly tasty. So, grab your apron and get ready to conjure up these ghostly delights for your Halloween gathering.
Ingredients:
For the Puff Pastry Ghosts:
1 sheet of puff pastry (thawed)
1 egg (for egg wash)
Black olives (for eyes)
For the Pizza Sauce:
1/2 cup tomato sauce
1/2 teaspoon dried oregano
1/2 teaspoon garlic powder
Salt and pepper to taste
For Toppings:
Shredded mozzarella cheese
Sliced black olives
Sliced red bell pepper
Sliced green bell pepper
Sliced mushrooms
Sliced pepperoni
Instructions:
Preheat your oven to 375°F (190°C).
Start by preparing the pizza sauce. In a small bowl, mix together the tomato sauce, dried oregano, garlic powder, salt, and pepper. Set it aside.
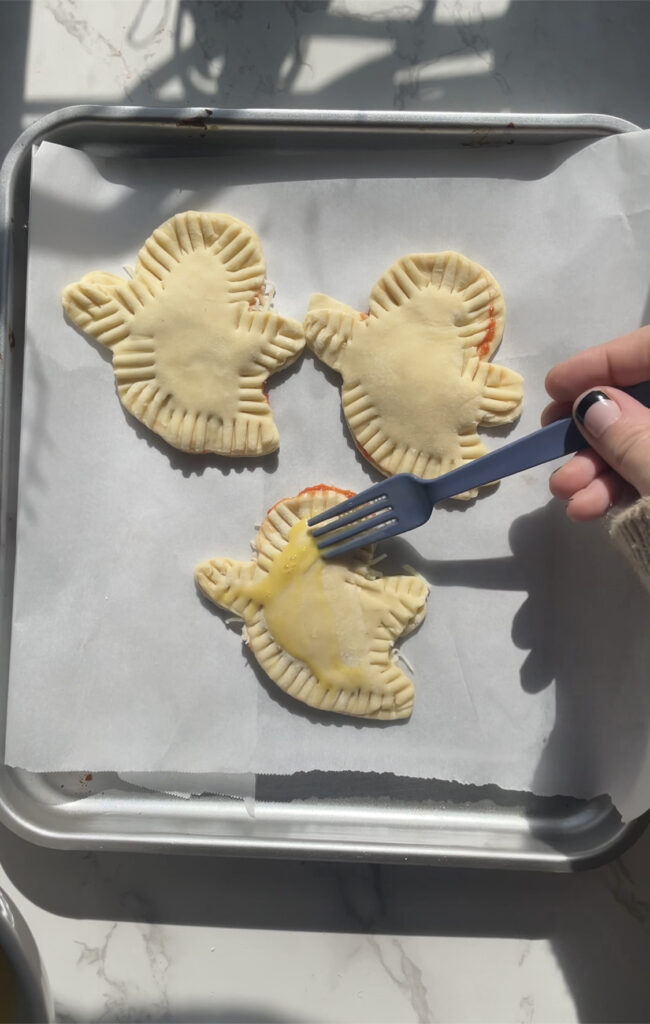
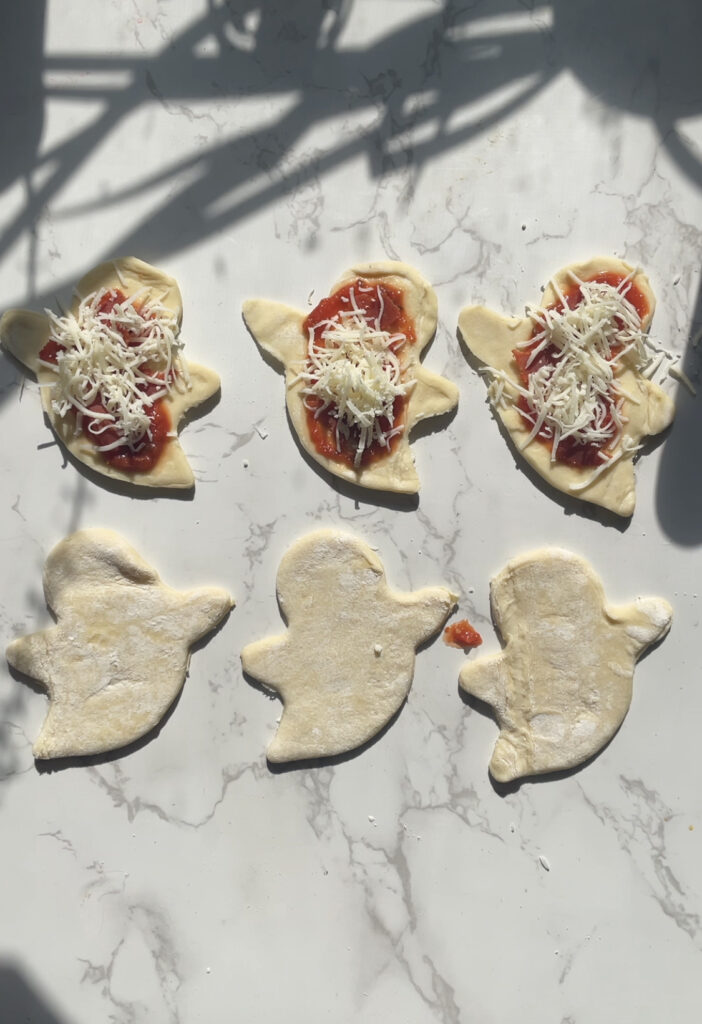
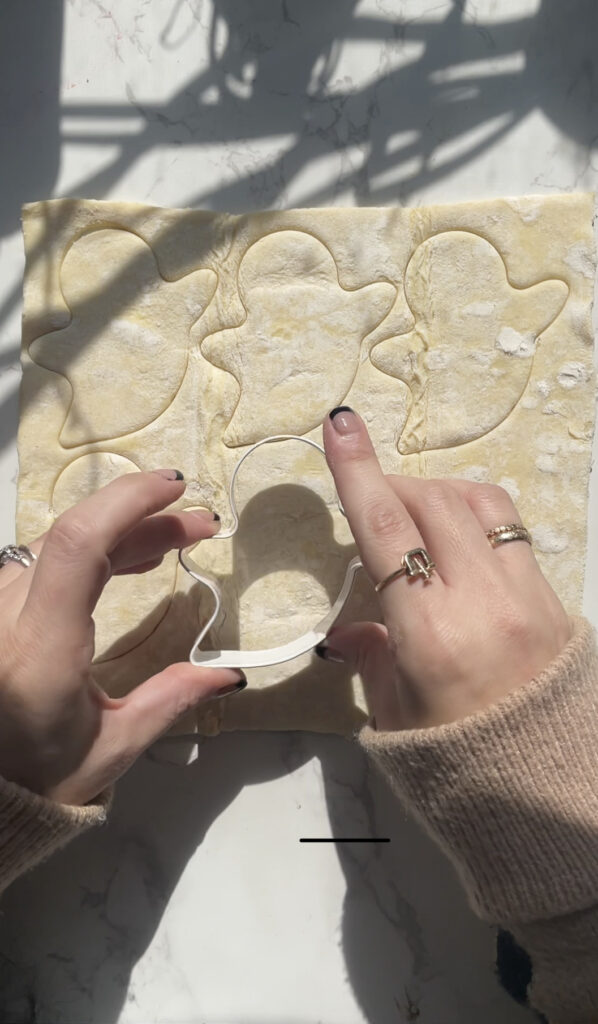
Roll out the puff pastry sheet on a lightly floured surface. Using a ghost-shaped cookie cutter, cut out ghost shapes from the puff pastry. Place them on a baking sheet lined with parchment paper.
Now it’s time to assemble the ghosts. Spread a thin layer of pizza sauce on each ghost, leaving a small border around the edges.
Add a generous sprinkle of shredded mozzarella cheese on top of the sauce.
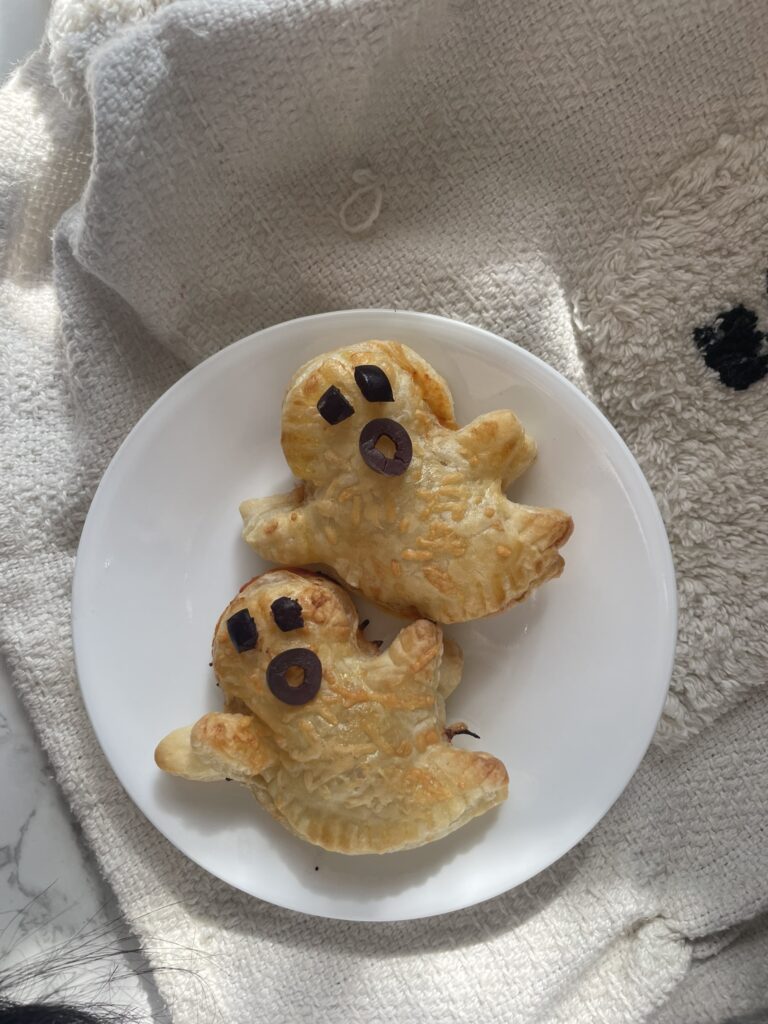
Decorate your ghost puff pastries with various toppings like sliced black olives for the eyes, red and green bell peppers for a mouth, and mushrooms for a spooky aura. Get creative with different toppings to make each ghost unique.
Top with another ghost and seal them together using a fork.
Brush the ghosts with egg wash.
Bake in the preheated oven for 12-15 minutes or until the puff pastry turns golden brown, and the cheese is bubbling.
Remove your Ghost Puff Pastry Pizzas from the oven and let them cool for a few minutes before serving.
Arrange your ghostly creations on a spooky platter, and watch as your guests are delighted by these adorable and delicious treats!
Ghost Puff Pastry Pizzas are the perfect addition to your Halloween menu, combining the flavors of a classic pizza with a hauntingly cute twist. They’re a hit with kids and adults alike, making them an ideal choice for your Halloween party. So, whip up a batch of these delightful, edible specters and get ready to celebrate a spooktacular Halloween with your friends and family. Happy Haunting!
Preheat oven to 400°F. Mix squash and garlic together in a bowl. Drizzle with olive oil and season with thyme, salt and pepper.
Roast for about 25 to 30 minutes or until tender.
Transfer squash mix to a food processor or blender. Puree until the mixture is smooth. Add the broth and tomato paste and puree again.
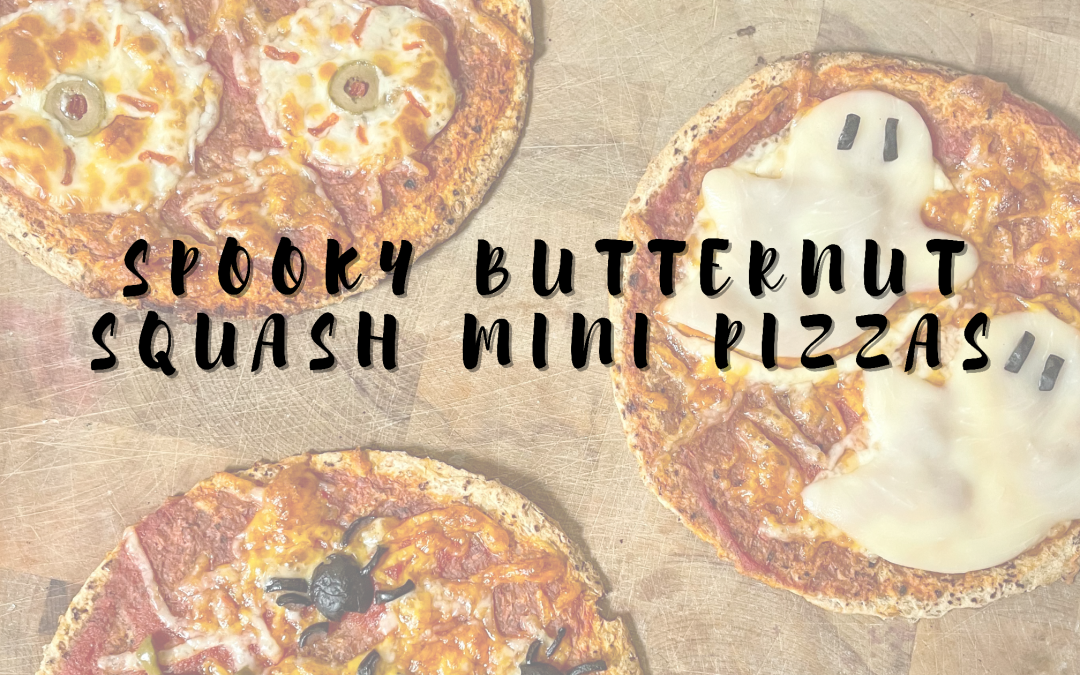
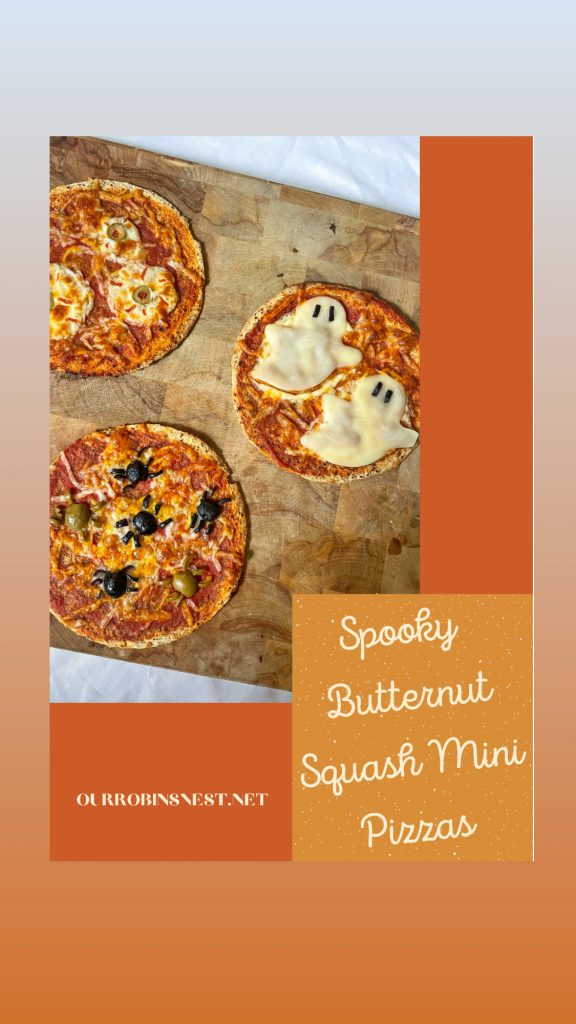
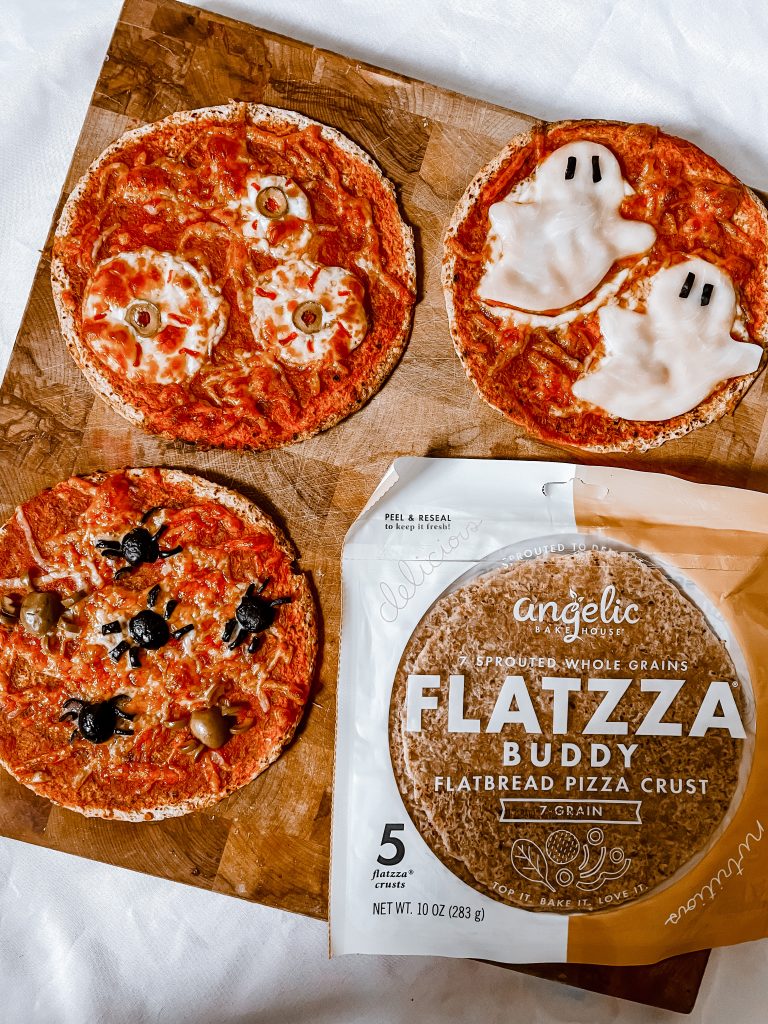
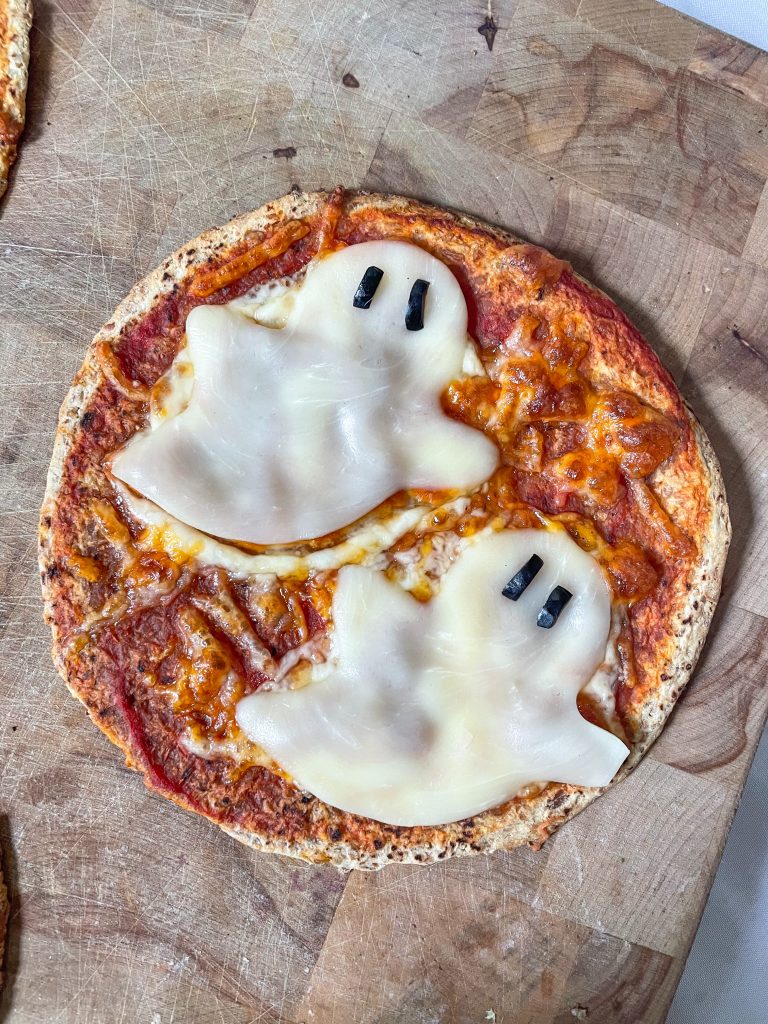
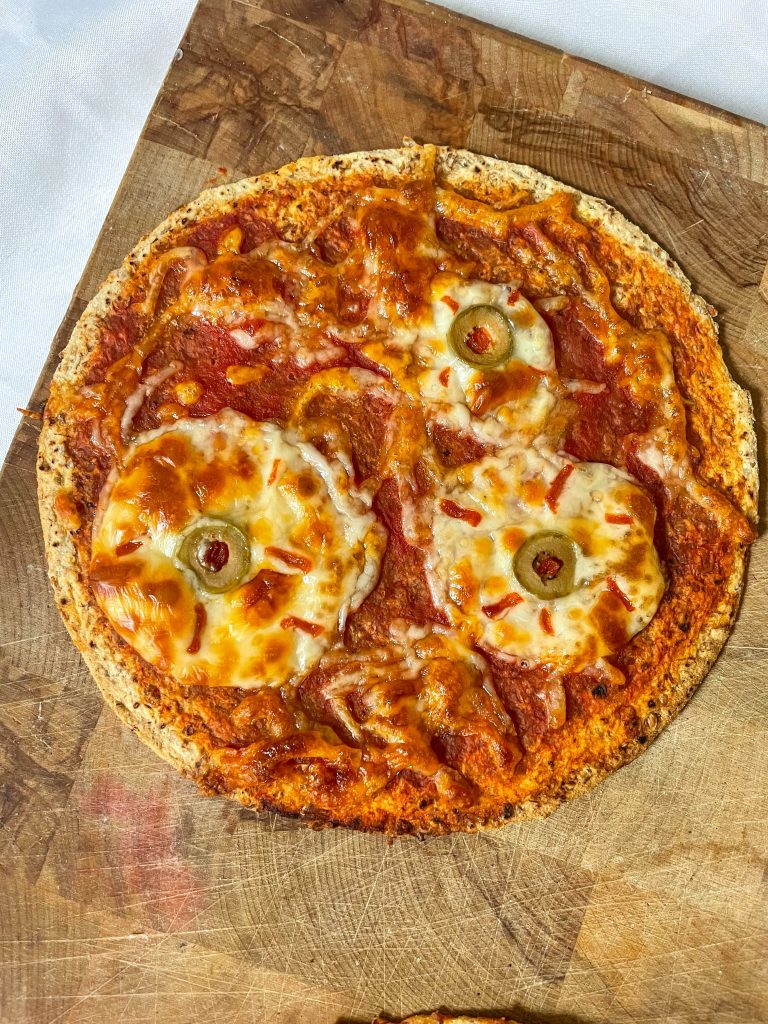
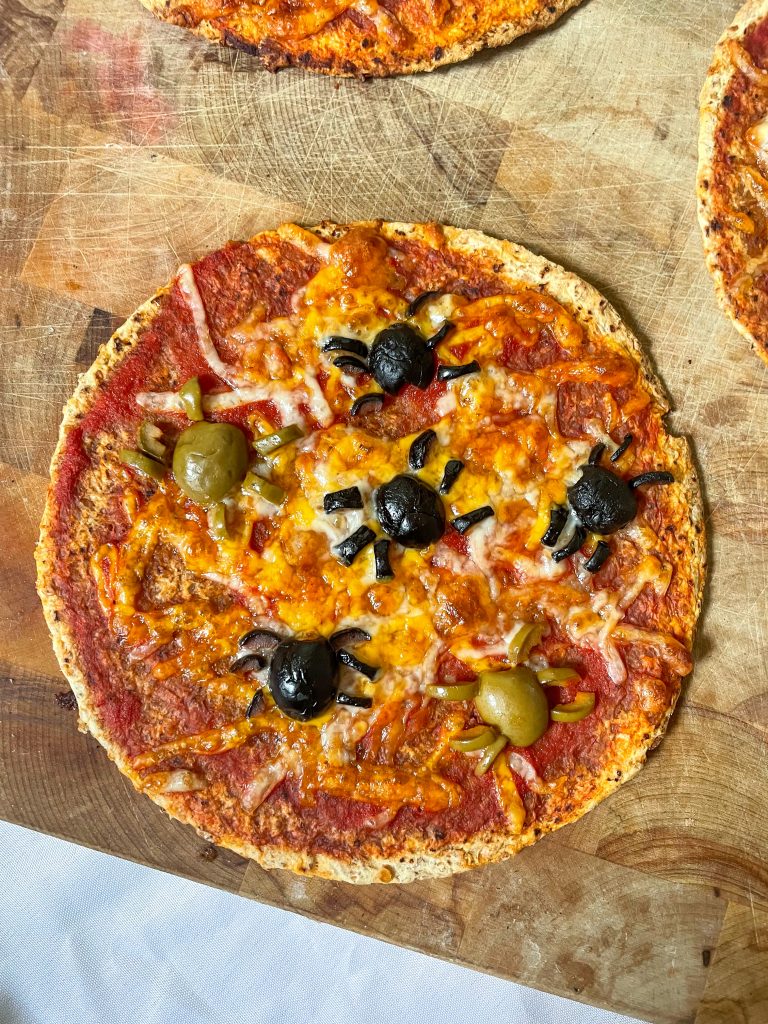
With the oven still on, spread sauce on your pizza, top with cheese and toppings of your choice. I cut olives in half and sliced little legs to make spiders on one. I made another by cutting out ghosts on mozzarella slices using a cookie cutter. I also made creepy eyes by cutting out circles of more cheese and olives slices to top on the pizza.
Bake pizza for about 8-10 minutes.
Pair with some Halloween pajamas and a spooky movie. Enjoy!
Other fun toppings to use
Green pepper Frankensteins
Pepperoni pumpkins
Onion skeletons
Basil brooms
Sausage brains
Enjoy 20% off your purchase of any Angelic Bakehouse item including these delicious flat pizza crusts with code NICOLE20.
By using this code and clicking my affiliate links I earn a small commission. As always thank you for your support!
If motherhood has you stressed and you feel like you’ve lost your creativity, I am here to help! Here you will find easy recipes, simple DIY’s, affordable styles, and what to read next. I believe we all have a creative side, some of us just need a little help to find it. I will help inspire you to have creative expression without standards.