


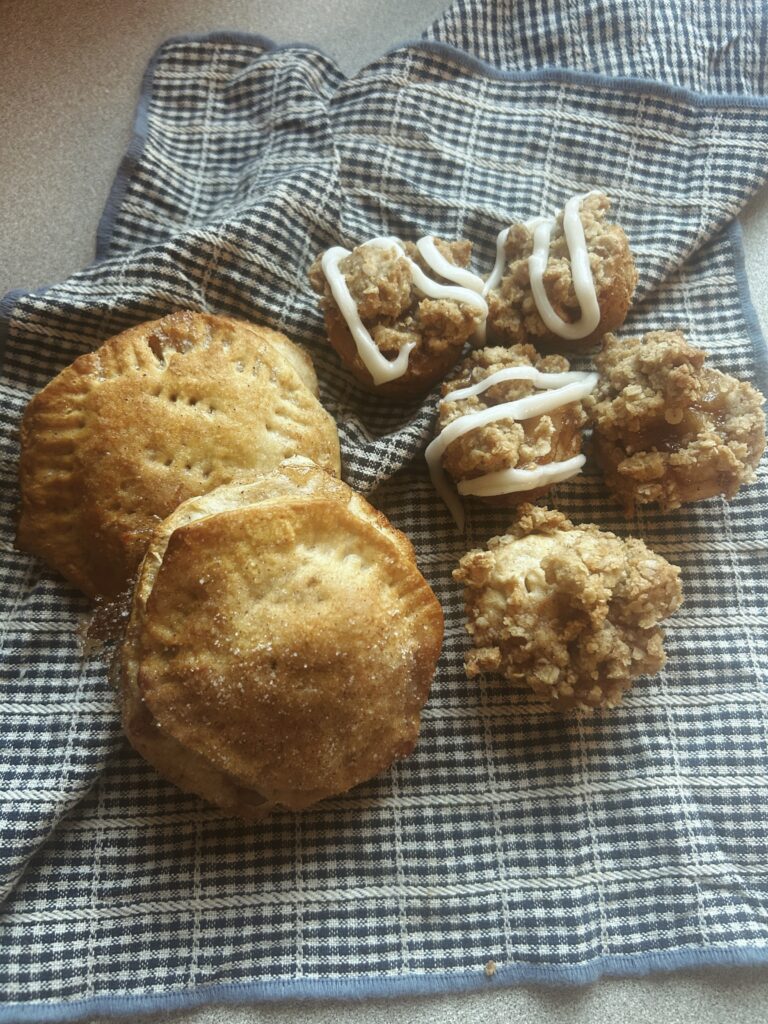
We finally used up the last of our apple picking haul, and I couldn’t think of a better way to finish off our apples than with two easy fall treats! We made mini apple crisp cupcakes and apple hand pies, and both recipes were so simple that my toddler could help in the kitchen.
The best part? Both recipes use Pillsbury Grands! Maple Flavored Biscuits as the base, making them perfect for busy afternoons when you want to bake something homemade without spending hours in the kitchen.
I made my own apple pie filling with the apples we picked, but you can absolutely use store-bought apple pie filling to make these recipes even easier.
If you’re looking for fun toddler-friendly apple recipes, these two are definitely worth trying!
Why We Loved These Easy Apple Recipes
Baking with toddlers can be messy, but that’s part of the fun! These recipes have simple steps that little hands can help with, from pressing biscuit dough into cupcake tins to filling and sealing hand pies.
Here’s why they’re perfect for baking with kids:
- Both recipes use the same maple-flavored biscuit dough.
- You can use homemade or store-bought apple pie filling.
- They require only a handful of ingredients.
- Toddlers can help press, scoop, sprinkle, and seal.
- They’re perfect for using up leftover apples after apple picking.
Recipe 1: Mini Apple Crisp Cupcakes
These little apple crisp cupcakes are such a fun fall treat! Using a mini cupcake tin, we turned maple-flavored biscuit dough into bite-sized cups filled with sweet apple pie filling.
The maple flavor pairs perfectly with the cinnamon apples, and the mini size makes them great for little hands.
Ingredients
- 1 can Pillsbury Grands! Maple Flavored Biscuits
- 1 cup homemade or store-bought apple pie filling, approximately
- Cooking spray or butter for greasing the tin
Optional crumb topping for an apple crisp finish:
- 2 tablespoons all-purpose flour
- 2 tablespoons brown sugar
- 2 tablespoons quick oats
- 1 tablespoon softened butter
- 1/4 teaspoon cinnamon
Instructions
- Preheat your oven to 350°F, or the temperature recommended on your biscuit package.
- Lightly grease a mini cupcake tin.
- Separate the maple biscuits and cut each biscuit into smaller pieces that will fit into the mini cupcake cavities.
- Press each piece of biscuit dough into the bottom and up the sides of the cupcake tin to create a little cup.
- Spoon a small amount of apple pie filling into each biscuit cup. If your filling has large apple chunks, chop them into smaller pieces.
- If adding the optional crisp topping, mix the flour, brown sugar, oats, butter, and cinnamon until crumbly. Sprinkle a little over each cupcake.
- Bake for approximately 12–18 minutes, checking frequently, until the biscuit dough is cooked through and golden brown. Baking time will vary depending on the size of your cups and your biscuit package directions.
- Allow the cupcakes to cool slightly before carefully removing them from the tin.
These are delicious served warm and make the cutest little fall desserts. Drizzle some icing to add extra sweetness!

Toddler-Friendly Baking Tip
Let your toddler help press the biscuit dough into the cupcake tin and spoon the apple filling into each cup. It’s a great way to practice fine motor skills while having fun together in the kitchen.

Recipe 2: Easy Maple Apple Hand Pies
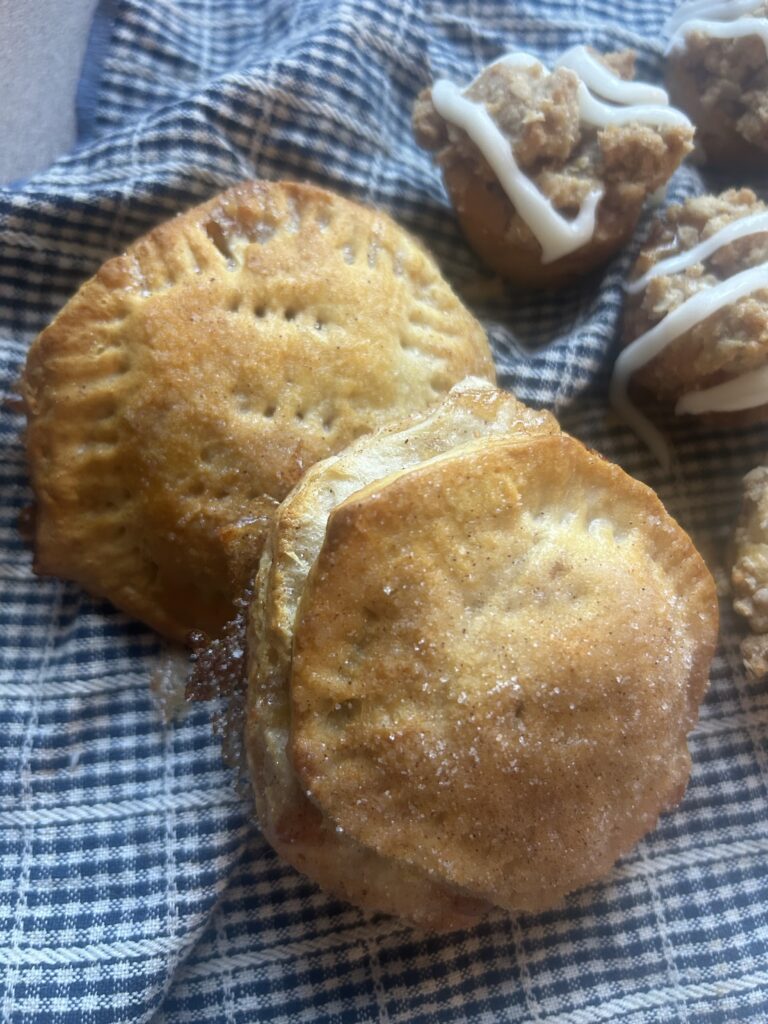
Our second recipe might be my favorite because of how simple it was! We used the same Pillsbury maple biscuits to make little apple hand pies.
They turned out golden, buttery, and filled with sweet cinnamon apples. The cinnamon sugar sprinkled on top made them even better!
Ingredients
- 1 can Pillsbury Grands! Maple Flavored Biscuits
- 1 cup homemade or store-bought apple pie filling, approximately
- 2 tablespoons melted butter
- 2 tablespoons granulated sugar
- 1 teaspoon ground cinnamon
Instructions
- Preheat your oven to 350°F, or follow the temperature recommended on the biscuit package.
- Line a baking sheet with parchment paper.
- Separate each maple biscuit and carefully split it horizontally into two thinner pieces.
- Gently flatten each piece of biscuit dough.
- Spoon a small amount of apple pie filling into the center of one piece of dough.
- Place the second piece of dough on top and press the edges together.
- Use a fork to seal the edges all the way around the hand pie.
- Poke a few small holes in the top of each pie to allow steam to escape.
- Place the hand pies on your prepared baking sheet.
- Bake for approximately 15–22 minutes, or until golden brown and cooked through. Adjust as needed based on the biscuit package directions.
- Once baked, brush the tops with melted butter.
- Mix the cinnamon and sugar together, then sprinkle over the warm hand pies.
Allow them to cool before serving. The apple filling can stay very hot even after the outside has cooled.
Toddler-Friendly Baking Tip
This recipe is especially fun for toddlers because they can help press the edges of the hand pies with a fork. They can also sprinkle the cinnamon sugar over the finished pies once an adult has brushed on the butter.
Easy Homemade Apple Pie Filling
If you still have apples left from apple picking, making your own apple pie filling is a great way to use them up. I made homemade filling for our treats, but prepared filling works just as well.
Here’s a simple version you can make at home.
Ingredients
- 3 medium apples, peeled and diced
- 2 tablespoons butter
- 1/4 cup brown sugar
- 1 teaspoon cinnamon
- 1 tablespoon lemon juice
- 2 tablespoons water
- 1 teaspoon cornstarch mixed with 1 tablespoon water
Instructions
- Melt the butter in a saucepan over medium heat.
- Add the diced apples, brown sugar, cinnamon, lemon juice, and water.
- Stir and cook for approximately 8–10 minutes, until the apples begin to soften.
- Add the cornstarch mixture and stir until the filling thickens.
- Remove from heat and allow to cool before using in either recipe.
For these mini treats, I recommend cutting the apples into small pieces so they’re easier to scoop into the dough.
Tips for Baking With Toddlers
One thing I’ve learned about baking with a toddler is that keeping things simple makes the experience much more enjoyable.
I like to have the ingredients ready before we start so there isn’t too much waiting around. For these recipes, I prepared the apple filling ahead of time and let it cool.
Giving toddlers little jobs, like pressing dough, scooping filling, or sprinkling cinnamon sugar, makes them feel involved.
And if the hand pies aren’t perfectly shaped or the cupcake filling gets a little messy, that’s okay! It’s all part of making memories together.
For younger toddlers, serve these treats fully cooled, in appropriately sized pieces, and while seated and supervised.
Frequently Asked Questions
Can I use store-bought apple pie filling?
Absolutely! Store-bought filling is a great shortcut for both recipes. I recommend chopping any large apple pieces into smaller chunks before adding them to the biscuit dough.
Do I have to use maple-flavored biscuits?
No! I loved the extra fall flavor from the Pillsbury Grands! Maple Flavored Biscuits, but regular refrigerated biscuits should work too. Follow the baking guidance for the variety you choose.
Can I make these recipes ahead of time?
Yes! Both treats can be prepared ahead of time. Store leftovers in an airtight container in the refrigerator for up to 3–4 days and reheat until warmed through.
Can I use different apples?
Yes! Granny Smith, Honeycrisp, Fuji, and Gala apples are all good options for baking. You can even mix different varieties for a balance of sweet and tart flavors.
What can toddlers help with?
Toddlers can help press the dough into the cupcake tin, scoop cooled apple filling, seal the edges of the hand pies with a fork, and sprinkle cinnamon sugar. Adults should handle the oven, hot pans, and melted butter.
A Sweet Way to End Apple Picking Season
These two toddler-friendly apple recipes were the perfect way to finish our apple picking haul. I loved that we could make two completely different treats using the same maple biscuits and apple filling.
The mini apple crisp cupcakes were adorable, and the apple hand pies were so easy to put together. Both were fun to make with my toddler and perfect for a cozy fall afternoon at home.
If you have a few apples left from your own apple picking adventures, give these a try!
You Will Also Like
0 Comments