Cheers to Noon Year’s Eve: 4 Kid-Friendly Mocktails for a Festive Toast
Welcome to the ultimate Noon Year’s Eve celebration for your little ones! Whether you’re bidding farewell to the current year or just looking for a reason to enjoy some delightful mocktails, we’ve got you covered. These four kid-friendly concoctions are not only delicious but also add a touch of sparkle to your festivities. Get ready to raise your plastic champagne flutes and toast to a sweet and fizzy Noon Year!
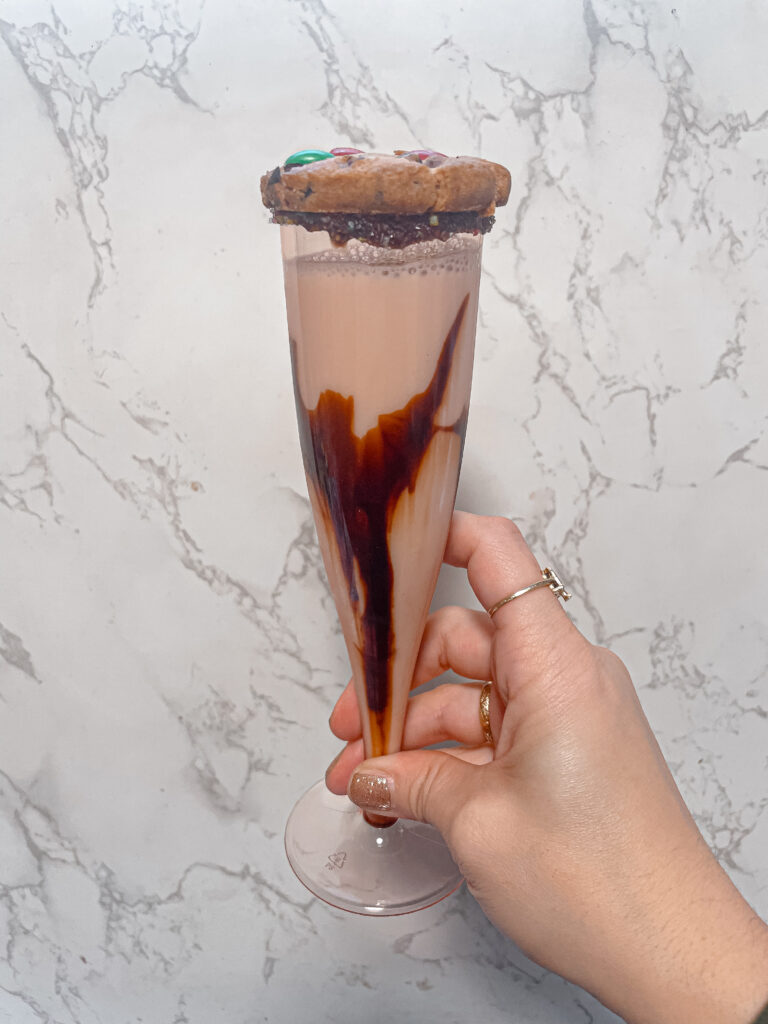
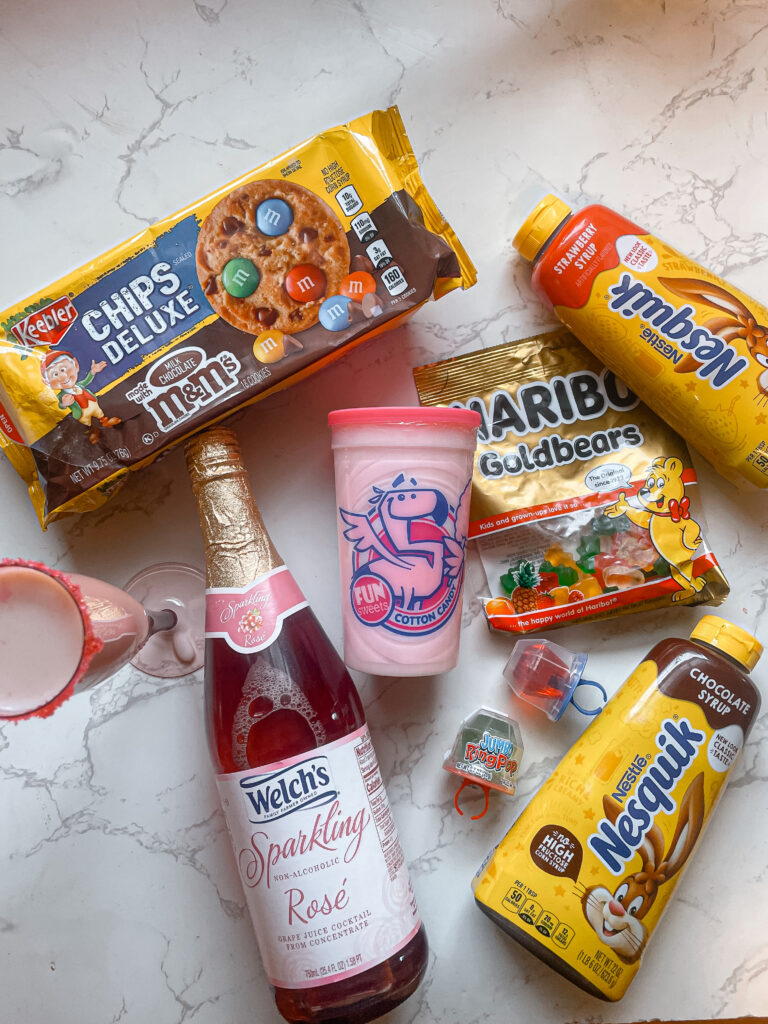
Milk and Cookies Mocktail: Ingredients:
Milk
Chocolate chip cookie
Chocolate syrup
Sprinkles for rim
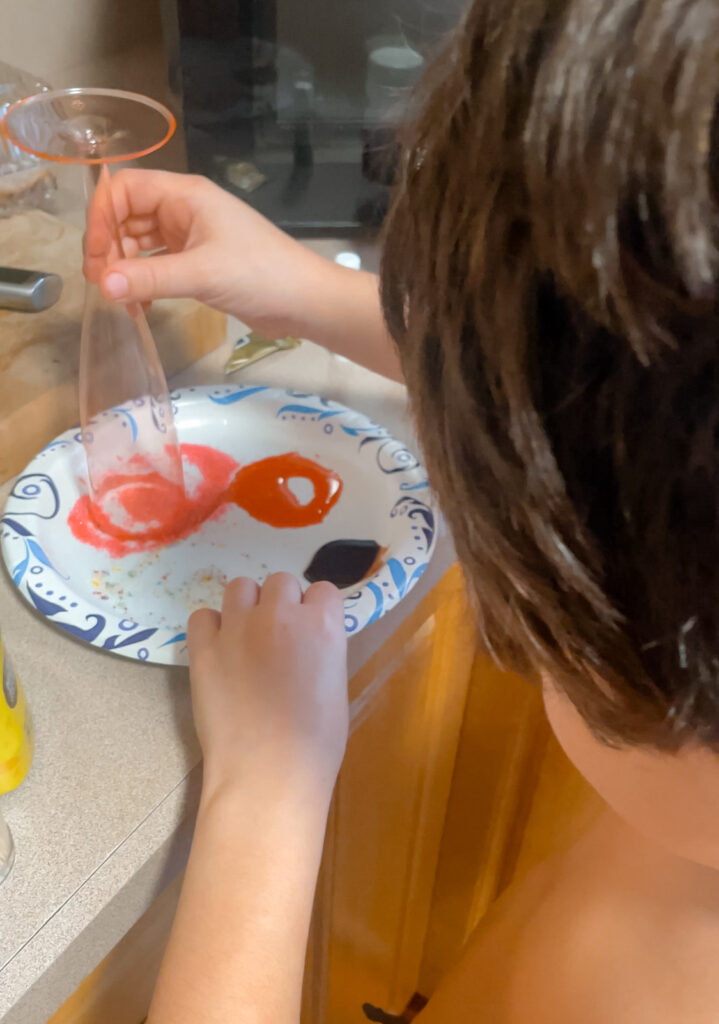
Instructions: Dip the rim of the plastic champagne flute in chocolate syrup, then coat it with colorful sprinkles. Pour in milk and garnish with a chocolate chip cookie. Cheers to the classic taste of milk and cookies in a bubbly twist!
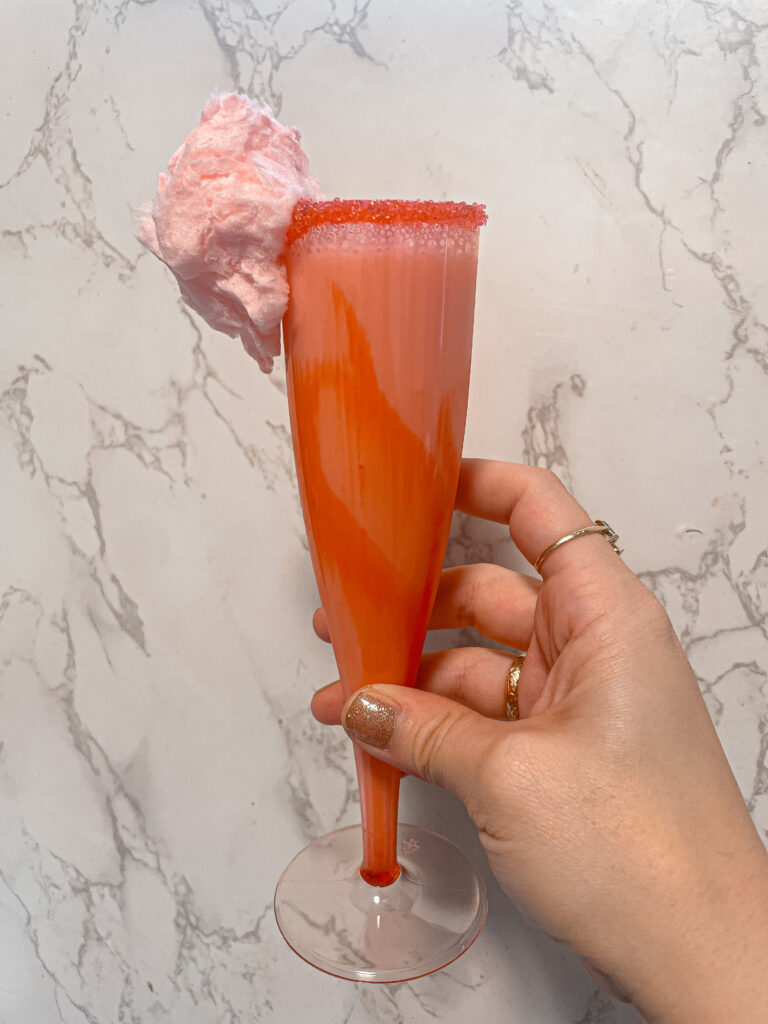
Strawberry Milk and Cotton Candy Fizz: Ingredients:
Milk
Strawberry syrup
Cotton candy
Sprinkles for rim
Instructions: Create a vibrant rim by dipping the flute in strawberry syrup and sprinkles. Pour in milk and top it off with a fluffy cloud of cotton candy. Watch the cotton candy dissolve into a sweet and fizzy delight – a treat for both the eyes and taste buds!
Sparkling Grape Juice with Ring Pop: Ingredients:
Sparkling grape juice
Ring Pop (any flavor)
Instructions: Pop open the sparkling grape juice and pour it into the flute. Add a splash of whimsy by placing a colorful Ring Pop on top. It’s a sparkling toast that combines the joy of bubbles with the fun of a sweet, wearable treat!
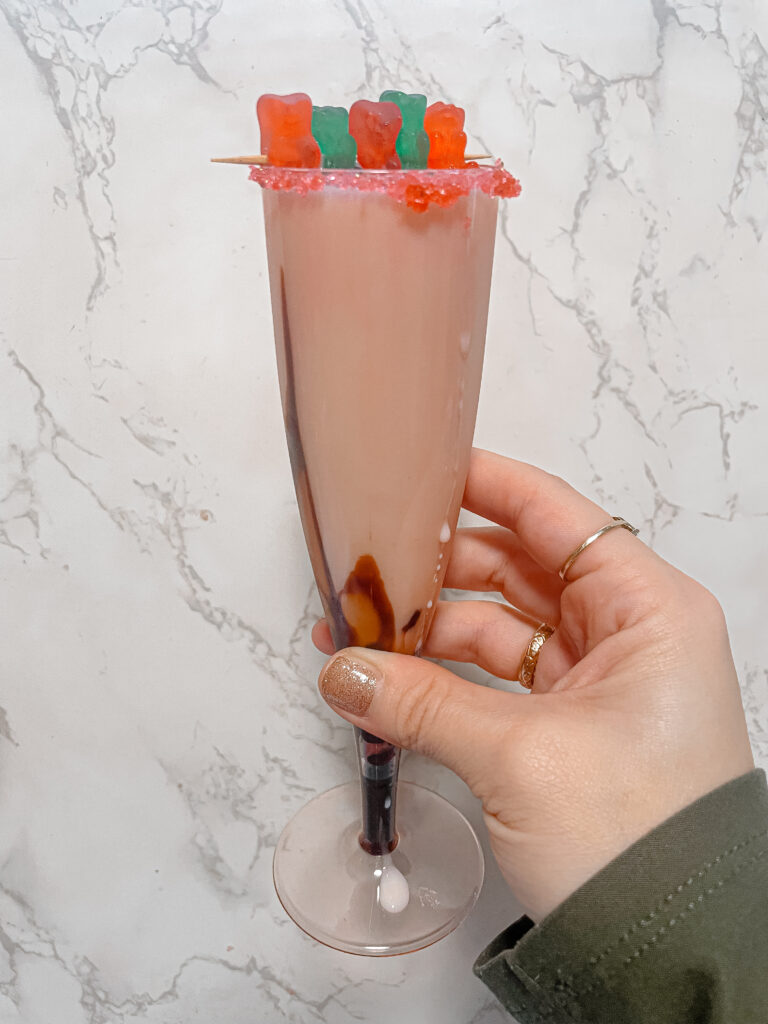
Gummy Bears and Lemonade Sparkle: Ingredients:
Gummy bears
Sparkling lemonade
Instructions: Drop a handful of gummy bears into the flute and pour in the sparkling lemonade. The gummy bears will soak up the bubbly goodness, creating a playful and flavorful sip. It’s a delightful fusion of chewy and fizzy fun!
Cheers! These Noon Year’s Eve mocktails are sure to make your celebration extra special. Whether your little ones are toasting with milk and cookies or sipping on gummy bears and juice, these festive drinks add a touch of magic to the countdown. So, gather your plastic champagne flutes, raise them high, and cheers to ringing in the Noon Year with delicious memories!
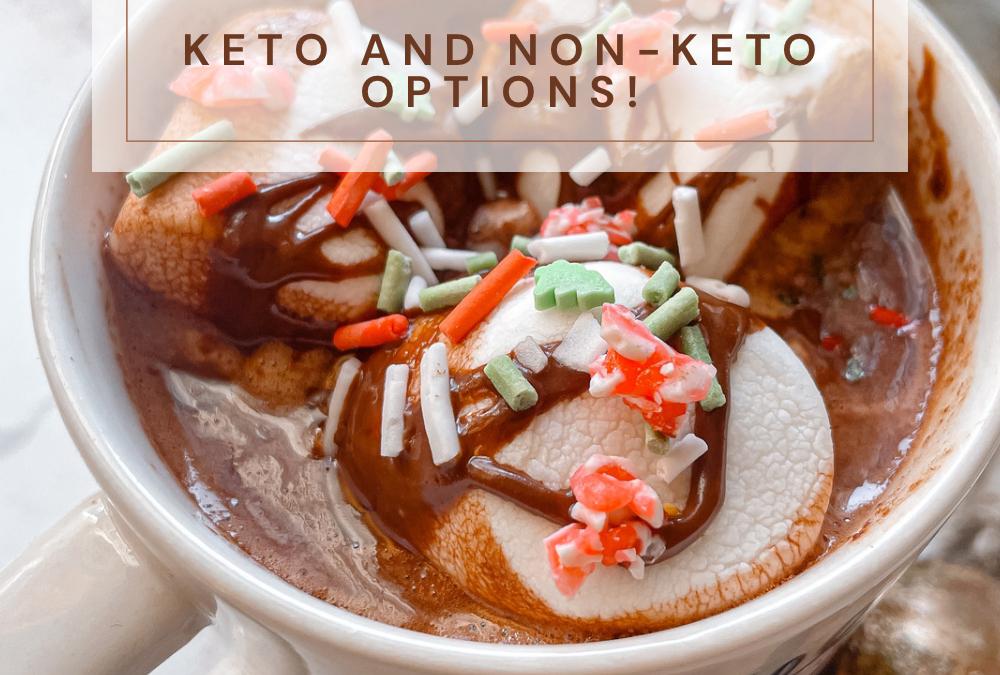
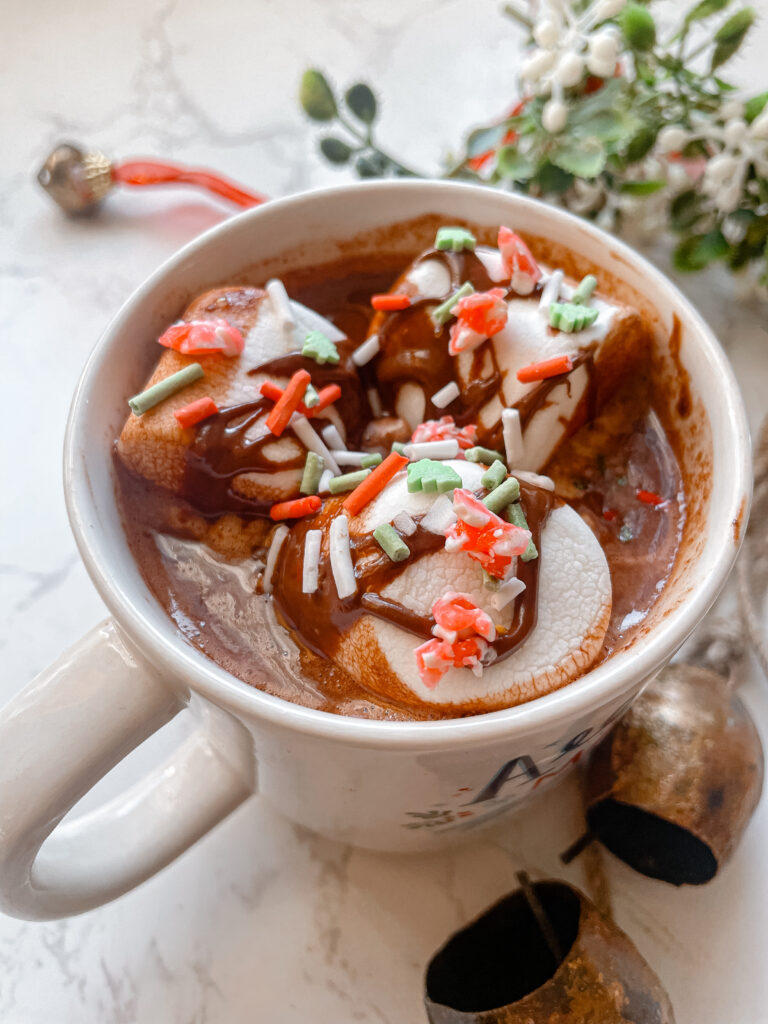
Decadent Hazelnut Hot Chocolate: Keto and Non-Keto Options
This is a sponsored post
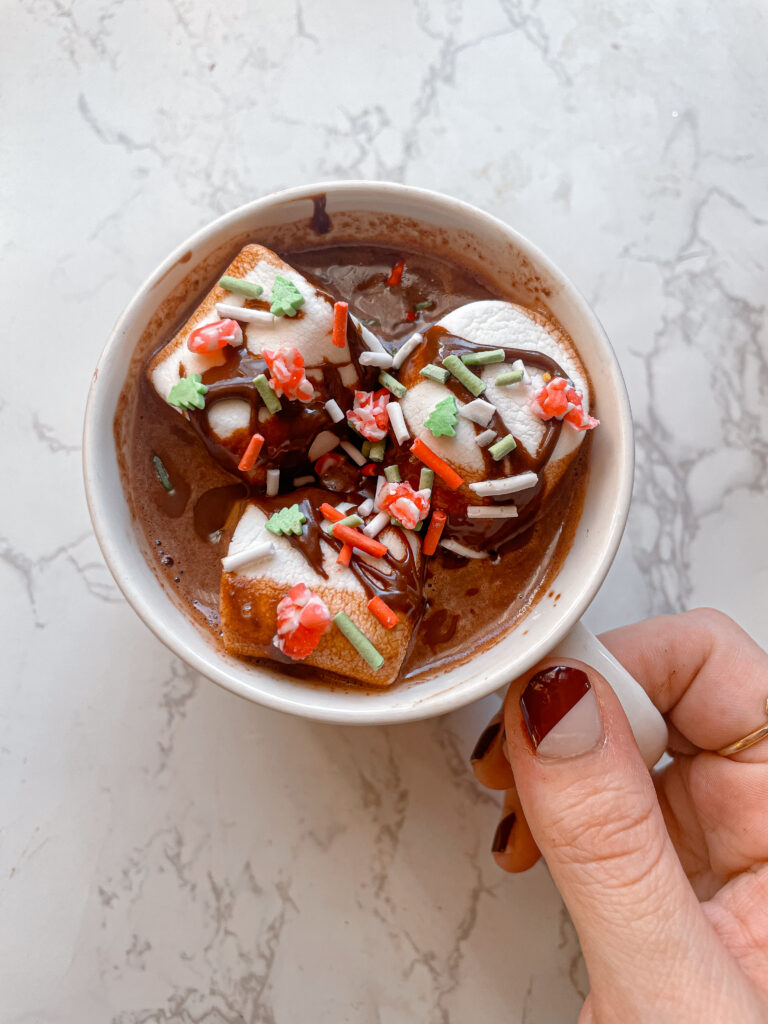
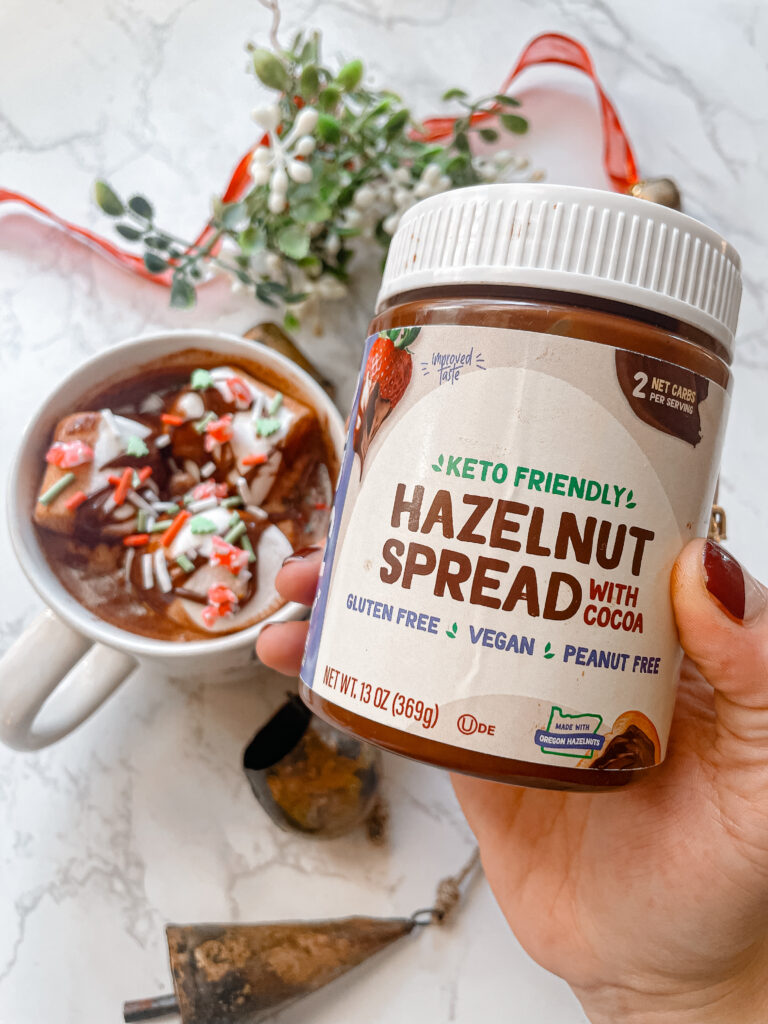
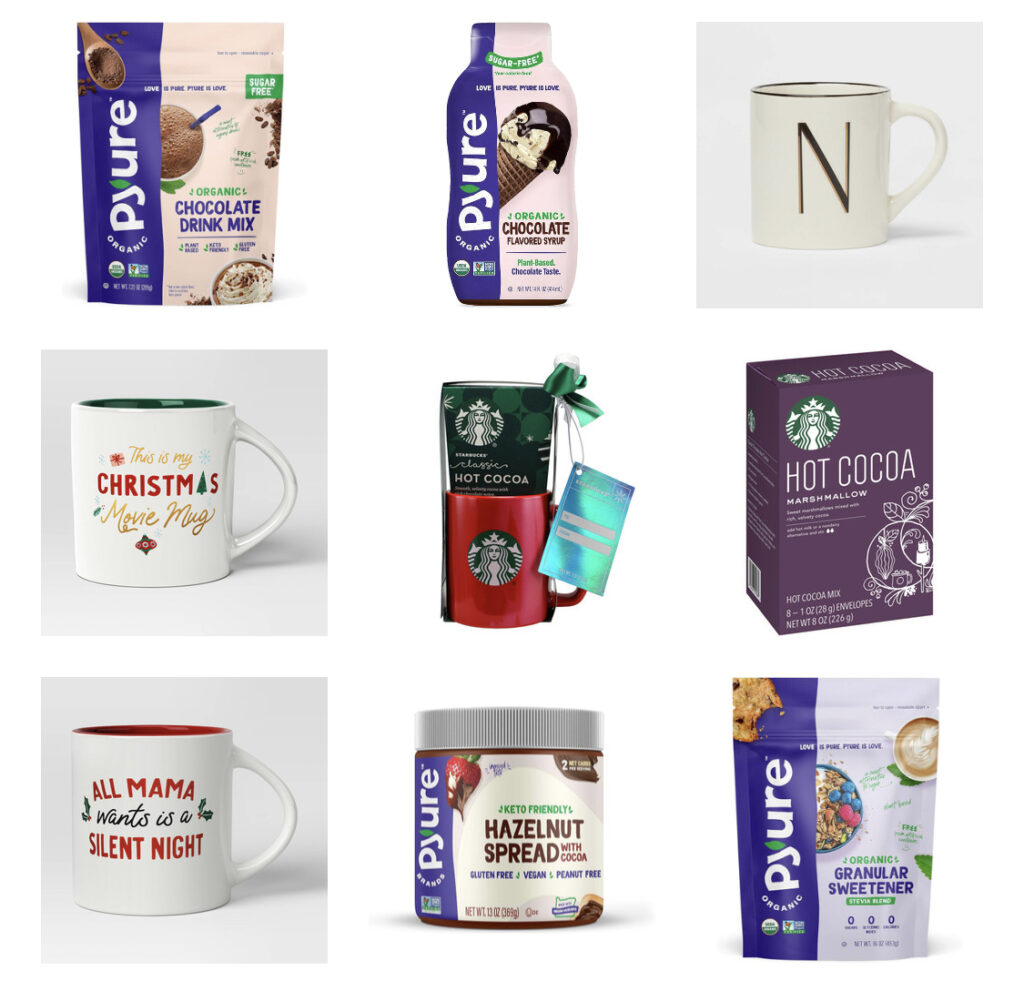
Indulge in the rich, velvety goodness of hazelnut hot chocolate with our special recipe featuring Pyure Organic Hazelnut Spread with Cocoa. Whether you’re on a keto journey or not, this delightful beverage will satisfy your sweet cravings and warm you up during chilly days.
Ingredients:
2 cups unsweetened almond milk (keto) or whole milk (non-keto)
In a small saucepan, heat the unsweetened almond milk over medium heat until warm but not boiling.
Add Pyure Organic Hazelnut Spread with Cocoa and unsweetened cocoa powder to the saucepan. Whisk continuously until the spread and cocoa are fully dissolved.
Stir in Pyure Organic Stevia Blend, adjusting to your desired sweetness level. Be cautious not to overpower the hazelnut flavor.
Add vanilla extract and a pinch of salt, enhancing the overall taste of the keto hazelnut hot chocolate.
Continue to heat and whisk until the mixture is well combined and hot. Remove from heat just before it reaches boiling point.
Pour the keto hazelnut hot chocolate into your favorite mug, and if desired, top with whipped cream or a sprinkle of cocoa powder.
Non-Keto Version:
Similar to the keto version, heat the whole milk in a saucepan until warm but not boiling.
Add Pyure Organic Hazelnut Spread with Cocoa and one packet of hot cocoa mix. Whisk continuously until the spread and cocoa are fully melted and blended into the milk.
Continue to heat and whisk until the mixture is well combined and hot. Remove from heat just before boiling.
Pour the non-keto hazelnut hot chocolate into your favorite mug, and feel free to garnish with whipped cream or marshmallows.
Whether you’re embracing a keto lifestyle or not, this hazelnut hot chocolate recipe caters to both preferences, delivering a delightful and comforting experience for all chocolate lovers. Enjoy the warmth and richness of this decadent treat, customized to suit your dietary choices.
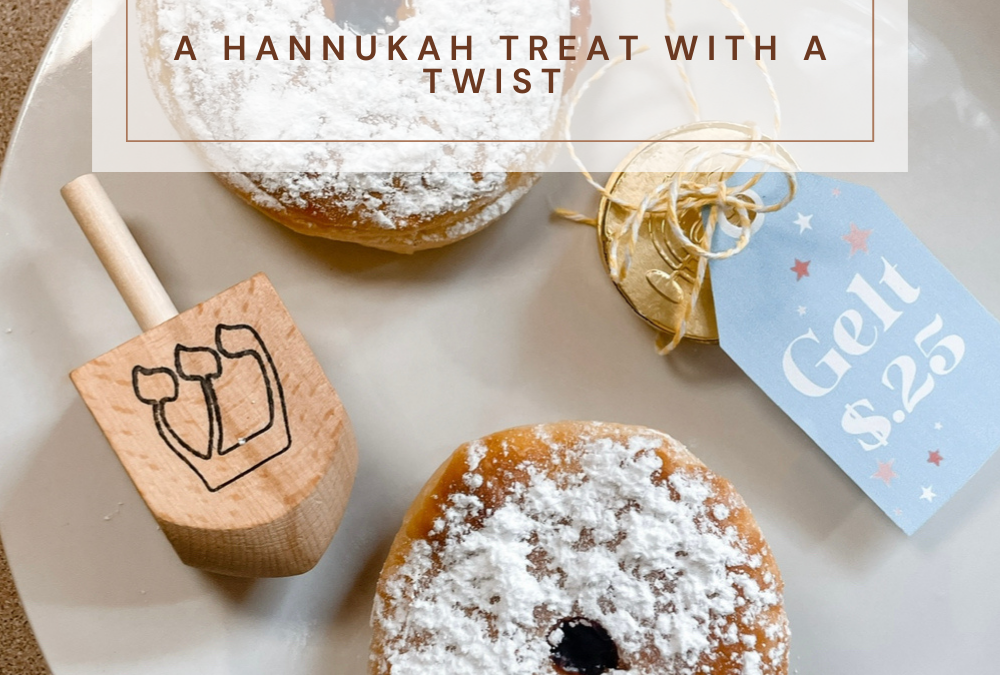
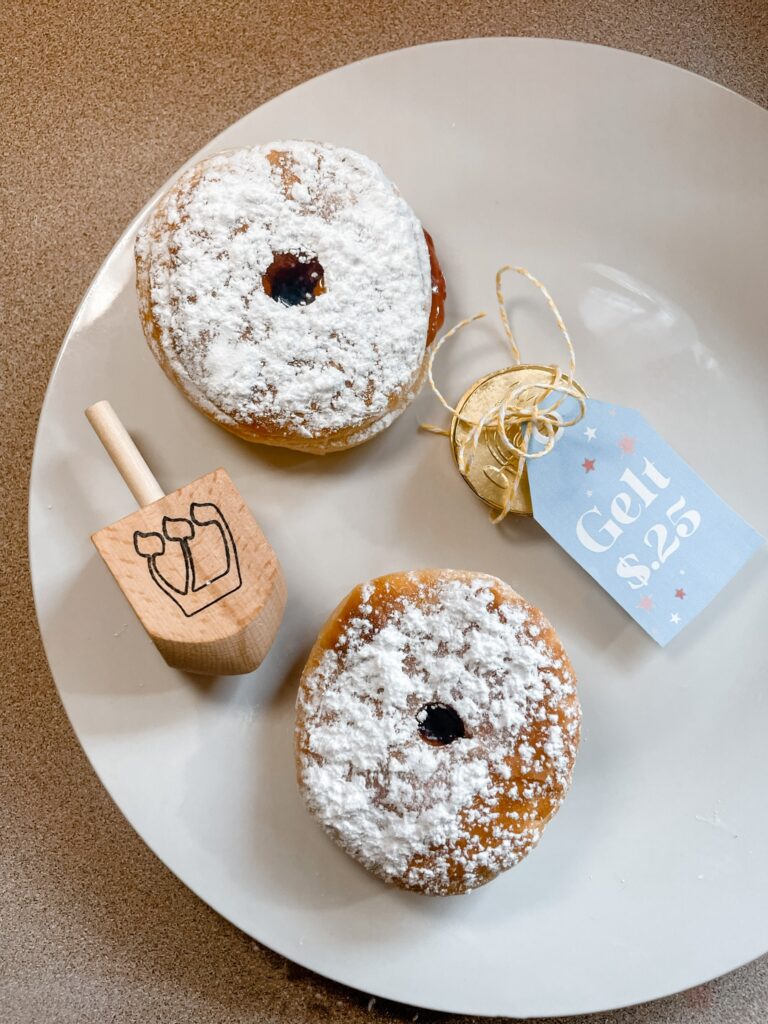
Hanukkah festivities are all about embracing tradition with a touch of innovation. Elevate your celebration with a modern twist on the classic jelly donut. In this blog post, I’ll guide you through the process of making air-fried jelly donuts using Pillsbury Grands biscuits, allowing you to add your favorite jam or jelly after the biscuits are cooked, ensuring a burst of flavor in every bite.
Why jelly donuts on Hanukkah?
Jelly donuts, known as sufganiyot in Hebrew, are a traditional Hanukkah treat. They are deep-fried and often filled with jelly or other sweet fillings. The significance lies in the oil used for frying, symbolizing the miracle of the oil in the Hanukkah story where a small amount of oil lasted for eight days in the temple menorah.
Ingredients:
Pillsbury Grands biscuits (1 can)
Jam or jelly of your choice (strawberry, raspberry, or grape work well)
Powdered sugar for dusting
Instructions:
1. Gather Your Ingredients:
Ensure you have all your ingredients ready to create a delightful combination of flaky biscuit dough, sweet fruit filling, and a finishing touch of powdered sugar.
2. Preheat Your Air Fryer:
Set your air fryer to 350°F (180°C) and allow it to preheat. This ensures your biscuits cook evenly and achieve a golden-brown perfection.
3. Air Fry the Biscuits:
Separate the Pillsbury Grands biscuits and lay them out on a clean surface. Flatten each biscuit as instructed on the package. Air fry the biscuits 6-8 minutes or until they reach a golden-brown color.
4. Cool and Create a Pocket:
Allow the air-fried biscuits to cool slightly. Once cooled, use a small knife to create a pocket in each biscuit by gently cutting a slit into the side, being careful not to cut through entirely.
5. Fill with Jelly:
Take your favorite jam or jelly and carefully inject it into each biscuit pocket. Ensure an even distribution of the fruity goodness, allowing the biscuit to soak up the flavors.
6. Dust with Powdered Sugar:
After injecting the jelly, dust the air-fried jelly donuts generously with powdered sugar. This adds a touch of sweetness and a visually appealing finish.
7. Serve and Enjoy:
Present your jelly-filled donuts on a festive platter. These delightful treats are ready to be enjoyed by family and friends. The combination of the flaky biscuit and the burst of fruity jelly creates a memorable Hanukkah experience.
This Hanukkah, savor the best of both worlds with air-fried jelly donuts that combine tradition with a modern twist. Share these delectable treats as a symbol of the joy and innovation that make the Festival of Lights truly special.
This is a sponsored post, thank you for your support! Scroll down for a fun giveaway.
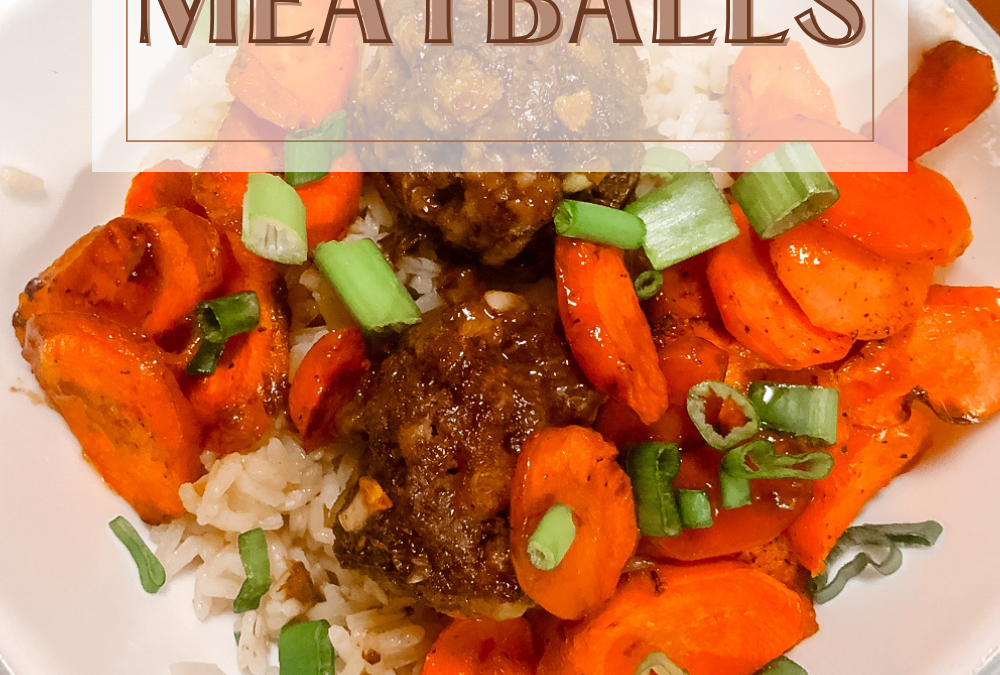
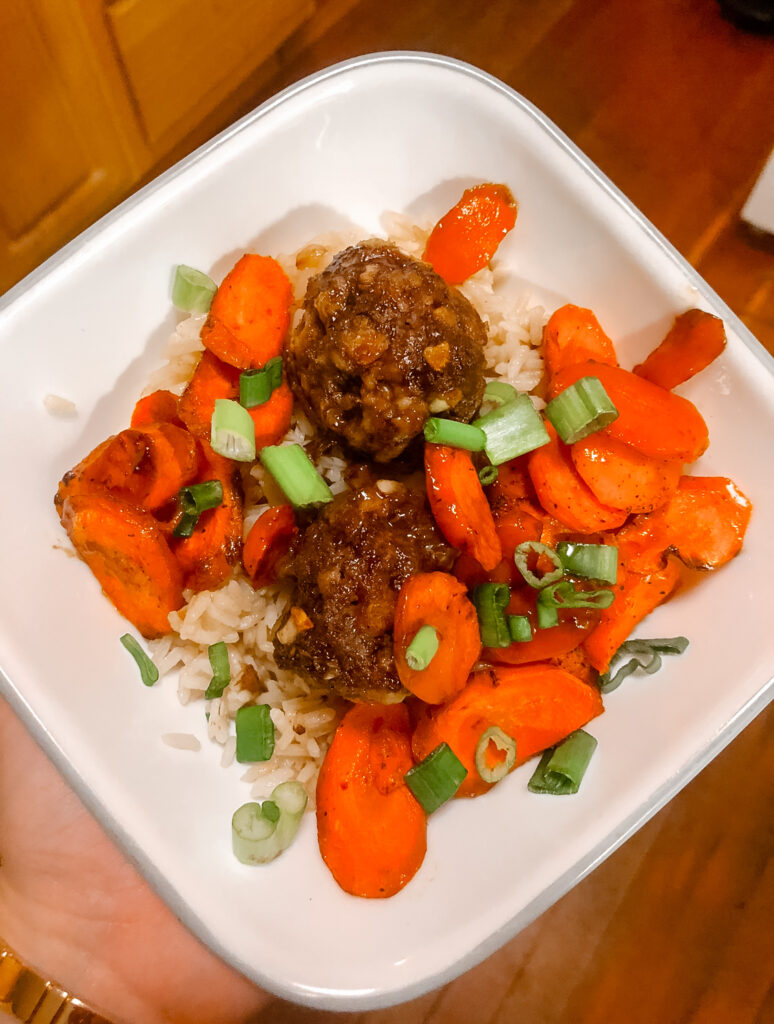
There’s something undeniably satisfying about biting into a juicy, tender meatball, especially when it’s coated in a luscious teriyaki sauce. If you’re looking to elevate your dinner game and impress your friends and family, you’re in for a treat. In this blog post, I’ll take you through a step-by-step guide on how to make delectable teriyaki meatballs that will leave your taste buds dancing with joy.
In a large mixing bowl, combine the ground meat, breadcrumbs, green onions, egg, minced garlic, grated ginger, salt, and pepper.
Mix the ingredients thoroughly, but be careful not to overmix, as this can make the meatballs tough.
Shape the mixture into meatballs of your desired size. A golf ball size is a good starting point.
Cook the Meatballs:
Heat a pan over medium-high heat and add a bit of oil.
Place the meatballs in the pan and cook until they are browned on all sides and cooked through. This should take about 10-12 minutes.
Prepare the Teriyaki Sauce:
In a separate saucepan, combine the soy sauce, brown sugar, rice vinegar, minced garlic, and grated ginger.
In a small bowl, mix the cornstarch and water to create a slurry.
Add the slurry to the saucepan and whisk everything together.
Combine and Glaze:
Once the meatballs are cooked, pour the teriyaki sauce over them in the pan.
Gently toss the meatballs in the sauce, ensuring they are well-coated.
Let them simmer for a few minutes, allowing the sauce to thicken and glaze the meatballs.
Serve and Enjoy:
Once the sauce has thickened to your liking, remove the meatballs from the heat.
Serve them hot, garnished with extra green onions or sesame seeds, if desired.
These teriyaki meatballs are a perfect combination of savory, sweet, and savory flavors. The juicy, tender meatballs absorb the rich teriyaki sauce, creating an explosion of flavors in every bite. Whether you serve them as an appetizer at a party or as a main course for dinner, these meatballs are sure to be a hit.
This November, we are teaming up with Dakota Bluffs Beef on a “Fill Your Freezer” full of grass-fed beef giveaway! This is in celebration of the autumn season, and we are literally going to FILL YOUR FREEZER with beef!
Giveaway Time!
Every year, Dakota Bluffs opens up deposits to their fall herd to get you a share of bulk beef (Eighths, Quarters, Halves, and Whole beefs) but this year Dakota Bluffs Beef is going all out starting with one lucky person who is going to literally get their freezer stuffed with $70 worth of the best Grass-Finished Beef on the planet! Trust us, this beef has been compared as “better than chocolate”!
Hot chocolate is a beloved beverage that warms our souls during the cold, cozy days of winter. It’s a timeless classic, and you might think there’s not much room for improvement. But what if I told you that you can take this comforting drink to the next level by adding a scoop of ice cream? Yes, you read that right – hot chocolate with ice cream is a delightful twist that turns a childhood favorite into an indulgent treat for all ages. In this blog post, I’ll guide you through the simple steps of making this delectable hot chocolate with ice cream.
Ingredients:
1/2 cup cocoa powder
1 cup milk
2-4 tablespoons agave nectar (adjust to your preferred level of sweetness)
1/2 cup ice cream (any flavor you desire!)
Whipped cream
Sprinkles
Instructions:
Whisk Together the Cocoa, Milk, and Agave Nectar
Start by combining the cocoa powder, milk, and agave nectar in a saucepan.
Whisk them together thoroughly to create a rich and smooth chocolate mixture.
Agave nectar is a natural sweetener, and you can adjust the quantity to suit your taste. If you prefer a sweeter hot chocolate, use more; for a lighter sweetness, use less.
Add the Ice Cream
The magic begins with the addition of ice cream. You can use any flavor you like, whether it’s classic vanilla, chocolate chip, or something more adventurous.
Soften the ice cream slightly by leaving it out at room temperature for a few minutes. This makes it easier to incorporate into the hot chocolate.
Heat on the Stovetop
Place your saucepan on the stovetop over medium-low heat.
Stir the mixture consistently as the ice cream begins to melt and blend with the cocoa and milk.
Continue heating until the mixture is warm all the way through. Be careful not to overheat it, as you don’t want to scorch the mixture or bring it to a boil.
Serve and Garnish
Once your hot chocolate is warm and thoroughly mixed, pour it into your favorite mug.
Top it off with a generous dollop of whipped cream for an extra layer of decadence.
Don’t forget to add some sprinkles on top for a burst of color and extra fun.
Hot chocolate with ice cream is a delightful twist on a classic beverage that’s perfect for indulgent moments or as a special treat during the holiday season. The combination of rich, creamy cocoa and the cold, sweet ice cream creates a contrast that’s both comforting and exciting. Whether you choose a traditional flavor or go for something unique, this hot chocolate variation is bound to become a favorite. So, why not surprise yourself or your loved ones with this scrumptious creation the next time you’re craving a comforting, warming drink? It’s the perfect way to make winter a little sweeter and a lot more enjoyable.
If motherhood has you stressed and you feel like you’ve lost your creativity, I am here to help! Here you will find easy recipes, simple DIY’s, affordable styles, and what to read next. I believe we all have a creative side, some of us just need a little help to find it. I will help inspire you to have creative expression without standards.