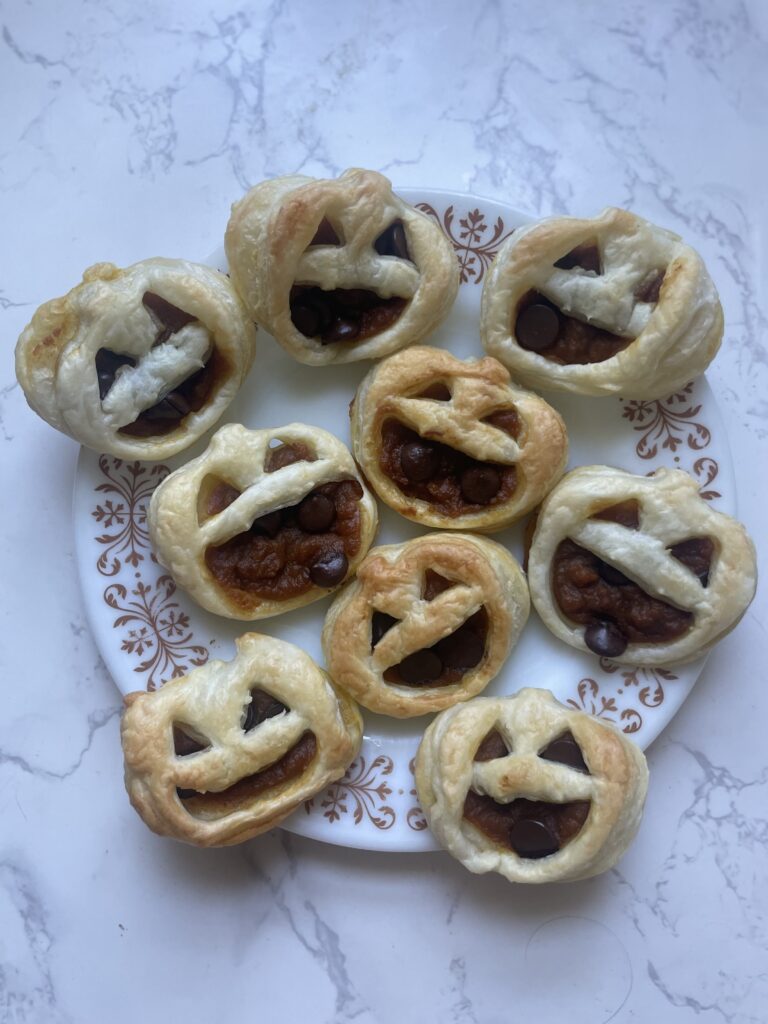
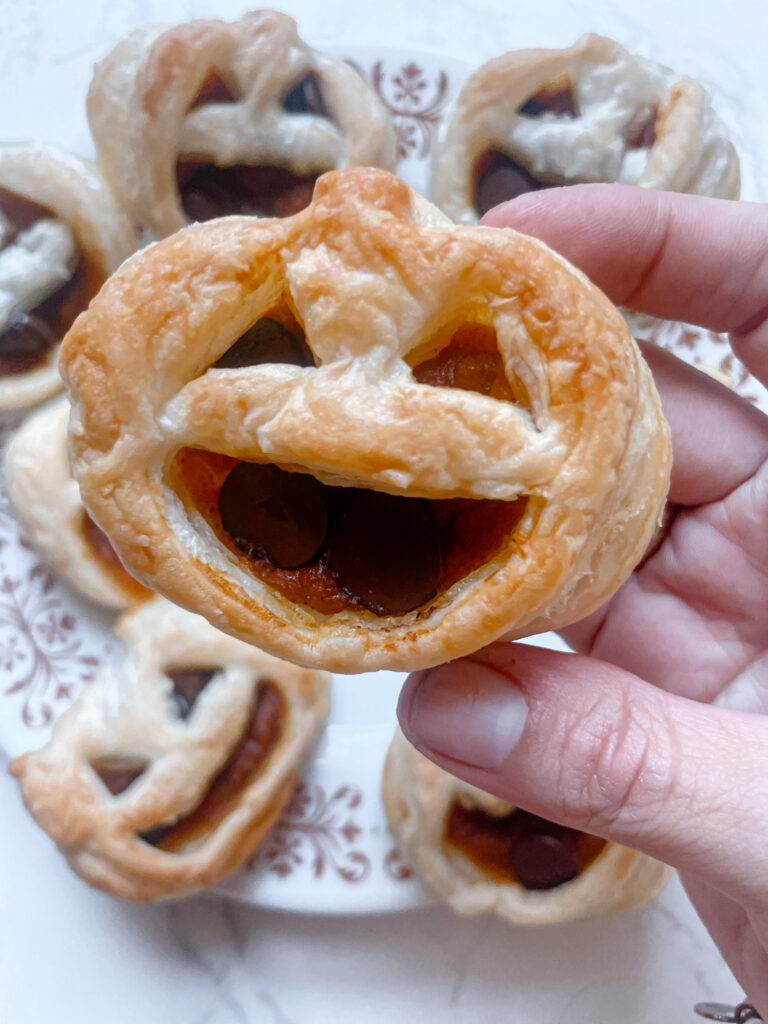
If you’re looking for the perfect autumn treat that’s both easy to make and irresistibly delicious, these Chocolate and Pumpkin Hand Pies are it! Imagine biting into a flaky puff pastry filled with warm spiced pumpkin and a hint of rich dark chocolate—pure fall magic. Plus, the festive shapes make them as fun to eat as they are to create, making this recipe a must-try for any fall baking session.
Autumn is a special time in our household, especially for my 8-year-old, Franco. He looks forward to all the festive treats we create together during this time of year, from spooky Halloween cookies to comforting pumpkin-flavored desserts. These hand pies are a particular favorite because they’re as fun to make as they are to eat. Franco loves helping out in the kitchen, especially when he gets to choose which autumn-themed cutters we use to shape our pies.
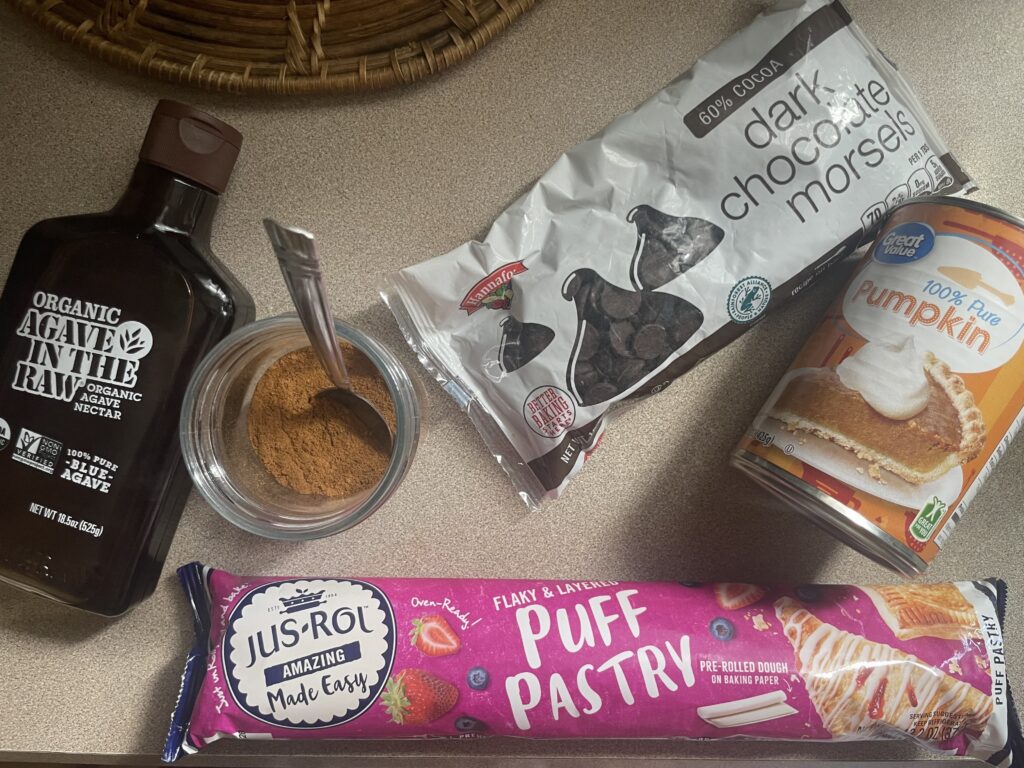
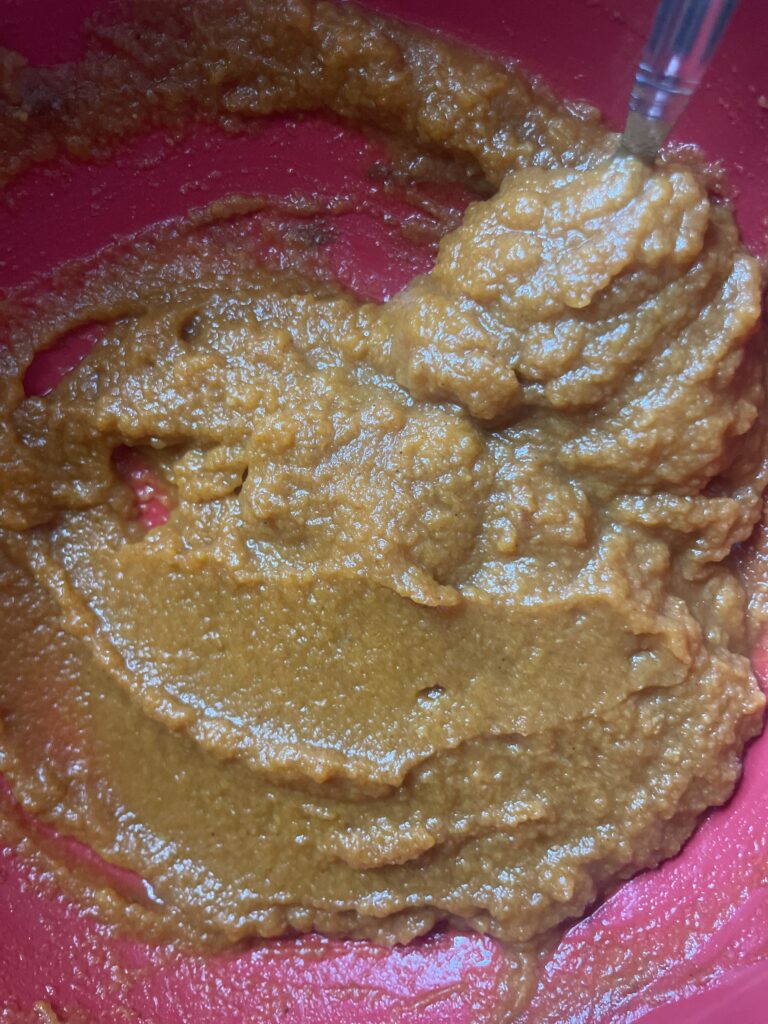
Prepare the Filling: In a medium bowl, combine the pumpkin puree, agave nectar, and pumpkin pie spice. Stir until well mixed.
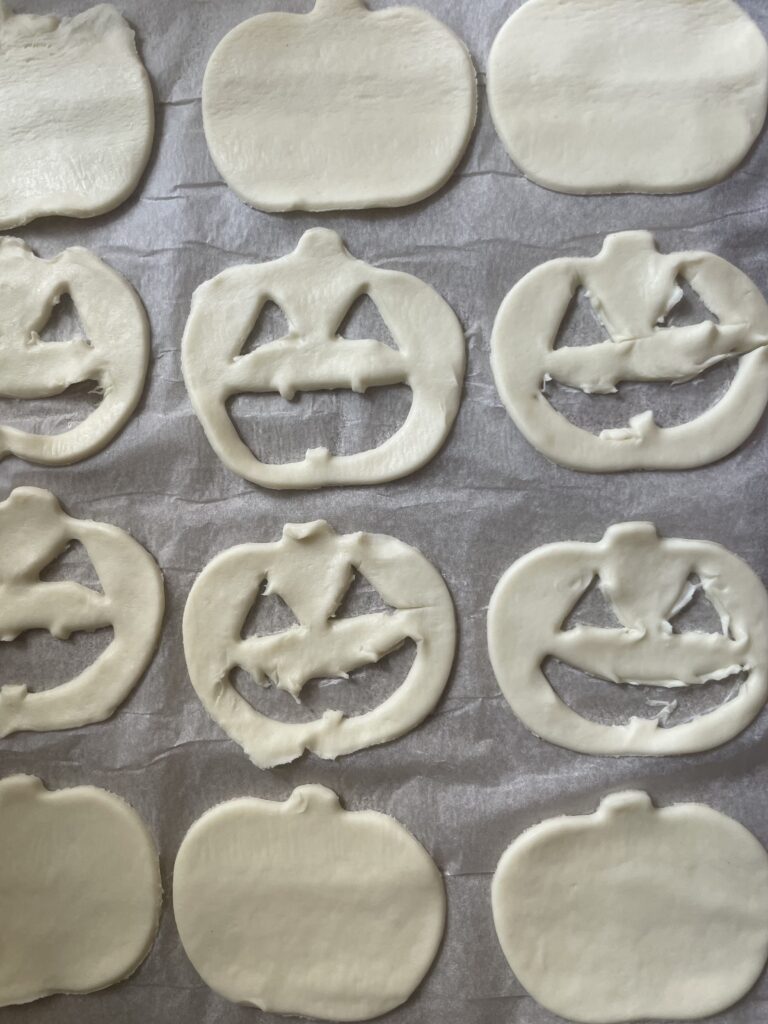
Roll Out the Puff Pastry: On a lightly floured surface, roll out the puff pastry sheet to smooth any creases. Use your autumn-themed cookie cutters to cut out an even number of shapes—these will form the tops and bottoms of your hand pies.
Assemble the Hand Pies:
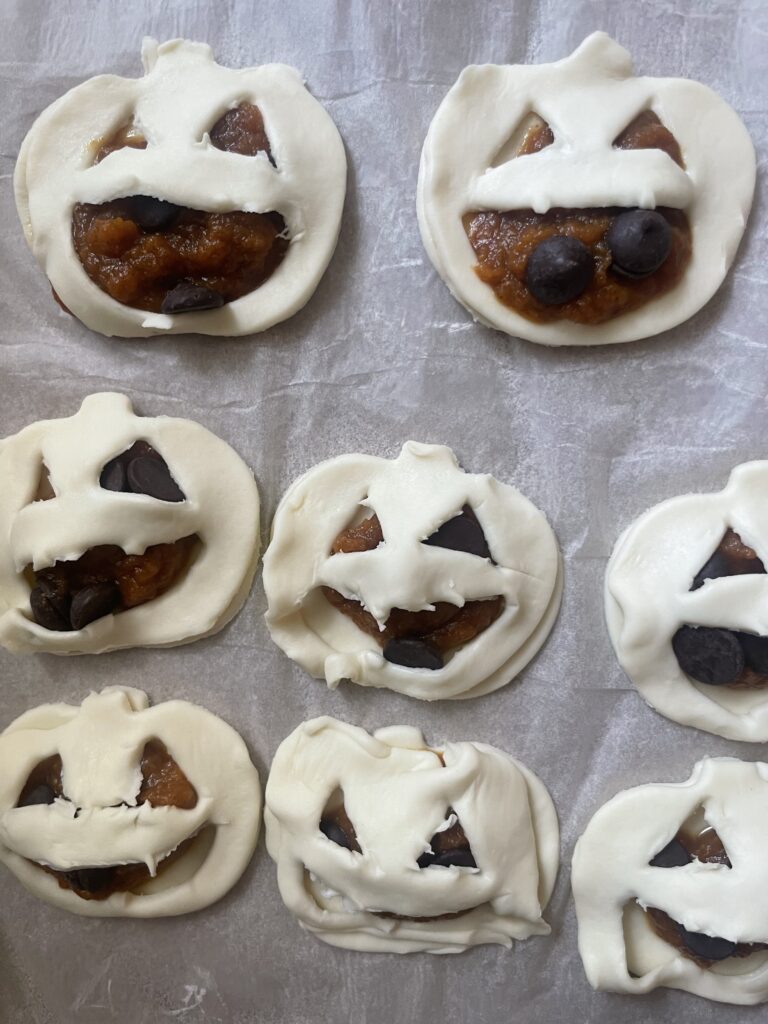
Place half of the cut-out shapes on a parchment-lined baking sheet.
Spoon a small amount of the pumpkin mixture into the center of each shape, leaving a border around the edges.
Add a few dark chocolate chips on top of the pumpkin filling.
Seal the Pies:
Brush the edges of each filled shape with a bit of water, then place a second cut-out shape on top.
Gently press the edges together with your fingers, and then use a fork to crimp the edges and seal the pies.
Egg Wash: In a small bowl, whisk the egg with a tablespoon of water. Brush the tops of each hand pie with the egg wash to give them a golden, glossy finish.
Bake: Preheat your oven to 375°F (190°C). Bake the hand pies for 20-25 minutes, or until they are golden brown and puffed up.
Cool and Serve: Allow the hand pies to cool slightly on a wire rack before serving. Enjoy them warm with a cup of spiced tea or hot chocolate!
Tips for Success
Keep It Cold: Make sure your puff pastry stays cold while working with it. If it becomes too warm, pop it back in the fridge for a few minutes before continuing.
Customize Your Fillings: Feel free to add nuts, dried fruit, or a sprinkle of cinnamon sugar on top for extra flavor and texture.
Make Ahead: These hand pies can be assembled and frozen before baking. Just pop them in the oven directly from the freezer, adding a few extra minutes to the baking time.
Why You’ll Love These Hand Pies
These Chocolate and Pumpkin Hand Pies are the perfect blend of sweet and savory, with the rich taste of dark chocolate complementing the warm, spiced pumpkin filling. The puff pastry gives each pie a delightful flakiness, and the autumn-themed shapes make them as fun to look at as they are to eat.
Whether you’re making them for a fall gathering or just to enjoy with your family, these hand pies are sure to become a seasonal favorite. Plus, they’re the perfect size for little hands to hold, making them a hit with kids too!
What’s your favorite fall dessert? Let me know in the comments, and don’t forget to share your creations if you try this recipe!
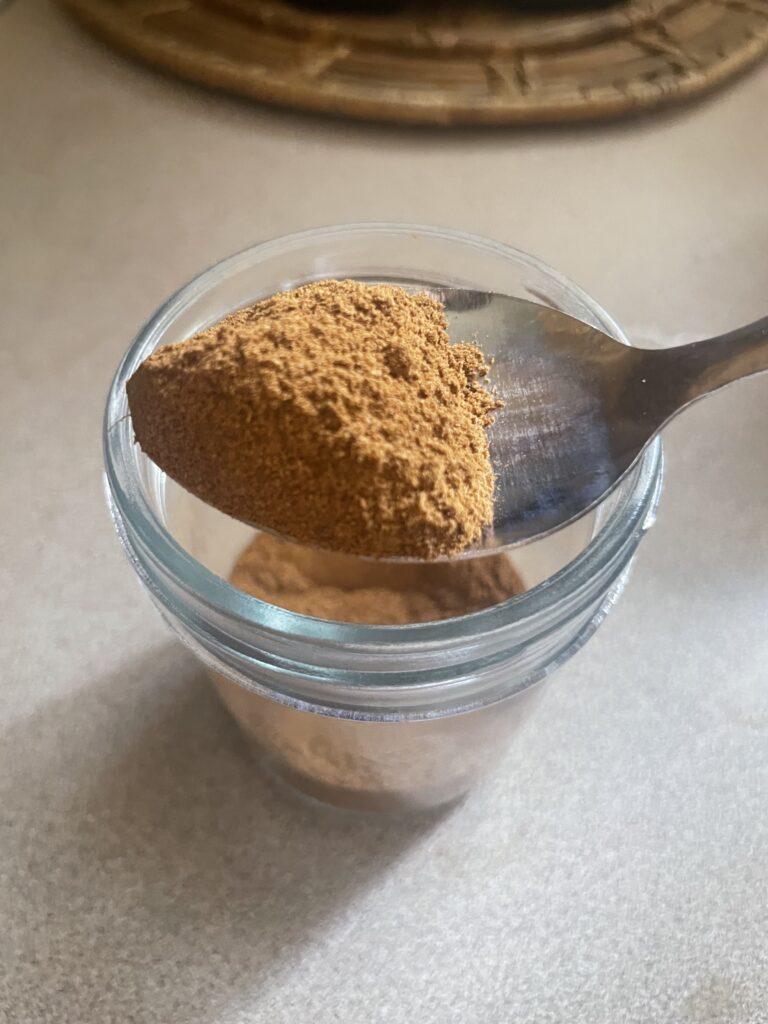
Homemade Pumpkin Spice Recipe: Your Go-To Fall Flavor
Fall is in the air, and you know what that means—pumpkin spice everything! Instead of reaching for a store-bought mix, why not create your own homemade pumpkin spice? With just a few pantry staples, you can whip up a batch that’s fresher, more flavorful, and free of any unnecessary additives. This versatile spice blend is perfect for everything from lattes to baked goods, and it makes a great gift too!
Ingredients
3 tablespoons ground cinnamon
2 teaspoons ground ginger
2 teaspoons ground nutmeg
1 1/2 teaspoons ground allspice
1 1/2 teaspoons ground cloves
Instructions
Measure the Spices: In a small bowl, combine the ground cinnamon, ginger, nutmeg, allspice, and cloves.
Mix Thoroughly: Use a whisk or spoon to thoroughly mix the spices together. Ensure there are no clumps, and the blend is even.
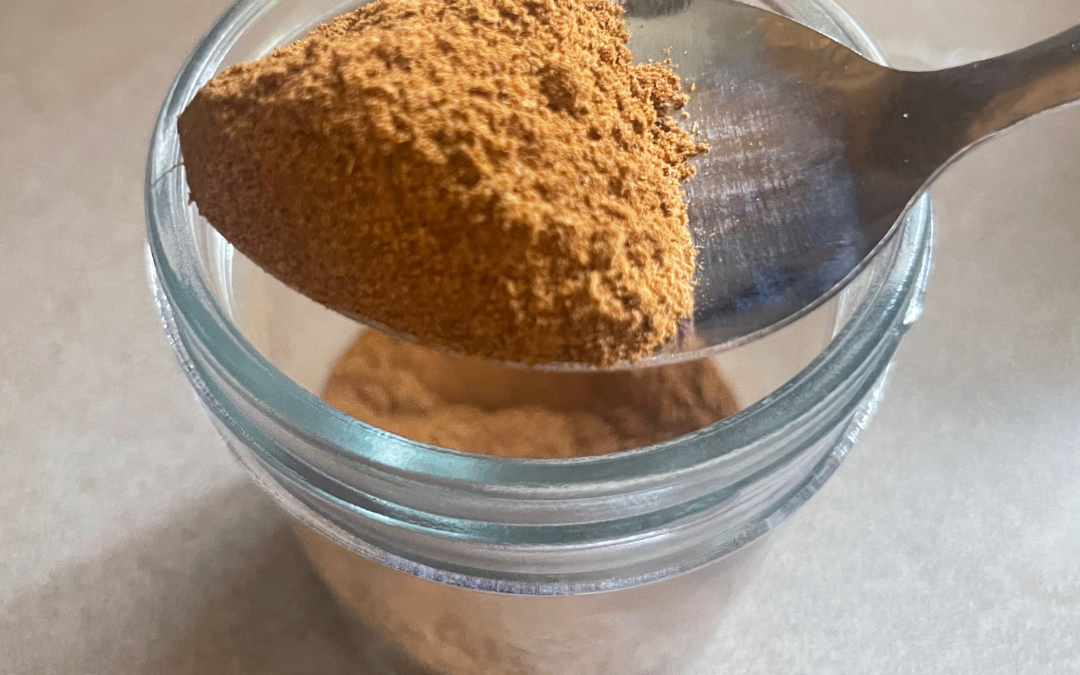
Store: Transfer your pumpkin spice mix to an airtight container. Store in a cool, dark place for up to 6 months.
Use: Add a teaspoon to your morning coffee, sprinkle it over oatmeal, mix it into pancake batter, or use it in your favorite fall dessert recipes.
Tips for the Perfect Pumpkin Spice Blend
Adjust to Taste: Feel free to tweak the ratios based on your preference. If you love cinnamon, add a bit more; if cloves are too strong for you, scale them back.
Double the Recipe: This blend makes about 1/4 cup, but you can easily double or triple the recipe if you plan on using it frequently or gifting it.
Add a Twist: Consider adding a pinch of cardamom for an extra layer of flavor or a bit of ground vanilla for sweetness.
Why Make Your Own Pumpkin Spice?
Homemade pumpkin spice isn’t just more economical than the store-bought versions; it’s also customizable. You can control the quality of the ingredients, making sure your spice mix is fresh and potent. Plus, there’s something satisfying about mixing up your own seasonal flavors—it’s like capturing the essence of fall in a jar!
Have a favorite way to use pumpkin spice? Share your tips or recipe ideas in the comments below!
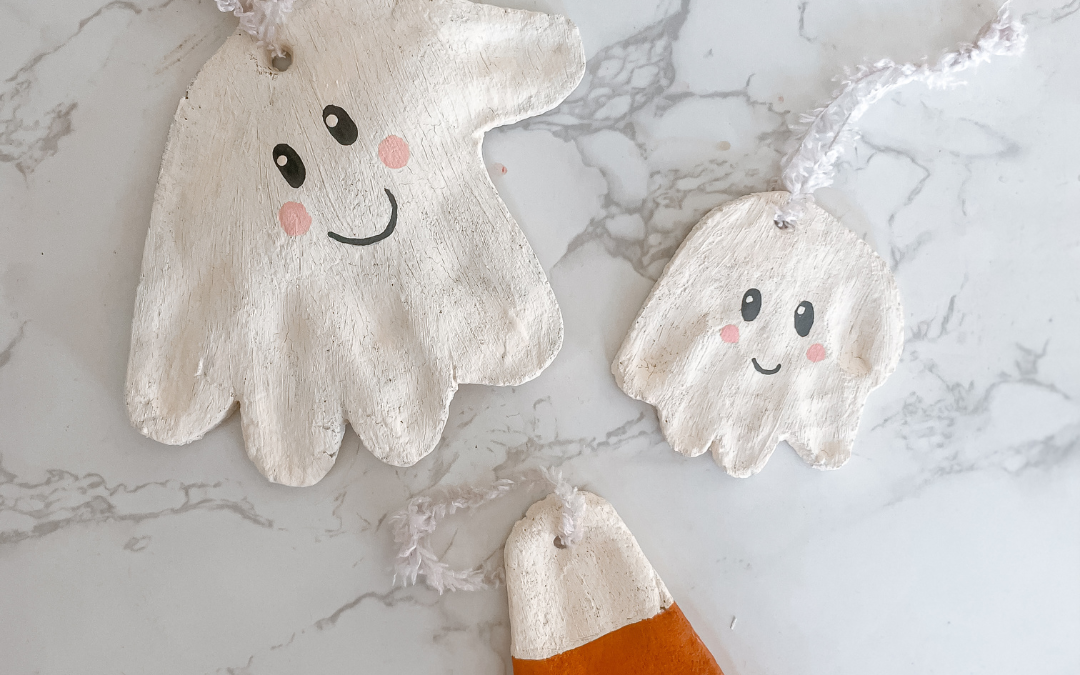
If you’re looking for a fun and easy way to celebrate Halloween with your little ones, spooky salt dough keepsakes are the perfect project! They are simple to make and double as cherished mementos you’ll love pulling out year after year.
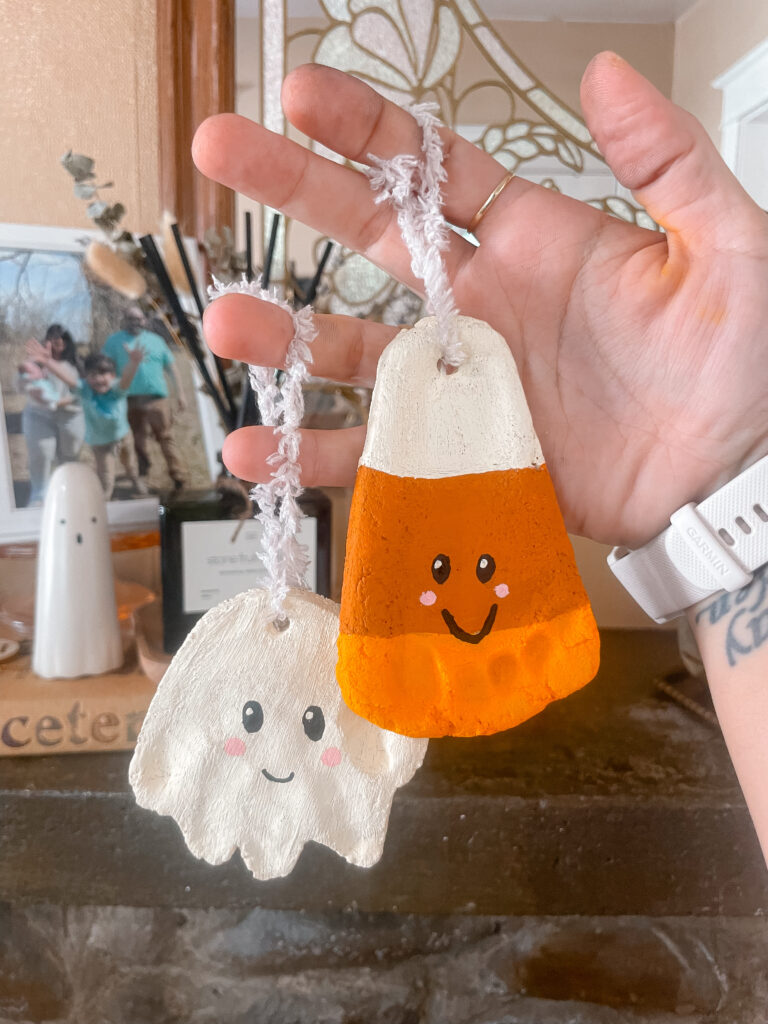
As a mom with an 8-year-old, I sometimes miss the days when we did these cute crafts together all the time. But let’s be real—he’ll never be too old for me! He’s stuck doing these projects until he’s an adult. It’s definitely fun, though, to keep these traditions alive with my younger son. Making handprint ghosts and candy corn footprint keepsakes together has become a sweet way to continue the fun memories and pass them down.
Ingredients
For the Salt Dough:
1 cup of all-purpose flour
1/2 cup of salt
1/2 cup of water
For Decorating:
White, black, orange, and yellow acrylic paint
Paintbrushes
Clear varnish or Mod Podge (optional)
Ribbon or string for hanging
A straw (for creating holes in the dough)
Step-by-Step Instructions
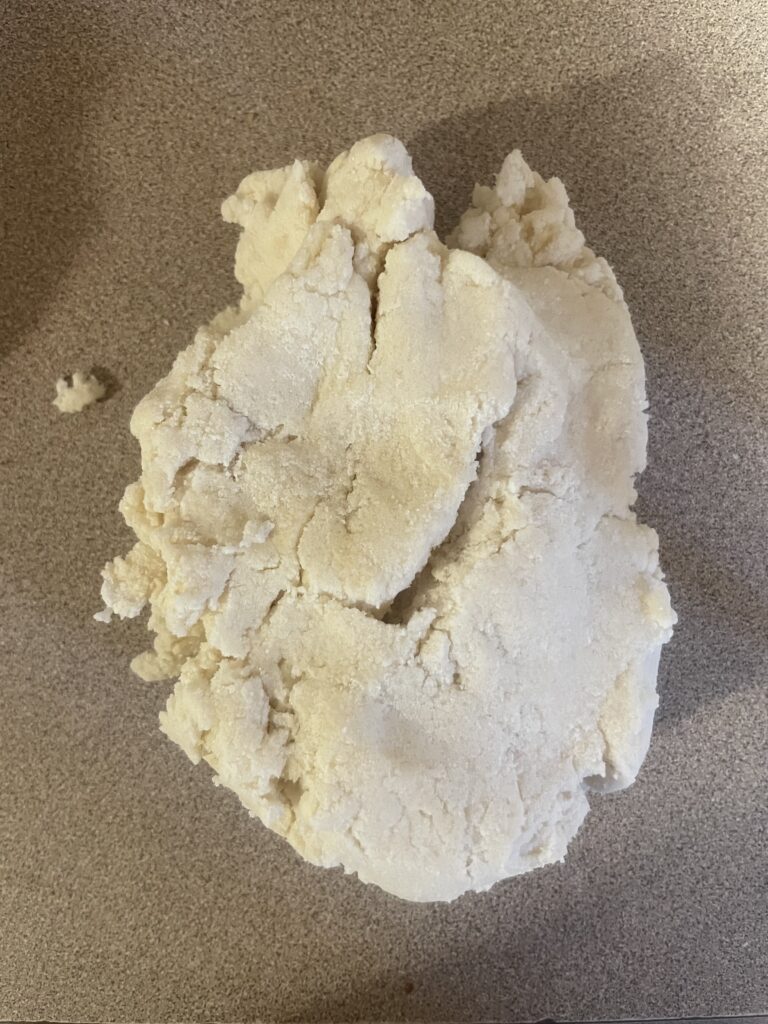
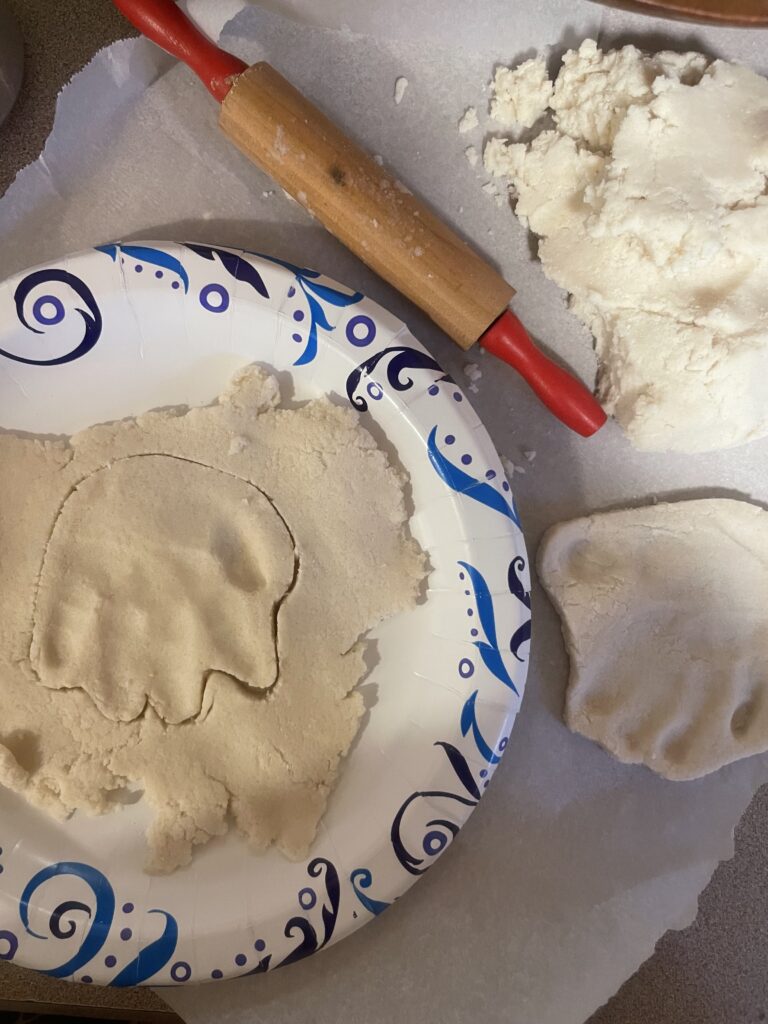
Prepare the Dough: Combine the flour and salt in a large mixing bowl. Gradually add water while stirring until a dough forms. Knead the dough on a floured surface until it’s smooth and pliable.
Shape the Keepsakes:
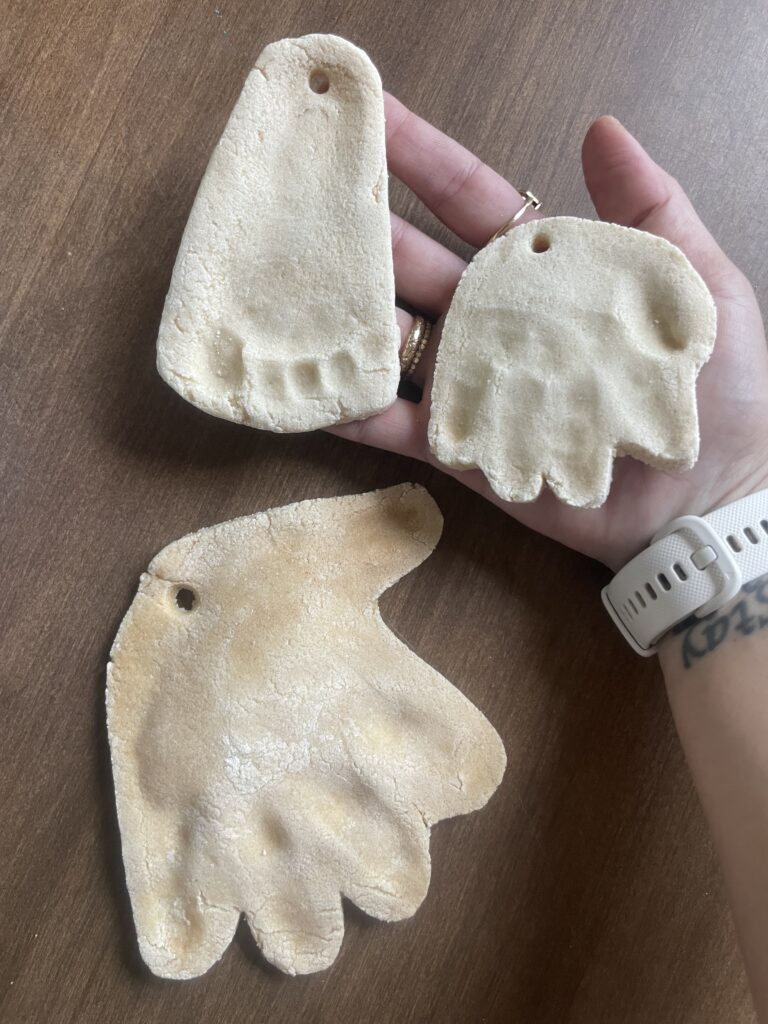
Handprint Ghosts: Roll out the dough to about 1/4-inch thickness. Help your child press their hand into the dough to create a handprint. Cut around the print, leaving a small border. Use a straw to poke a hole at the top for hanging.
Candy Corn Footprints: Roll out the dough and help your child press their foot into it to create a footprint. Cut around the print, leaving a small border. Use a straw to make a hole at the top of each piece if you plan to hang them.
Bake: Preheat your oven to 250°F (120°C). Place the shapes on a parchment-lined baking sheet and bake for 2-3 hours or until fully dry and hardened. Let them cool completely.
Decorate the Keepsakes:
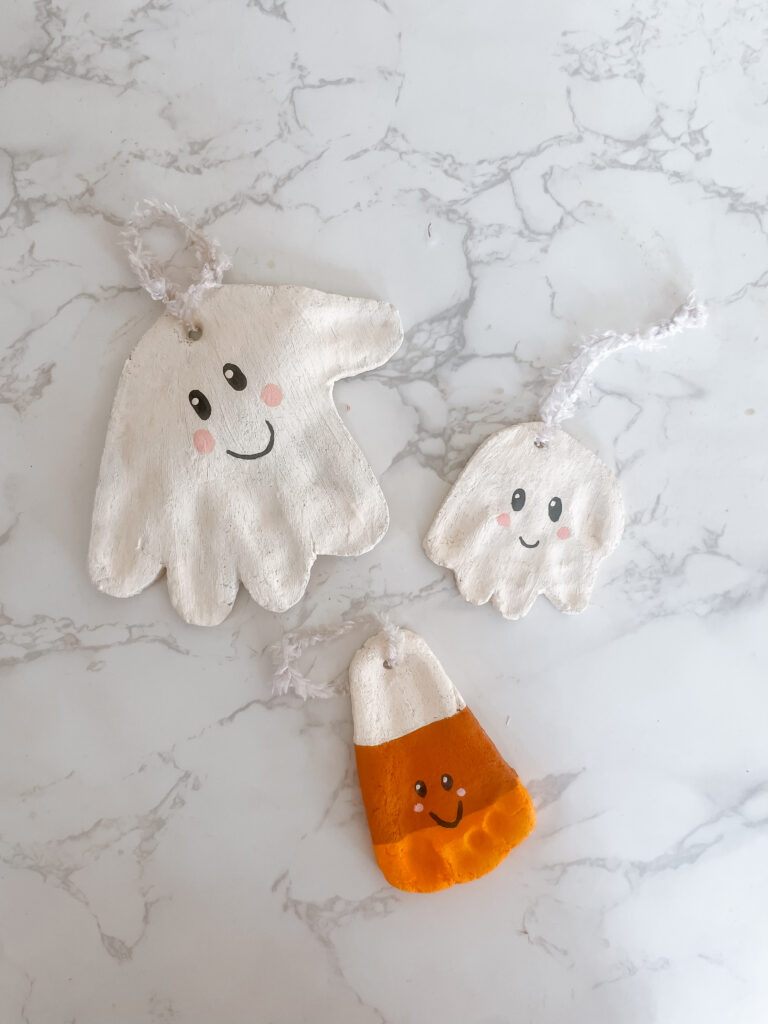
Handprint Ghosts: Paint the entire handprint white. Once dry, use black paint to add eyes and a mouth for a ghostly face.
Candy Corn Footprints: To resemble candy corn, paint the heel of the footprint white, the middle section orange, and the toes yellow. Let the paint dry thoroughly.
Seal and Hang: Once your paint is dry, apply a clear varnish or Mod Podge coat to protect your keepsakes. Thread ribbon or string through the holes, and your spooky salt dough keepsakes are ready to display!
Frequently Asked Questions
How do I store salt dough keepsakes? To prevent fading or cracking, store them in a cool, dry place away from direct sunlight. Wrapping them in tissue paper before storing can also help preserve them.
Can I use other shapes for these keepsakes? Of course! Get creative with Halloween-themed cookie cutters like pumpkins, bats, or witches’ hats.
What if my dough is too sticky or crumbly? If the dough is too sticky, add a little more flour. If it’s crumbly, gradually add water until it reaches the right consistency.
Can I make these with a baby or toddler? Yes! Just keep in mind that you’ll need to help them press their hands or feet into the dough and handle the paint. Supervision is key, especially during the baking and painting stages.
Are salt dough keepsakes safe around pets? NO, salt dough can be very dangerous if eaten by pets due to its high salt content. Be sure to keep these keepsakes out of reach of curious animals.
These spooky salt dough keepsakes are more than just Halloween decorations—they’re a way to capture memories with your kids. Remember to keep them out of reach of your furry friends!
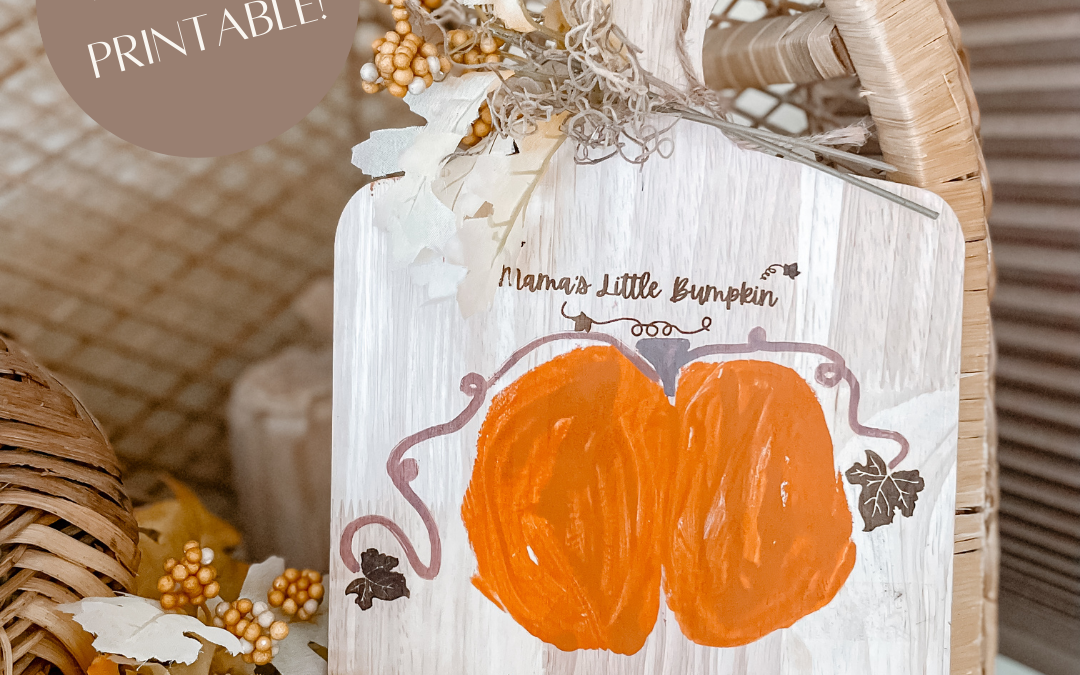
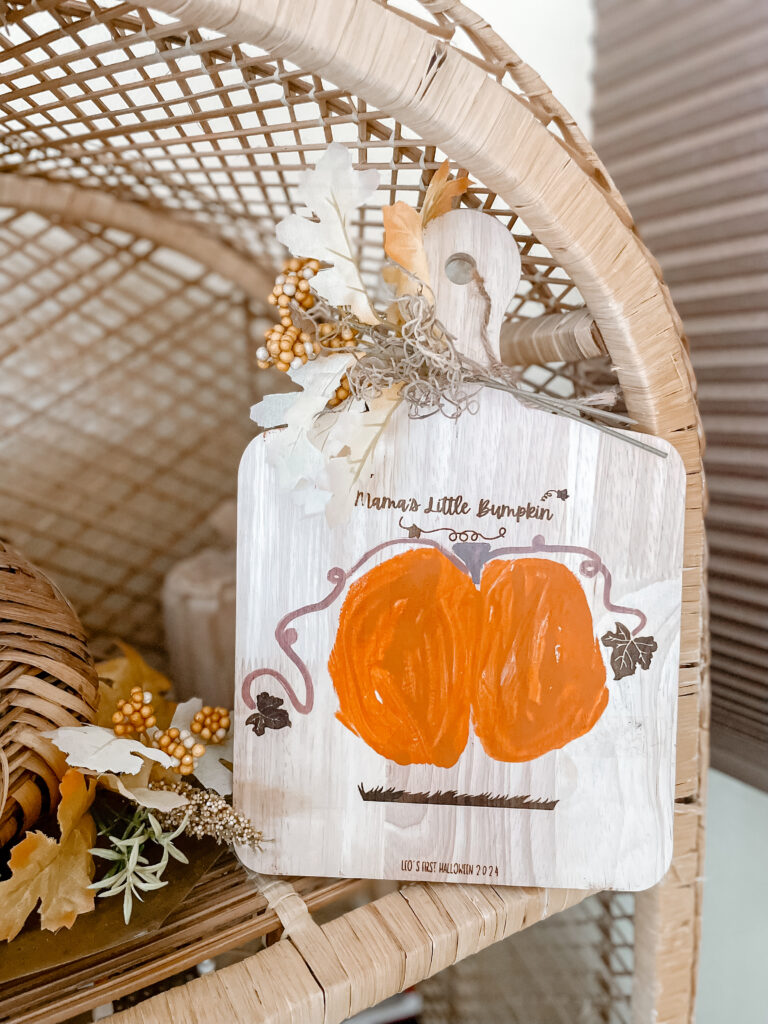
Fall is here, and what better way to celebrate than with a touch of seasonal creativity? If you’re a fan of pumpkins, Halloween, and all things adorable, you’ll love this Baby Bum Pumpkin craft! This project transforms your baby’s tiny bum into the cutest little pumpkin you’ve ever seen. With my free printable, you can create a unique keepsake that’s perfect for your home or as a gift. Plus, I’ll share how I took this idea to the next level by using my laser cutter on a wooden cutting board.
Why You’ll Love This Craft:
Seasonal Charm: Capture the essence of fall and Halloween with an unforgettable keepsake.
Easy to Create: Simple materials and quick steps make this craft perfect for busy parents.
Versatile Template: Whether you’re using paint, a laser cutter, or a Cricut machine, this template works wonders.
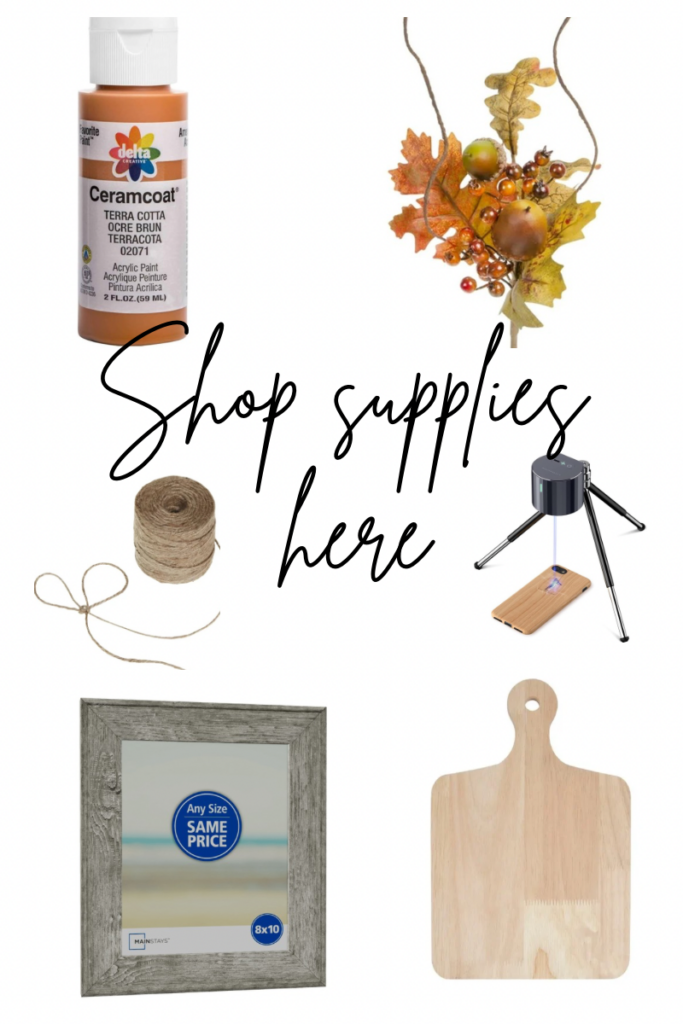
Download and Print: Grab your free Baby Bum Pumpkin printable [here].
Paint Your Baby’s Bum: For a classic version, apply a layer of non-toxic orange paint to your baby’s bum and press onto the printable.
Create with Technology:
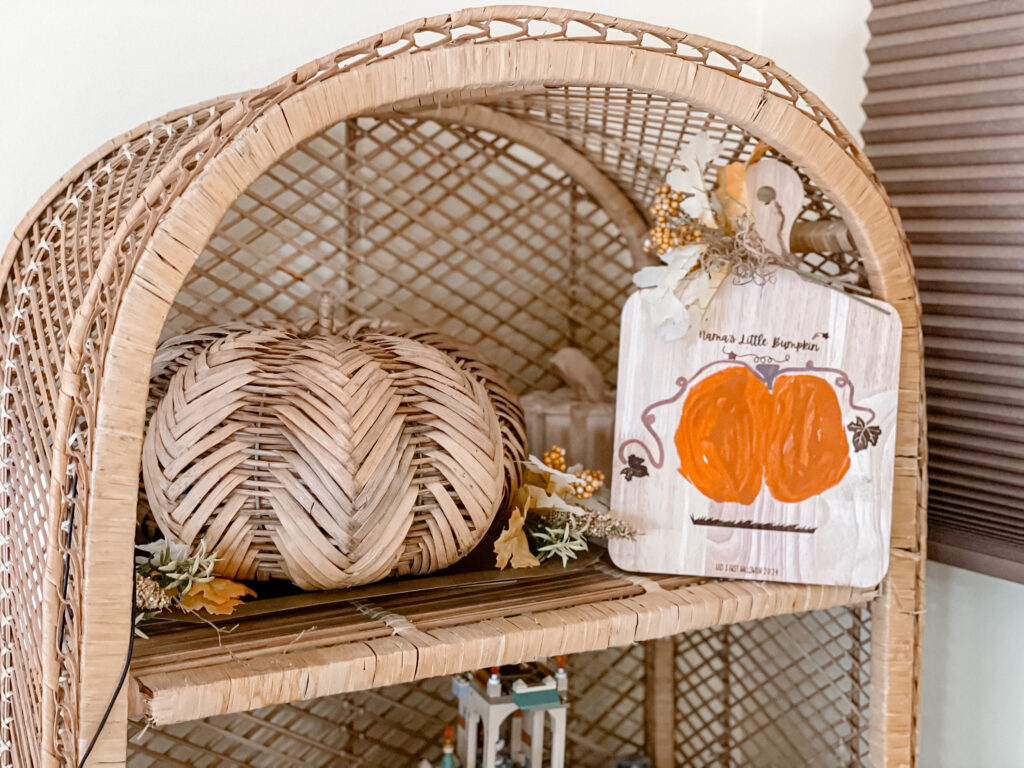
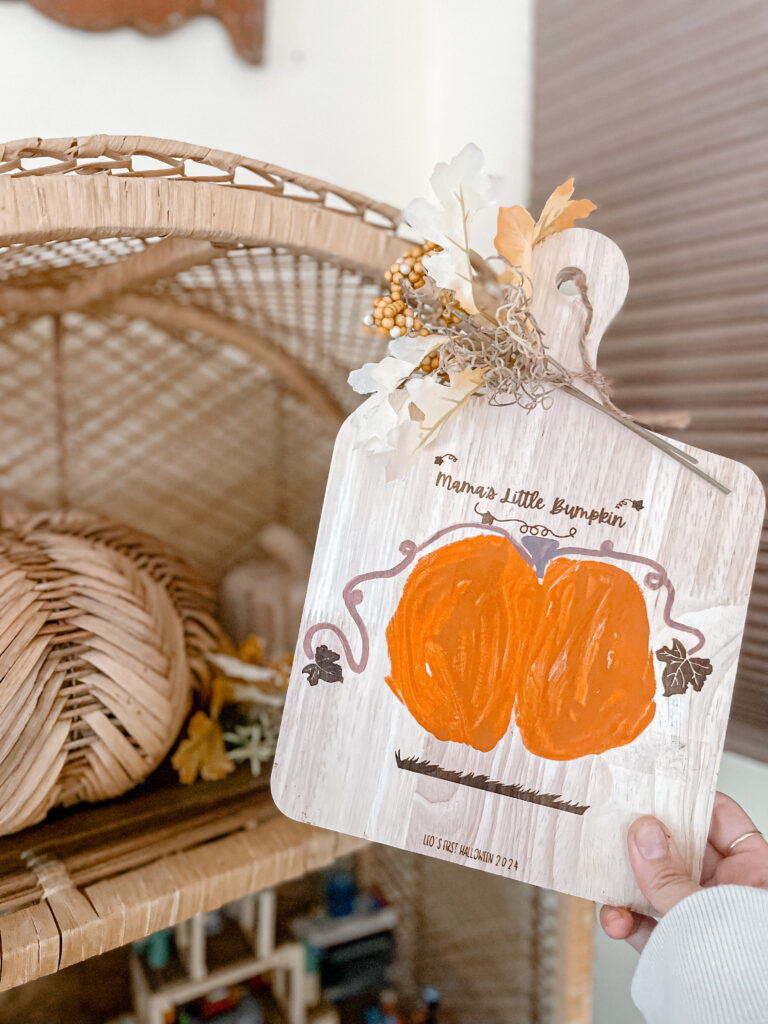
Laser Cutter: I used a laser cutter to engrave the Baby Bum Pumpkin design onto a wooden cutting board. The result was a charming keepsake perfect for the kitchen or as a gift.
Cricut Machine: You can also use the template with your Cricut machine to cut vinyl or stencil material. This is great for creating custom signs, clothing, or even more permanent keepsakes.
Add Finishing Touches: For the painted version, add green paint for the stem and leaves.
Display with Pride: Frame your paper version, gift your engraved cutting board, or show off your Cricut creation at home.
From traditional crafting to modern technology, the Baby Bum Pumpkin craft offers endless possibilities. Whether you’re using paint, a laser cutter, or a Cricut machine, this project is sure to capture the magic of your little one’s early years. Don’t forget to share your creations on social media and tag me @thenicoleroseblog.
Homemade Pureed Prunes: A Nutritious First Food for Your Baby
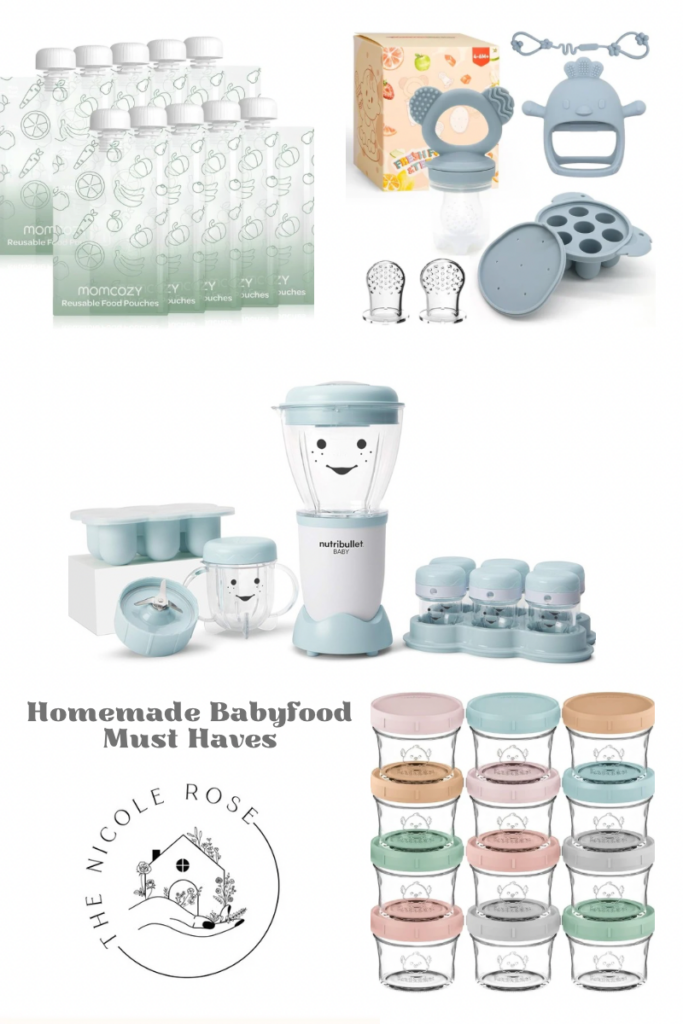
Introducing solid foods to your baby is an exciting milestone, and making your own pureed baby food can ensure quality and cost-effectiveness. One of the simplest and most nutritious options is pureed prunes, perfect for gently easing your baby into the world of solid foods. This easy-to-make puree is not only packed with essential nutrients but also helps maintain healthy digestion for your little one.
As I continue to slowly introduce solid food to my five-month-old, I’ve found that making my own pureed baby food is both satisfying and practical. Not only do I have control over the ingredients, but it’s also more cost-effective than store-bought options. I recently shared our introduction to banana puree and it was a hit! One of Leo’s favorites so far is pureed prunes. This smooth, sweet puree is a fantastic way to incorporate natural sweetness and fiber into his diet.
Ingredients Breakdown
Ingredients:
Pitted prunes
Water
Step-by-Step Instructions
Prepare the Prunes: If your prunes aren’t already pitted, remove the pits. Use about 1 cup of pitted prunes for a good batch of puree.
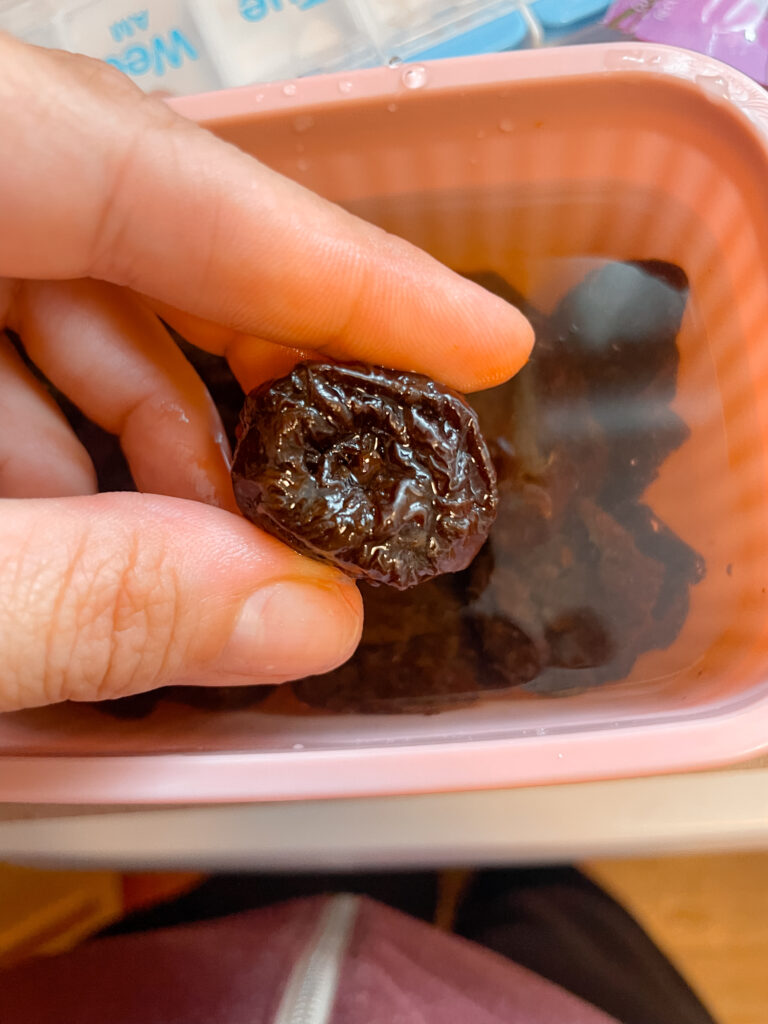
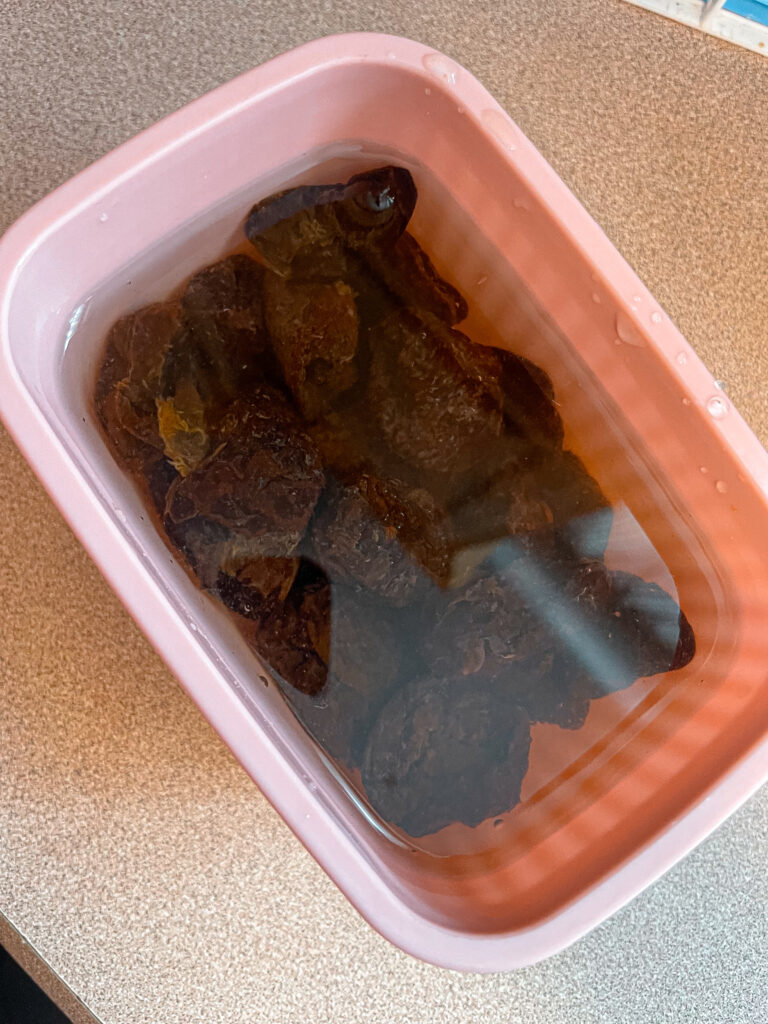
Soak the Prunes: Place the prunes in a bowl and cover them with warm water. Let them soak for about 15-20 minutes until they are plump and soft.
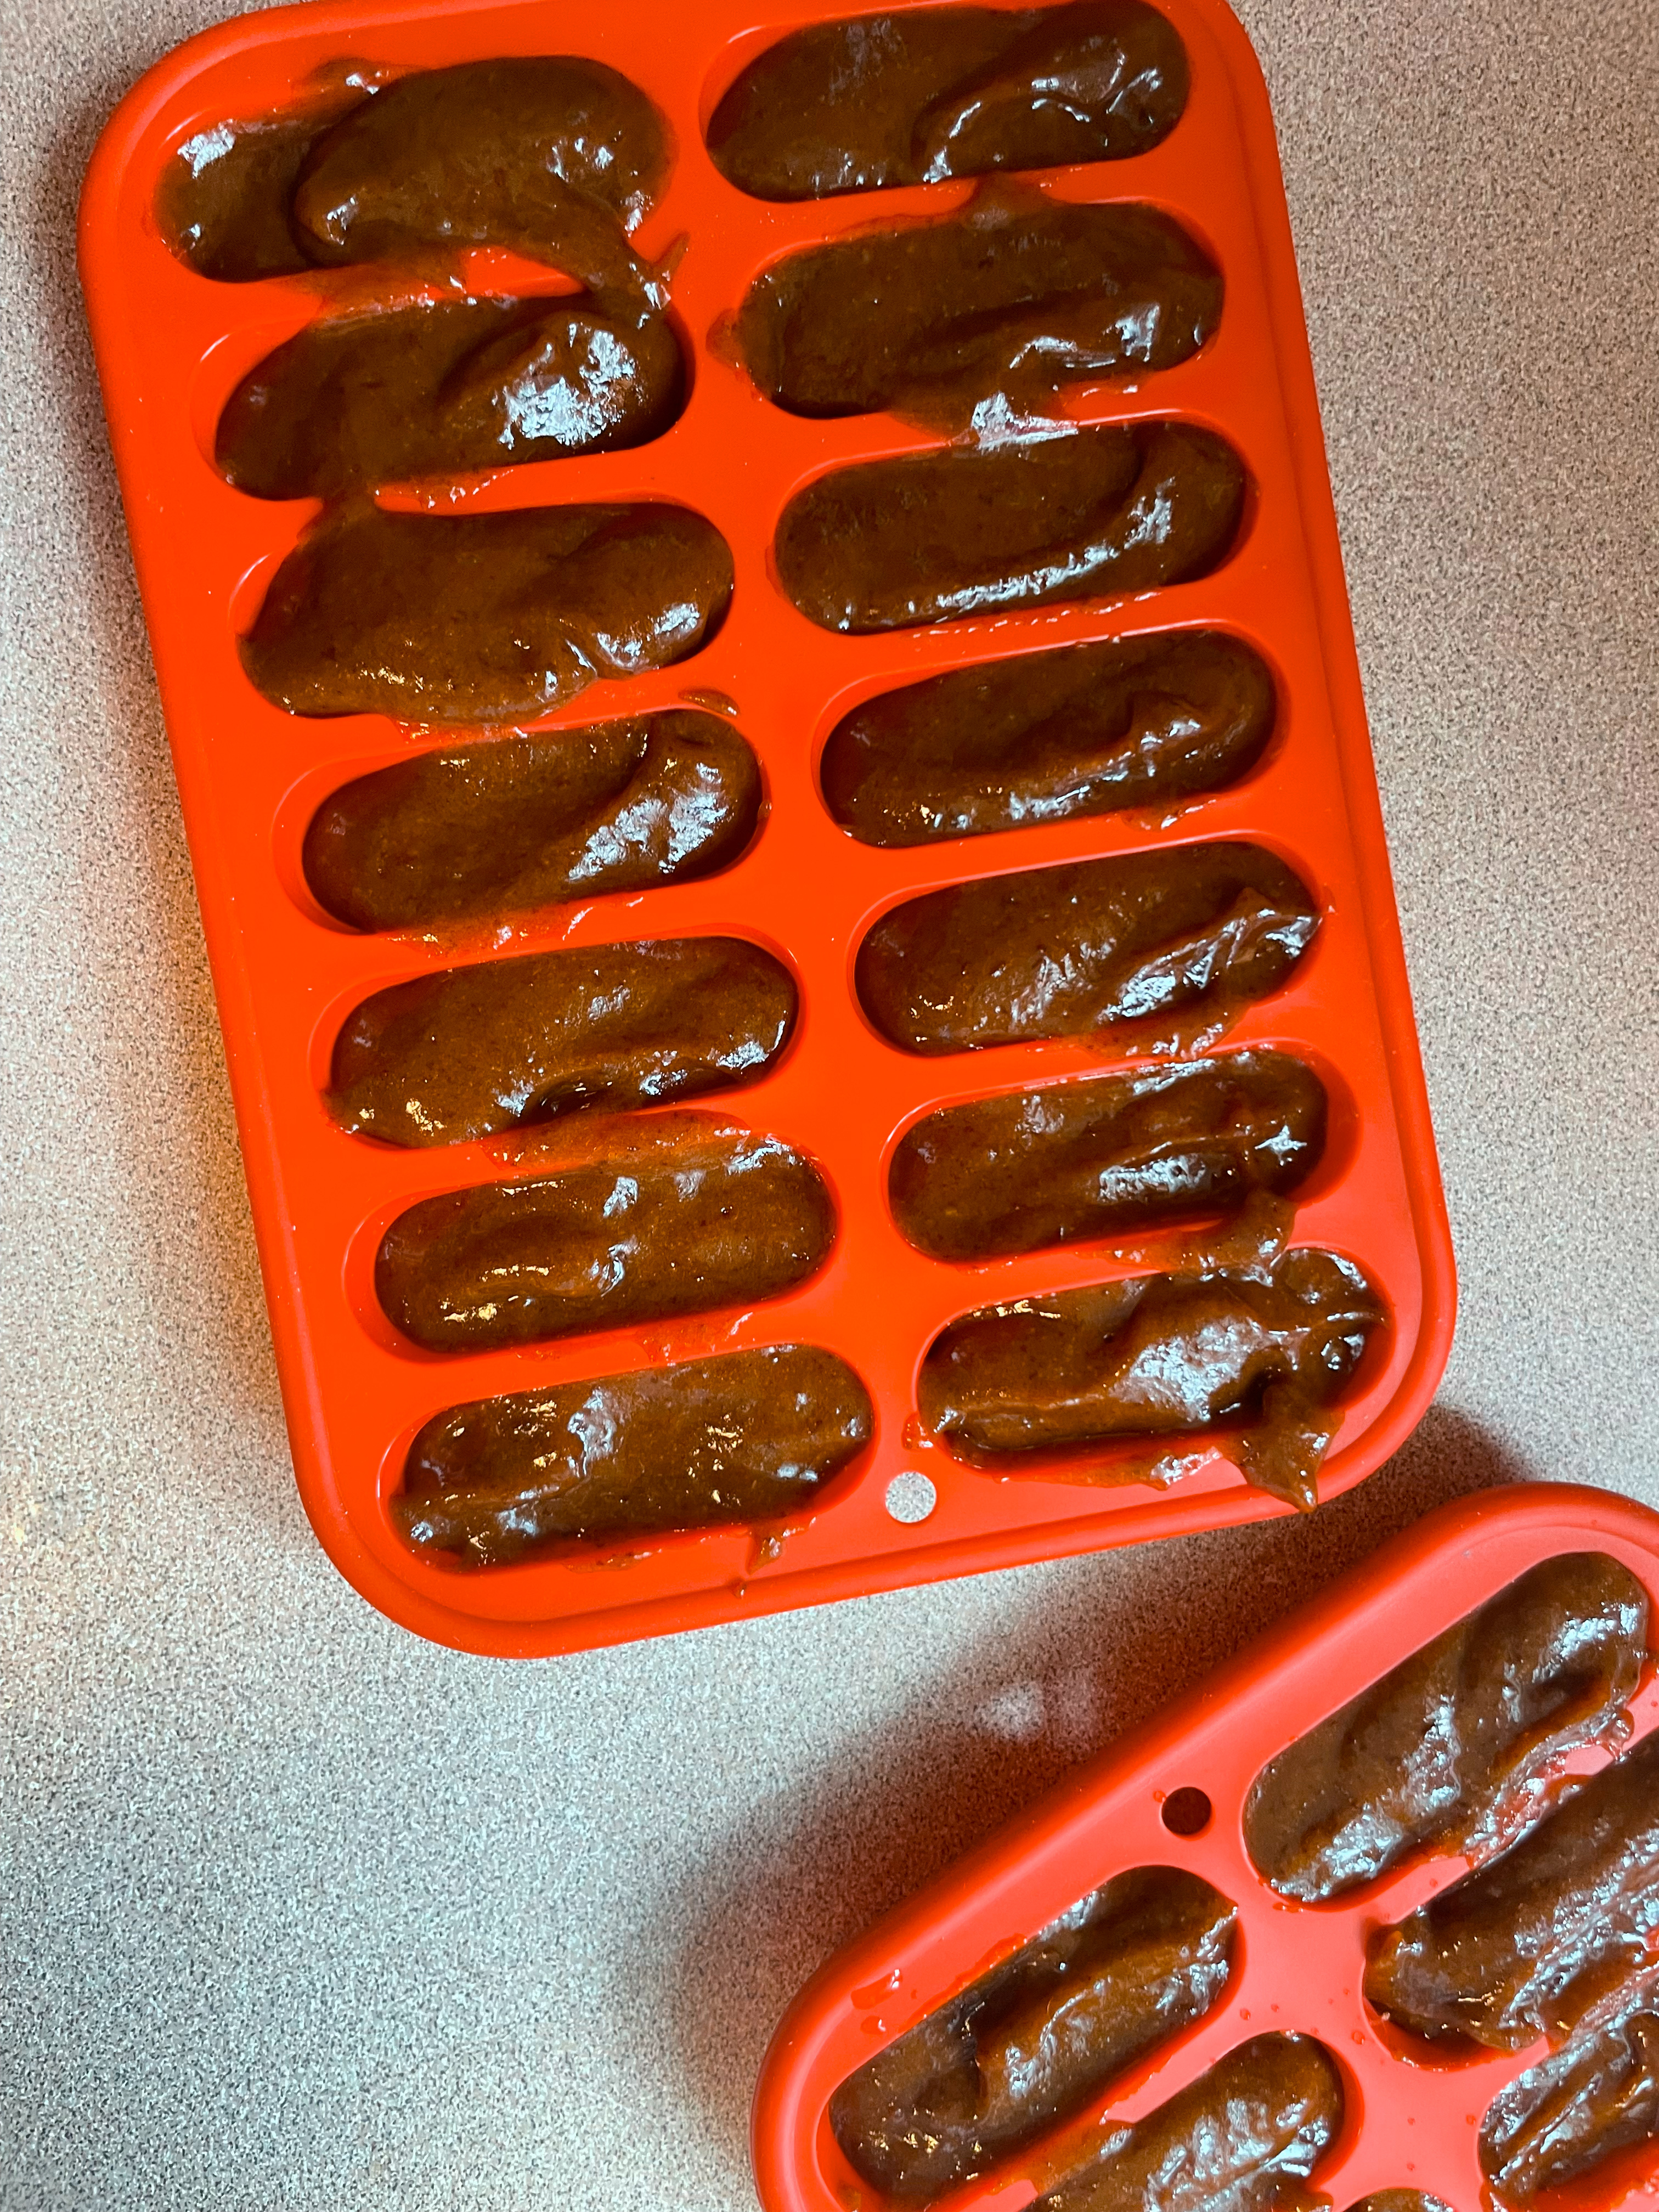
Drain and Reserve: Drain the prunes, reserving the soaking water. This water is rich in nutrients and can be used to adjust the consistency of your puree.
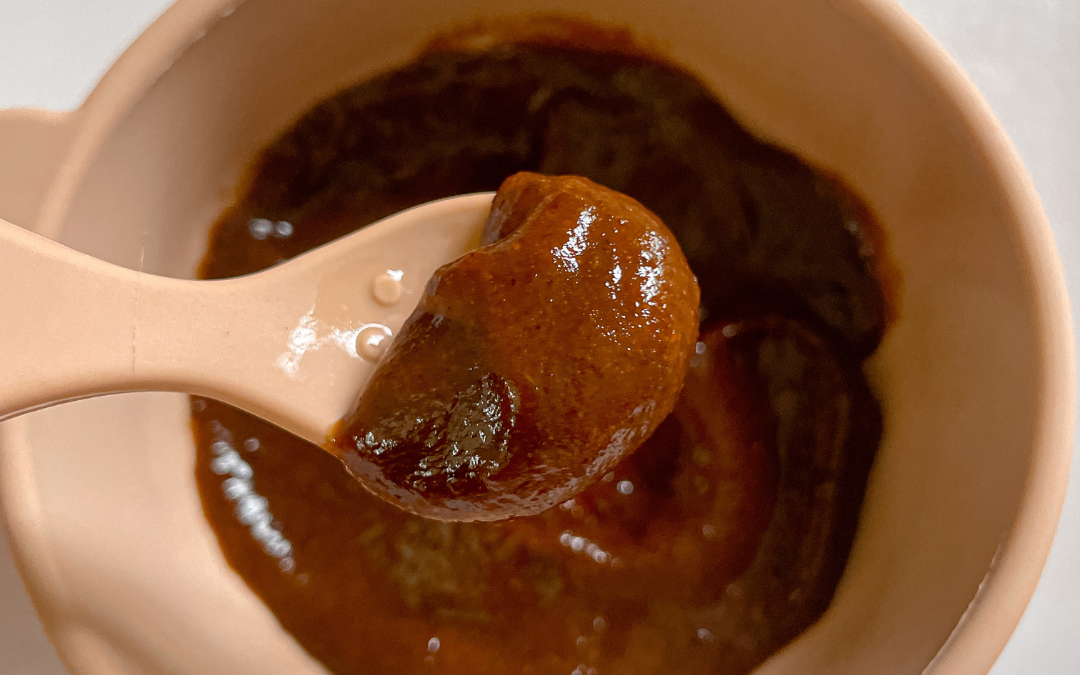
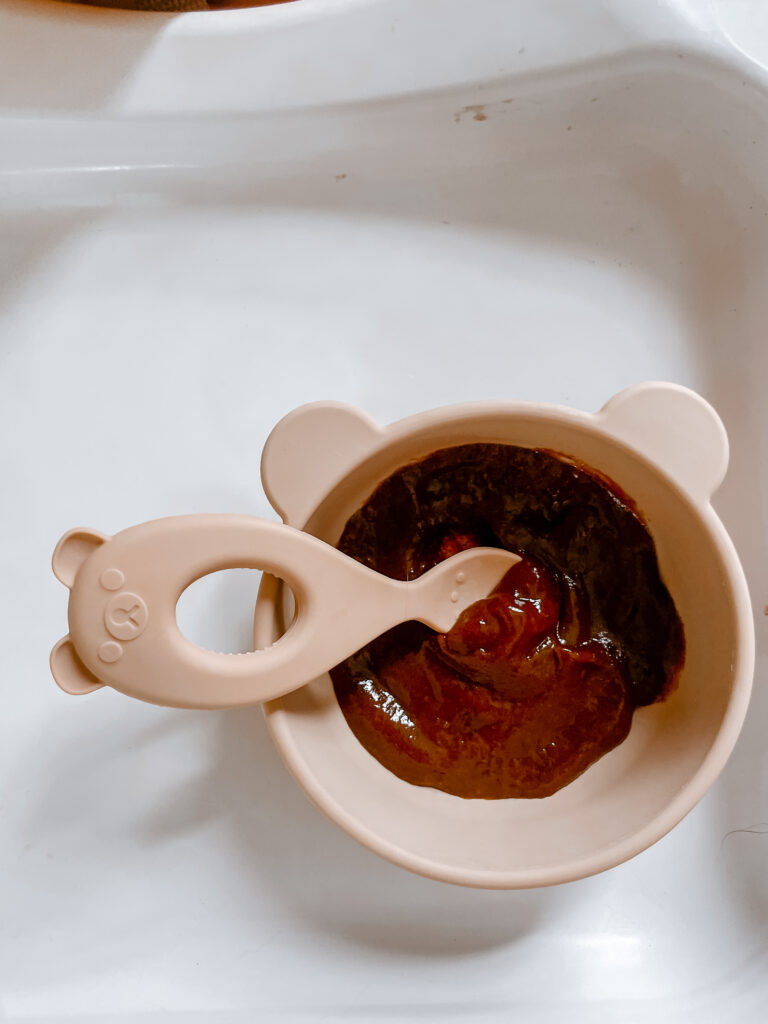
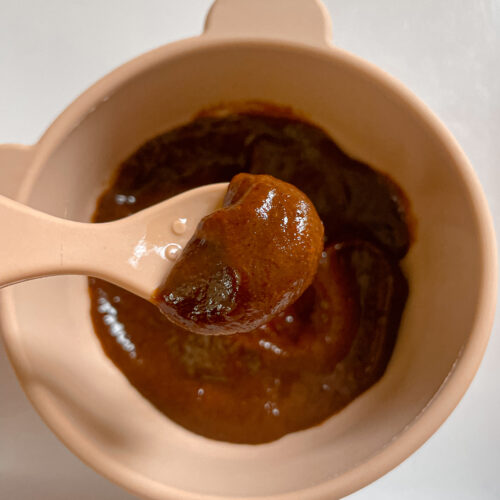
Blend the Prunes: Transfer the soaked prunes to a blender or food processor. Add a small amount of the reserved soaking water to start, and blend until smooth. You can add more water if needed to achieve your desired consistency.
Store or Serve: Once blended, the prune puree can be served immediately or stored in an airtight container in the refrigerator for up to 3 days or in the freezer for up to 3 months.
Frequently Asked Questions
1. Why should I introduce prunes to my baby?
Prunes are rich in fiber, which helps with digestion and prevents constipation. They also contain vitamins and minerals like vitamin K, vitamin A, and potassium, which are beneficial for your baby’s growth and development.
2. Can I use dried prunes?
Yes, dried prunes are typically used for pureeing. Just make sure they are pitted and soak them in water to rehydrate before blending.
3. How long can I store the puree?
Pureed prunes can be stored in an airtight container in the refrigerator for up to 3 days or in the freezer for up to 3 months. Use ice cube trays to freeze portions for easy serving.
4. Can I mix prune puree with other foods?
Absolutely! Prune puree can be mixed with other pureed fruits, vegetables, or even cereals to add a natural sweetness and extra nutrients to your baby’s meals.
5. What should I do if my baby doesn’t like prunes?
It’s normal for babies to take time to adjust to new foods. Try mixing prune puree with familiar flavors or other fruits your baby enjoys. If they still refuse, give it a break and try again later.
By preparing your own pureed prunes, you’re not only providing your baby with a nutritious start to solid foods but also ensuring that every bite is filled with love and care. Enjoy this exciting journey of introducing new flavors and textures to your little one!
If your prunes aren’t already pitted, remove the pits. Use about 1 cup of pitted prunes for a good batch of puree.
Place the prunes in a bowl and cover them with warm water. Let them soak for about 15-20 minutes until they are plump and soft.
Drain the prunes, reserving the soaking water. This water is rich in nutrients and can be used to adjust the consistency of your puree.
Transfer the soaked prunes to a blender or food processor. Add a small amount of the reserved soaking water to start, and blend until smooth. You can add more water if needed to achieve your desired consistency.
Once blended, the prune puree can be served immediately or stored in an airtight container in the refrigerator for up to 3 days or in the freezer for up to 3 months.
If motherhood has you stressed and you feel like you’ve lost your creativity, I am here to help! Here you will find easy recipes, simple DIY’s, affordable styles, and what to read next. I believe we all have a creative side, some of us just need a little help to find it. I will help inspire you to have creative expression without standards.