

How to Capture Perfect Baby Handprints: A Simple Hack
If you’ve ever attempted to capture a baby’s handprint, you know the struggle of getting those tiny fingers to cooperate. They have a knack for curling and wriggling, making it a challenging task. However, fear not! With a simple hack, you can capture the perfect baby handprints that you’ll cherish forever.

Step 1: Gather Your Materials
To begin, gather the necessary materials: paint (non-toxic and baby-friendly), clear contact paper, and your desired project surface. Ensure you have a clean, flat surface to work on, and have everything within easy reach.
Step 2: Prepare Your Workspace
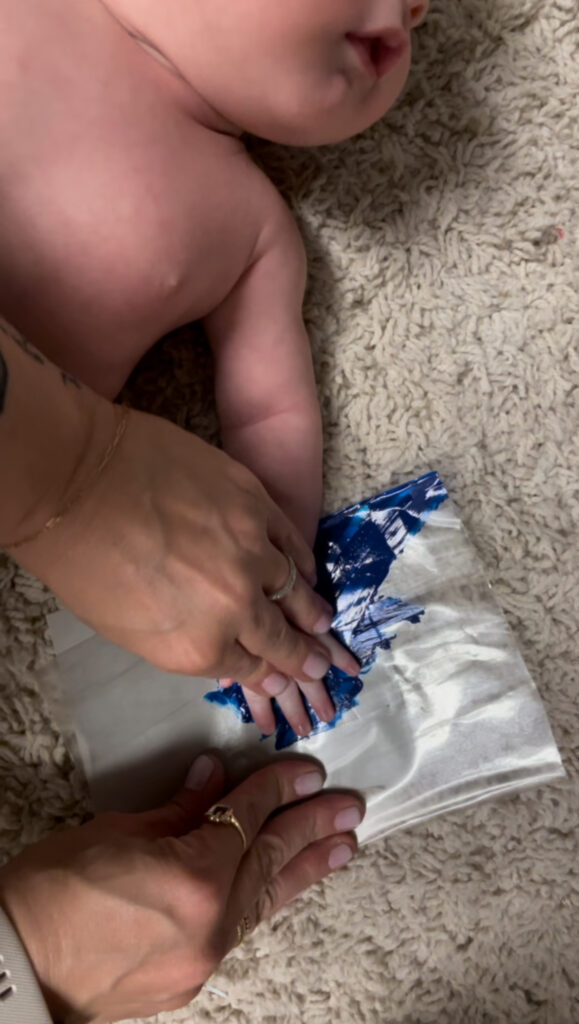
Cut and lay down the contact paper over your project surface. This will protect your surface from any accidental spills or smudges. No need to peel the contact paper because the surface provides a smooth, flat surface for capturing the handprint.
Step 3: Apply the Paint
Gently cover your baby’s hand with a thin layer of paint. Make sure to choose a paint color that contrasts nicely with your project surface for the best results. You can use a brush or even your fingers to apply the paint evenly.
Step 4: Capture the Handprint
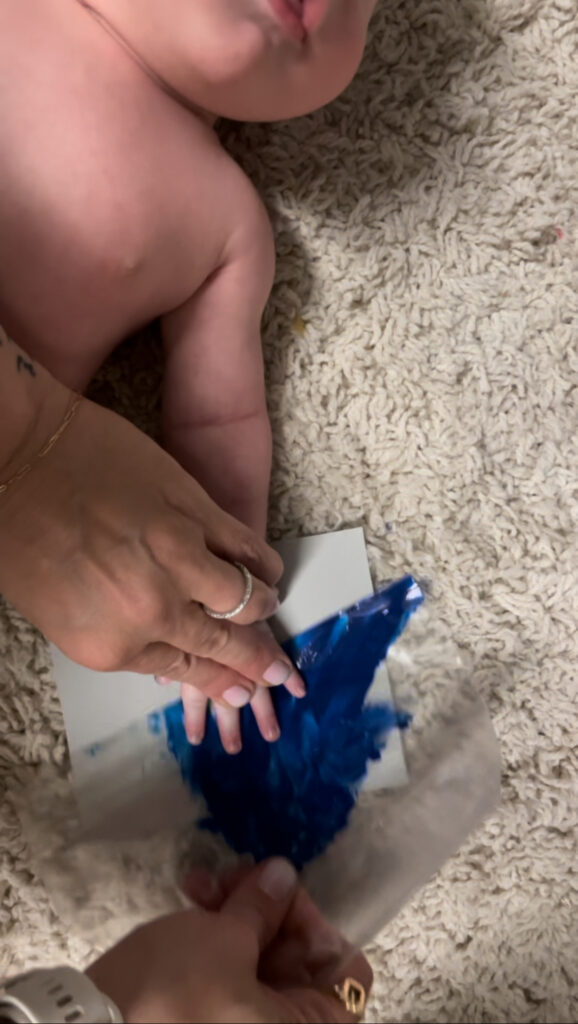
Once your baby’s hand is coated with paint, lightly place it on the contact paper. Be quick but gentle to prevent any smudging or smearing. Press down slightly to ensure good contact between the hand and the paper.
Step 5: Transfer to Your Project
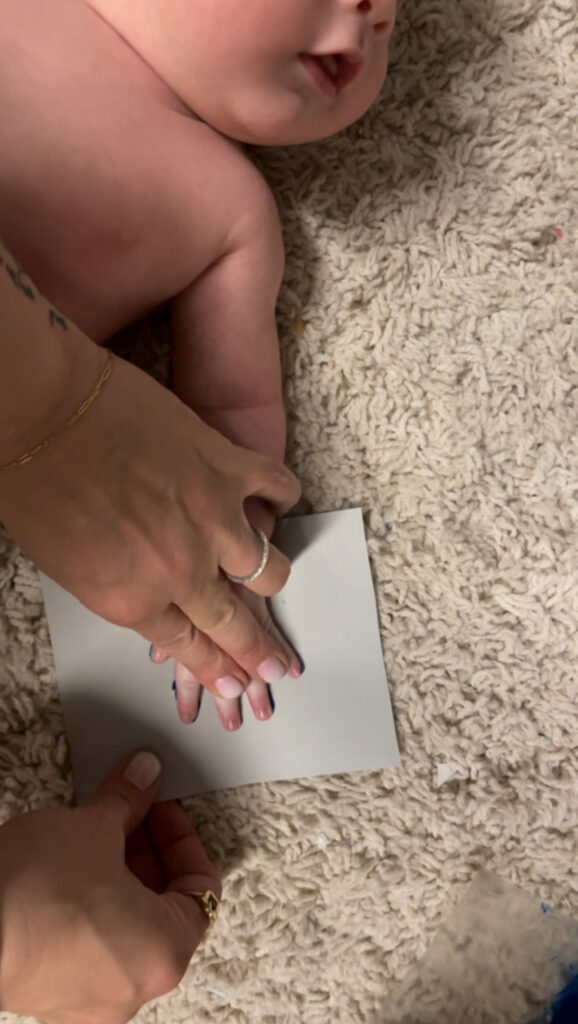
Swiftly remove the contact paper from underneath your baby’s hand. Then, firmly press their hand onto your project surface. Ensure that you press down evenly to transfer the handprint accurately.
Step 6: Admire Your Work
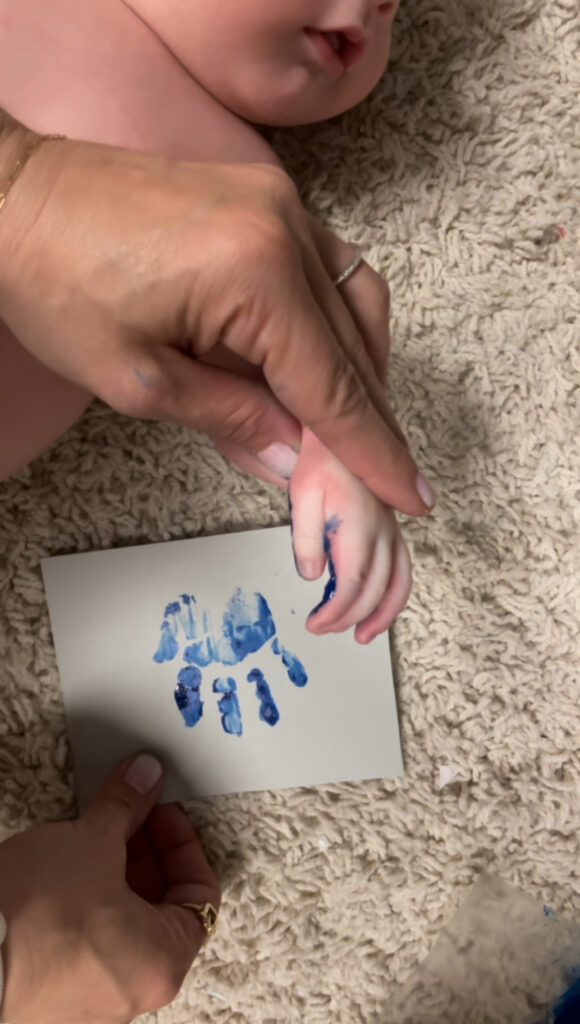
Carefully lift your baby’s hand from the project surface to reveal the perfect handprint. Take a moment to admire your handiwork and marvel at how quickly those little hands grow.
Step 7: Clean Up
Once you’re satisfied with the handprint, it’s time to clean up. Wash your baby’s hand thoroughly with soap and water to remove any remaining paint. Clean any paint residue from your workspace as well.
Step 8: Preserve and Enjoy
Now that you’ve captured the perfect handprint, consider sealing it with a clear coat of varnish or framing it for display. This will help preserve the handprint for years to come, allowing you to cherish this precious moment forever.
Capturing a baby’s handprint doesn’t have to be a daunting task. With this simple hack, you can create beautiful handprints that you’ll treasure for a lifetime. So grab your paint and get ready to immortalize those tiny fingers in a work of art!
You May Also Like

0 Comments